Note
Access to this page requires authorization. You can try signing in or changing directories.
Access to this page requires authorization. You can try changing directories.
In this article, you use the Microsoft Entra admin center to enable single sign-on (SSO) for an enterprise application that you added to your Microsoft Entra tenant. After you configure SSO, your users can sign in by using their Microsoft Entra credentials.
Microsoft Entra ID has a gallery that contains thousands of preintegrated applications that use SSO. This article uses an enterprise application named Microsoft Entra SAML Toolkit 1 as an example, but the concepts apply for most preconfigured enterprise applications in the Microsoft Entra application gallery.
If your application doesn't integrate directly with Microsoft Entra ID for single sign-on, and instead tokens are provided to the application by a relying party Security Token Service (STS), then see the article Enable single sign-on for an enterprise application with a relying party security token service.
We recommend that you use a nonproduction environment to test the steps in this article.
Prerequisites
To configure SSO, you need:
- A Microsoft Entra user account. If you don't already have one, you can Create an account for free.
- One of the following roles: Cloud Application Administrator, Application Administrator, or owner of the service principal.
- Completion of the steps in Quickstart: Create and assign a user account.
Enable single sign-on
To enable SSO for an application:
Sign in to the Microsoft Entra admin center as at least a Cloud Application Administrator.
Browse to Entra ID > Enterprise apps > All applications.
Enter the name of the existing application in the search box, and then select the application from the search results. For example, Microsoft Entra SAML Toolkit 1.
In the Manage section of the left menu, select Single sign-on to open the Single sign-on pane for editing.
Select SAML to open the SSO configuration page. After the application is configured, users can sign in to it by using their credentials from the Microsoft Entra tenant.
The process of configuring an application to use Microsoft Entra ID for SAML-based SSO varies depending on the application. For any of the enterprise applications in the gallery, use the configuration guide link to find information about the steps needed to configure the application. The steps for the Microsoft Entra SAML Toolkit 1 are listed in this article.
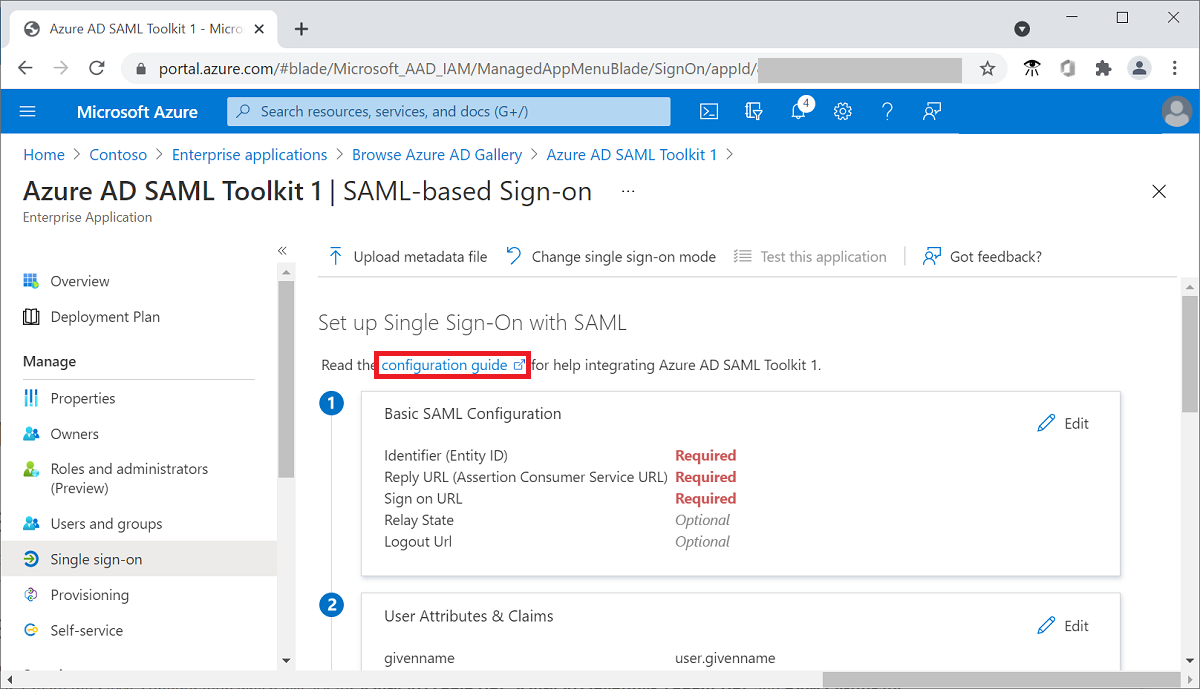
In the Set up Microsoft Entra SAML Toolkit 1 section, record the values of the Login URL, Microsoft Entra Identifier, and Logout URL properties to be used later.
Configure single sign-on in the tenant
You add sign-in and reply URL values, and you download a certificate to begin the configuration of SSO in Microsoft Entra ID.
To configure SSO in Microsoft Entra ID:
- In the Microsoft Entra admin center, select Edit in the Basic SAML Configuration section on the Set up Single Sign-On with SAML pane.
- For Reply URL (Assertion Consumer Service URL), enter
https://samltoolkit.azurewebsites.net/SAML/Consume. - For Sign on URL, enter
https://samltoolkit.azurewebsites.net/. The Identifier (Entity ID) is typically a URL specific to the application you're integrating with. For the Microsoft Entra SAML Toolkit 1 application in this example, the value is automatically generated once you input the Sign on URL and Reply URL values. Follow the specific configuration guide for the application you're integrating with to determine the correct value. - Select Save.
- In the SAML Certificates section, select Download for Certificate (Raw) to download the SAML signing certificate and save it to be used later.
Configure single sign-on in the application
Using single sign-on in the application requires you to register the user account with the application and to add the SAML configuration values that you previously recorded.
Register the user account
To register a user account with the application:
Open a new browser window and browse to the sign-in URL for the application. For the Microsoft Entra SAML Toolkit application, the address is
https://samltoolkit.azurewebsites.net.Select Register in the upper right corner of the page.
For Email, enter the email address of the user that can access the application. Ensure that the user account is already assigned to the application.
Enter a Password and confirm it.
Select Register.
Configure SAML settings
To configure SAML settings for the application:
- On the application's sign-in page, sign in with the credentials of the user account that you already assigned to the application, select SAML Configuration at the upper-left corner of the page.
- Select Create in the middle of the page.
- For Login URL, Microsoft Entra Identifier, and Logout URL, enter the values that you recorded earlier.
- Select Choose file to upload the certificate that you previously downloaded.
- Select Create.
- Copy the values of the SP Initiated Login URL and the Assertion Consumer Service (ACS) URL to be used later.
Update single sign-on values
Use the values that you recorded for SP Initiated Login URL and Assertion Consumer Service (ACS) URL to update the single sign-on values in your tenant.
To update the single sign-on values:
- In the Microsoft Entra admin center, select Edit in the Basic SAML Configuration section on the Set up single sign-on pane.
- For Reply URL (Assertion Consumer Service URL), enter the Assertion Consumer Service (ACS) URL value that you previously recorded.
- For Sign on URL, enter the SP Initiated Login URL value that you previously recorded.
- Select Save.
Test single sign-on
You can test the single sign-on configuration from the Set up single sign-on pane.
To test SSO:
- In the Test single sign-on with Microsoft Entra SAML Toolkit 1 section, on the Set up single sign-on with SAML pane, select Test.
- Sign in to the application using the Microsoft Entra credentials of the user account that you assigned to the application.