Tutorial: Migrate your applications from Okta to Microsoft Entra ID
In this tutorial, you'll learn how to migrate your applications from Okta to Microsoft Entra ID.
Prerequisites
To manage the application in Microsoft Entra ID, you need:
- A Microsoft Entra user account. If you don't already have one, you can Create an account for free.
- One of the following roles: Cloud Application Administrator, Application Administrator, or owner of the service principal.
Create an inventory of current Okta applications
Before migration, document the current environment and application settings. You can use the Okta API to collect this information. Use an API explorer tool such as Postman.
To create an application inventory:
With the Postman app, from the Okta admin console, generate an API token.
On the API dashboard, under Security, select Tokens > Create Token.
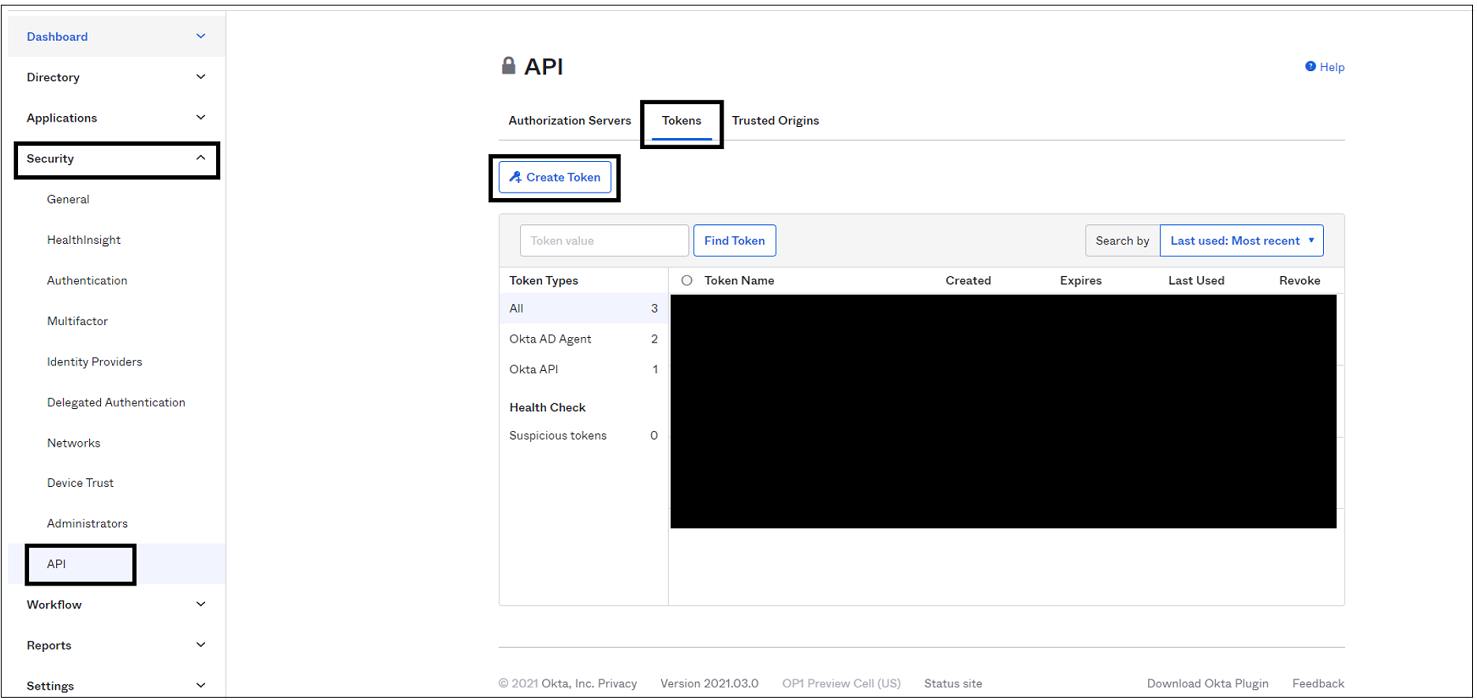
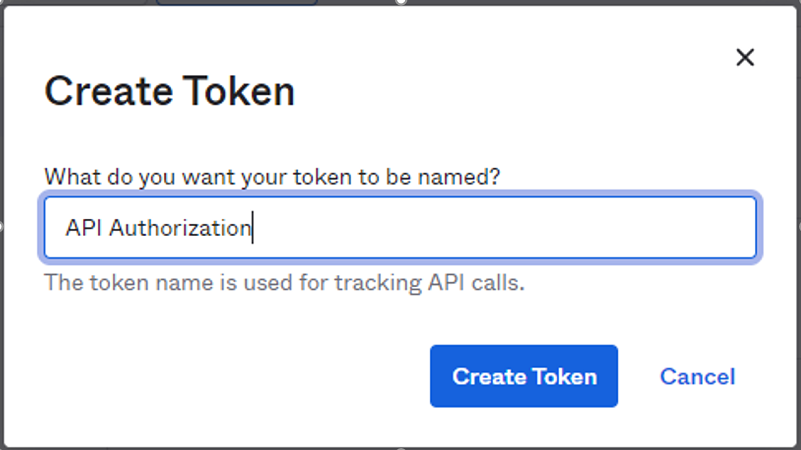
Enter a token name and then select Create Token.
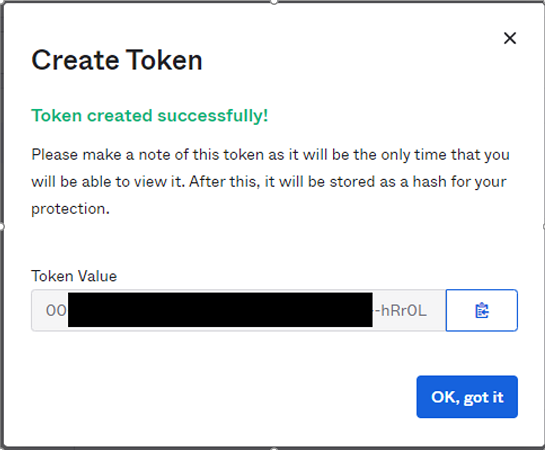
Record the token value and save it. After you select OK, got it, it is not accessible.
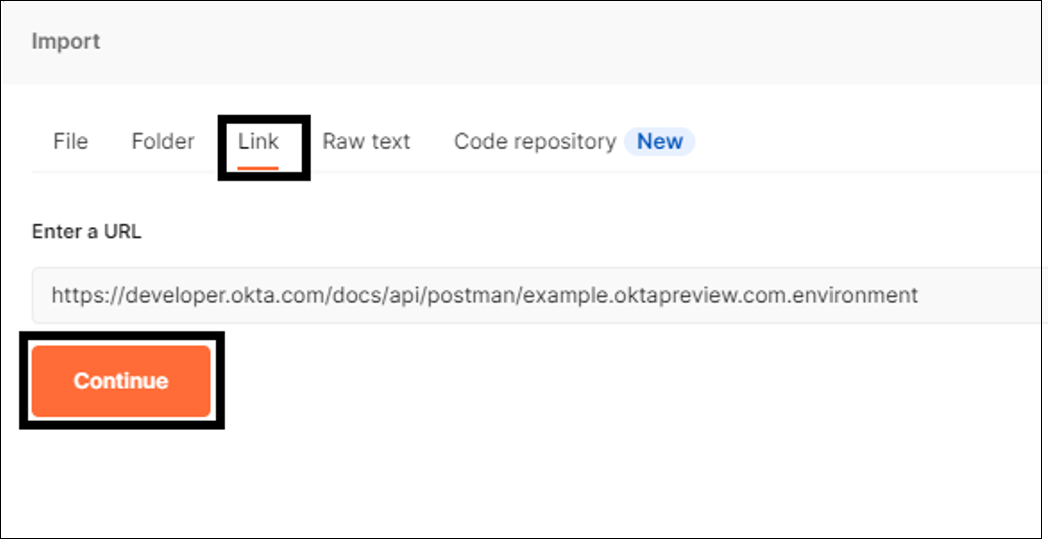
In the Postman app, in the workspace, select Import.
On the Import page, select Link. To import the API, insert the following link:
https://developer.okta.com/docs/api/postman/example.oktapreview.com.environment
Note
Don't modify the link with your tenant values.
Select Import.
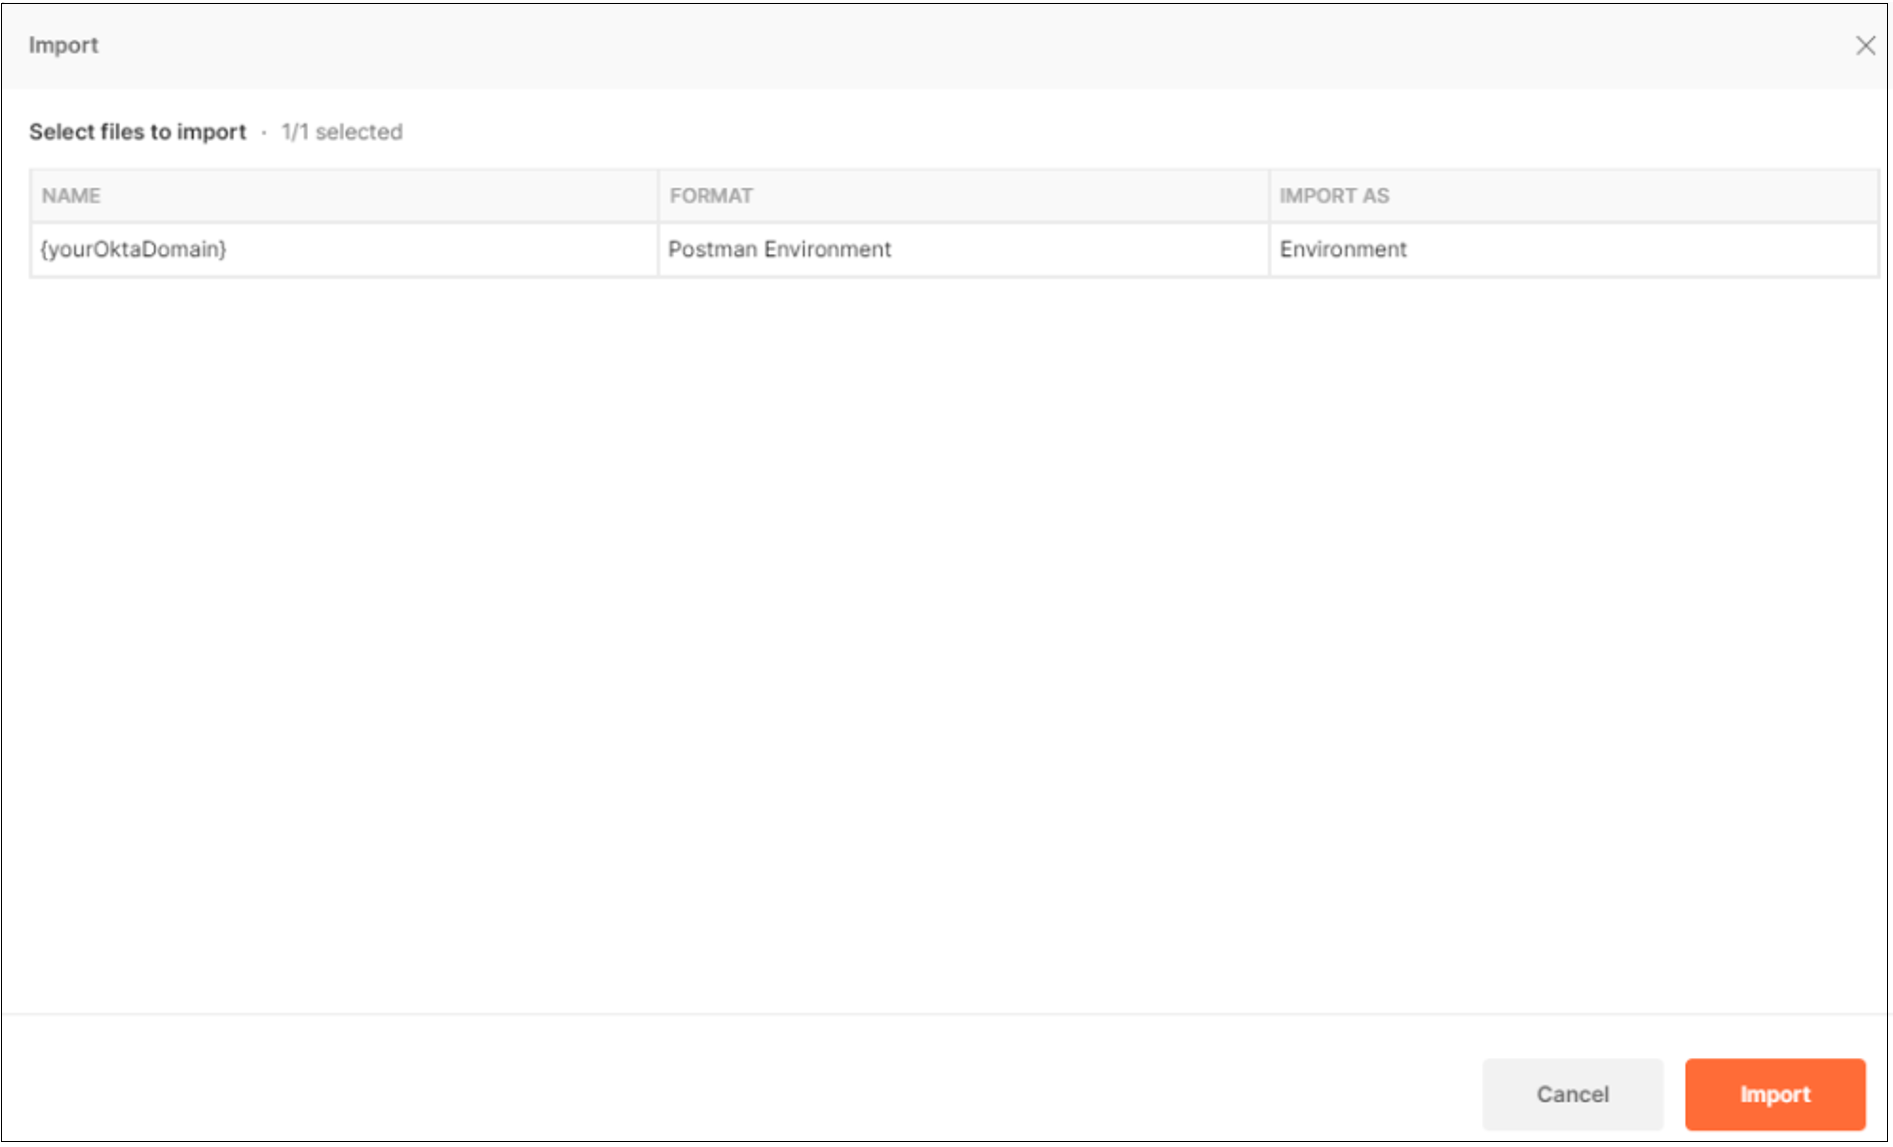
After the API is imported, change the Environment selection to {yourOktaDomain}.
To edit your Okta environment select the eye icon. Then select Edit.
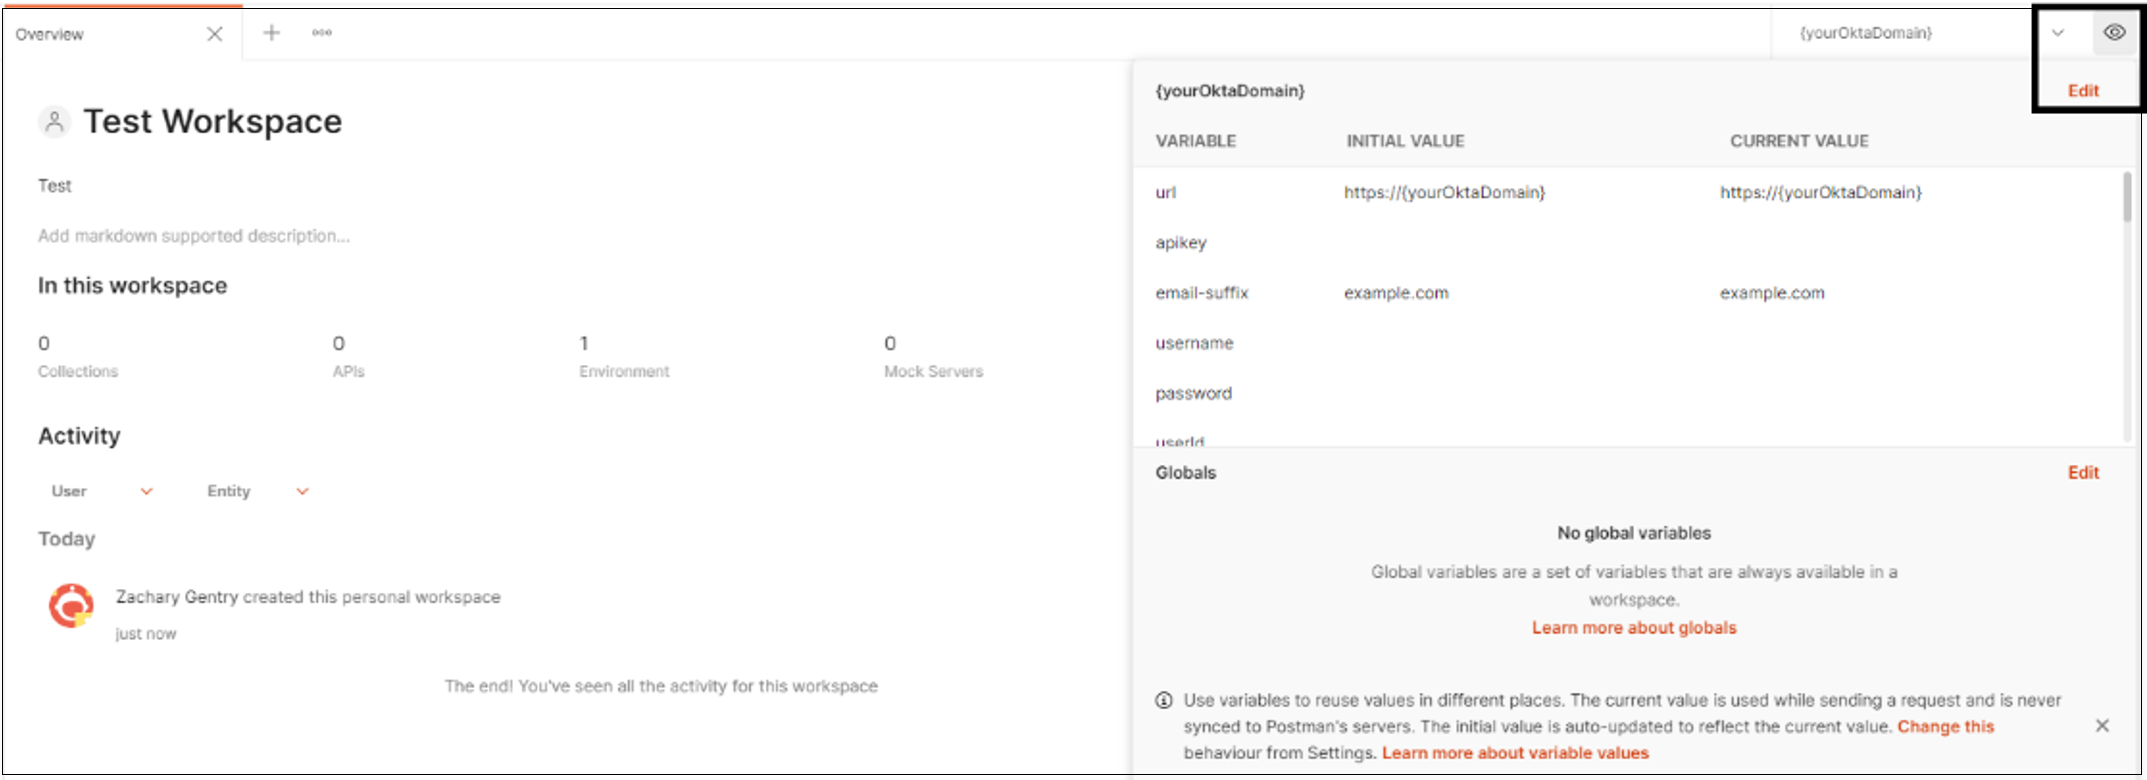
In the Initial Value and Current Value fields, update the values for the URL and API key. Change the name to reflect your environment.
Save the values.

Select Apps > Get List Apps > Send.
Note
You can print the applications in your Okta tenant. The list is in JSON format.
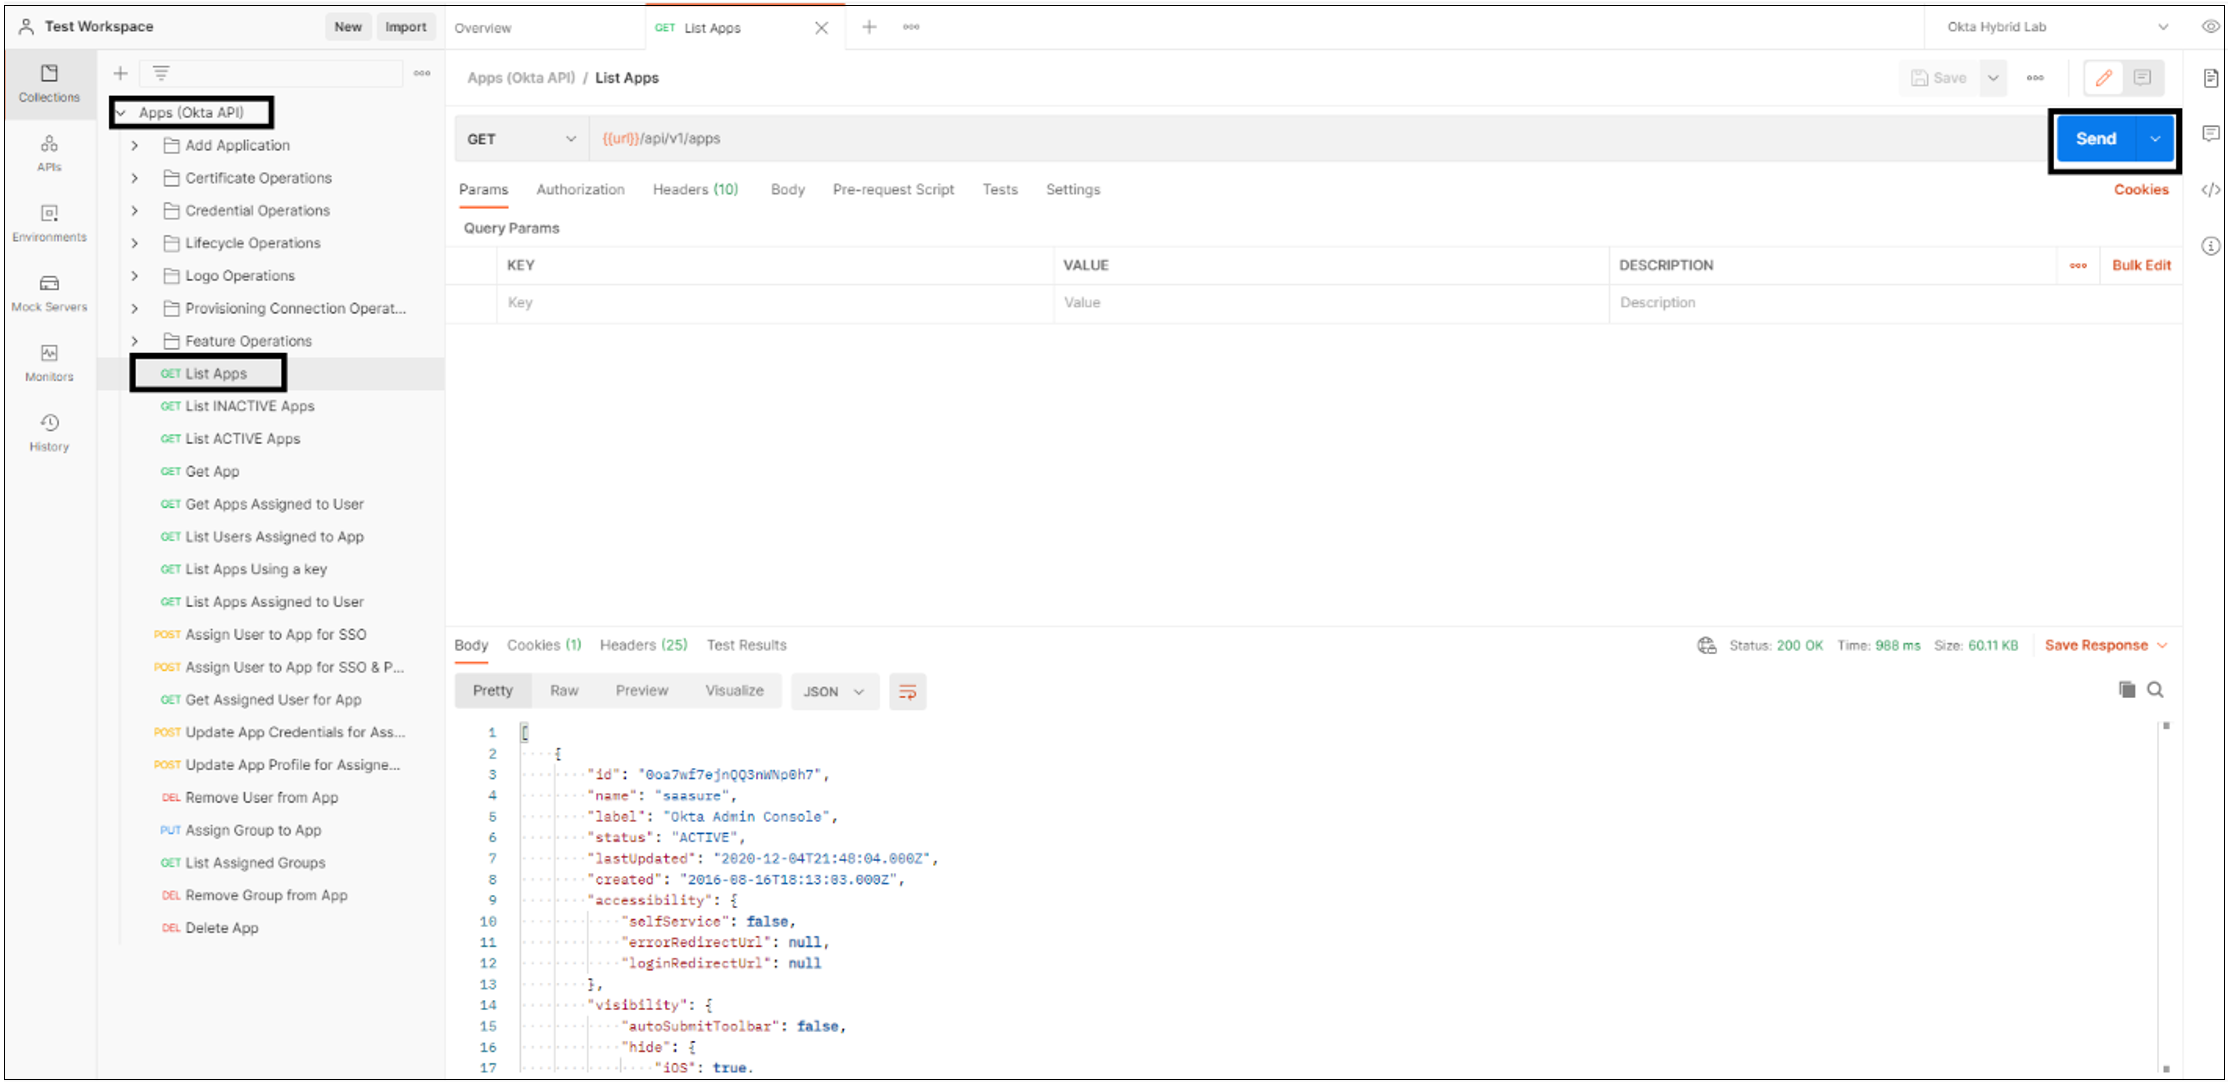
We recommend you copy and convert this JSON list to a CSV format:
- Use a public converter such as Konklone
- Or for PowerShell, use ConvertFrom-Json and ConvertTo-CSV
Note
To have a record of the applications in your Okta tenant, download the CSV.
Migrate a SAML application to Microsoft Entra ID
To migrate a SAML 2.0 application to Microsoft Entra ID, configure the application in your Microsoft Entra tenant for application access. In this example, we convert a Salesforce instance.
Sign in to the Microsoft Entra admin center as at least a Cloud Application Administrator.
Browse to Identity > Applications > Enterprise applications > All applications, then select New application.
In Microsoft Entra Gallery, search for Salesforce, select the application, and then select Create.
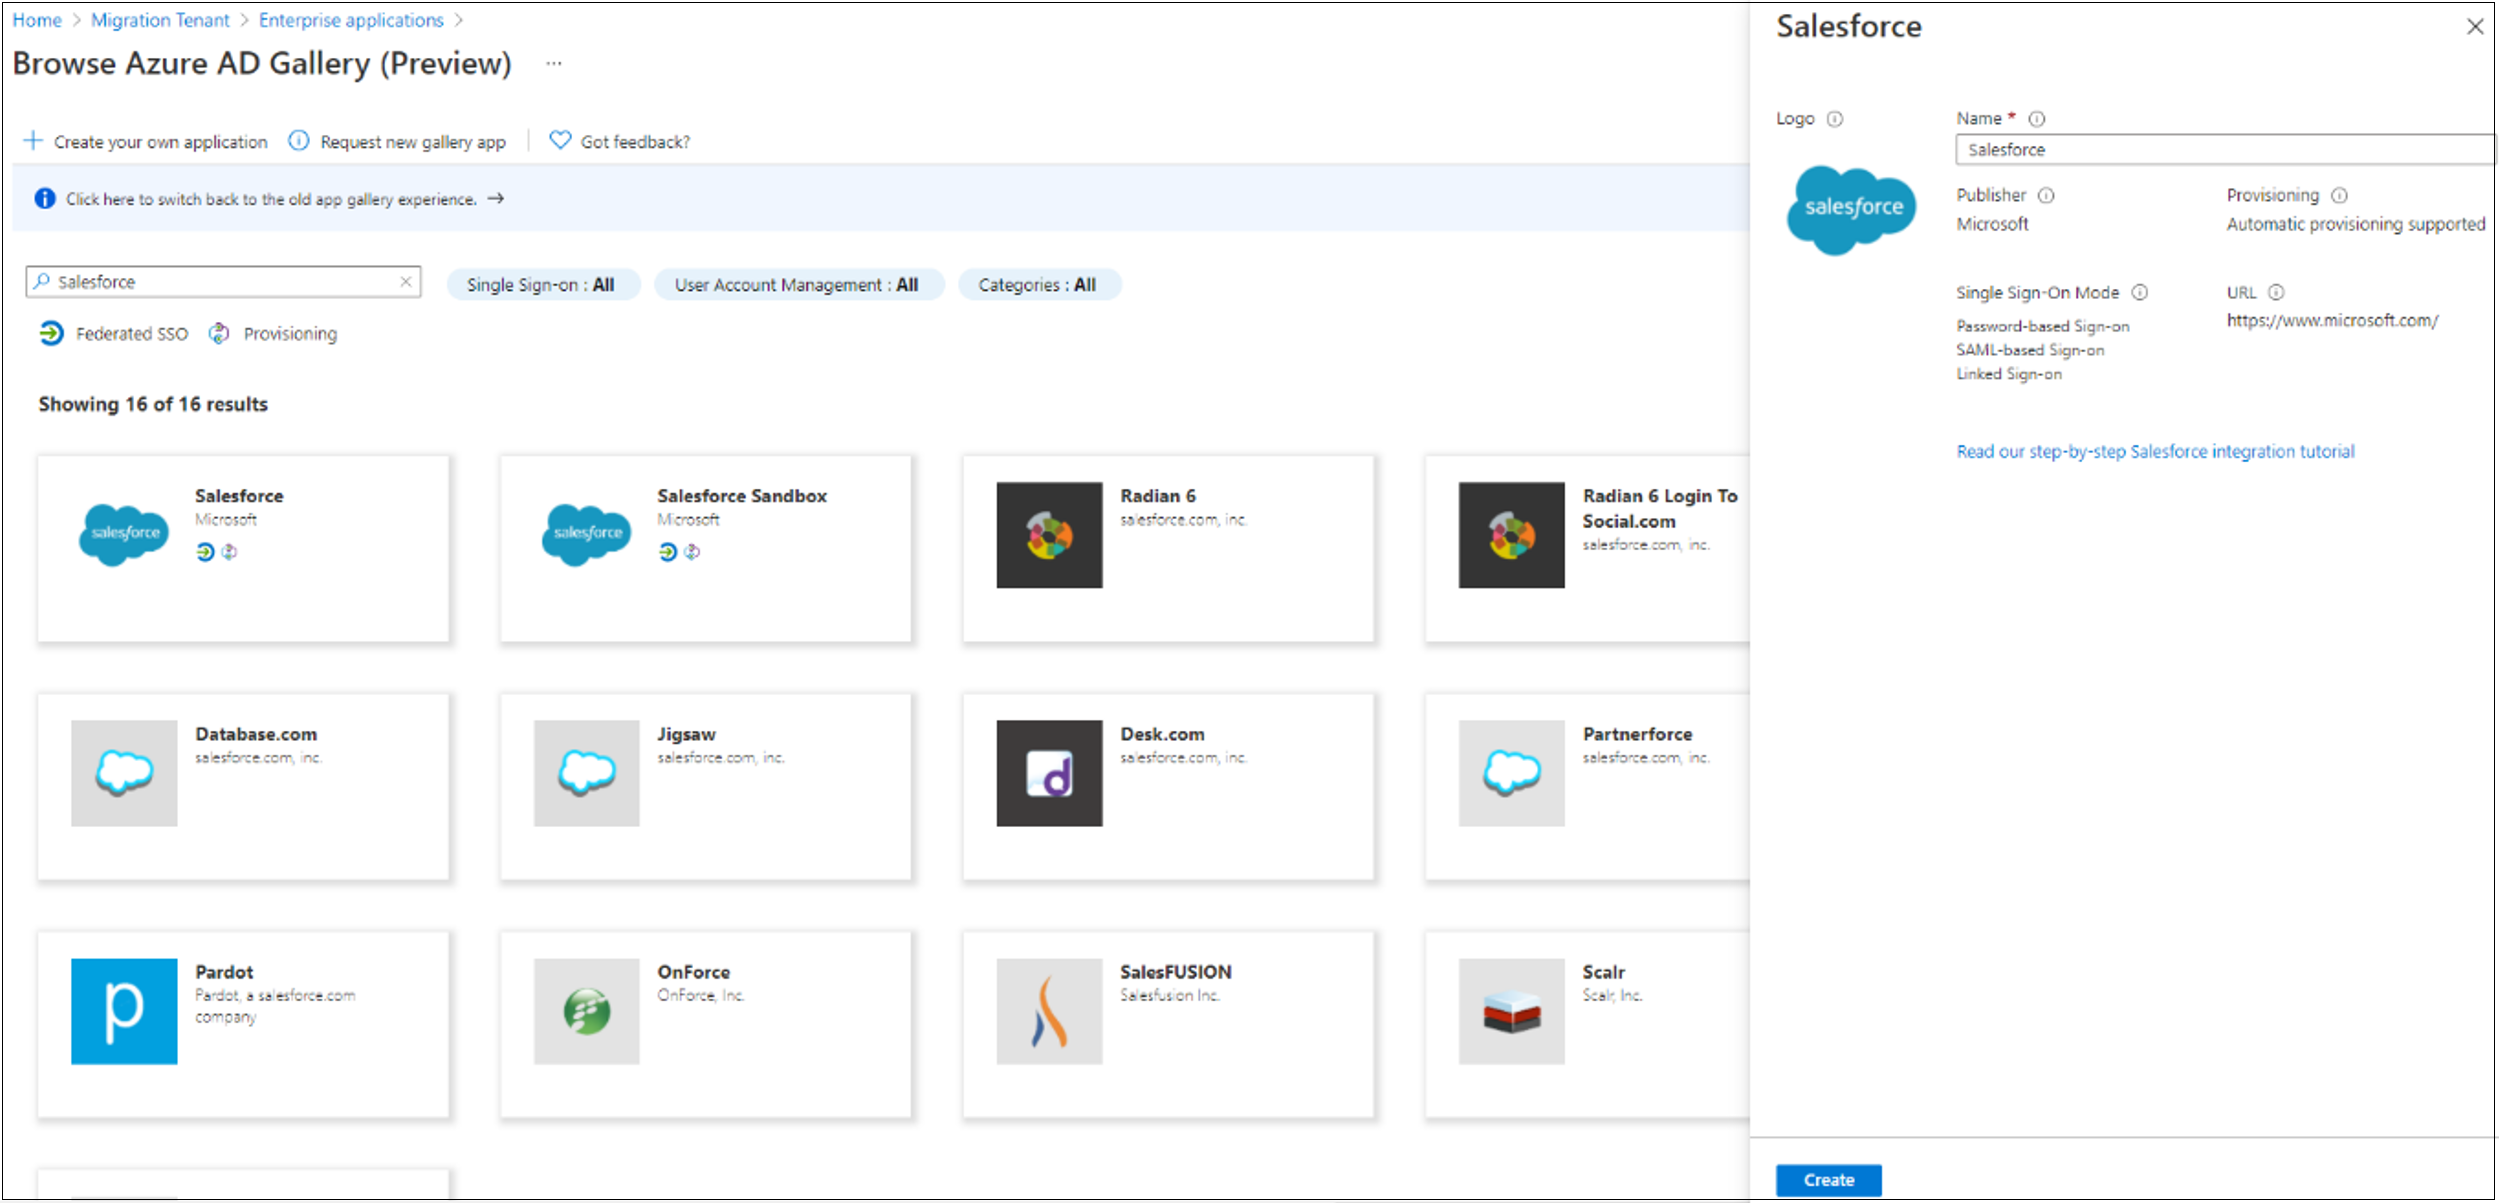
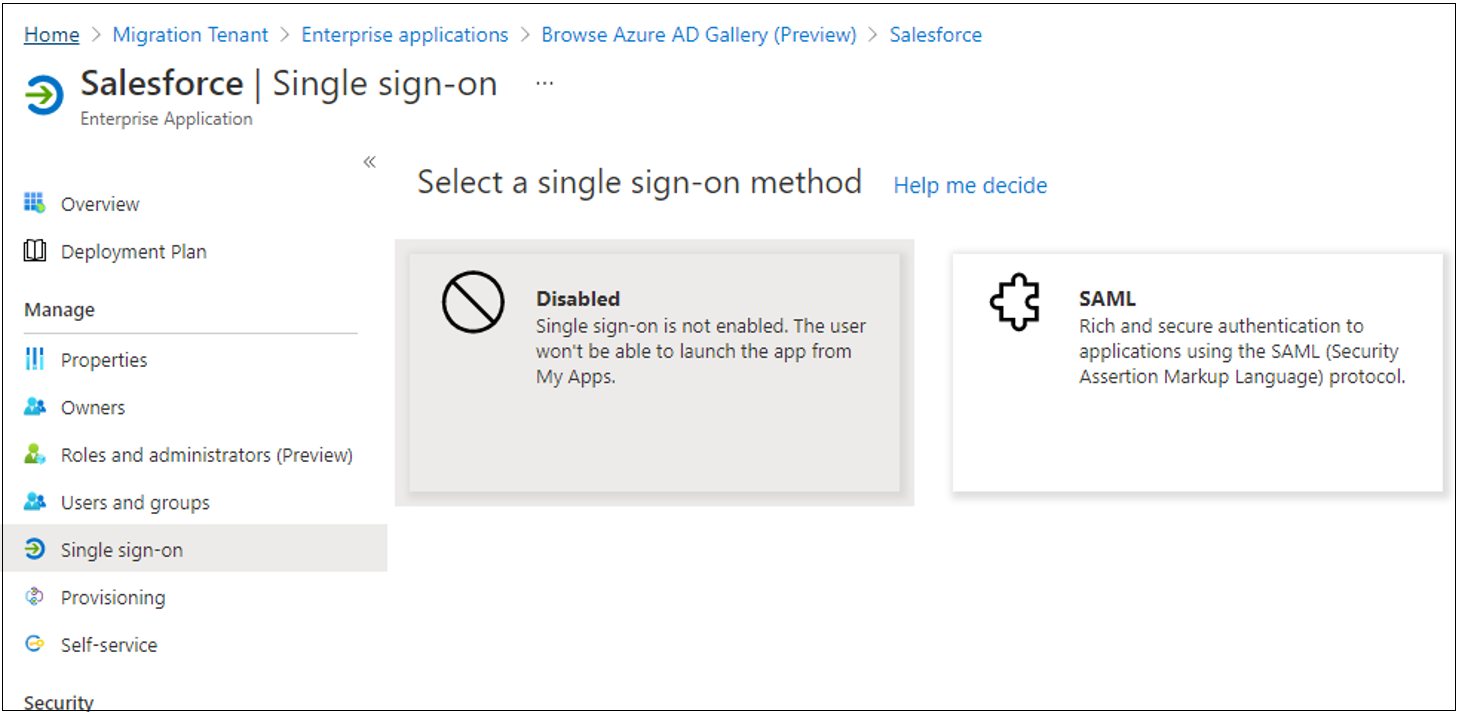
After the application is created, on the Single sign-on (SSO) tab, select SAML.
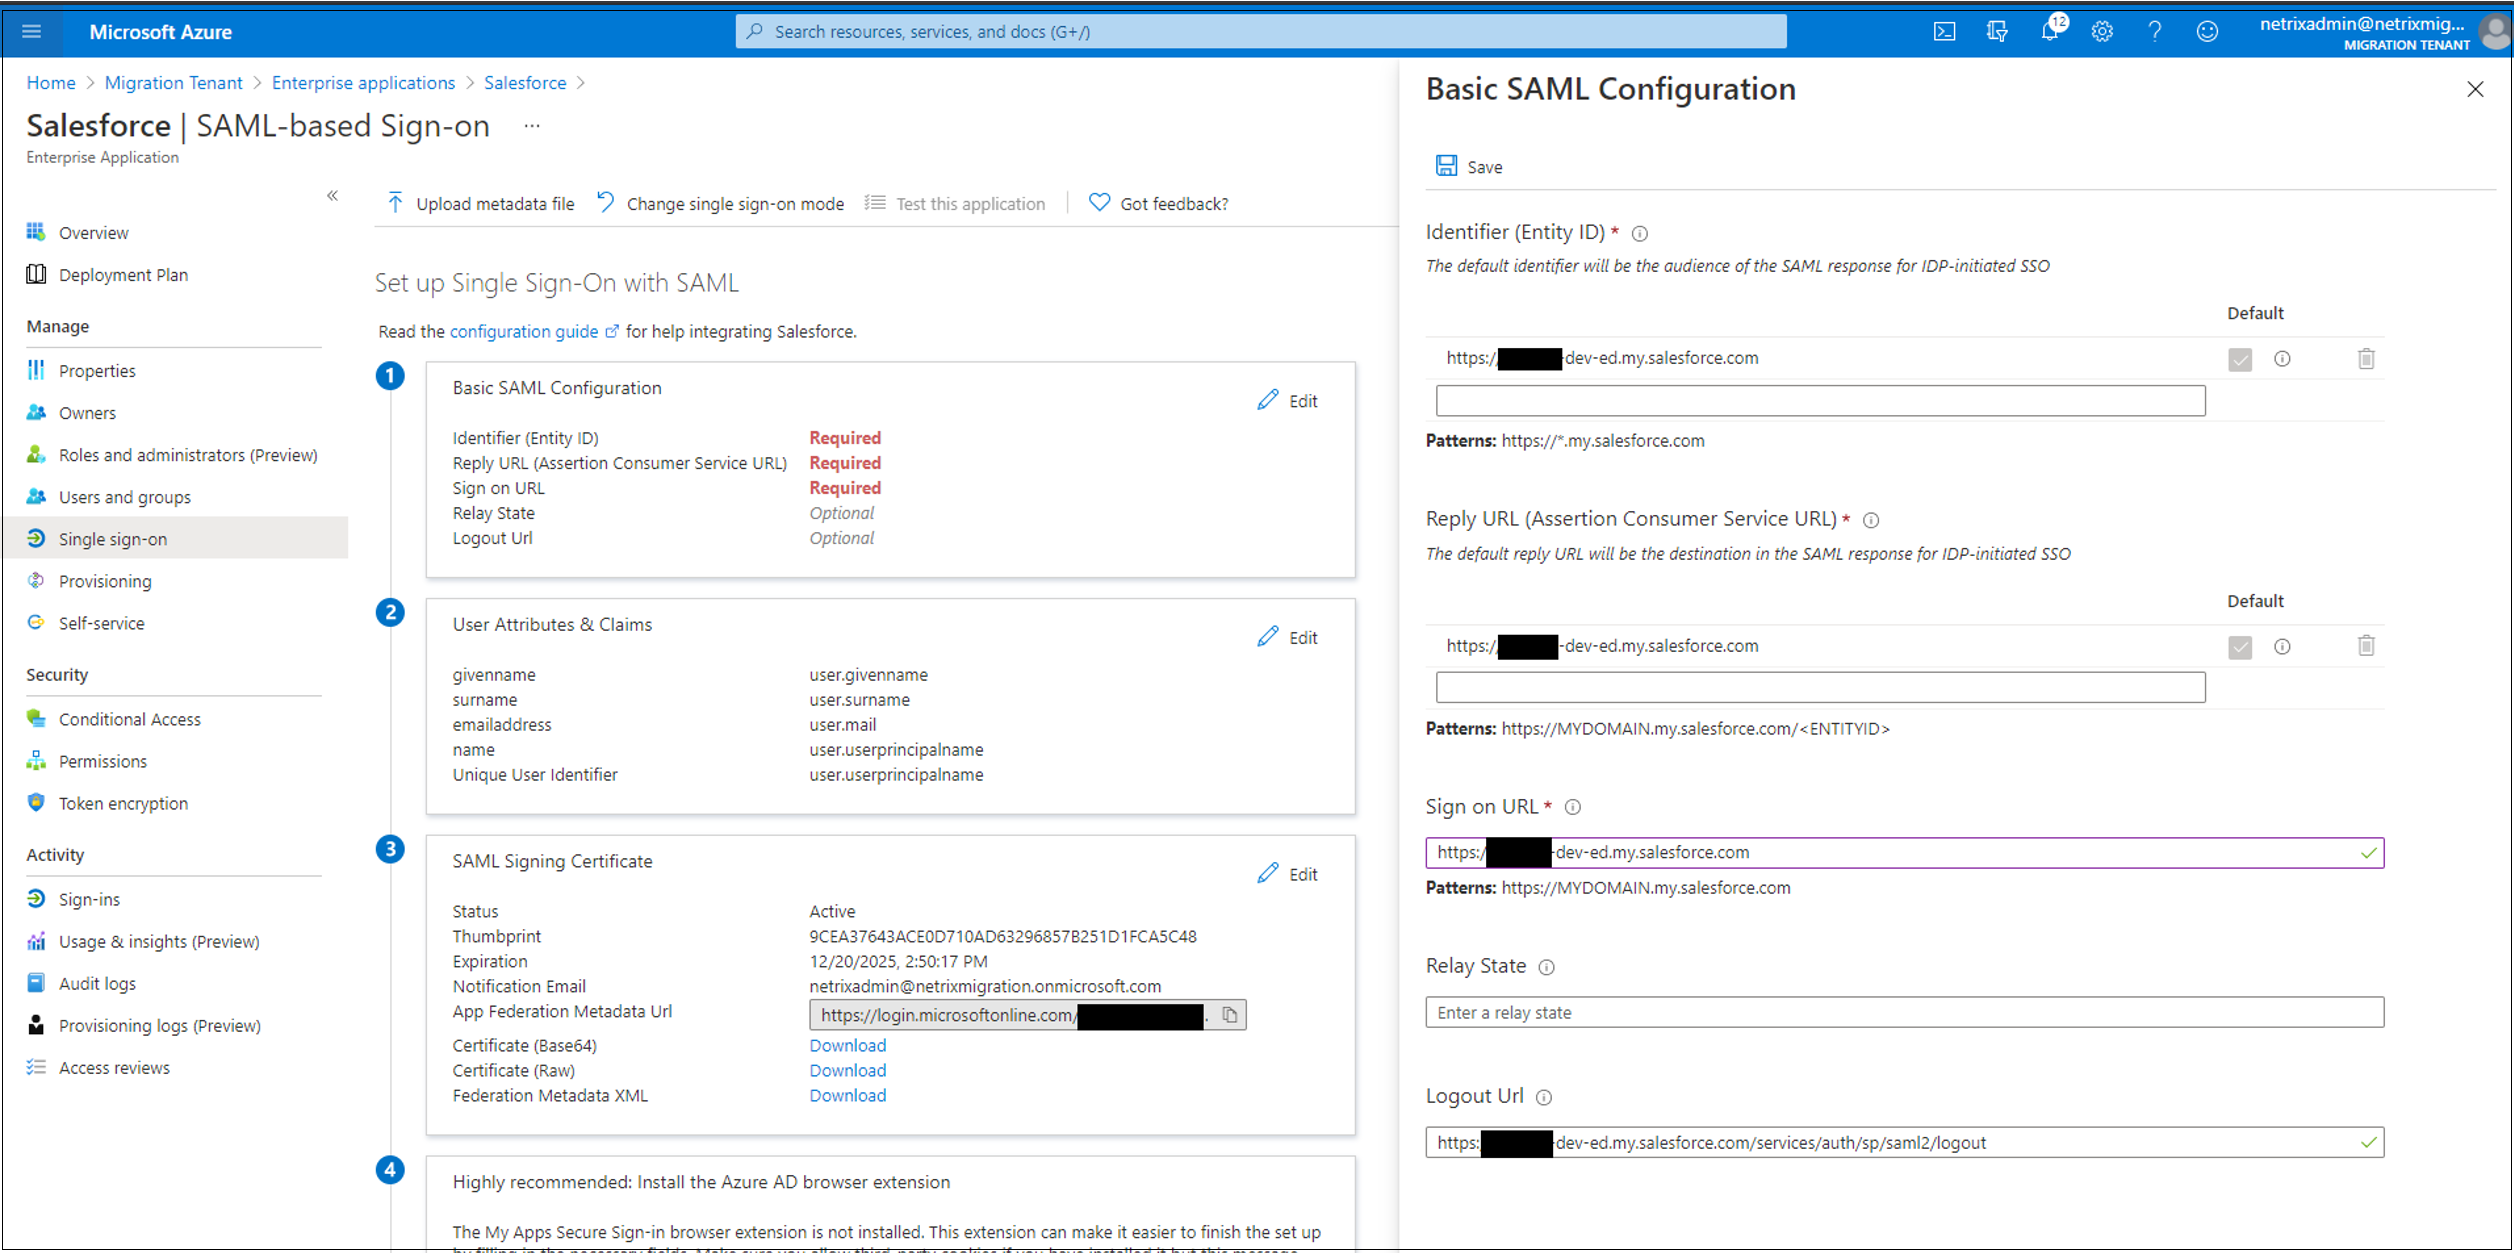
Download the Certificate (Raw) and Federation Metadata XML to import it into Salesforce.
On the Salesforce administration console, select Identity > Single Sign-On Settings > New from Metadata File.
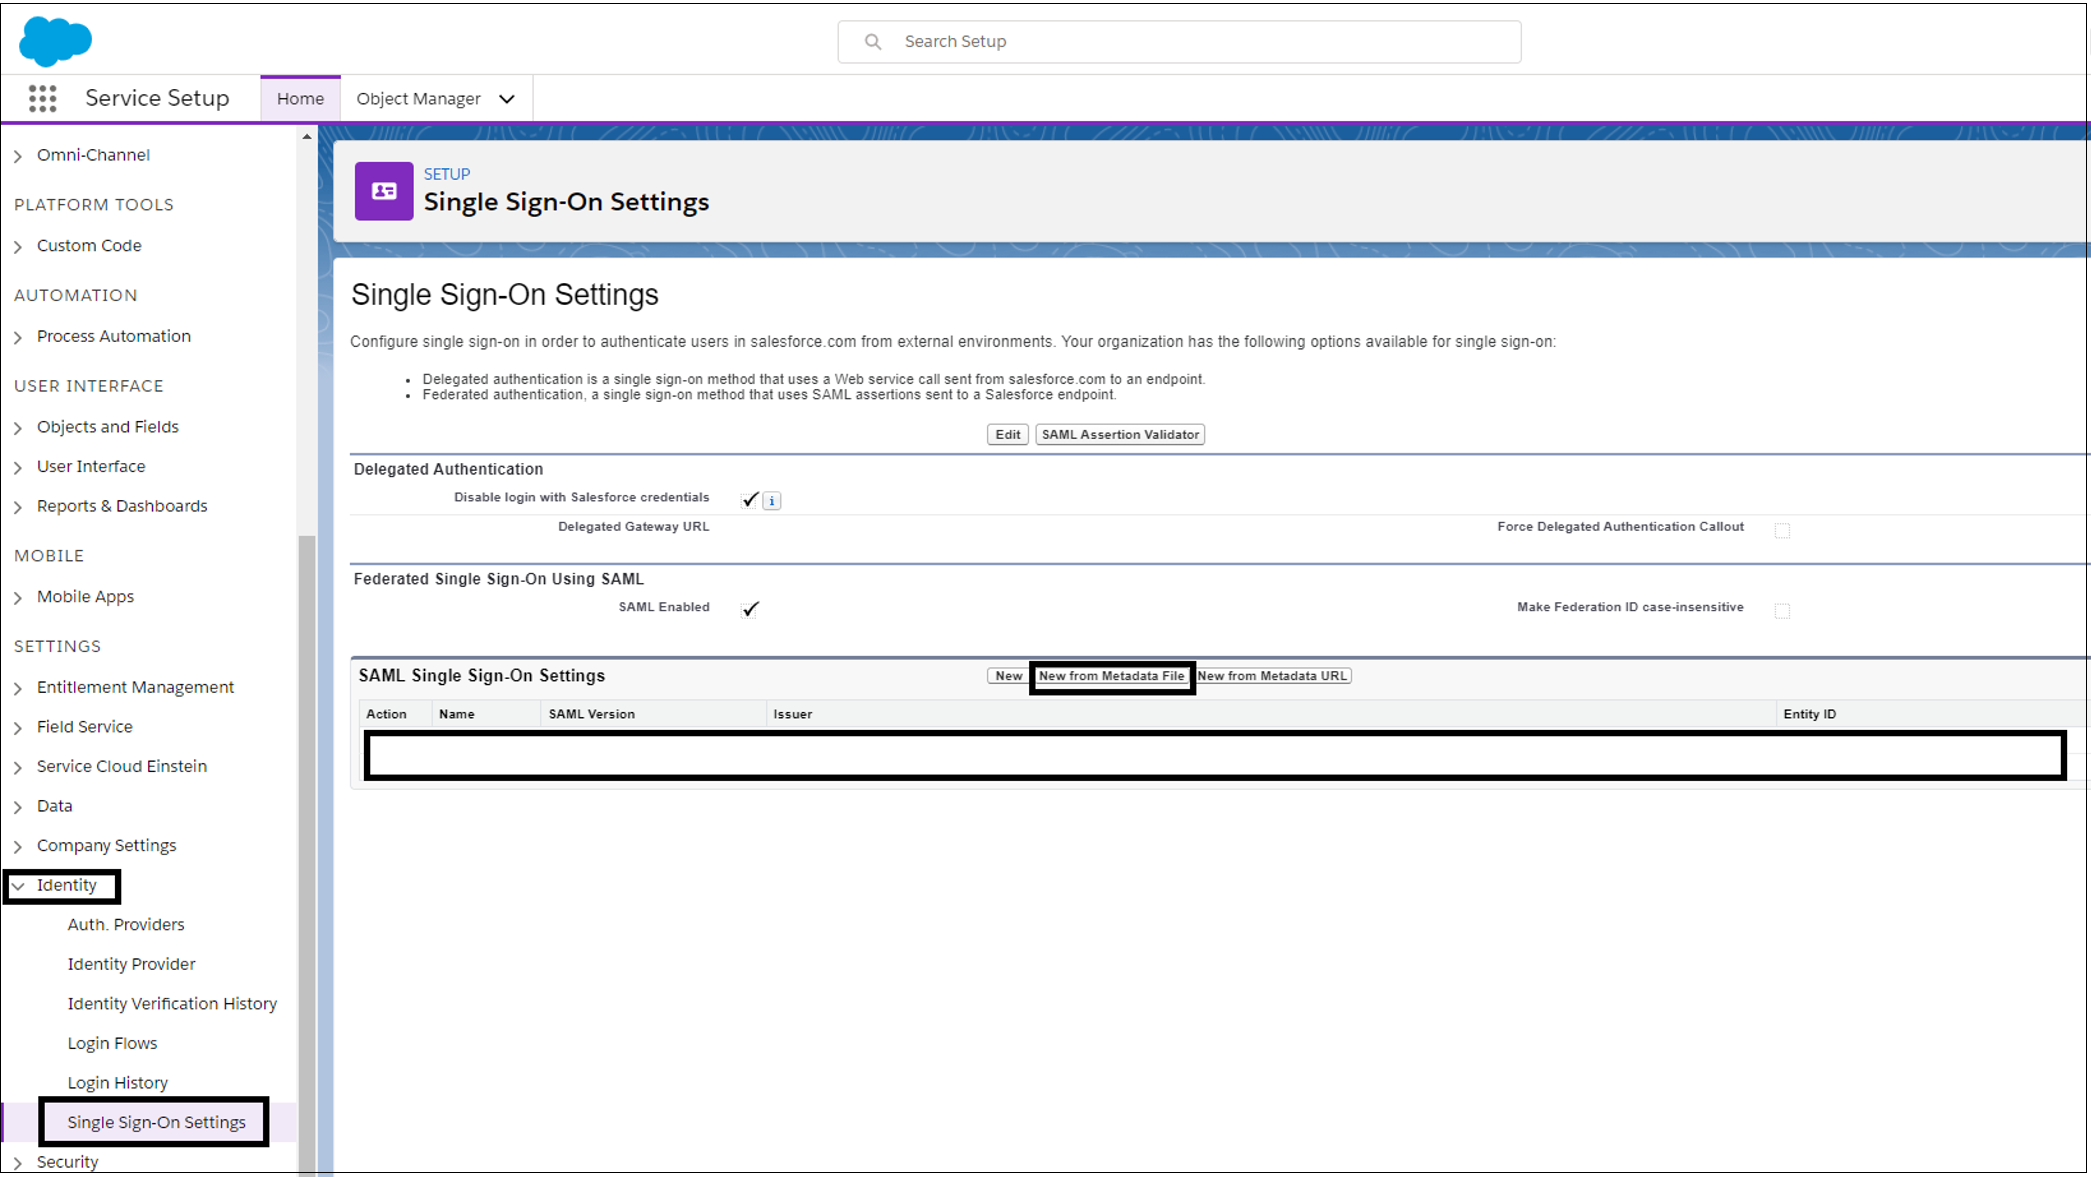
Upload the XML file you downloaded from the Microsoft Entra admin center. Then select Create.
Upload the certificate you downloaded from Azure. Select Save.
Record the values in the following fields. The values are in Azure.
- Entity ID
- Login URL
- Logout URL
Select Download Metadata.
To upload the file to the Microsoft Entra admin center, in the Microsoft Entra ID Enterprise applications page, in the SAML SSO settings, select Upload metadata file.
Ensure the imported values match the recorded values. Select Save.
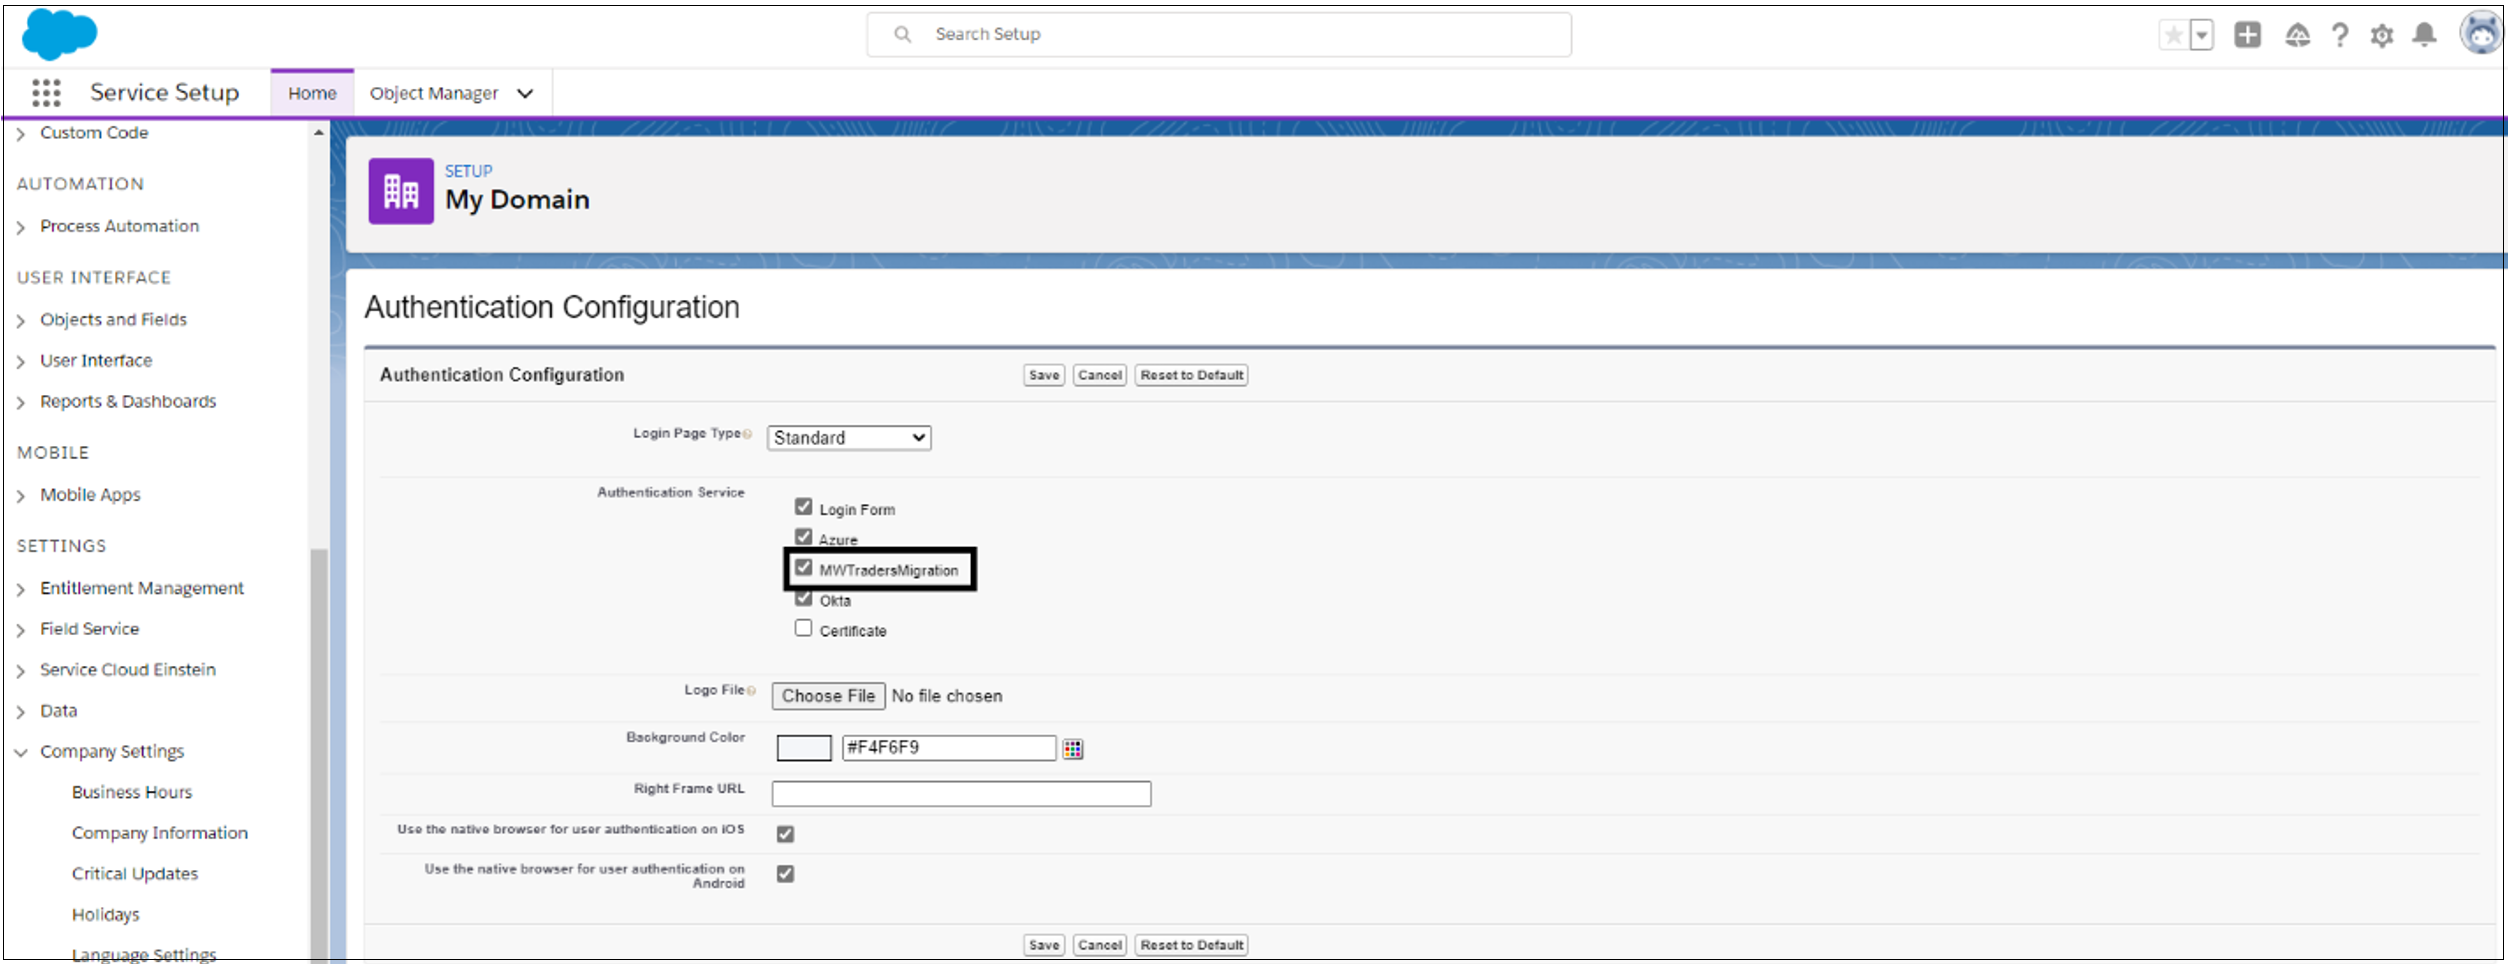
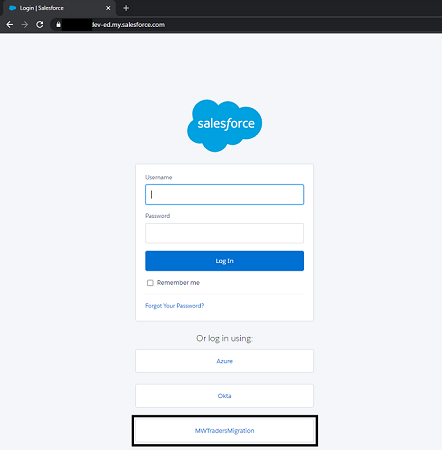
In the Salesforce administration console, select Company Settings > My Domain. Go to Authentication Configuration and then select Edit.
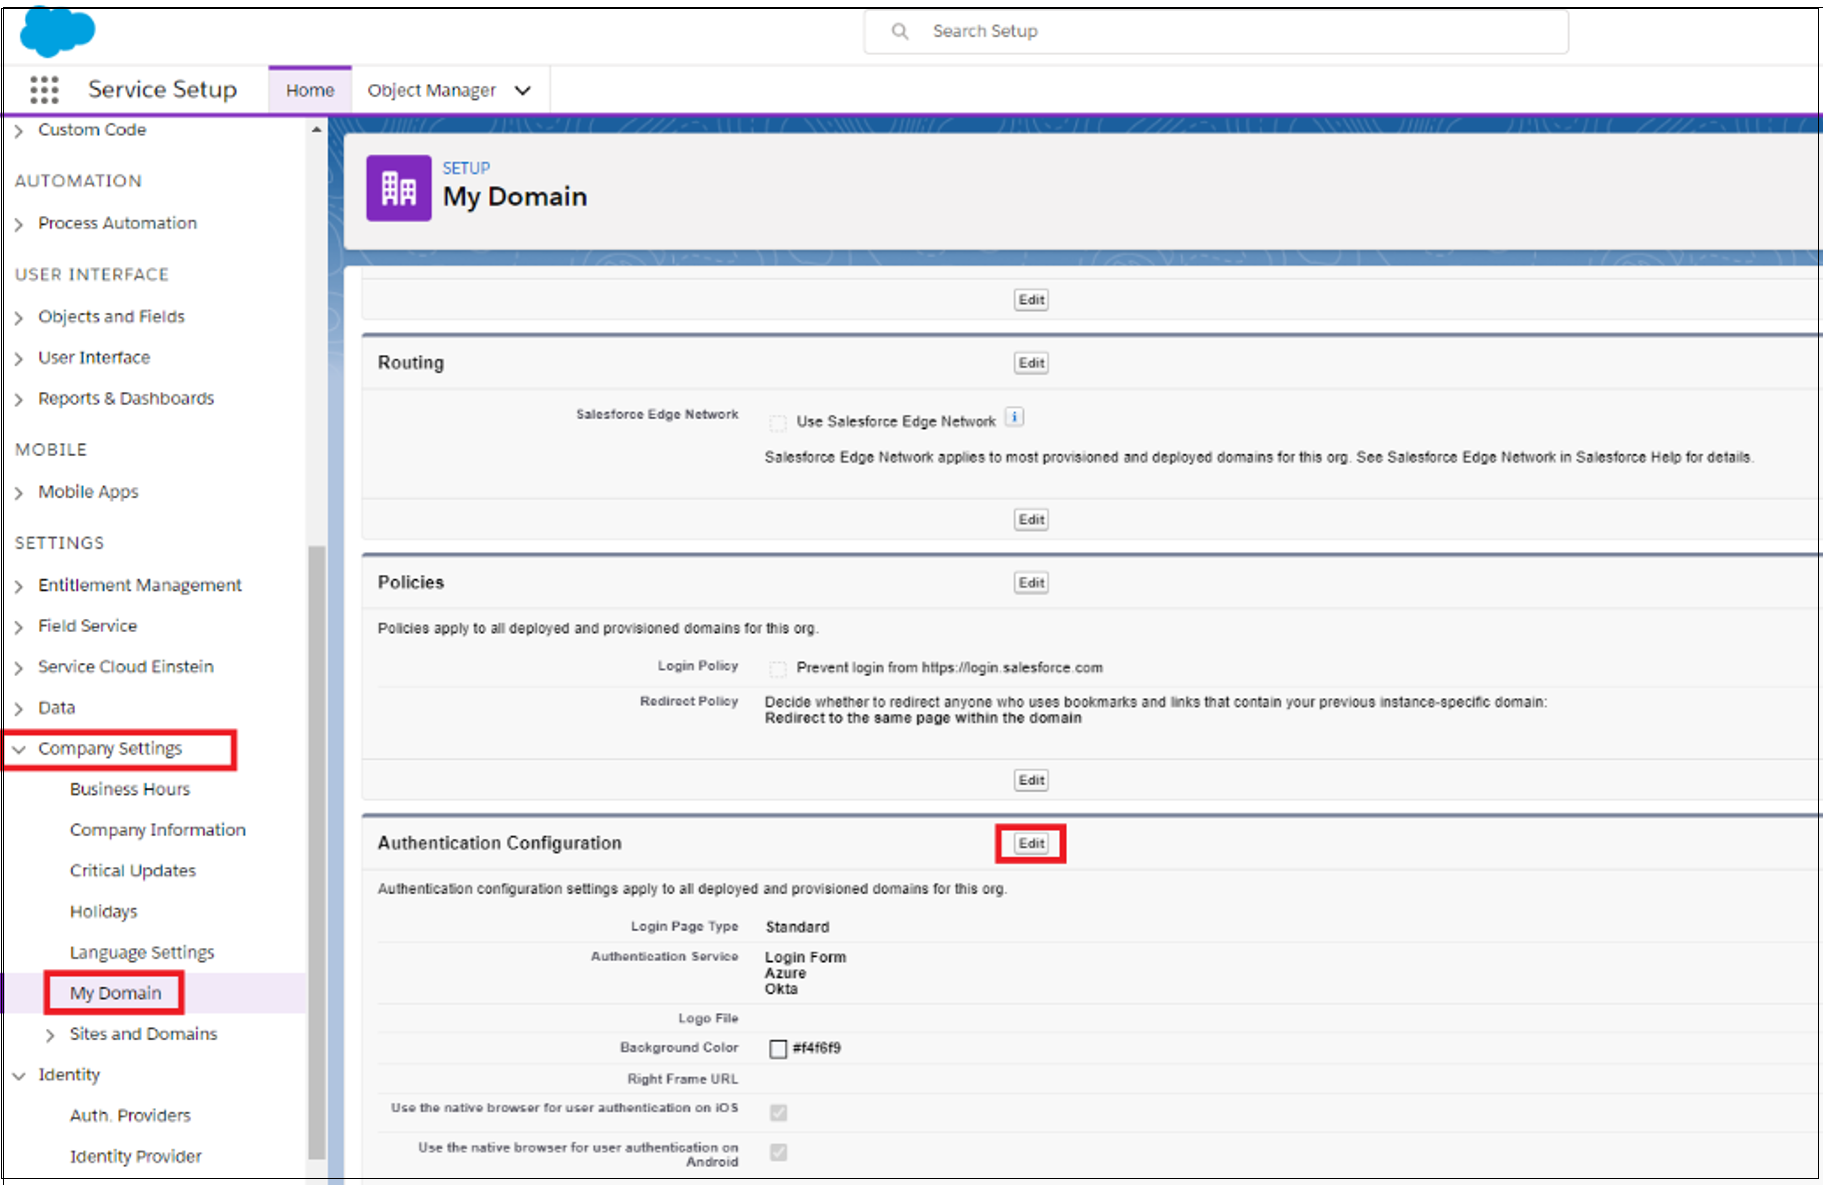
For a sign-in option, select the new SAML provider you configured. Select Save.
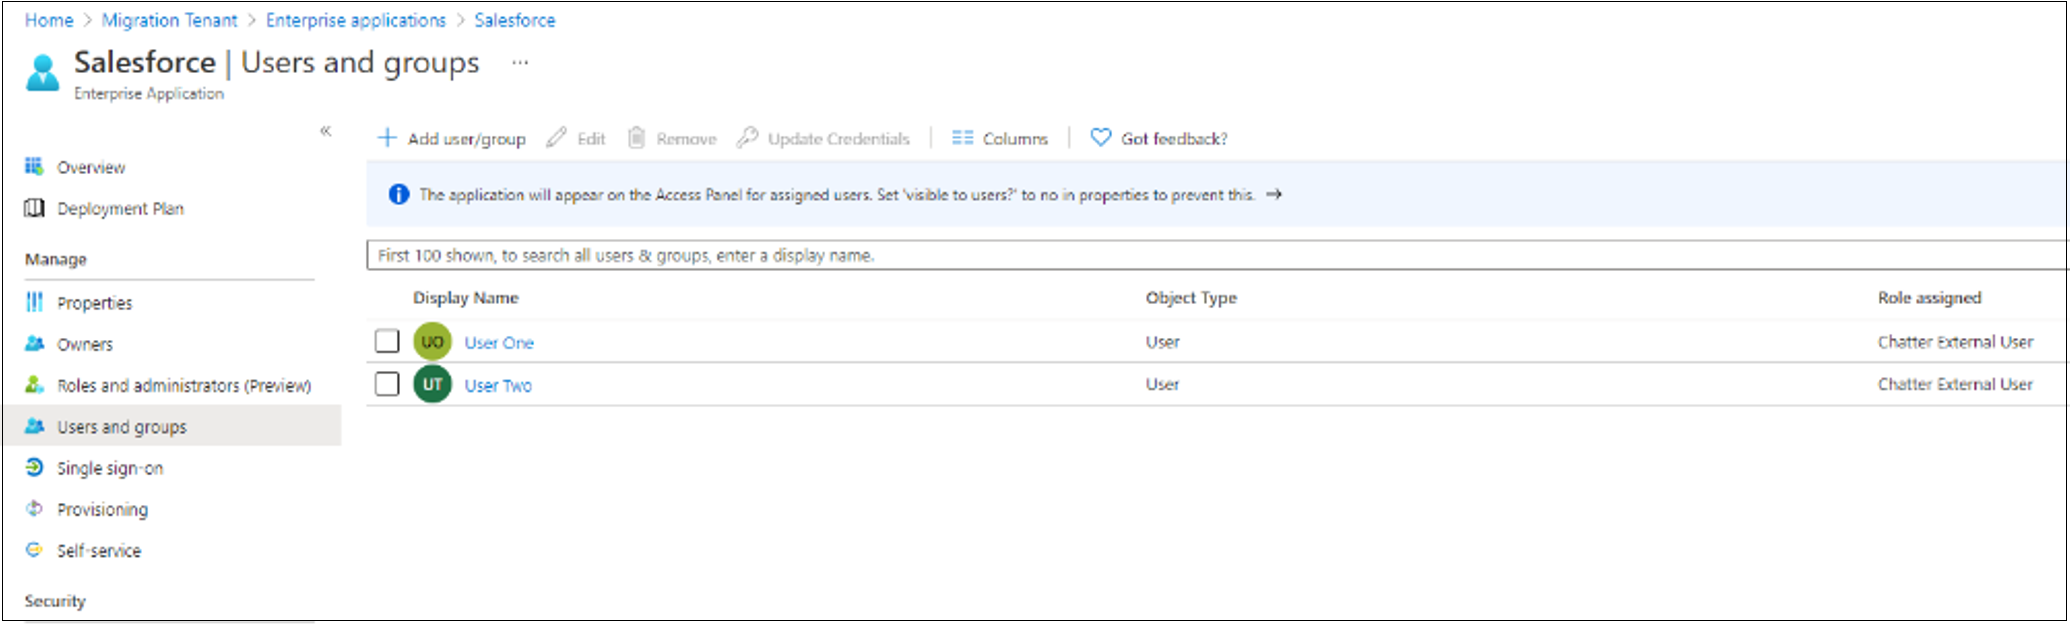
In Microsoft Entra ID, on the Enterprise applications page, select Users and groups. Then add test users.
To test the configuration, sign in as a test user. Go to the Microsoft apps gallery and then select Salesforce.
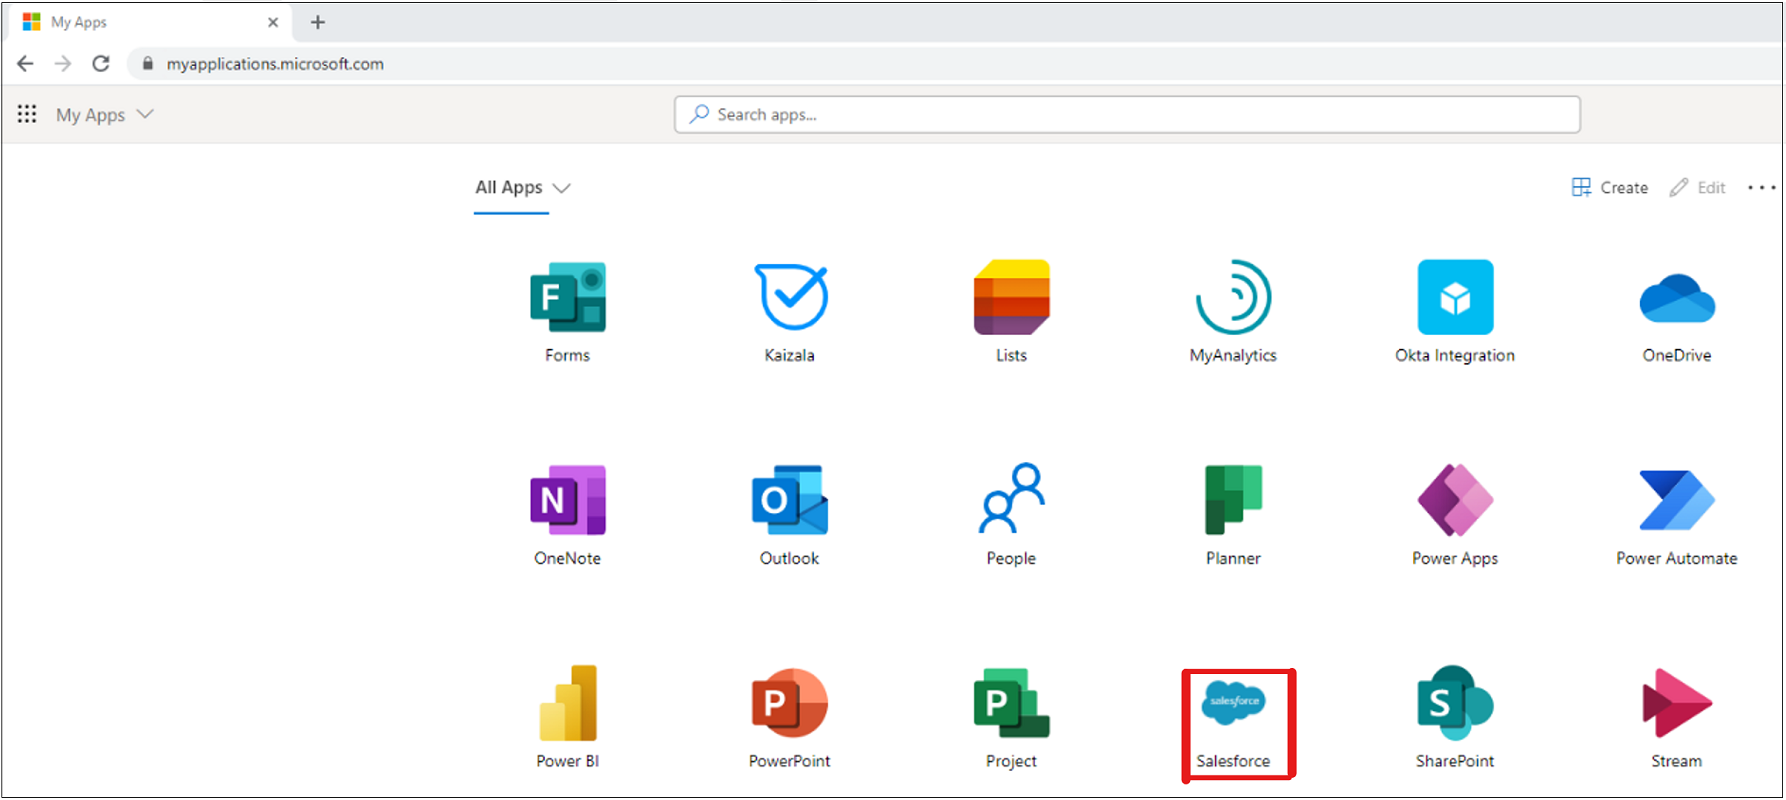
To sign in, select the configured identity provider (IdP).
Note
If configuration is correct, the test user lands on the Salesforce home page. For troubleshooting help, see the debugging guide.
- On the Enterprise applications page, assign the remaining users to the Salesforce application, with the correct roles.
Note
After you add the remaining users to the Microsoft Entra application, users can test the connection to ensure they have access. Test the connection before the next step.
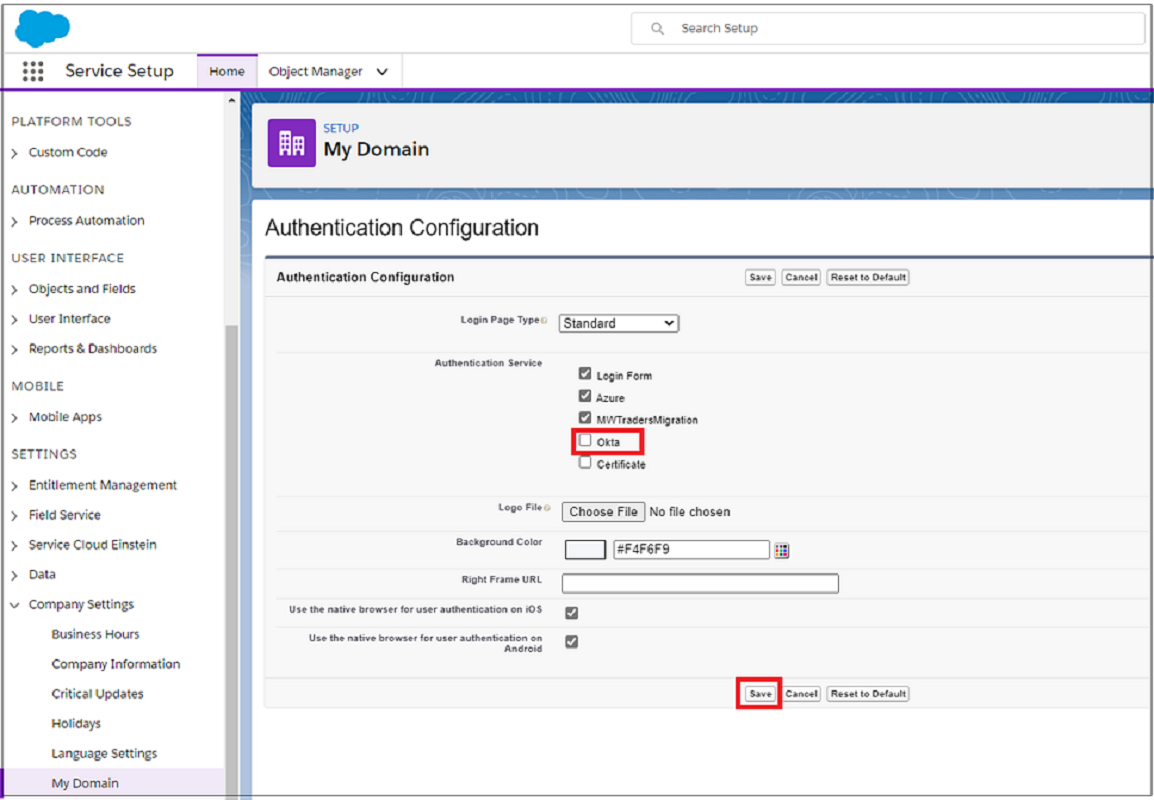
On the Salesforce administration console, select Company Settings > My Domain.
Under Authentication Configuration, select Edit. For authentication service, clear the selection for Okta.
Migrate an OpenID Connect or OAuth 2.0 application to Microsoft Entra ID
Tip
Steps in this article might vary slightly based on the portal you start from.
To migrate an OpenID Connect (OIDC) or OAuth 2.0 application to Microsoft Entra ID, in your Microsoft Entra tenant, configure the application for access. In this example, we convert a custom OIDC app.
To complete the migration, repeat configuration for all applications in the Okta tenant.
Sign in to the Microsoft Entra admin center as at least a Cloud Application Administrator.
Browse to Identity > Applications > Enterprise applications > All applications.
Select New application.
Select Create your own application.
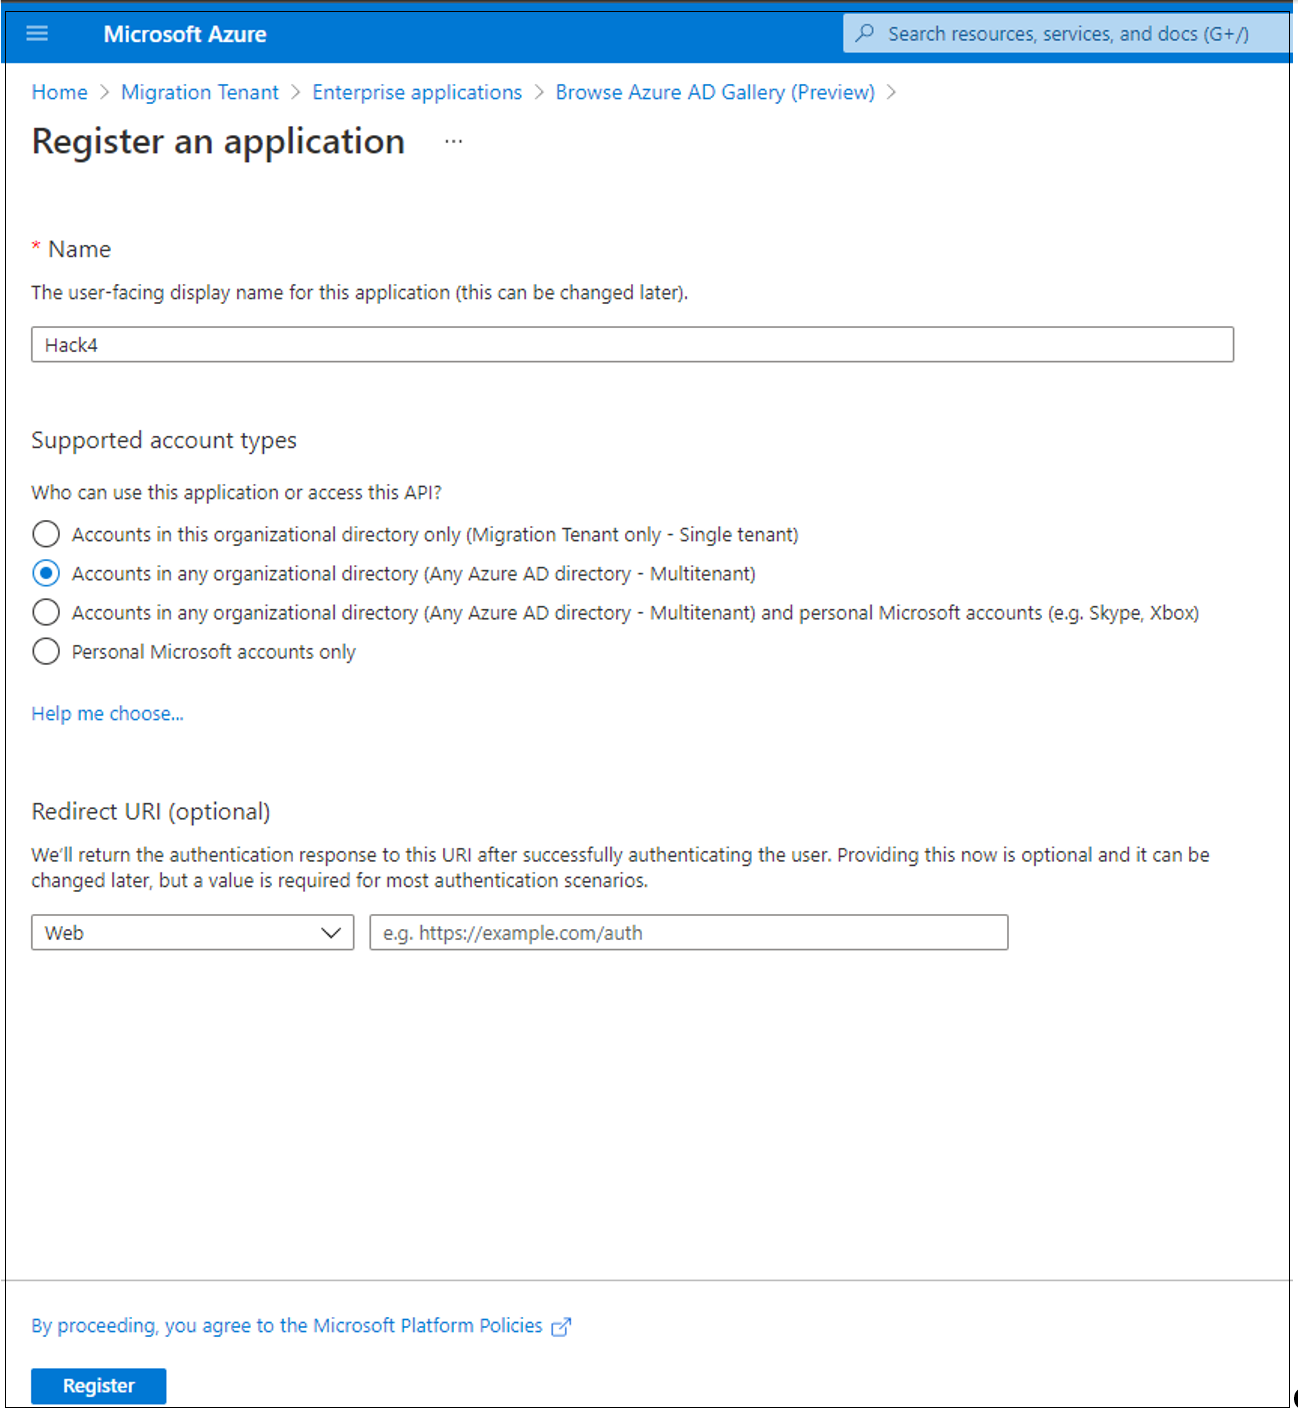
On the menu that appears, name the OIDC app and then select Register an application you're working on to integrate with Microsoft Entra ID.
Select Create.
On the next page, set up the tenancy of your application registration. For more information, see Tenancy in Microsoft Entra ID. Go to Accounts in any organizational directory (Any Microsoft Entra directory - Multitenant) > Register.
On the App registrations page, under Microsoft Entra ID, open the created registration.
Note
Depending on the application scenario, there are various configuration actions. Most scenarios require an app client secret.
On the Overview page, record the Application (client) ID. You use this ID in your application.
On the left, select Certificates & secrets. Then select + New client secret. Name the client secret and set its expiration.
Record the value and ID of the secret.
Note
If you misplace the client secret, you can't retrieve it. Instead, regenerate a secret.
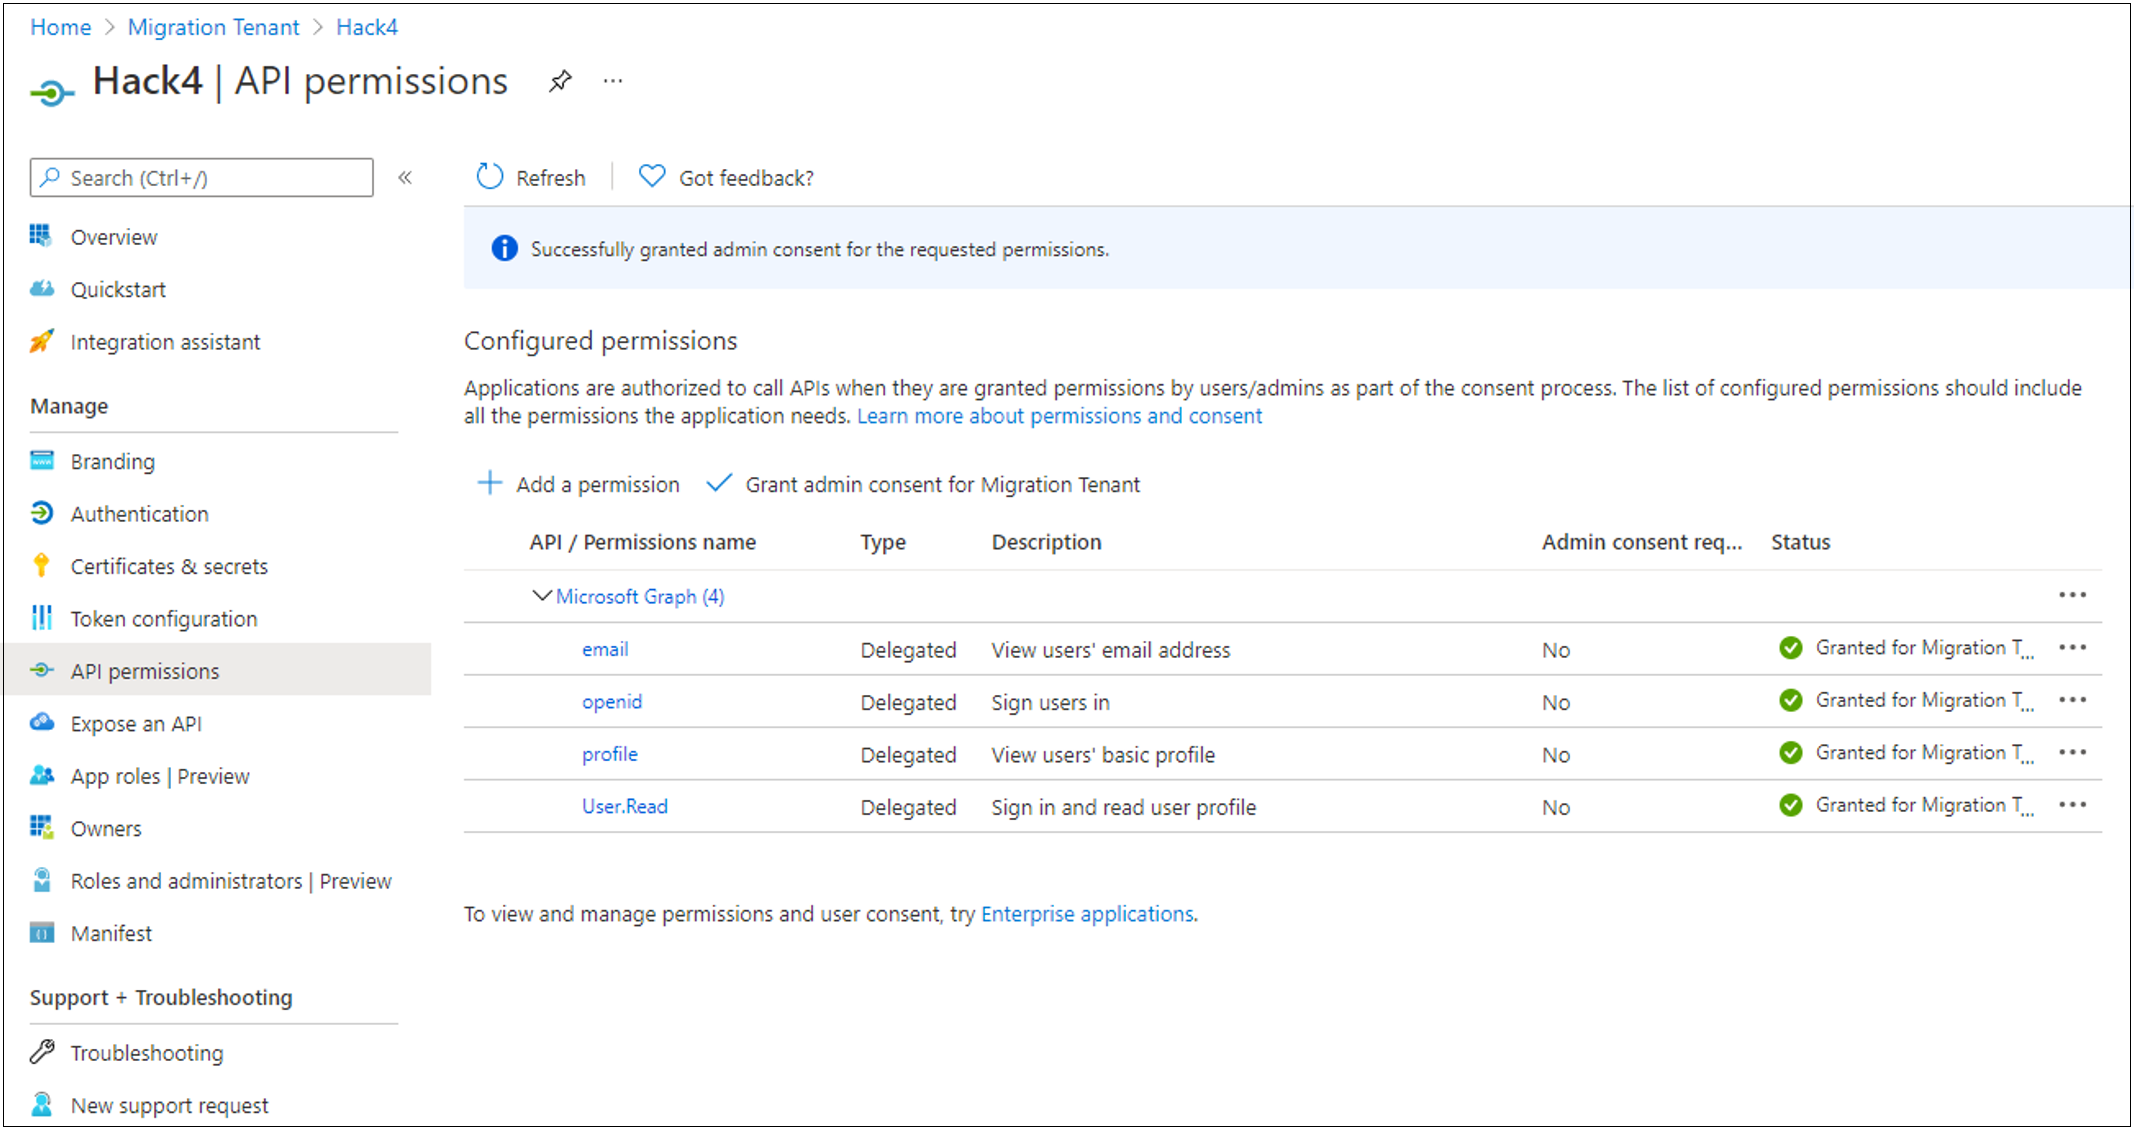
On the left, select API permissions. Then grant the application access to the OIDC stack.
Select + Add permission > Microsoft Graph > Delegated permissions.
In the OpenId permissions section, select email, openid, and profile. Then select Add permissions.
To improve user experience and suppress user consent prompts, select Grant admin consent for Tenant Domain Name. Wait for the Granted status to appear.
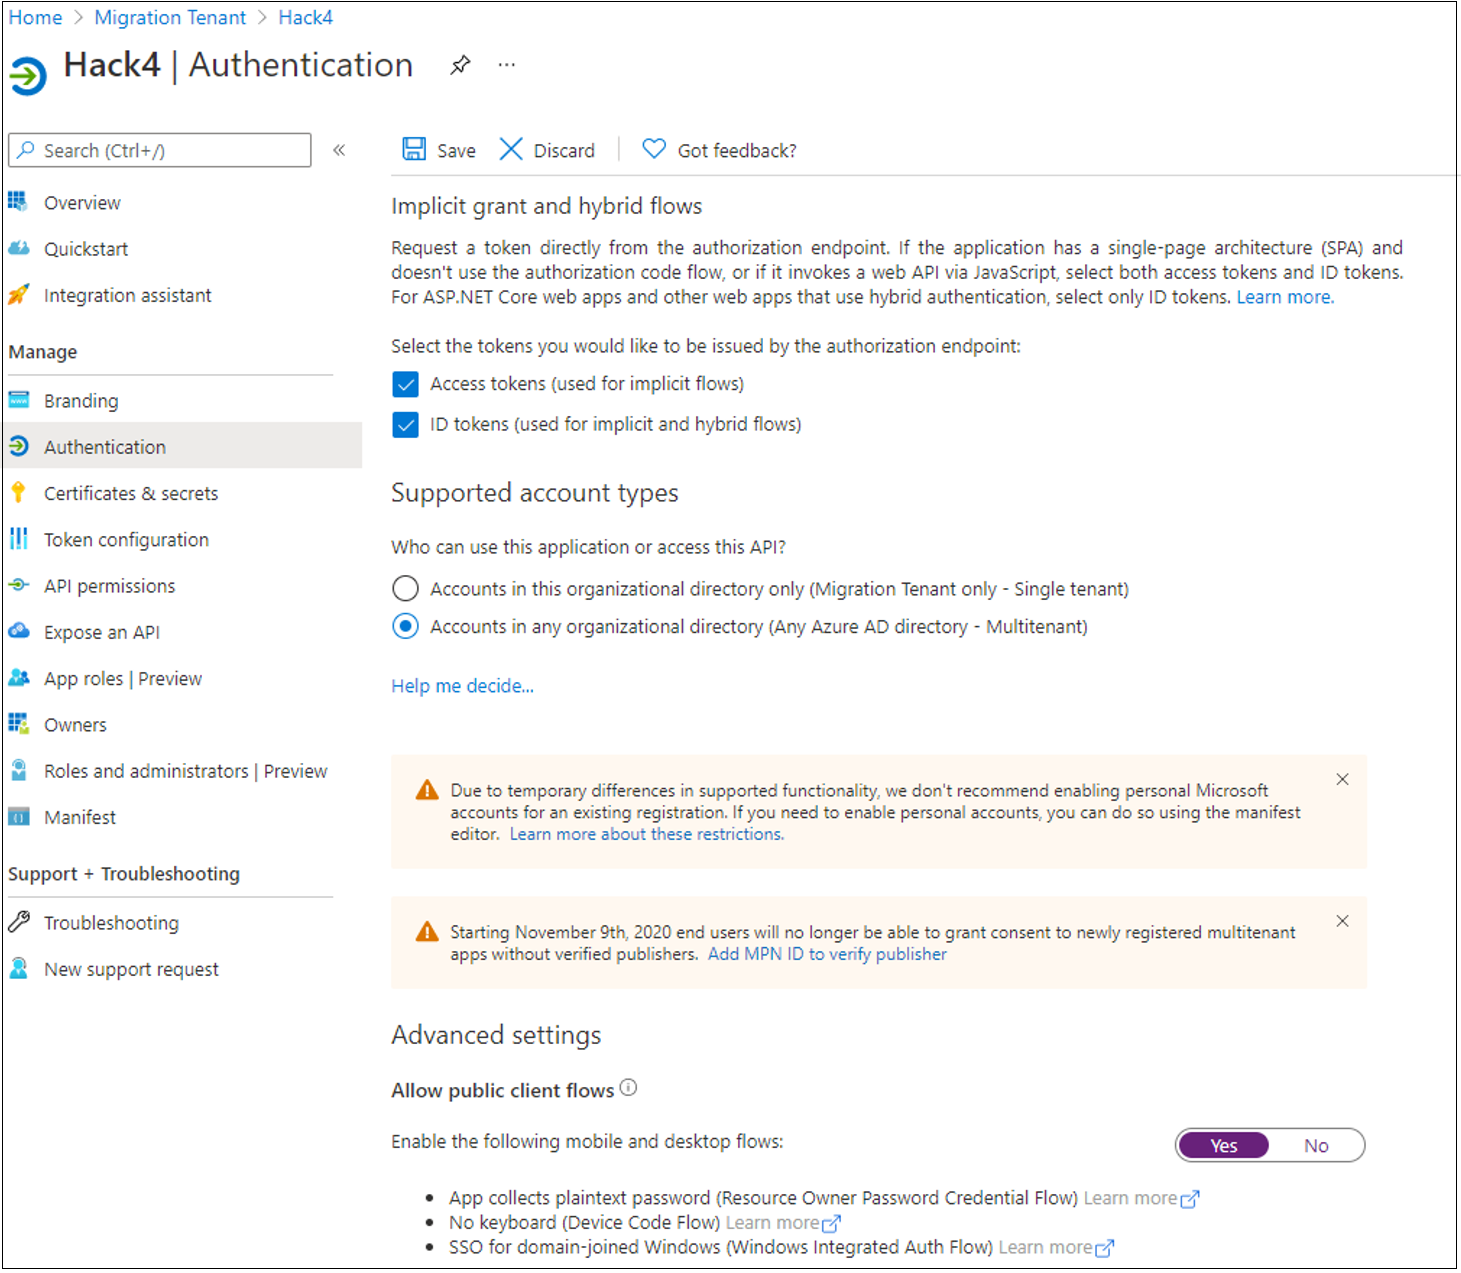
If your application has a redirect URI, enter the URI. If the reply URL targets the Authentication tab, followed by Add a platform and Web, enter the URL.
Select Access tokens and ID tokens.
Select Configure.
If needed, on the Authentication menu, under Advanced settings and Allow public client flows, select Yes.
Before you test, in your OIDC-configured application, import the application ID and client secret.
Note
Use the previous steps to configure your application with settings such as Client ID, Secret, and Scopes.
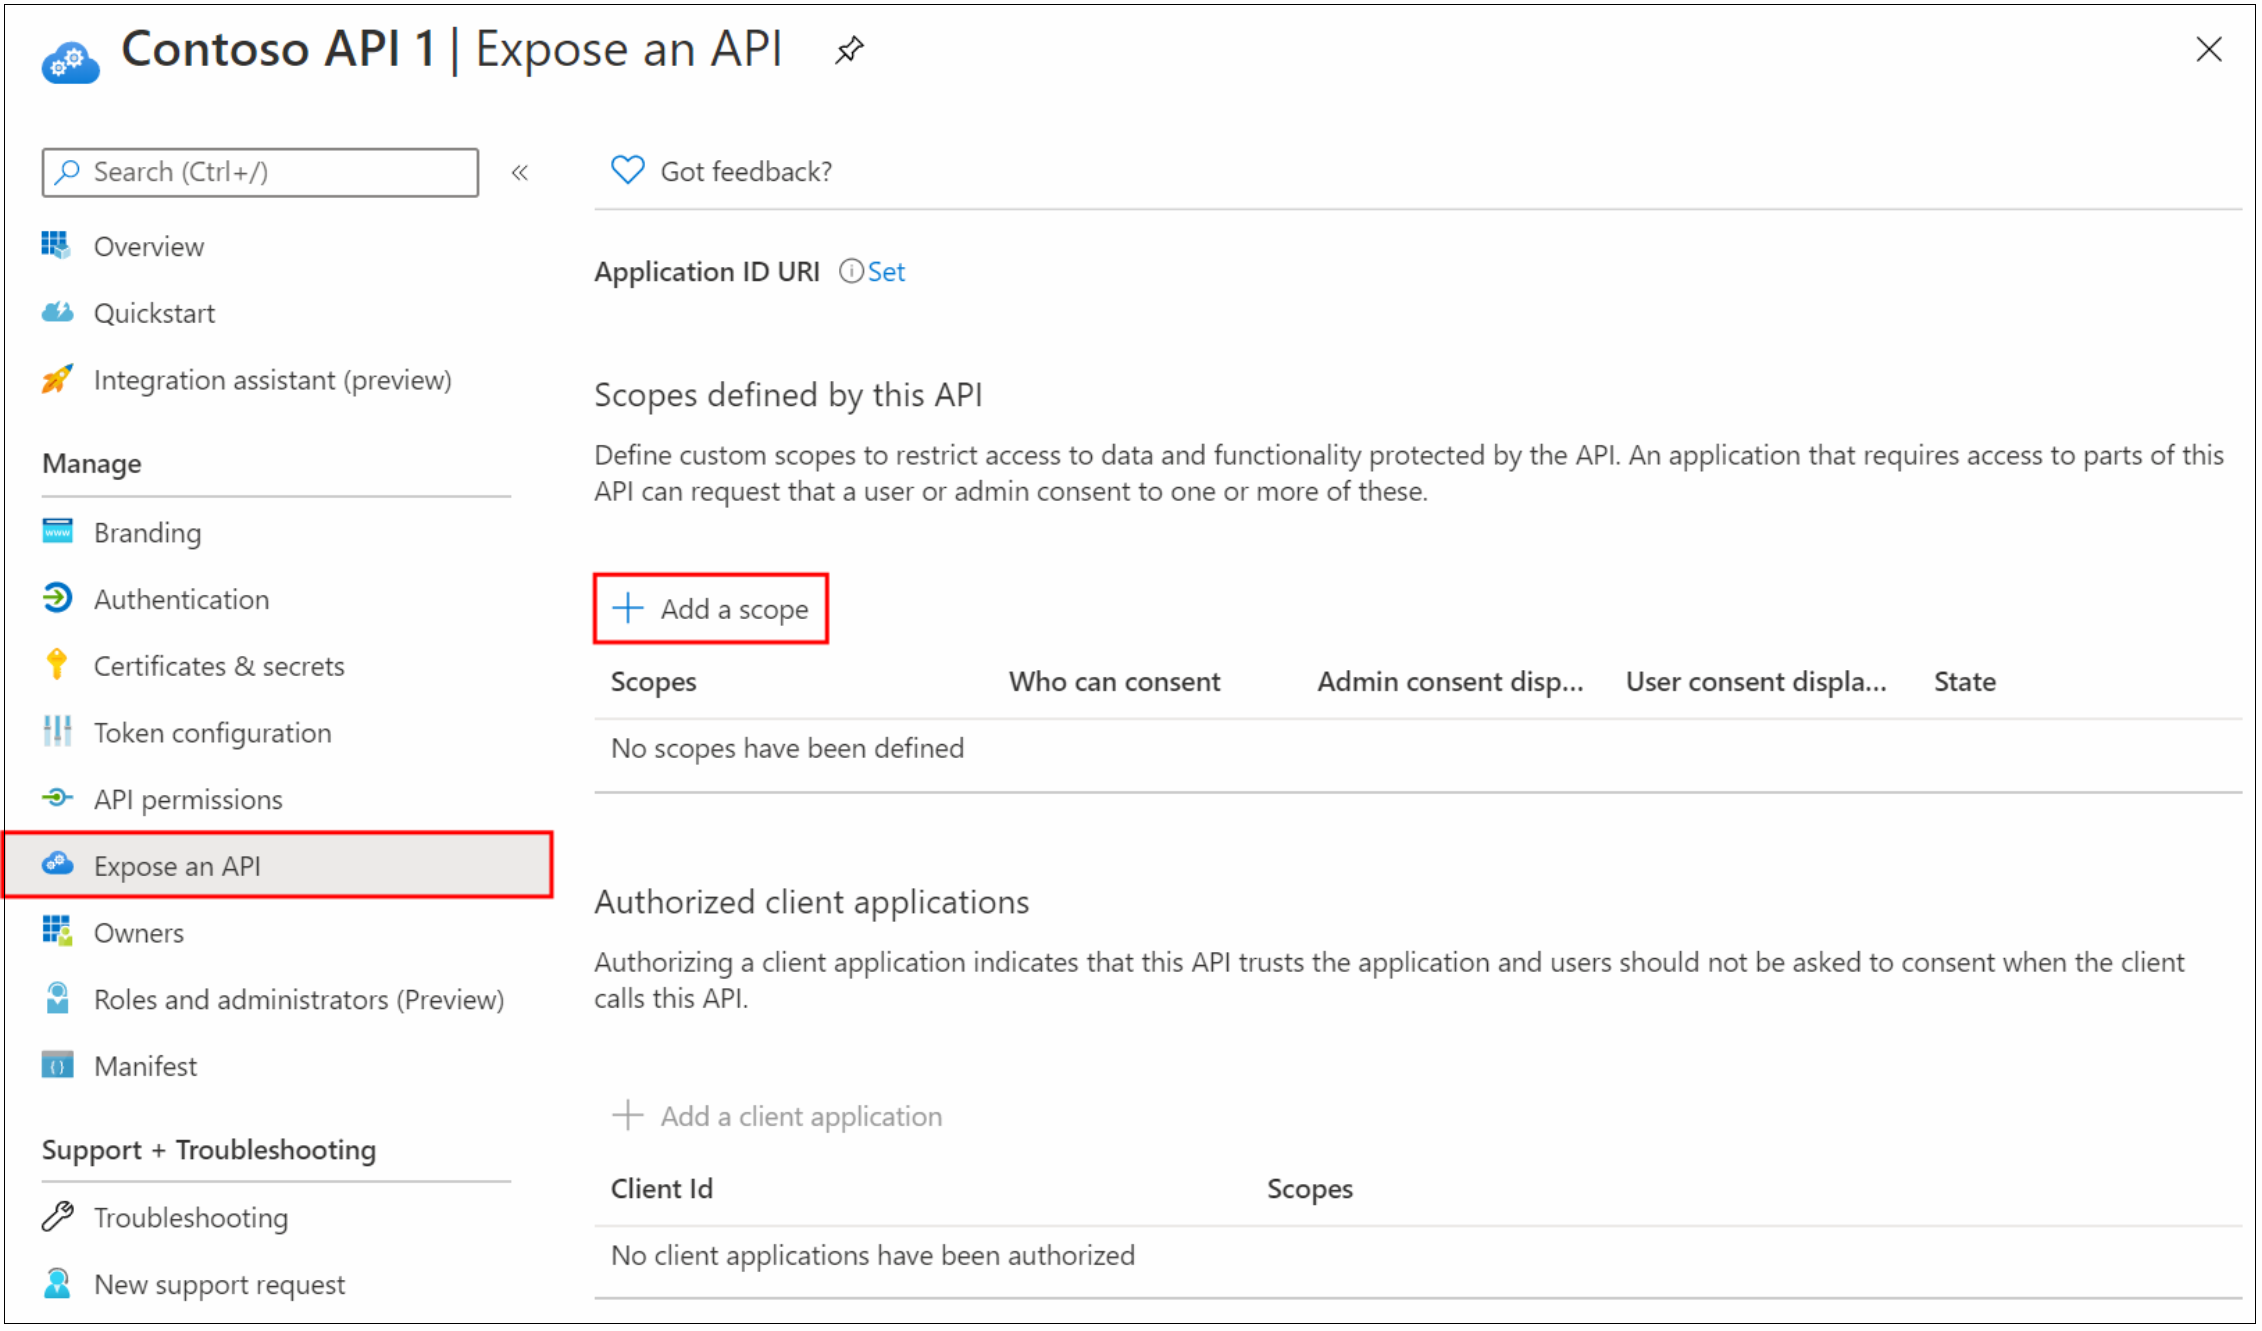
Migrate a custom authorization server to Microsoft Entra ID
Okta authorization servers map one-to-one to application registrations that expose an API.
Map the default Okta authorization server to Microsoft Graph scopes or permissions.