Approve or deny requests for Microsoft Entra roles in Privileged Identity Management
With Privileged Identity Management (PIM) in Microsoft Entra ID you can configure roles to require approval for activation, and choose one or multiple users or groups as delegated approvers. Delegated approvers have 24 hours to approve requests. If a request isn't approved within 24 hours, then the eligible user must re-submit a new request. The 24 hour approval time window isn't configurable.
View pending requests
Tip
Steps in this article might vary slightly based on the portal you start from.
As a delegated approver, you receive an email notification when a Microsoft Entra role request is pending your approval. You can view these pending requests in Privileged Identity Management.
Sign in to the Microsoft Entra admin center.
Browse to Identity governance > Privileged Identity Management > Approve requests.
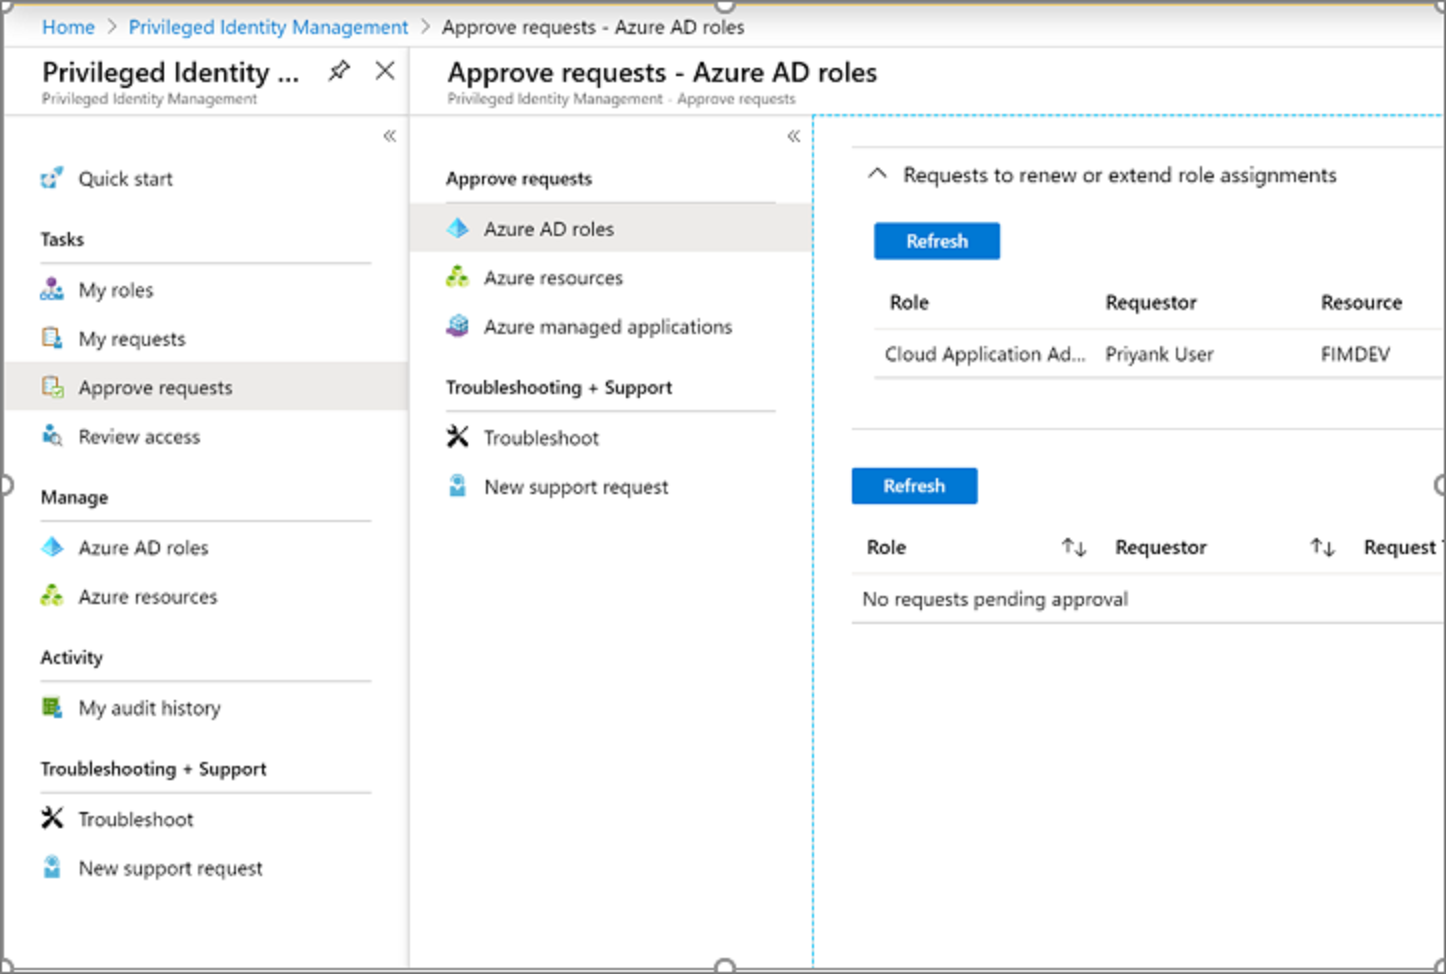
In the Requests for role activations section, you'll see a list of requests pending your approval.
View pending requests using Microsoft Graph API
HTTP request
GET https://graph.microsoft.com/v1.0/roleManagement/directory/roleAssignmentScheduleRequests/filterByCurrentUser(on='approver')?$filter=status eq 'PendingApproval'
HTTP response
{
    "@odata.context": "https://graph.microsoft.com/v1.0/$metadata#Collection(unifiedRoleAssignmentScheduleRequest)",
    "value": [
        {
            "@odata.type": "#microsoft.graph.unifiedRoleAssignmentScheduleRequest",
            "id": "9f2b5ddb-a50e-44a1-a6f4-f616322262ea",
            "status": "PendingApproval",
            "createdDateTime": "2021-07-15T19:57:17.76Z",
            "completedDateTime": "2021-07-15T19:57:17.537Z",
            "approvalId": "9f2b5ddb-a50e-44a1-a6f4-f616322262ea",
            "customData": null,
            "action": "SelfActivate",
            "principalId": "d96ea738-3b95-4ae7-9e19-78a083066d5b",
            "roleDefinitionId": "88d8e3e3-8f55-4a1e-953a-9b9898b8876b",
            "directoryScopeId": "/",
            "appScopeId": null,
            "isValidationOnly": false,
            "targetScheduleId": "9f2b5ddb-a50e-44a1-a6f4-f616322262ea",
            "justification": "test",
            "createdBy": {
                "application": null,
                "device": null,
                "user": {
                    "displayName": null,
                    "id": "d96ea738-3b95-4ae7-9e19-78a083066d5b"
                }
            },
            "scheduleInfo": {
                "startDateTime": null,
                "recurrence": null,
                "expiration": {
                    "type": "afterDuration",
                    "endDateTime": null,
                    "duration": "PT5H30M"
                }
            },
            "ticketInfo": {
                "ticketNumber": null,
                "ticketSystem": null
            }
        }
    ]
}
Approve requests
Note
Approvers are not able to approve their own role activation requests.
- Find and select the request that you want to approve. An approve or deny page appears.
- In the Justification box, enter the business justification.
- Select Submit. You will receive an Azure notification of your approval.
Approve pending requests using Microsoft Graph API
Note
Approval for extend and renew requests is currently not supported by the Microsoft Graph API
Get IDs for the steps that require approval
For a specific activation request, this command gets all the approval steps that need approval. Multi-step approvals aren't currently supported.
HTTP request
GET https://graph.microsoft.com/beta/roleManagement/directory/roleAssignmentApprovals/<request-ID-GUID>
HTTP response
{
    "@odata.context": "https://graph.microsoft.com/beta/$metadata#roleManagement/directory/roleAssignmentApprovals/$entity",
    "id": "<request-ID-GUID>",
    "steps@odata.context": "https://graph.microsoft.com/beta/$metadata#roleManagement/directory/roleAssignmentApprovals('<request-ID-GUID>')/steps",
    "steps": [
        {
            "id": "<approval-step-ID-GUID>",
            "displayName": null,
            "reviewedDateTime": null,
            "reviewResult": "NotReviewed",
            "status": "InProgress",
            "assignedToMe": true,
            "justification": "",
            "reviewedBy": null
        }
    ]
}
Approve the activation request step
HTTP request
PATCH
https://graph.microsoft.com/beta/roleManagement/directory/roleAssignmentApprovals/<request-ID-GUID>/steps/<approval-step-ID-GUID>
{
    "reviewResult": "Approve", // or "Deny"
    "justification": "Trusted User"
}
HTTP response
Successful PATCH calls generate an empty response.
Deny requests
- Find and select the request that you want to approve. An approve or deny page appears.
- In the Justification box, enter the business justification.
- Select Deny. A notification appears with your denial.
Workflow notifications
Here's some information about workflow notifications:
- Approvers are notified by email when a request for a role is pending their review. Email notifications include a direct link to the request, where the approver can approve or deny.
- Requests are resolved by the first approver who approves or denies.
- When an approver responds to the request, all approvers are notified of the action.
- Global admins and Privileged role admins are notified when an approved user becomes active in their role.
Note
A Global Administrator or Privileged role admin who believes that an approved user should not be active can remove the active role assignment in Privileged Identity Management. Although administrators are not notified of pending requests unless they are an approver, they can view and cancel any pending requests for all users by viewing pending requests in Privileged Identity Management.
Next steps
Feedback
Coming soon: Throughout 2024 we will be phasing out GitHub Issues as the feedback mechanism for content and replacing it with a new feedback system. For more information see: https://aka.ms/ContentUserFeedback.
Submit and view feedback for