Note
Access to this page requires authorization. You can try signing in or changing directories.
Access to this page requires authorization. You can try changing directories.
In this article, you learn how to integrate Akamai with Microsoft Entra ID. When you integrate Akamai with Microsoft Entra ID, you can:
- Control in Microsoft Entra ID who has access to Akamai.
- Enable your users to be automatically signed-in to Akamai with their Microsoft Entra accounts.
- Manage your accounts in one central location.
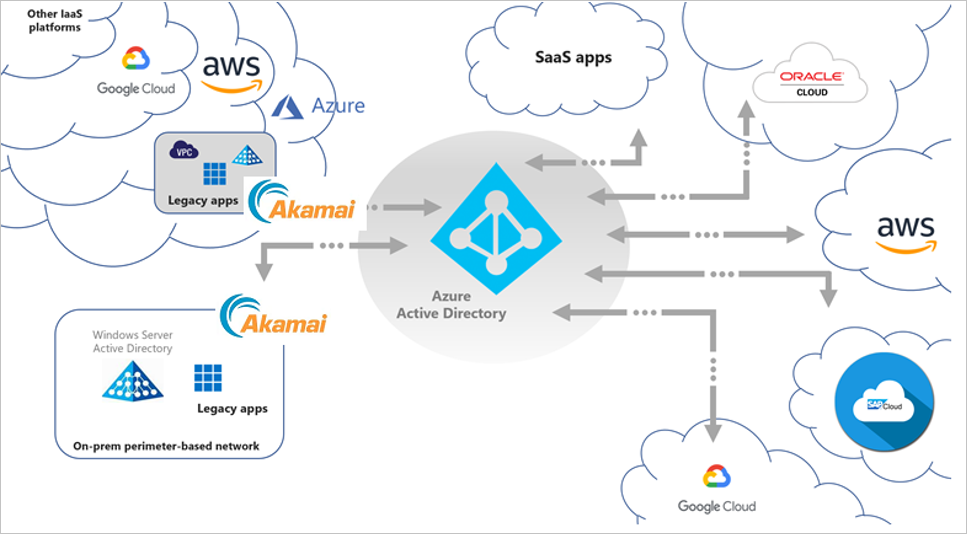
Microsoft Entra ID and Akamai Enterprise Application Access integration allows seamless access to legacy applications hosted in the cloud or on-premises. The integrated solution takes advantages of all the modern capabilities of Microsoft Entra ID like Microsoft Entra Conditional Access, Microsoft Entra ID Protection, and Microsoft Entra ID Governance for legacy applications access without app modifications or agents installation.
The following image describes, where Akamai EAA fits into the broader Hybrid Secure Access scenario.
Key Authentication Scenarios
Apart from Microsoft Entra native integration support for modern authentication protocols like OpenID Connect, SAML and WS-Fed, Akamai EAA extends secure access for legacy-based authentication apps for both internal and external access with Microsoft Entra ID, enabling modern scenarios (such as password-less access) to these applications. This includes:
- Header-based authentication apps
- Remote Desktop
- SSH (Secure Shell)
- Kerberos authentication apps
- VNC (Virtual Network Computing)
- Anonymous auth or no inbuilt authentication apps
- NTLM authentication apps (protection with dual prompts for the user)
- Forms-Based Application (protection with dual prompts for the user)
Integration Scenarios
Microsoft and Akamai EAA partnership allows the flexibility to meet your business requirements by supporting multiple integration scenarios based on your business requirement. These could be used to provide zero-day coverage across all applications and gradually classify and configure appropriate policy classifications.
Integration Scenario 1
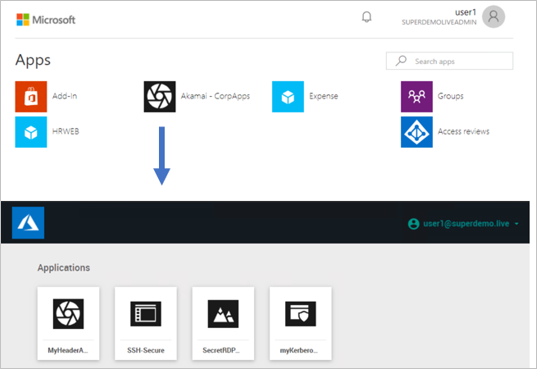
Akamai EAA is configured as a single application on the Microsoft Entra ID. Admin can configure the Conditional Access policy on the Application and once the conditions are satisfied users can gain access to the Akamai EAA Portal.
Pros:
- You need to only configure IDP once.
Cons:
Users end up having two applications portals.
Single Common Conditional Access policy coverage for all Applications.
Integration Scenario 2
Akamai EAA Application is set up individually on the Azure portal. Admin can configure Individual Conditional Access policy on the Application(s) and once the conditions are satisfied users can directly be redirected to the specific application.
Pros:
You can define individual Conditional Access Policies.
All Apps are represented on the 0365 Waffle and myApps.microsoft.com Panel.
Cons:
- You need to configure multiple IDP.

Prerequisites
The scenario outlined in this article assumes that you already have the following prerequisites:
- A Microsoft Entra user account with an active subscription. If you don't already have one, you can Create an account for free.
- One of the following roles:
- Akamai single sign-on (SSO) enabled subscription.
Scenario description
In this article, you configure and test Microsoft Entra SSO in a test environment.
- Akamai supports IDP initiated SSO.
Important
All the setup listed below are same for the Integration Scenario 1 and Scenario 2. For the Integration scenario 2 you have to set up Individual IDP in the Akamai EAA and the URL property needs to be modified to point to the application URL.
Add Akamai from the gallery
To configure the integration of Akamai into Microsoft Entra ID, you need to add Akamai from the gallery to your list of managed SaaS apps.
- Sign in to the Microsoft Entra admin center as at least a Cloud Application Administrator.
- Browse to Entra ID > Enterprise apps > New application.
- In the Add from the gallery section, type Akamai in the search box.
- Select Akamai from results panel and then add the app. Wait a few seconds while the app is added to your tenant.
Alternatively, you can also use the Enterprise App Configuration Wizard. In this wizard, you can add an application to your tenant, add users/groups to the app, assign roles, and walk through the SSO configuration as well. Learn more about Microsoft 365 wizards.
Configure and test Microsoft Entra SSO for Akamai
Configure and test Microsoft Entra SSO with Akamai using a test user called B.Simon. For SSO to work, you need to establish a link relationship between a Microsoft Entra user and the related user in Akamai.
To configure and test Microsoft Entra SSO with Akamai, perform the following steps:
- Configure Microsoft Entra SSO - to enable your users to use this feature.
- Create a Microsoft Entra test user - to test Microsoft Entra single sign-on with B.Simon.
- Assign the Microsoft Entra test user - to enable B.Simon to use Microsoft Entra single sign-on.
- Configure Akamai SSO - to configure the single sign-on settings on application side.
- Setting up IDP
- Header Based Authentication
- Remote Desktop
- SSH
- Kerberos Authentication
- Create Akamai test user - to have a counterpart of B.Simon in Akamai that's linked to the Microsoft Entra representation of user.
- Test SSO - to verify whether the configuration works.
Configure Microsoft Entra SSO
Follow these steps to enable Microsoft Entra SSO.
Sign in to the Microsoft Entra admin center as at least a Cloud Application Administrator.
Browse to Entra ID > Enterprise apps > Akamai > Single sign-on.
On the Select a single sign-on method page, select SAML.
On the Set up single sign-on with SAML page, select the pencil icon for Basic SAML Configuration to edit the settings.
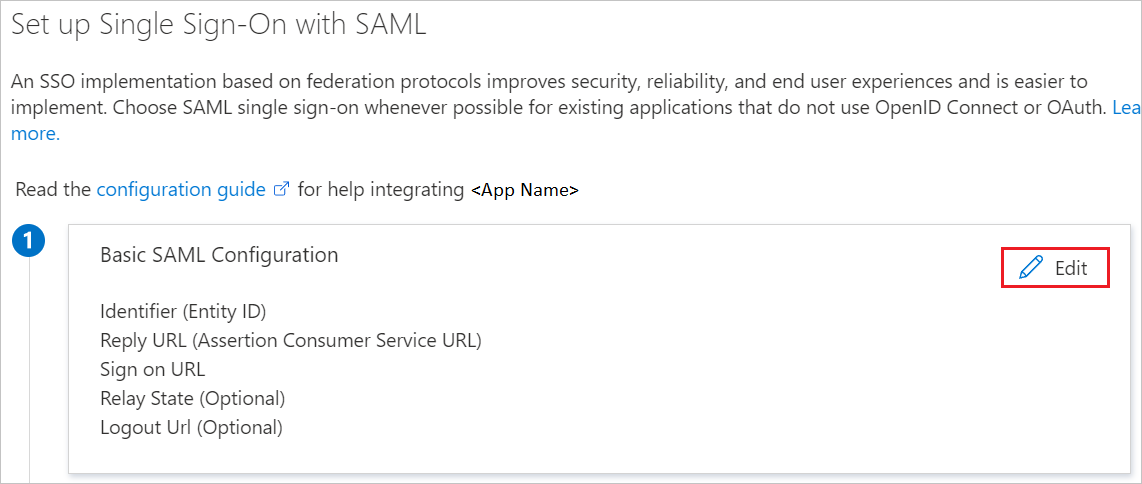
On the Basic SAML Configuration section, if you wish to configure the application in IDP initiated mode, enter the values for the following fields:
a. In the Identifier text box, type a URL using the following pattern:
https://<Yourapp>.login.go.akamai-access.com/saml/sp/responseb. In the Reply URL text box, type a URL using the following pattern:
https:// <Yourapp>.login.go.akamai-access.com/saml/sp/responseNote
These values aren't real. Update these values with the actual Identifier and Reply URL. Contact Akamai Client support team to get these values. You can also refer to the patterns shown in the Basic SAML Configuration section.
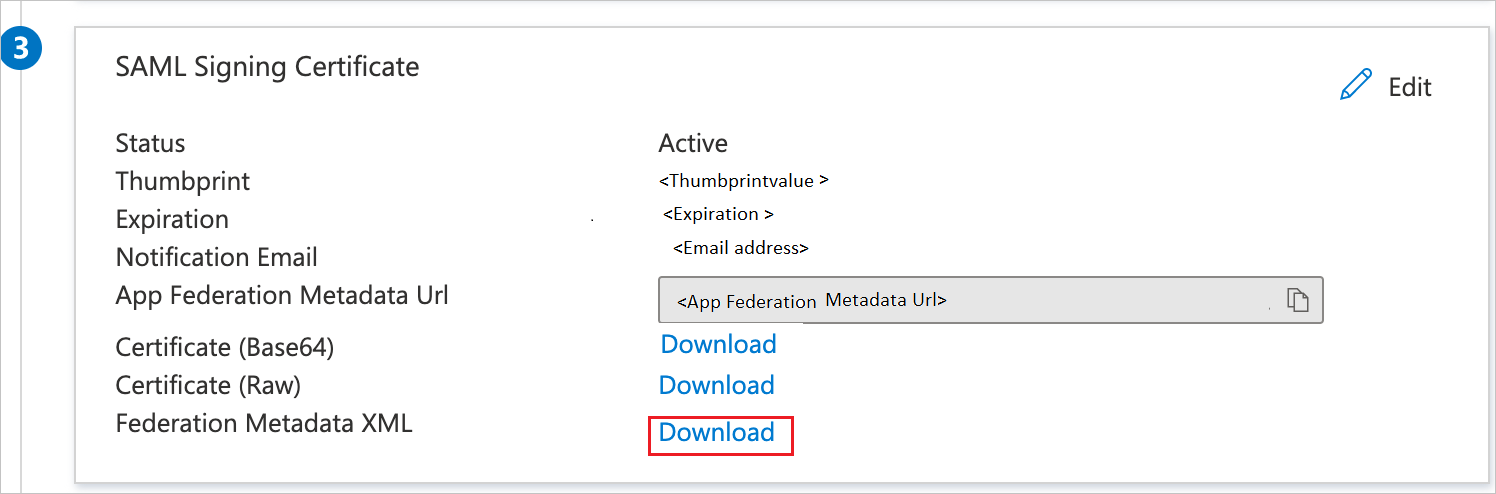
On the Set up single sign-on with SAML page, in the SAML Signing Certificate section, find Federation Metadata XML and select Download to download the certificate and save it on your computer.
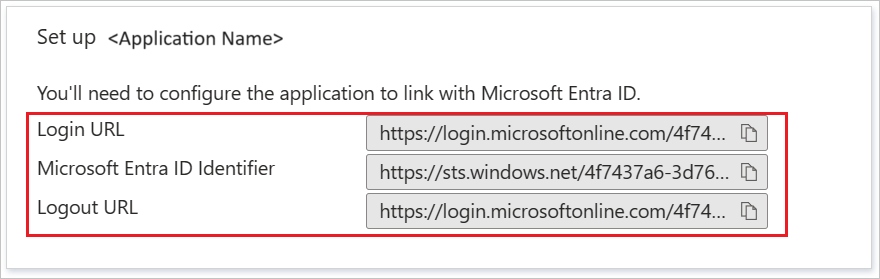
On the Set up Akamai section, copy the appropriate URL(s) based on your requirement.
Create and assign Microsoft Entra test user
Follow the guidelines in the create and assign a user account quickstart to create a test user account called B.Simon.
Configure Akamai SSO
Setting up IDP
AKAMAI EAA IDP Configuration
Sign in to Akamai Enterprise Application Access console.
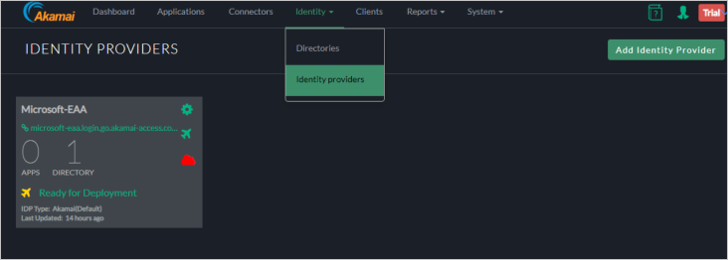
On the Akamai EAA console, Select Identity > Identity Providers and select Add Identity Provider.
On the Create New Identity Provider perform the following steps:
a. Specify the Unique Name.
b. Choose Third Party SAML and select Create Identity Provider and Configure.
General Settings
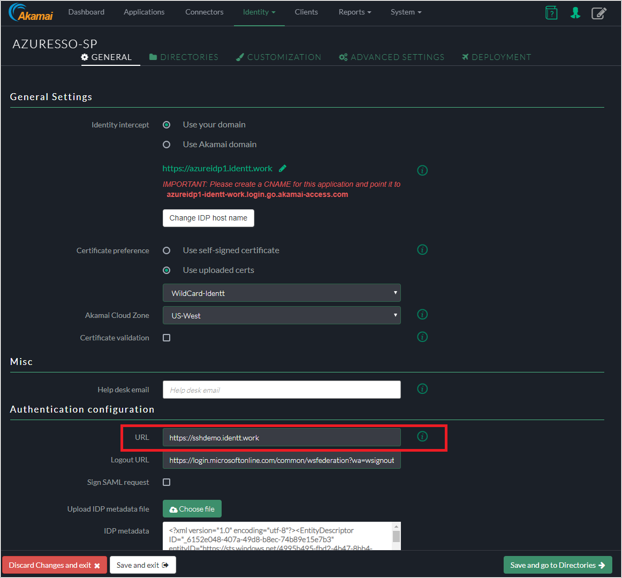
In the General tab, enter the following information:
Identity Intercept - Specify the name of the domain (SP base URL–is used for Microsoft Entra Configuration).
Note
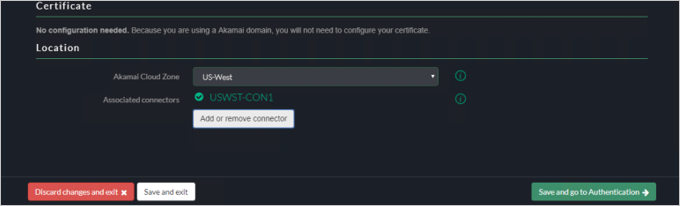
You can choose to have your own custom domain (requires a DNS entry and a Certificate). In this example we're going to use the Akamai Domain.
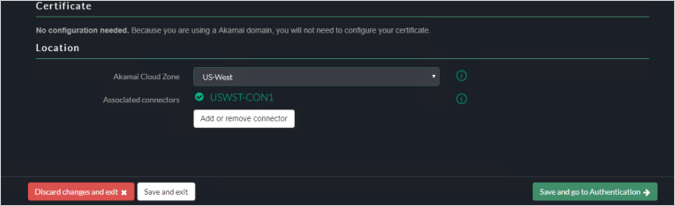
Akamai Cloud Zone - Select the Appropriate cloud zone.
Certificate Validation - Check Akamai Documentation (optional).
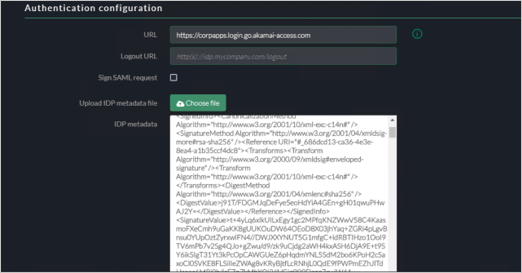
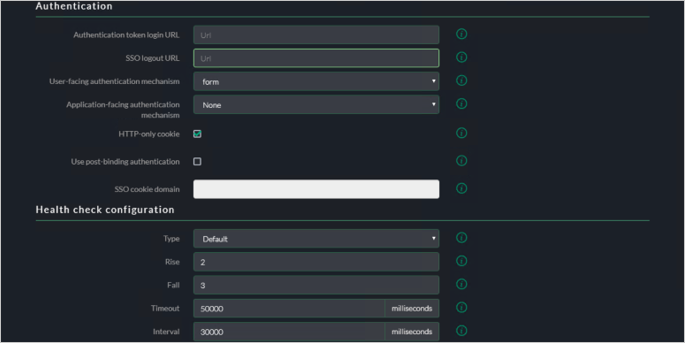
Authentication Configuration
URL – Specify the URL same as your identity intercept ( this is where users are redirect after authentication).
Logout URL : Update the logout URL.
Sign SAML Request: default unchecked.
For the IDP Metadata File, add the Application in the Microsoft Entra ID Console.
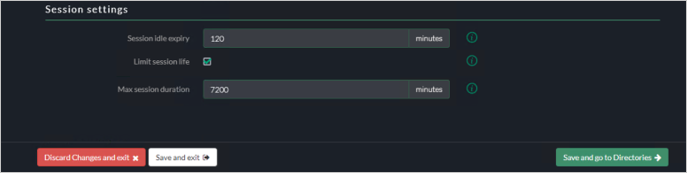
Session Settings
Leave the settings as default.
Directories
In the Directories tab, skip the directory configuration.
Customization UI
You could add customization to IDP. In the Customization tab, there are settings for Customize UI, Language settings, and Themes.
Advanced Settings
In the Advanced settings tab, accept the default values. Refer Akamai documentation for more details.
Deployment
In the Deployment tab, select Deploy Identity Provider.
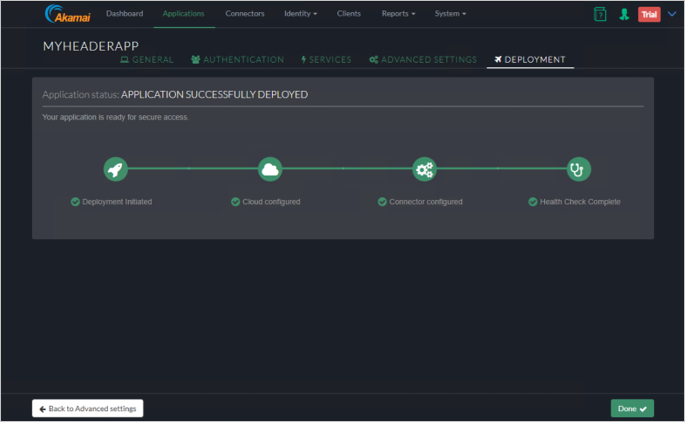
Verify the deployment was successful.
Header Based Authentication
Akamai Header Based Authentication
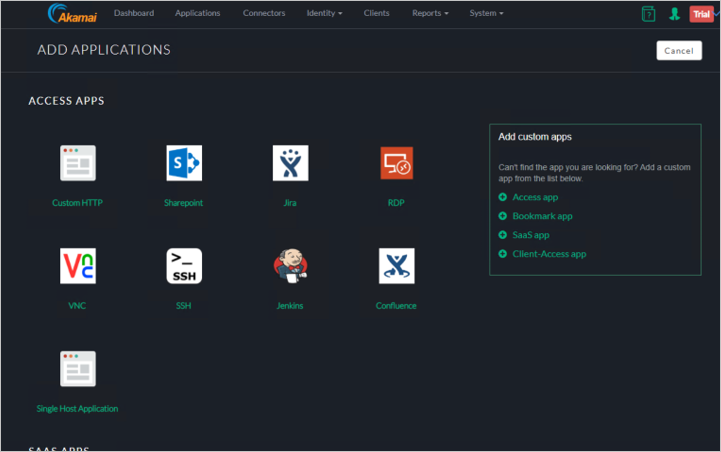
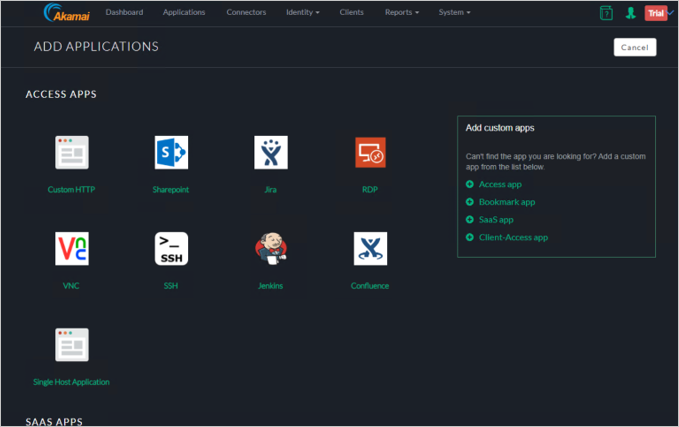
Choose Custom HTTP form the Add Applications Wizard.
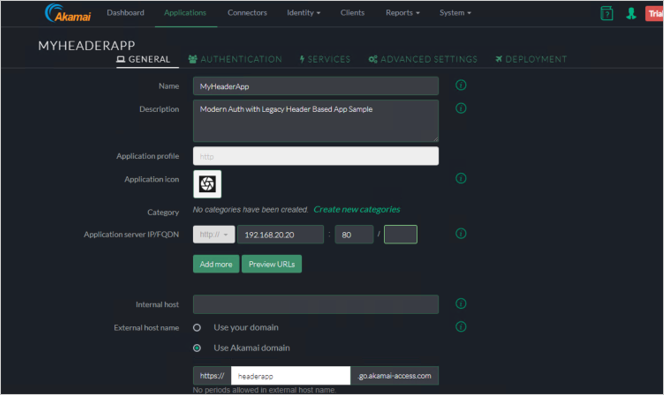
Enter Application Name and Description.

Authentication
Select Authentication tab.
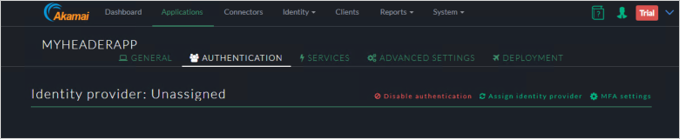
Select Assign identity provider.
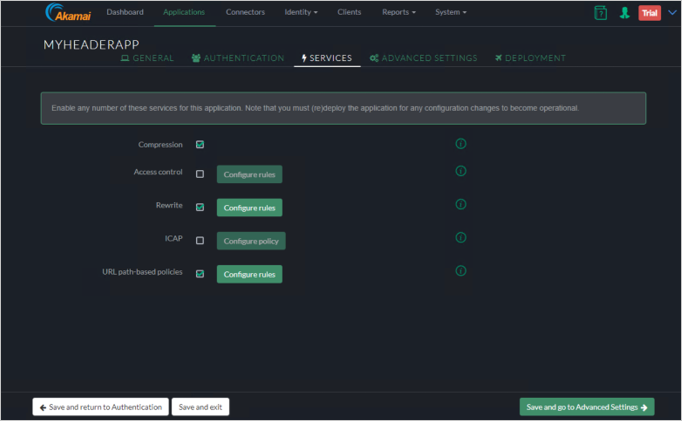
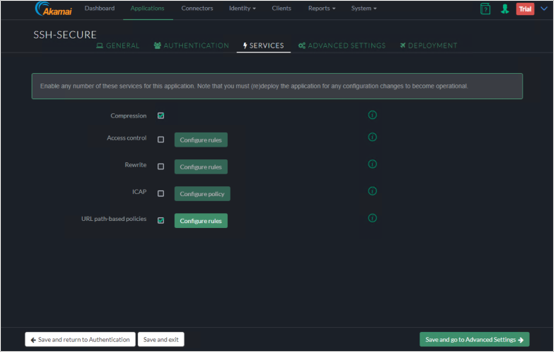
Services
Select Save and Go to Authentication.
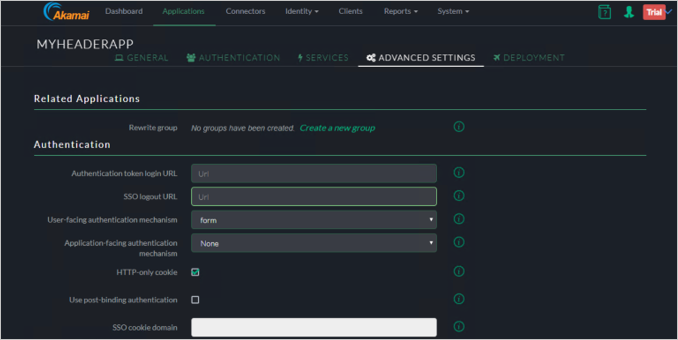
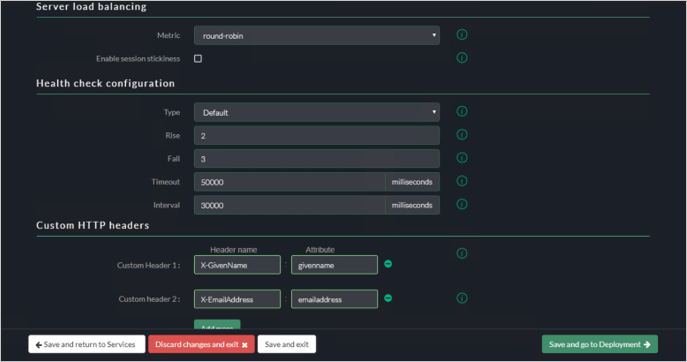
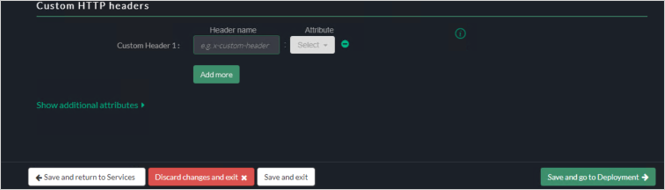
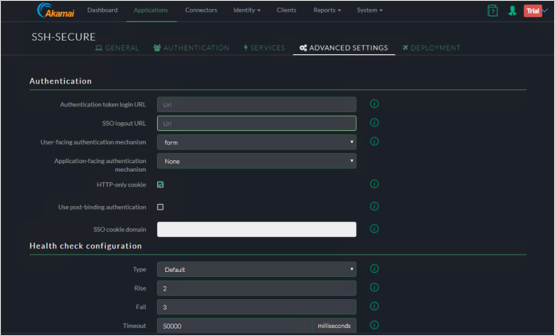
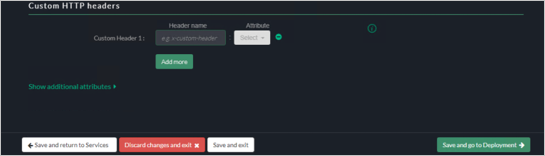
Advanced Settings
Under the Customer HTTP Headers, specify the CustomerHeader and SAML Attribute.
Select Save and go to Deployment button.
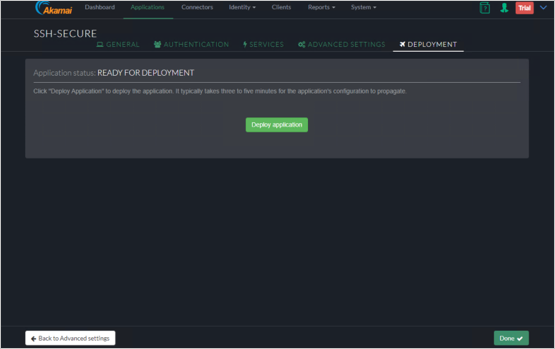
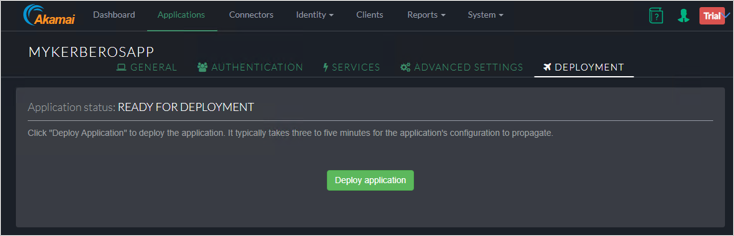
Deploy the Application
Select Deploy Application button.
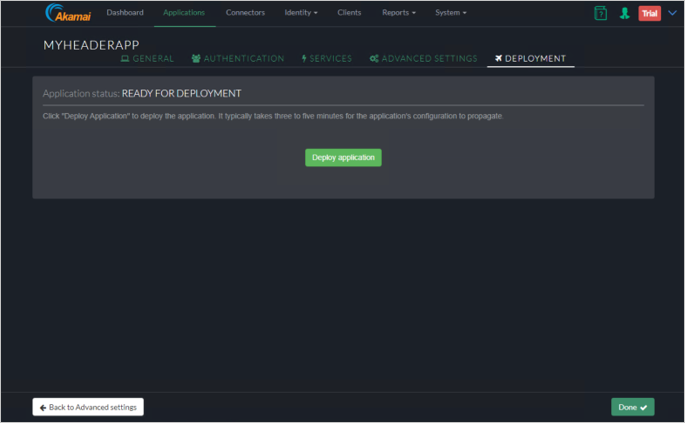
Verify the Application was deployed successfully.
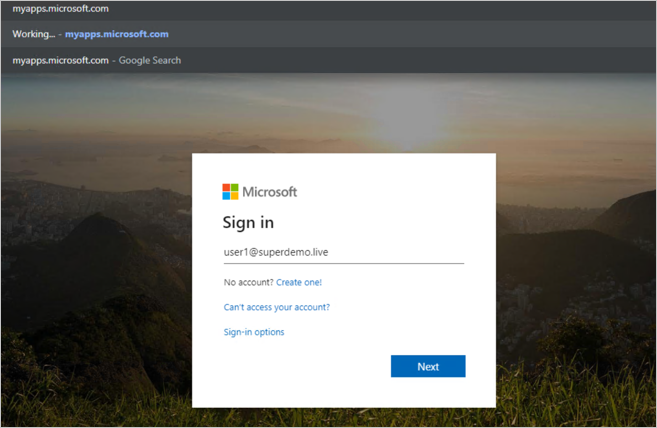
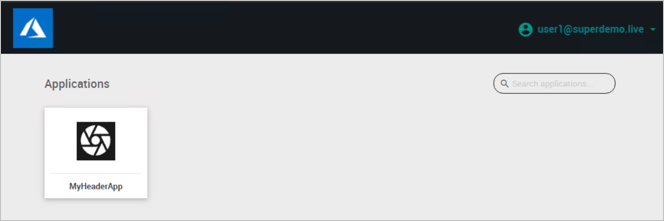
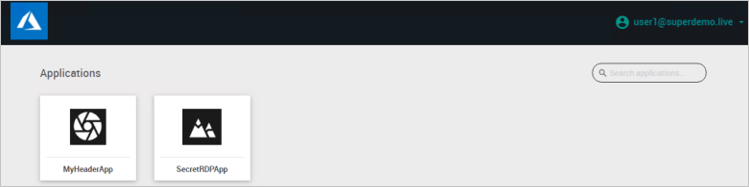
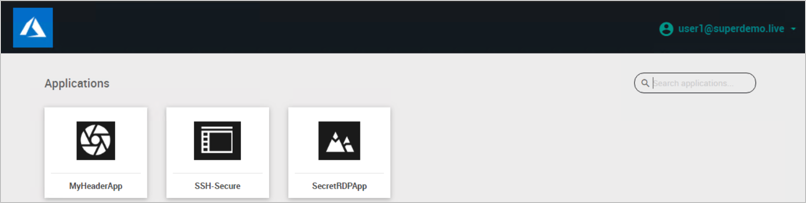
End-User Experience.
Conditional Access.
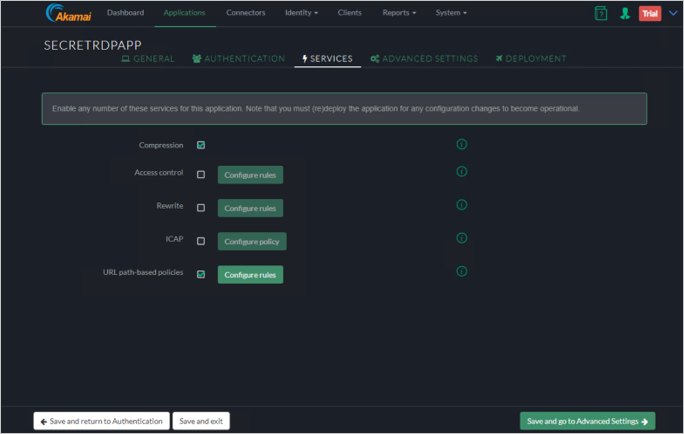
Remote Desktop
Choose RDP from the ADD Applications Wizard.
Enter Application Name, such as SecretRDPApp.
Select a Description, such as Protect RDP Session using Microsoft Entra Conditional Access.
Specify the Connector that's servicing this.
Authentication
In the Authentication tab, select Save and go to Services.
Services
Select Save and go to Advanced Settings.
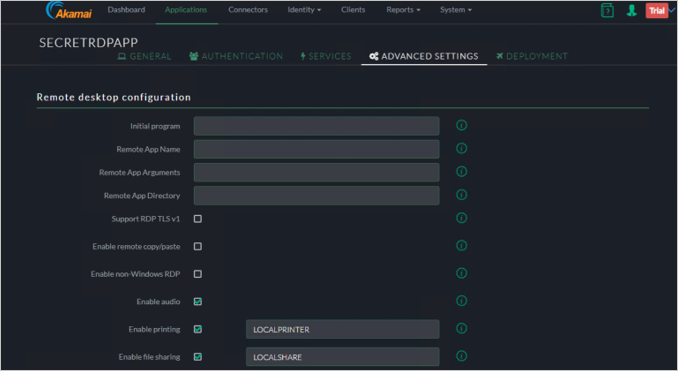
Advanced Settings
Select Save and go to Deployment.
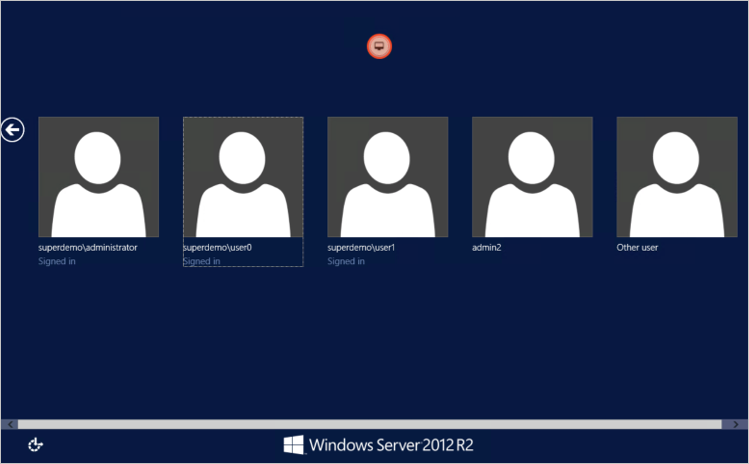
End-User Experience
Conditional Access
Alternatively, you can also directly Type the RDP Application URL.
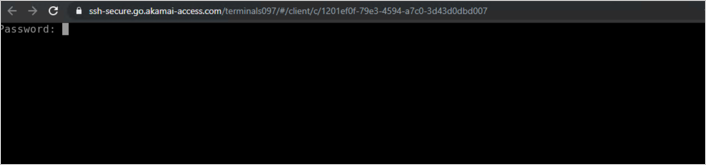
SSH
Go to Add Applications, Choose SSH.
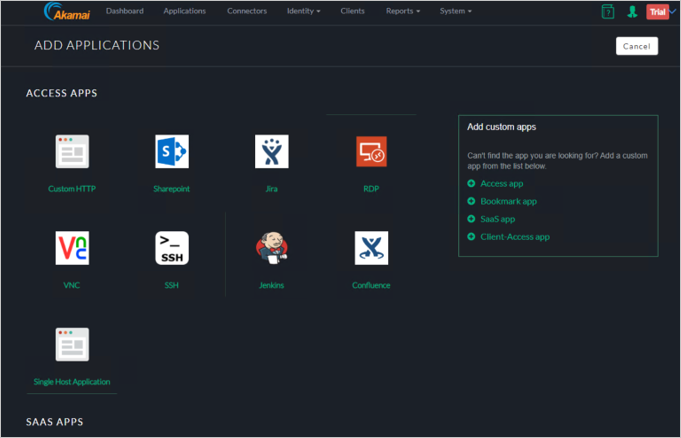
Enter Application Name and Description, such as Microsoft Entra modern authentication to SSH.
Configure Application Identity.
a. Specify Name / Description.
b. Specify Application Server IP/FQDN and port for SSH.
c. Specify SSH username / passphrase *Check Akamai EAA.
d. Specify the External host Name.
e. Specify the Location for the connector and choose the connector.
Authentication
In the Authentication tab, select Save and go to Services.
Services
Select Save and go to Advanced Settings.
Advanced Settings
Select Save and to go Deployment.
Deployment
Select Deploy application.
End-User Experience
Conditional Access
Kerberos Authentication
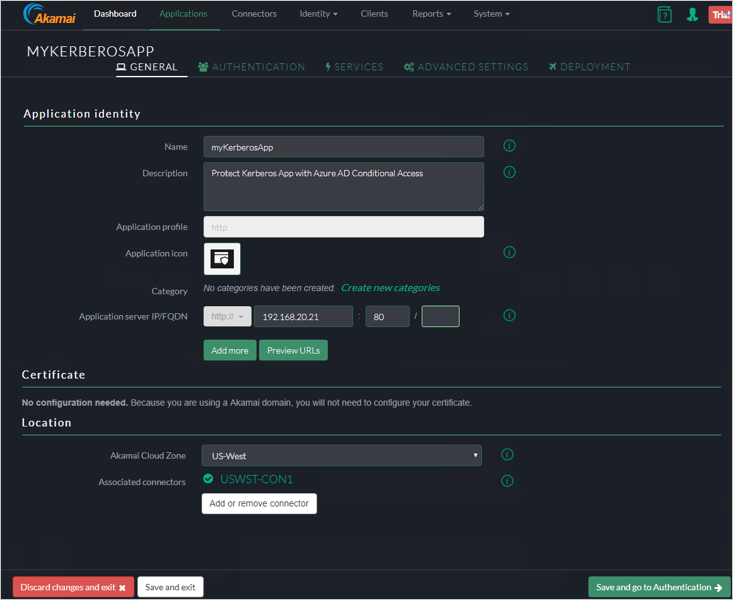
In the following example we publish an internal web server at http://frp-app1.superdemo.live and enable SSO using KCD.
General Tab
Authentication Tab
In the Authentication tab, assign the Identity Provider.
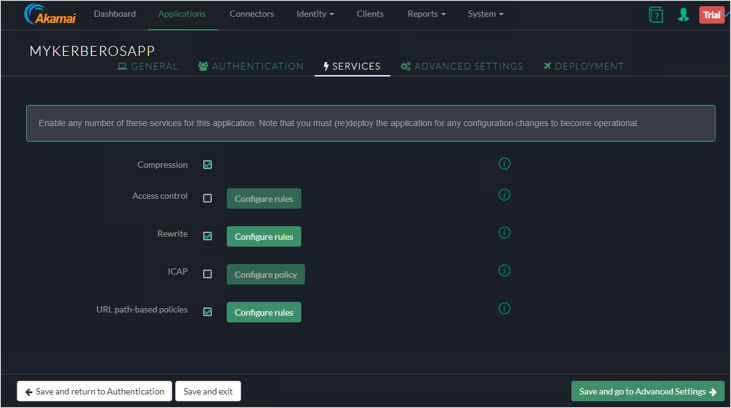
Services Tab
Advanced Settings
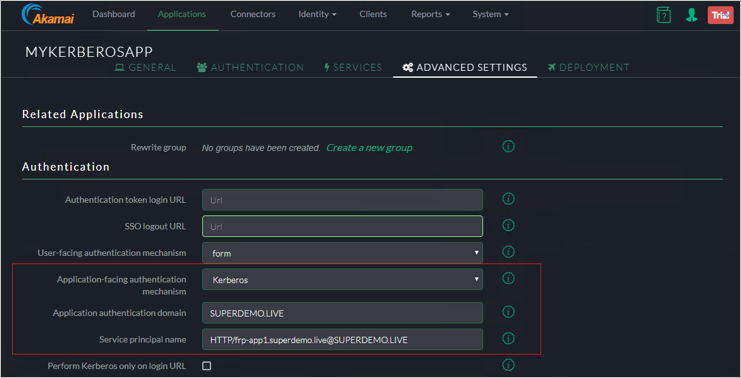
Note
The SPN for the Web Server has been in SPN@Domain Format ex: HTTP/frp-app1.superdemo.live@SUPERDEMO.LIVE for this demo. Leave rest of the settings to default.
Deployment Tab
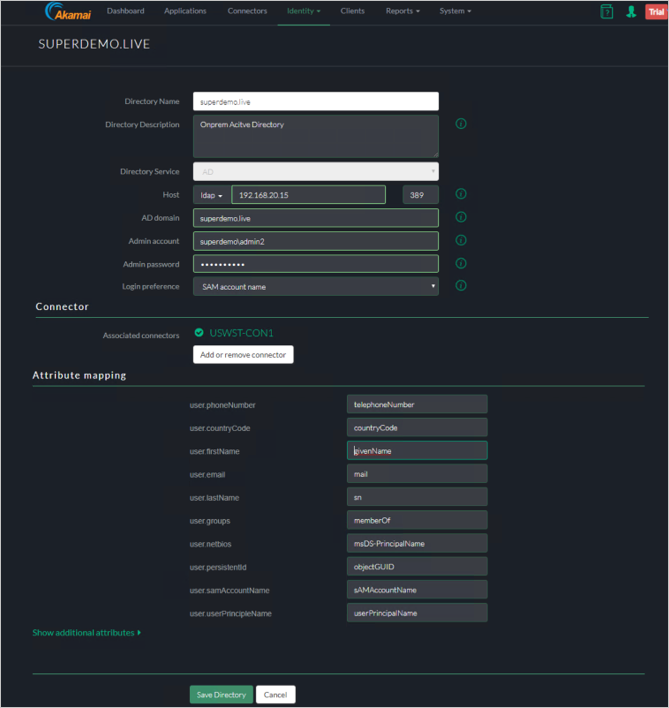
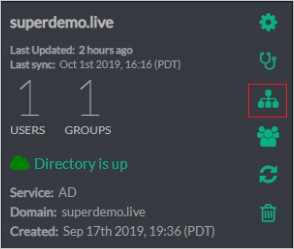
Adding Directory
Select AD from the dropdown.
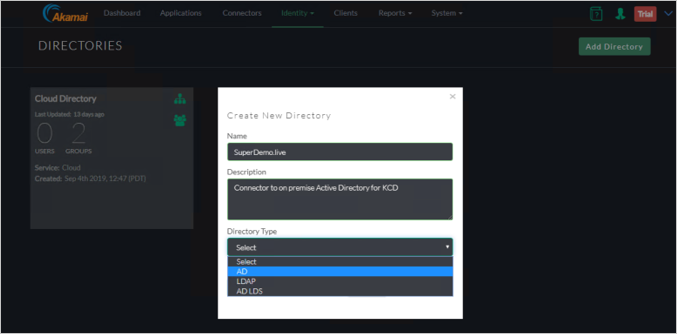
Provide the necessary data.
Verify the Directory Creation.
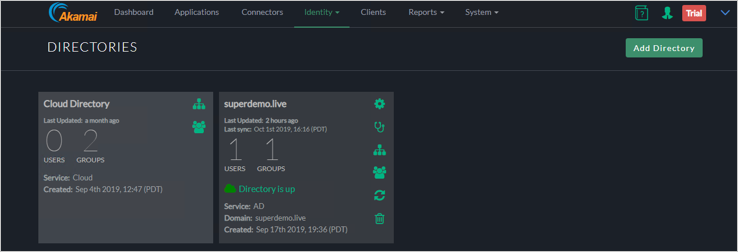
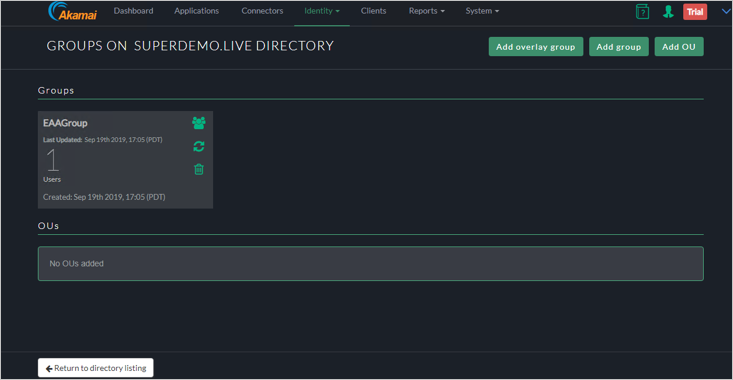
Add the Groups/OUs who would require access.
In the below the Group is called EAAGroup and has 1 Member.
Add the Directory to your Identity Provider by selecting Identity > Identity Providers and select the Directories Tab and Select Assign directory.
Configure KCD Delegation for EAA Walkthrough
Step 1: Create an Account
In the example, we use an account called EAADelegation. You can perform this using the Active Directory users and computer Snappin.
Note
The user name has to be in a specific format based on the Identity Intercept Name. From the figure 1 we see it's corpapps.login.go.akamai-access.com
User logon Name is:
HTTP/corpapps.login.go.akamai-access.com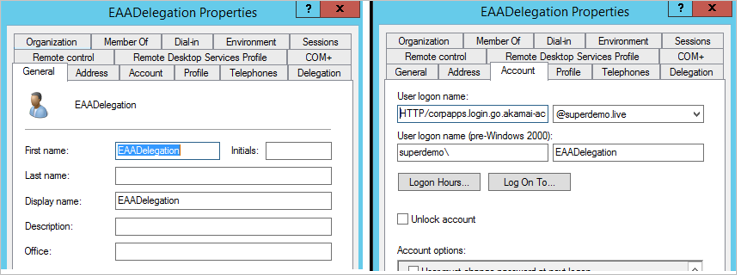
Step 2: Configure the SPN for this account
Based on this sample the SPN is as below.
setspn -s Http/corpapps.login.go.akamai-access.com eaadelegation

Step 3: Configure Delegation
For the EAADelegation account select the Delegation tab.
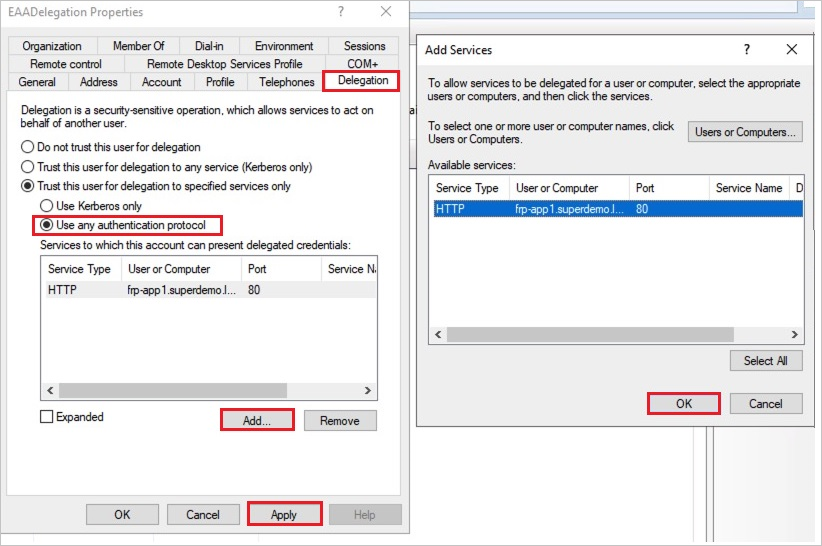
- Specify use any authentication Protocol.
- Select Add and Add the App Pool Account for the Kerberos Website. It should automatically resolve to correct SPN if configured correctly.
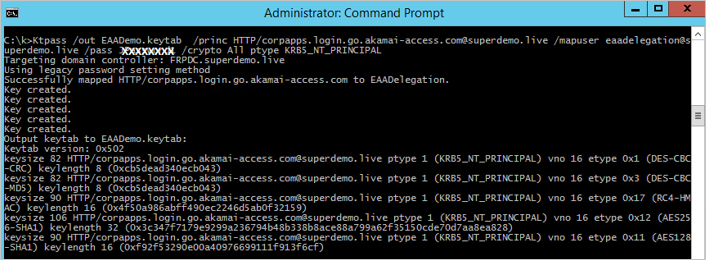
Step 4: Create a Keytab File for AKAMAI EAA
Here's the generic Syntax.
ktpass /out ActiveDirectorydomain.keytab /princ
HTTP/yourloginportalurl@ADDomain.com/mapuser serviceaccount@ADdomain.com /pass +rdnPass /crypto All /ptype KRB5_NT_PRINCIPALExample explained
Snippet Explanation Ktpass /out EAADemo.keytab // Name of the output Keytab file /princ HTTP/corpapps.login.go.akamai-access.com@superdemo.live // HTTP/yourIDPName@YourdomainName /mapuser eaadelegation@superdemo.live // EAA Delegation account /pass RANDOMPASS // EAA Delegation account Password /crypto All ptype KRB5_NT_PRINCIPAL // consult Akamai EAA documentation Ktpass /out EAADemo.keytab /princ HTTP/corpapps.login.go.akamai-access.com@superdemo.live /mapuser eaadelegation@superdemo.live /pass RANDOMPASS /crypto All ptype KRB5_NT_PRINCIPAL
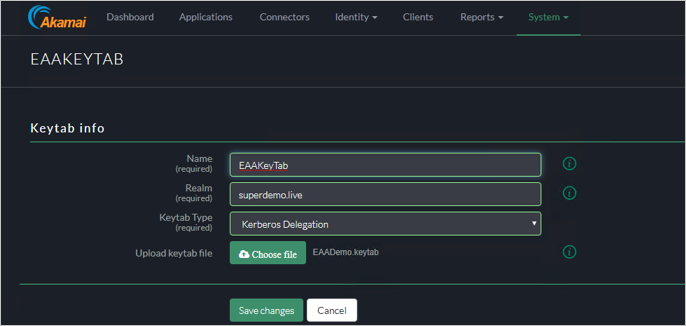
Step 5: Import Keytab in the AKAMAI EAA Console
Select System > Keytabs.
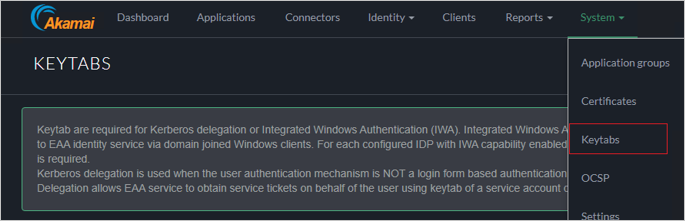
In the Keytab Type choose Kerberos Delegation.
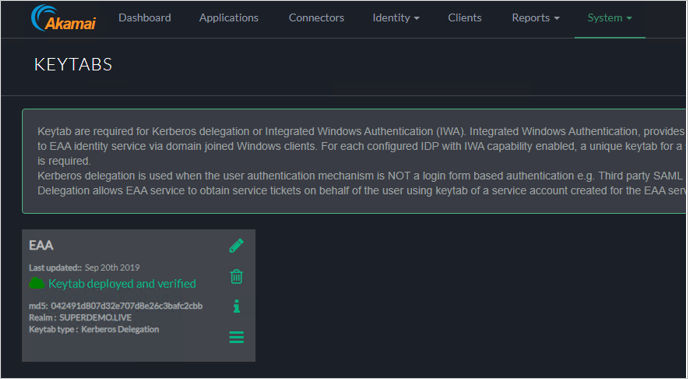
Ensure the Keytab shows up as Deployed and Verified.
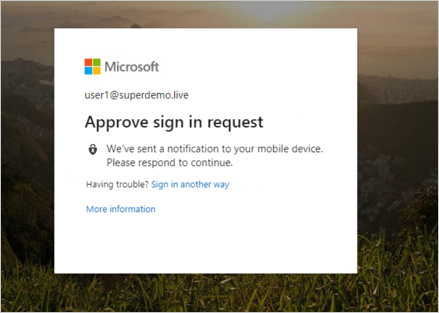
User Experience
Conditional Access

Create Akamai test user
In this section, you create a user called B.Simon in Akamai. Work with Akamai Client support team to add the users in the Akamai platform. Users must be created and activated before you use single sign-on.
Test SSO
In this section, you test your Microsoft Entra single sign-on configuration with following options.
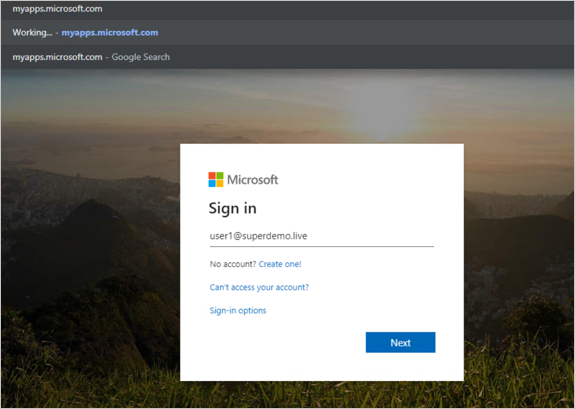
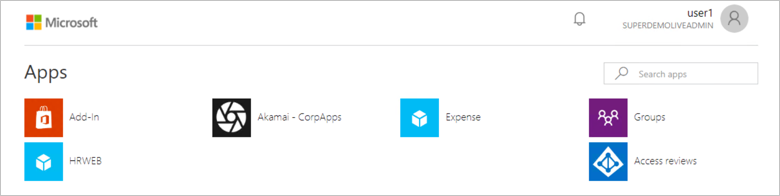
Select Test this application, and you should be automatically signed in to the Akamai for which you set up the SSO.
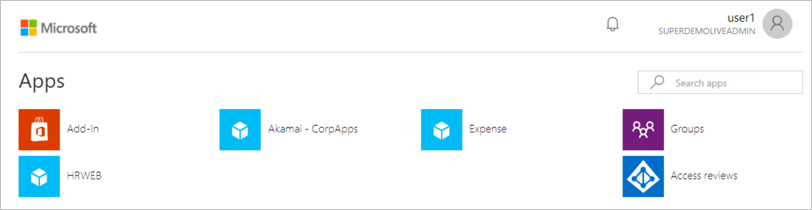
You can use Microsoft My Apps. When you select the Akamai tile in the My Apps, you should be automatically signed in to the Akamai for which you set up the SSO. For more information about the My Apps, see Introduction to the My Apps.
Related content
Once you configure Akamai you can enforce session control, which protects exfiltration and infiltration of your organization’s sensitive data in real time. Session control extends from Conditional Access. Learn how to enforce session control with Microsoft Defender for Cloud Apps.