Note
Access to this page requires authorization. You can try signing in or changing directories.
Access to this page requires authorization. You can try changing directories.
Important
Starting on the 20th of September, 2023 you won’t be able to create new Anomaly Detector resources. The Anomaly Detector service is being retired on the 1st of October, 2026.
Multivariate Anomaly Detection requires training to process your data, and an Azure Storage Account to store your data for further training and inference steps.
Data preparation
First you need to prepare your data for training and inference.
Input data schema
Multivariate Anomaly Detection supports two types of data schemas: OneTable and MultiTable. You could use either of these schemas to prepare your data and upload to Storage Account for further training and inference.

Schema 1: OneTable
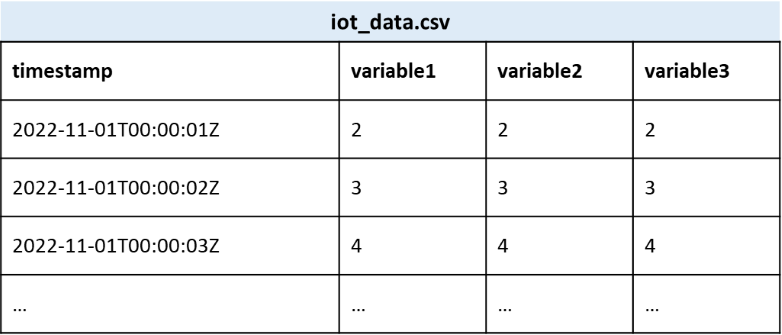
OneTable is one CSV file that contains all the variables that you want to train a Multivariate Anomaly Detection model and one timestamp column. Download One Table sample data
The
timestampvalues should conform to ISO 8601; the values of other variables in other columns could be integers or decimals with any number of decimal places.Variables for training and variables for inference should be consistent. For example, if you're using
series_1,series_2,series_3,series_4, andseries_5for training, you should provide exactly the same variables for inference.Example:
Schema 2: MultiTable
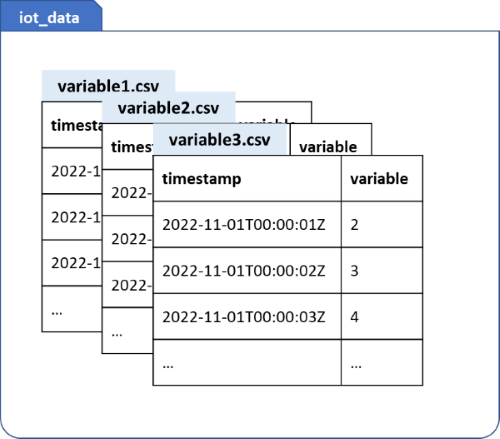
MultiTable is multiple CSV files in one file folder, and each CSV file contains only two columns of one variable, with the exact column names of: timestamp and value. Download Multiple Tables sample data and unzip it.
The
timestampvalues should conform to ISO 8601; thevaluecould be integers or decimals with any number of decimal places.The name of the csv file will be used as the variable name and should be unique. For example, temperature.csv and humidity.csv.
Variables for training and variables for inference should be consistent. For example, if you're using
series_1,series_2,series_3,series_4, andseries_5for training, you should provide exactly the same variables for inference.Example:
Note
If your timestamps have hours, minutes, and/or seconds, ensure that they're properly rounded up before calling the APIs. For example, if your data frequency is supposed to be one data point every 30 seconds, but you're seeing timestamps like "12:00:01" and "12:00:28", it's a strong signal that you should pre-process the timestamps to new values like "12:00:00" and "12:00:30". For details, please refer to the "Timestamp round-up" section in the best practices document.
Upload your data to Storage Account
Once you prepare your data with either of the two schemas above, you could upload your CSV file (OneTable) or your data folder (MultiTable) to your Storage Account.
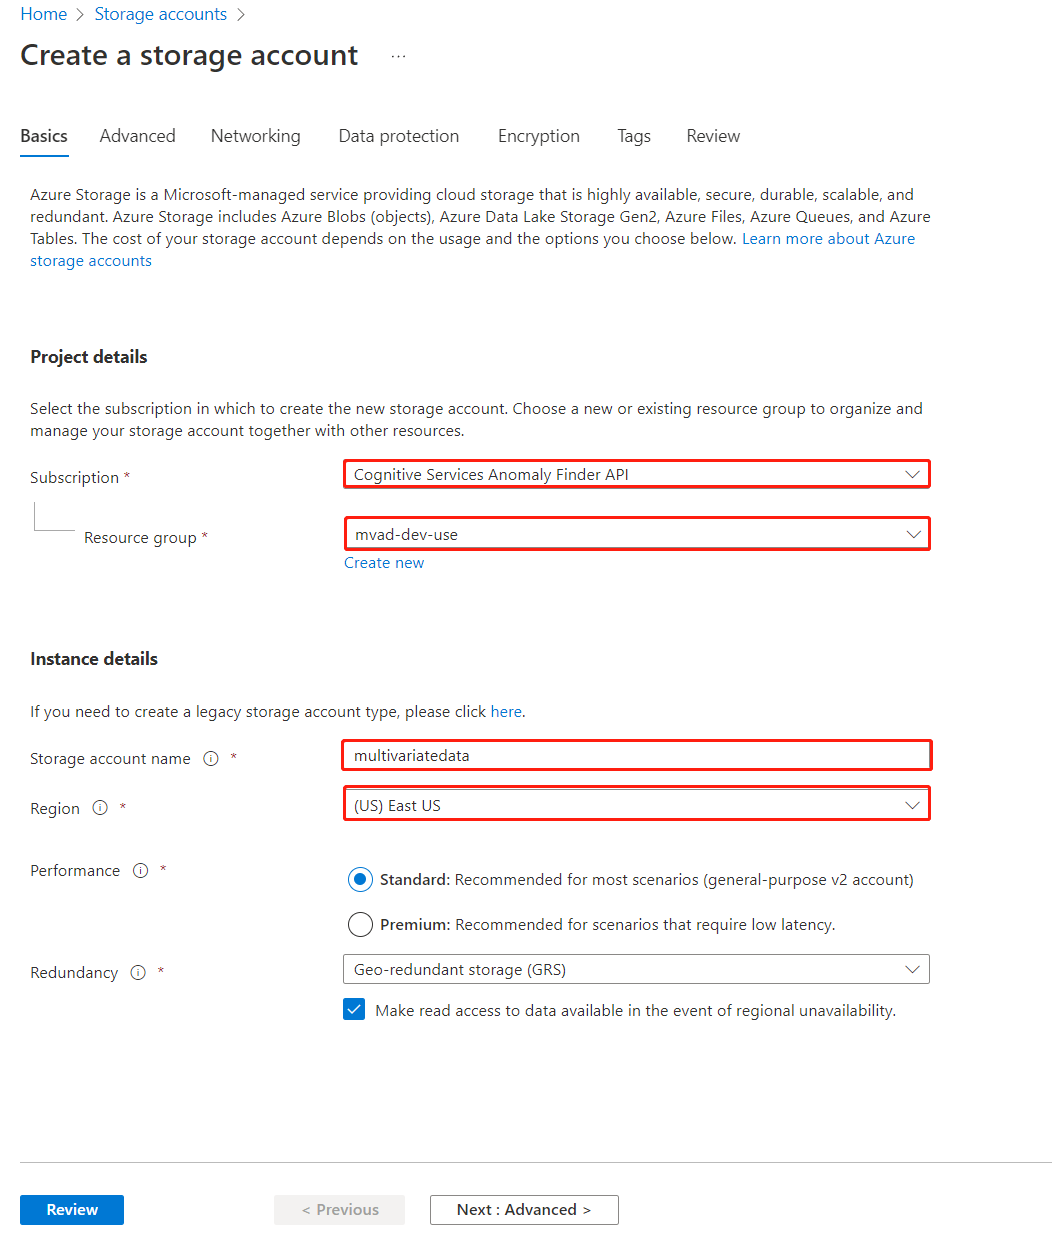
Create a Storage Account, fill out the fields, which are similar to the steps when creating Anomaly Detector resource.
Select Container to the left in your Storage Account resource and select +Container to create one that will store your data.
Upload your data to the container.
Upload OneTable data
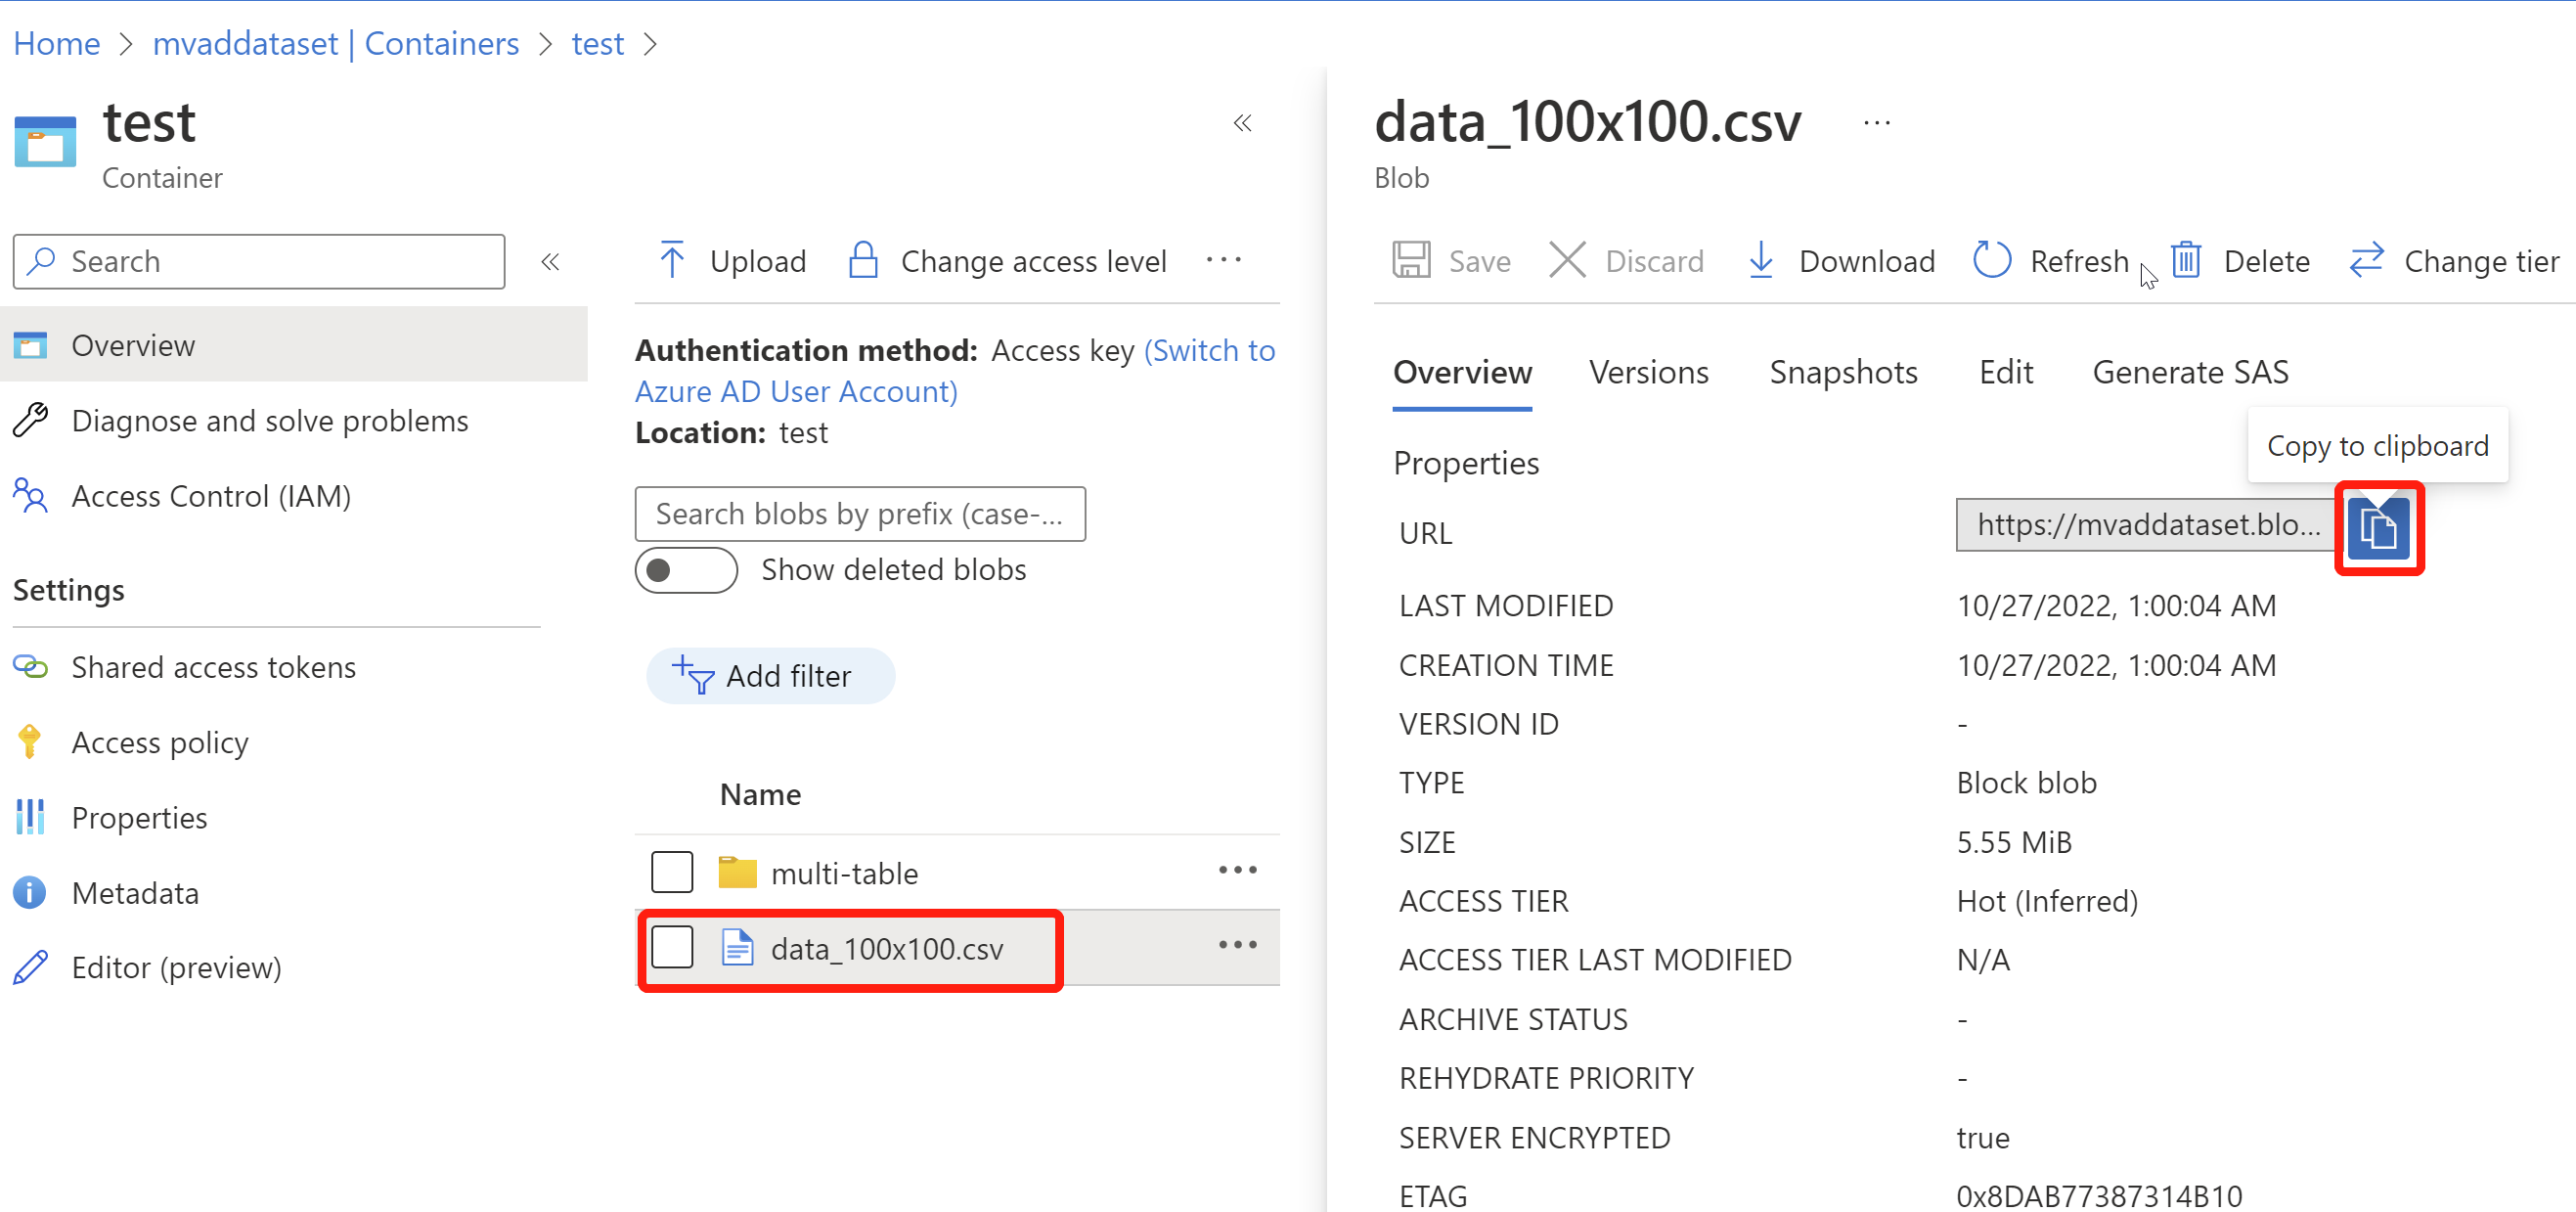
Go to the container that you created, and select Upload, then choose your prepared CSV file and upload.
Once your data is uploaded, select your CSV file and copy the blob URL through the small blue button. (Please paste the URL somewhere convenient for further steps.)
Upload MultiTable data
Go to the container that you created, and select Upload, then select Advanced, and initiate a folder name in Upload to folder, and select all the variables in separate CSV files and upload.
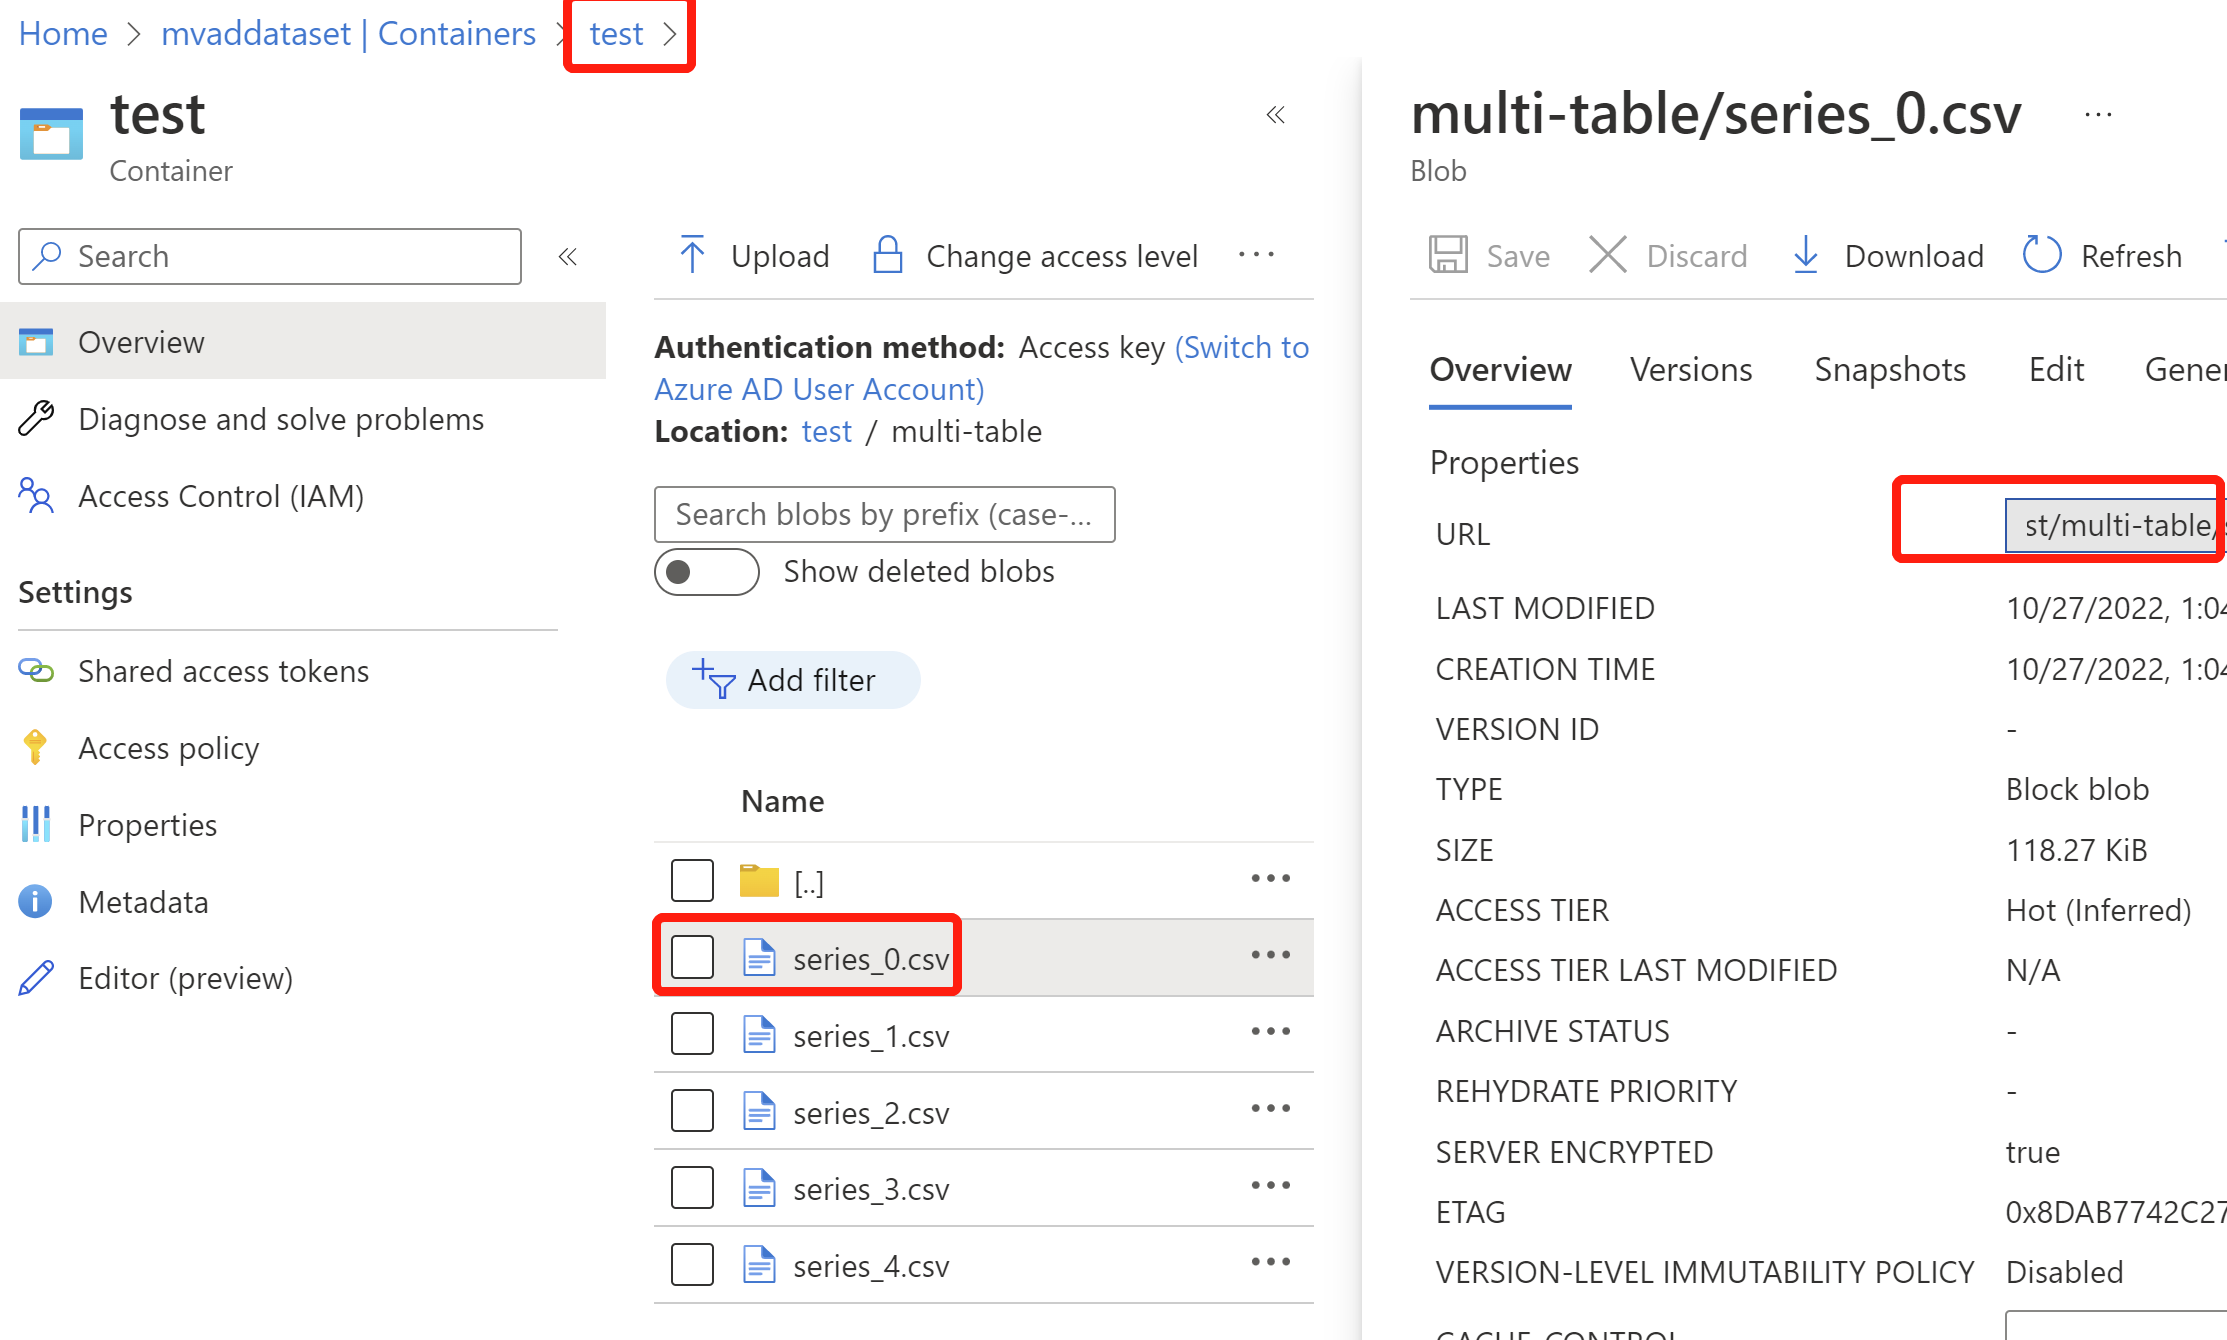
Once your data is uploaded, go into the folder, and select one CSV file in the folder, copy the blob URL and only keep the part before the name of this CSV file, so the final blob URL should link to the folder. (Please paste the URL somewhere convenient for further steps.)
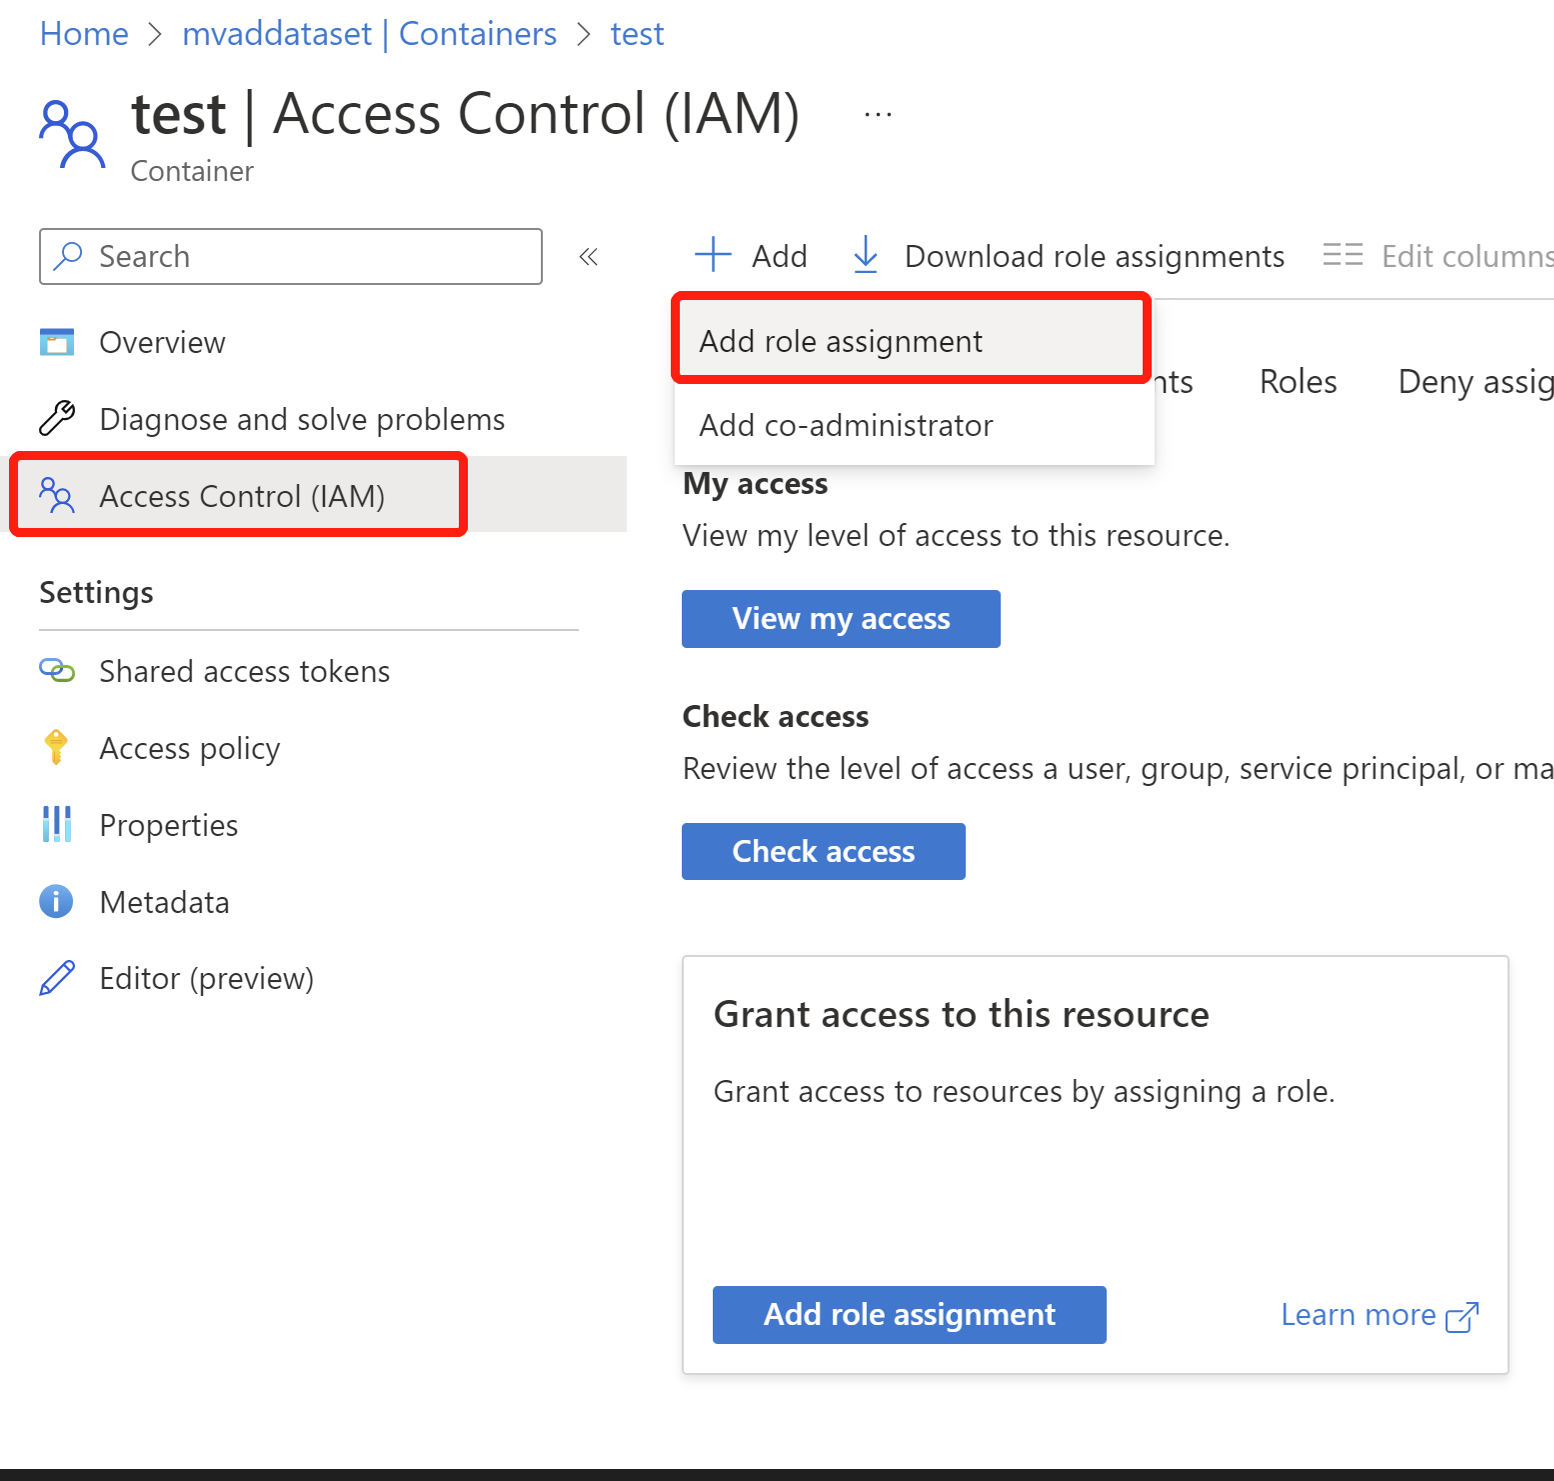
Grant Anomaly Detector access to read the data in your Storage Account.
- In your container, select Access Control(IAM) to the left, select + Add to Add role assignment. If you see the add role assignment is disabled, please contact your Storage Account owner to add Owner role to your Container.
- Search for and select the role of Storage Blob Data Reader and then select Next. Technically, the roles highlighted below and the Owner role all should work.

- Select assign access to Managed identity, and Select Members, then choose the anomaly detector resource that you created earlier, then select Review + assign.