Note
Access to this page requires authorization. You can try signing in or changing directories.
Access to this page requires authorization. You can try changing directories.
To get started with the Search photos with image retrieval scenario in Vision Studio, you need to select or create a new Azure storage account. Your storage account can be in any region, but creating it in the same region as your Vision resource is more efficient and reduces cost.
Important
You need to create your storage account on the same Azure subscription as the Vision resource you're using in the Search photos with image retrieval scenario.

Important
Image retrieval APIs are only available in certain geographic regions. See Region availability.
Create a new storage account
To get started, create a new storage account.
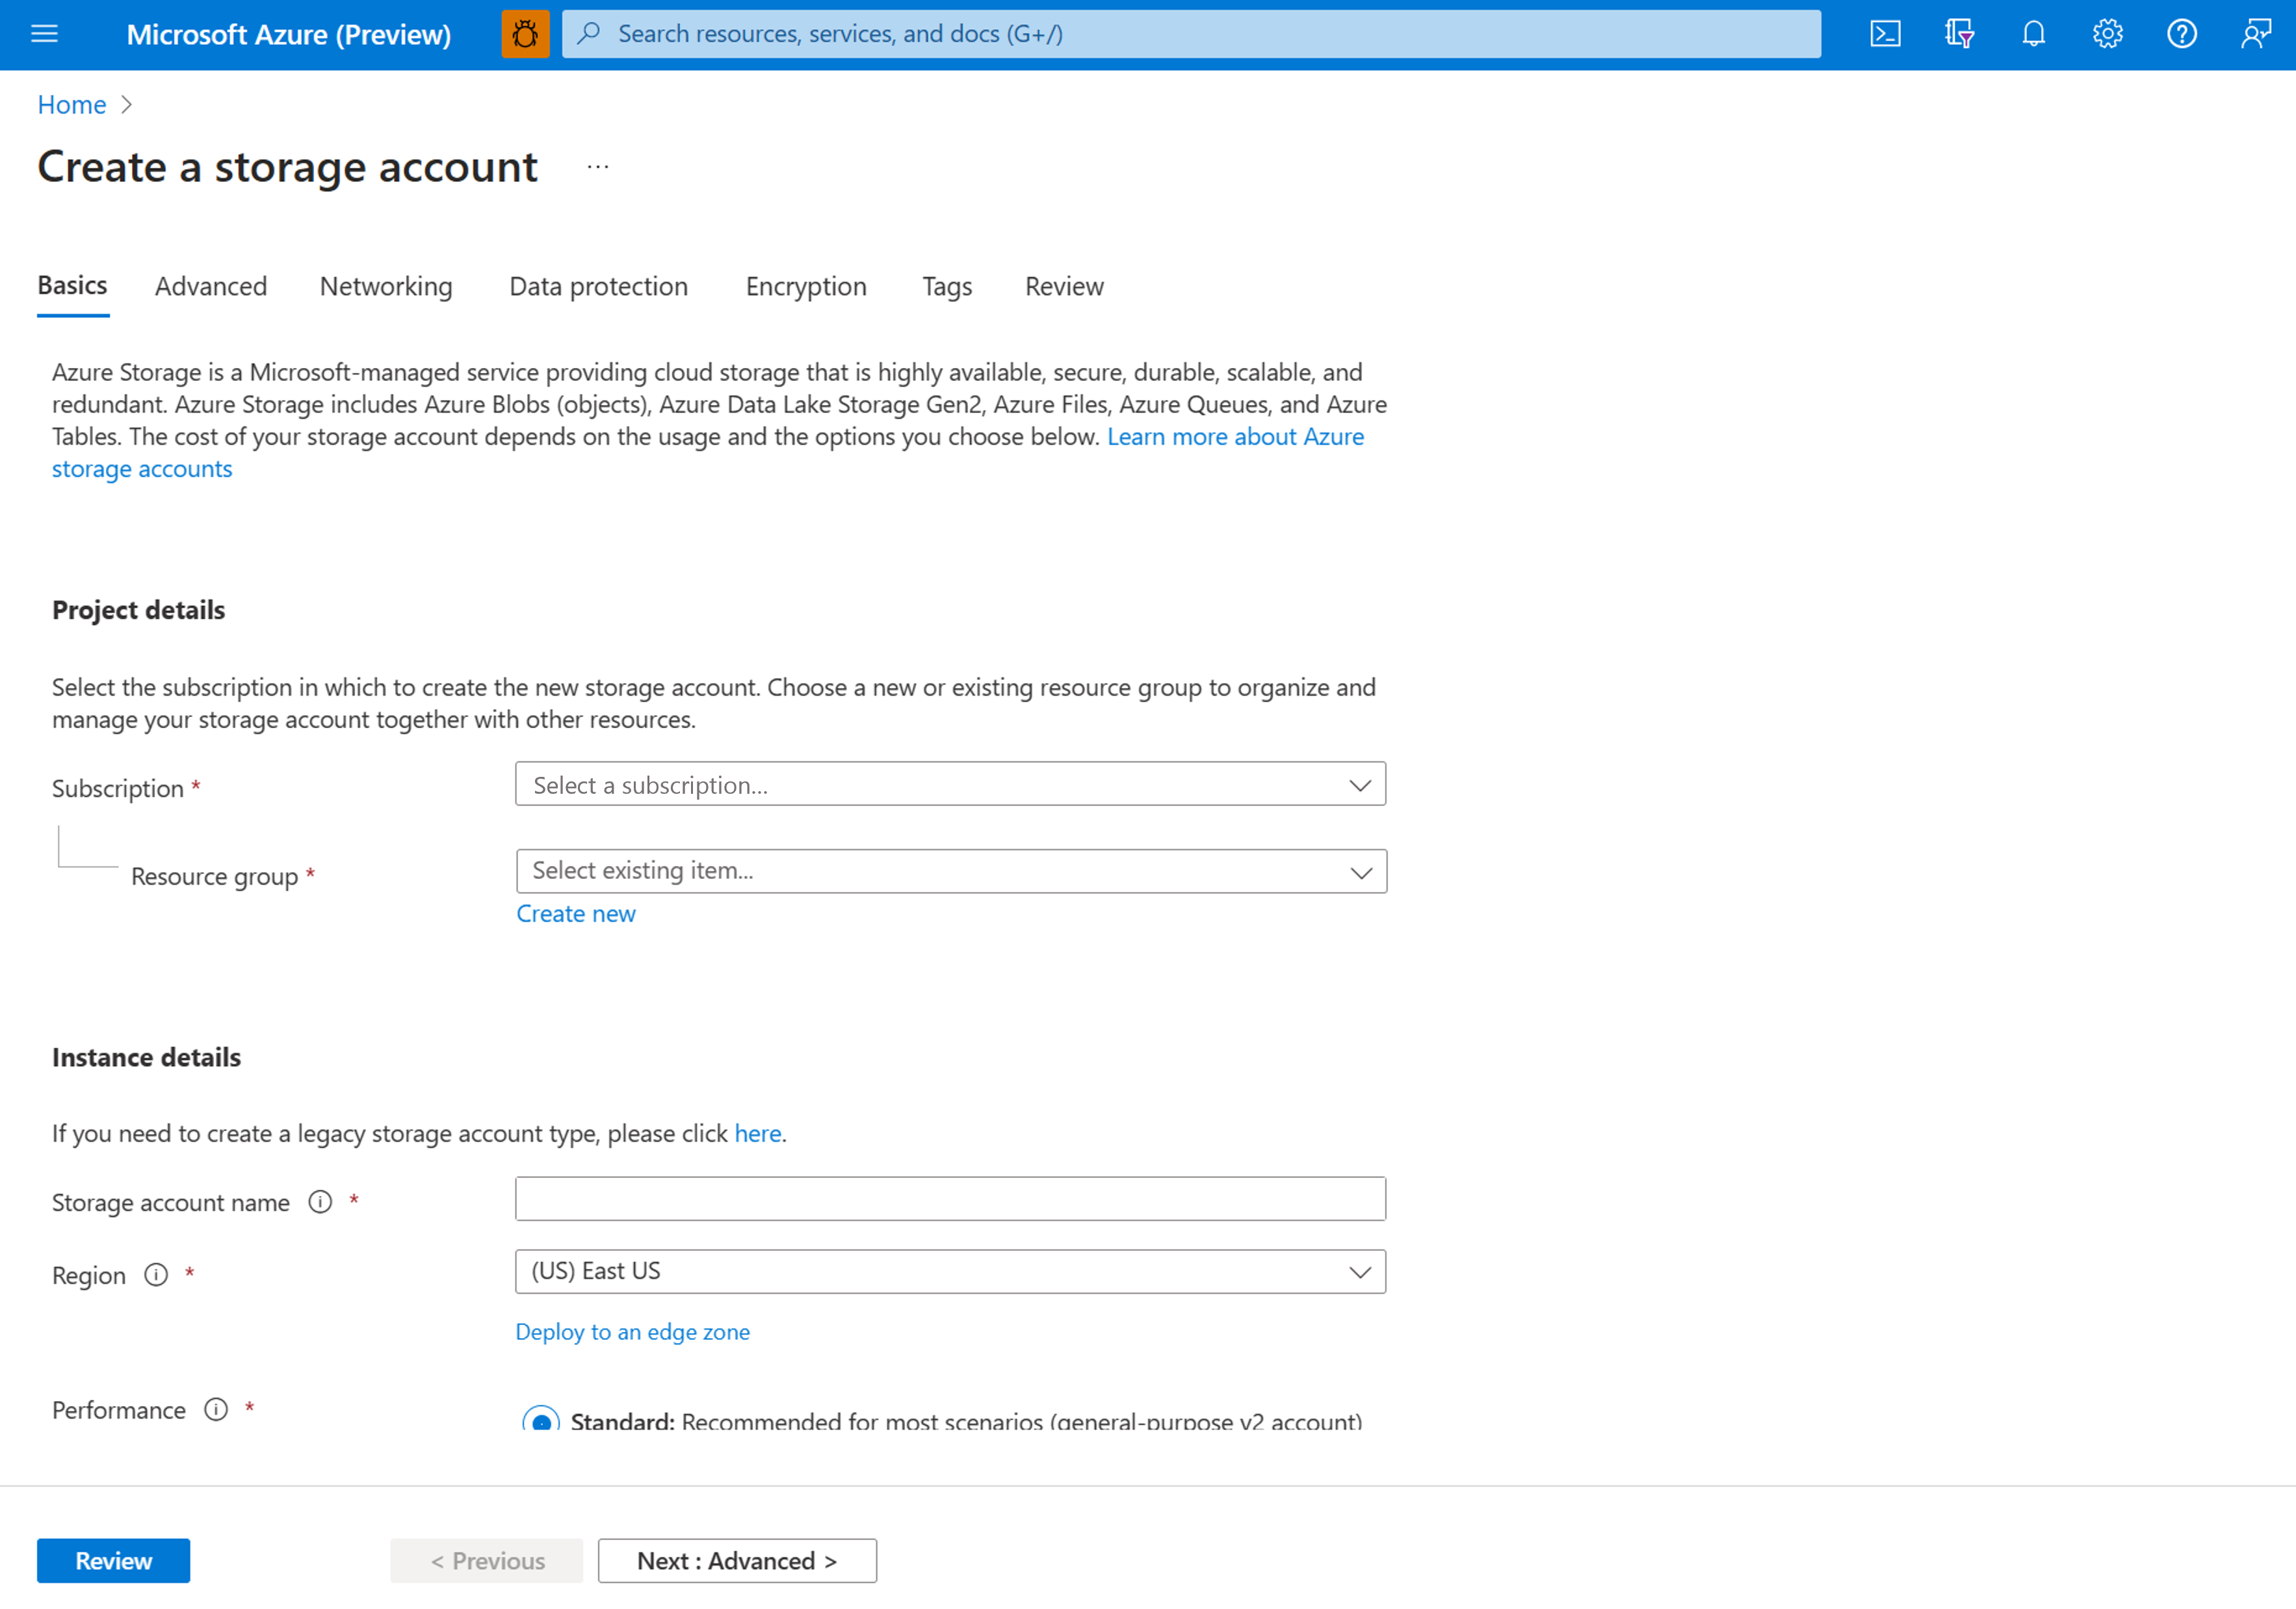
Fill in the required parameters to configure your storage account, then select Review and Create.
Important
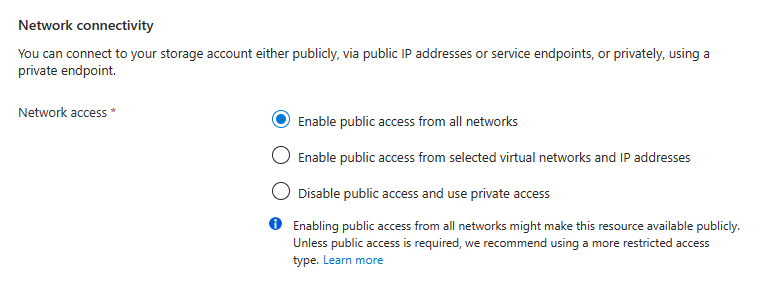
Your storage account must be publicly accessible to be used with Vision Studio. Configure this in the Networking tab of the resource creation page.
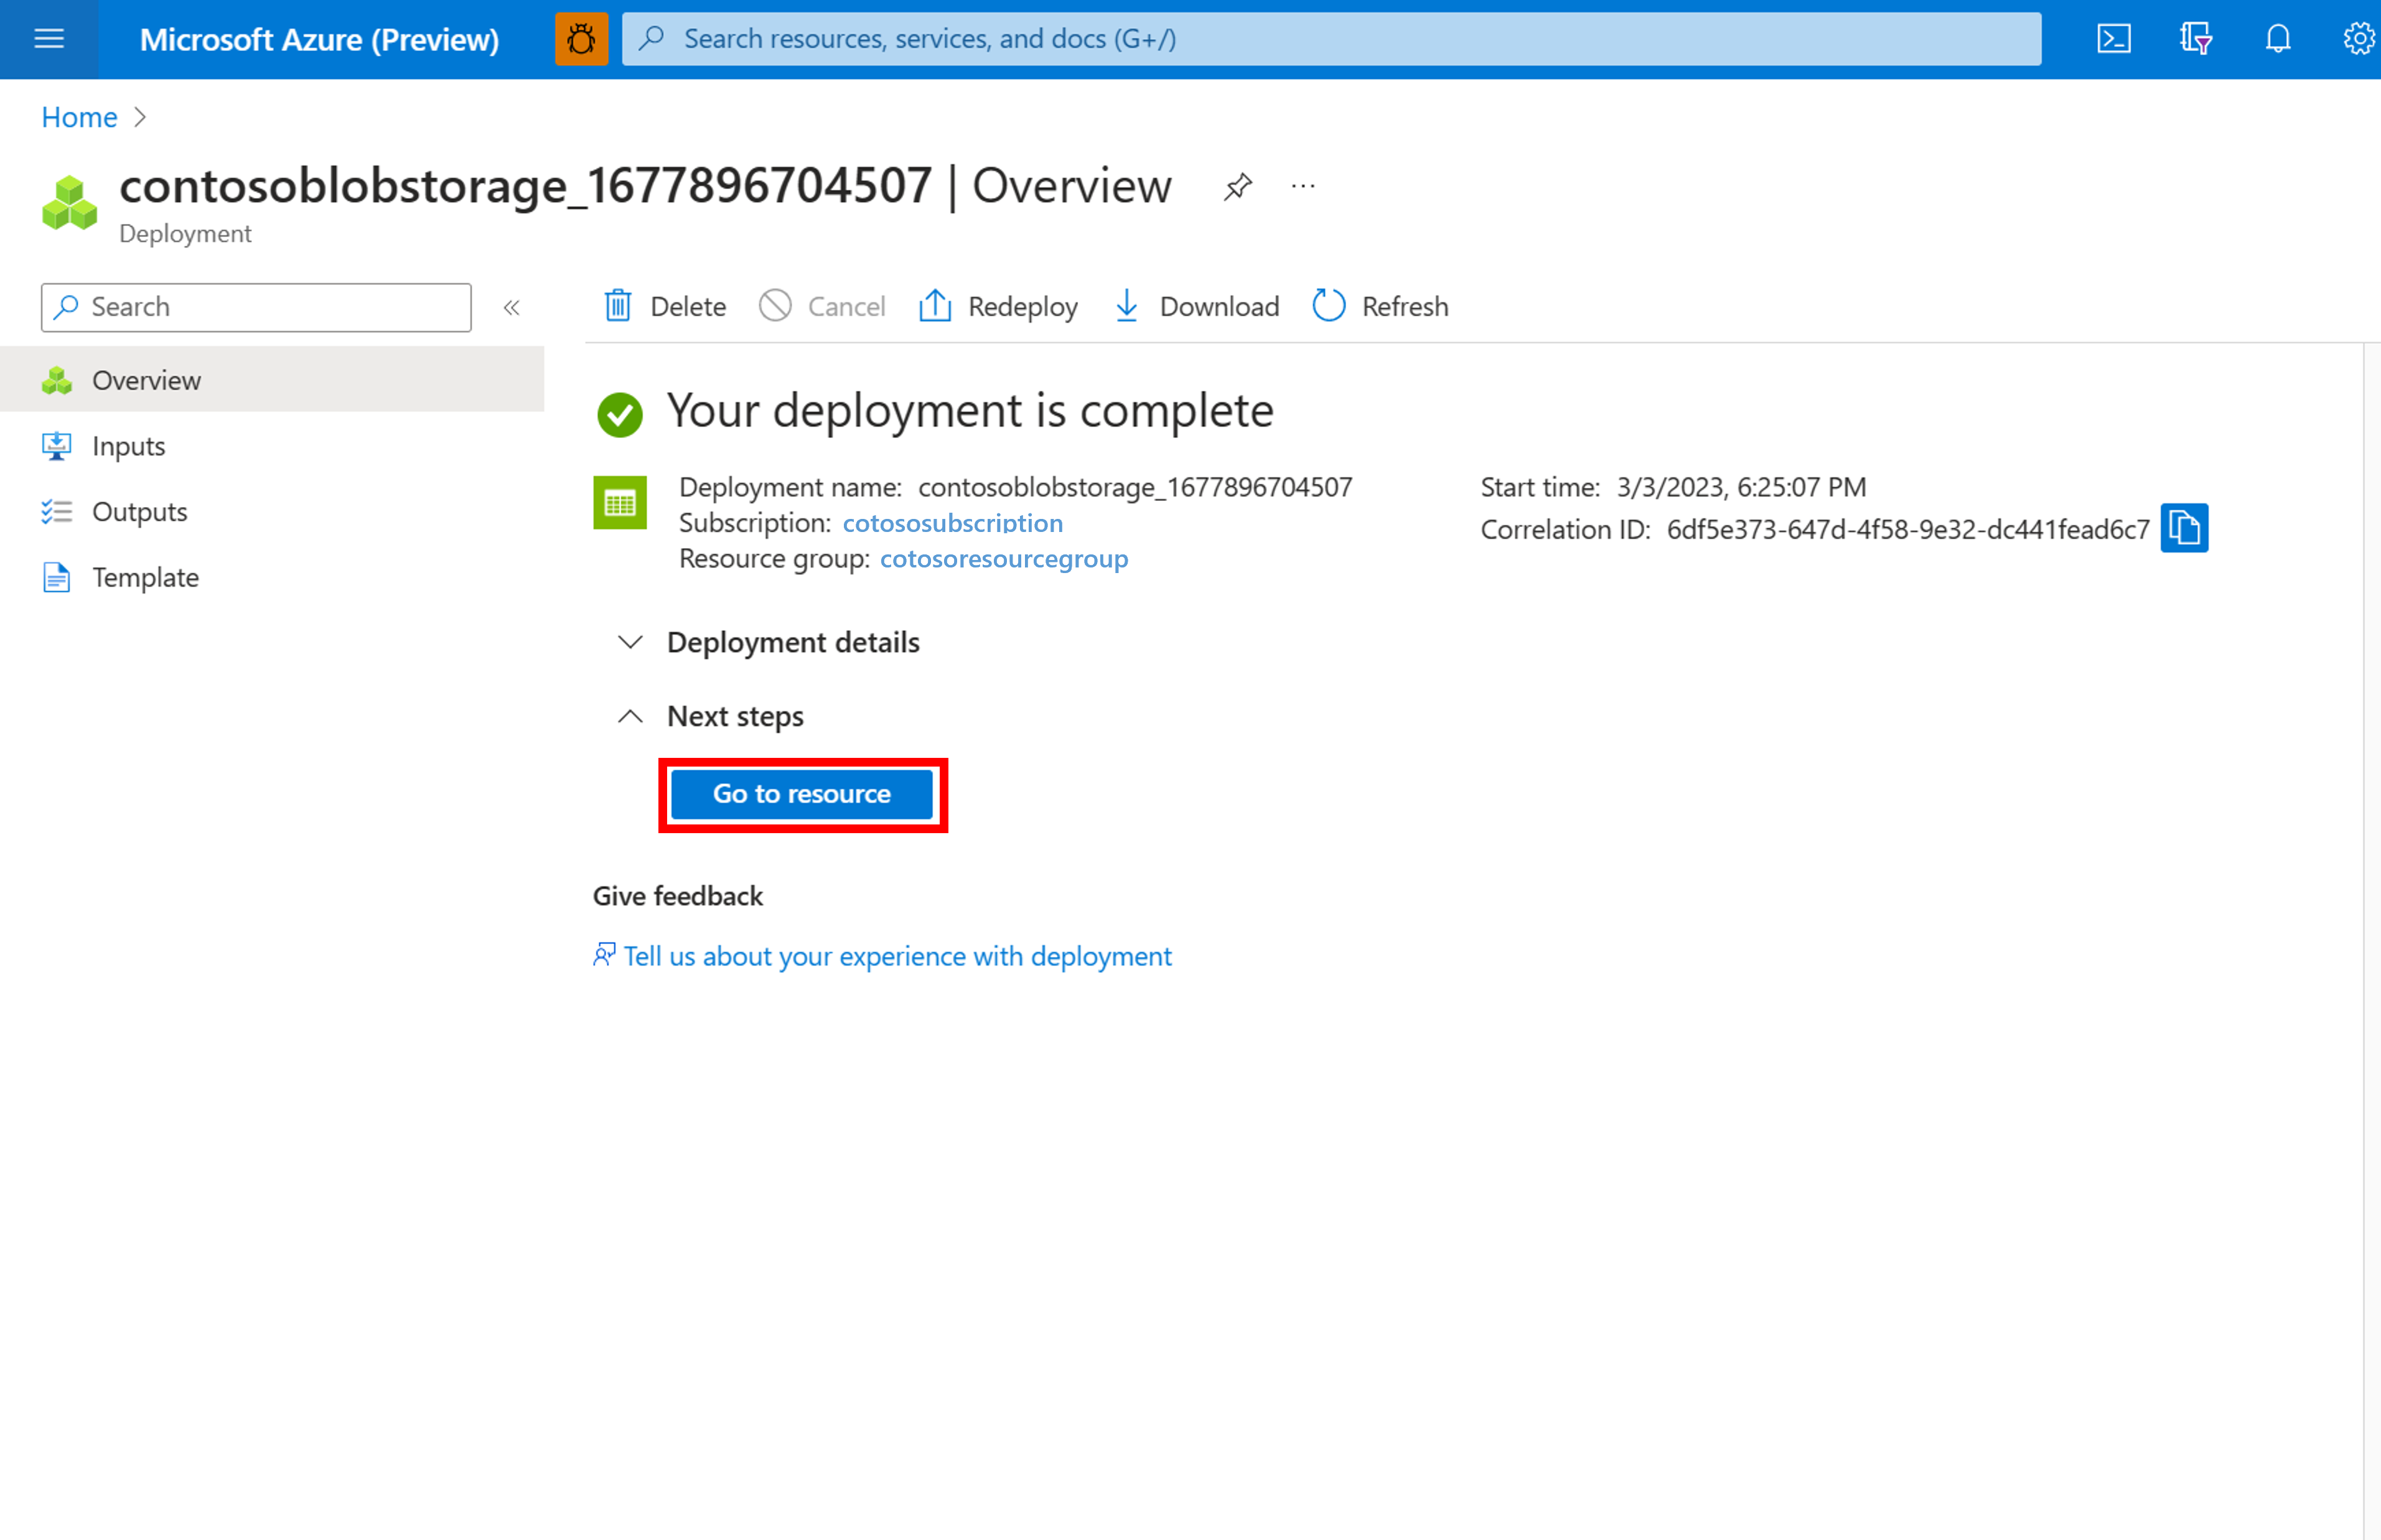
Once your storage account has been deployed, select Go to resource to open the storage account overview.
Configure CORS rule on the storage account
In your storage account overview, find the Settings section in the left hand navigation and select Resource sharing (CORS), shown below.
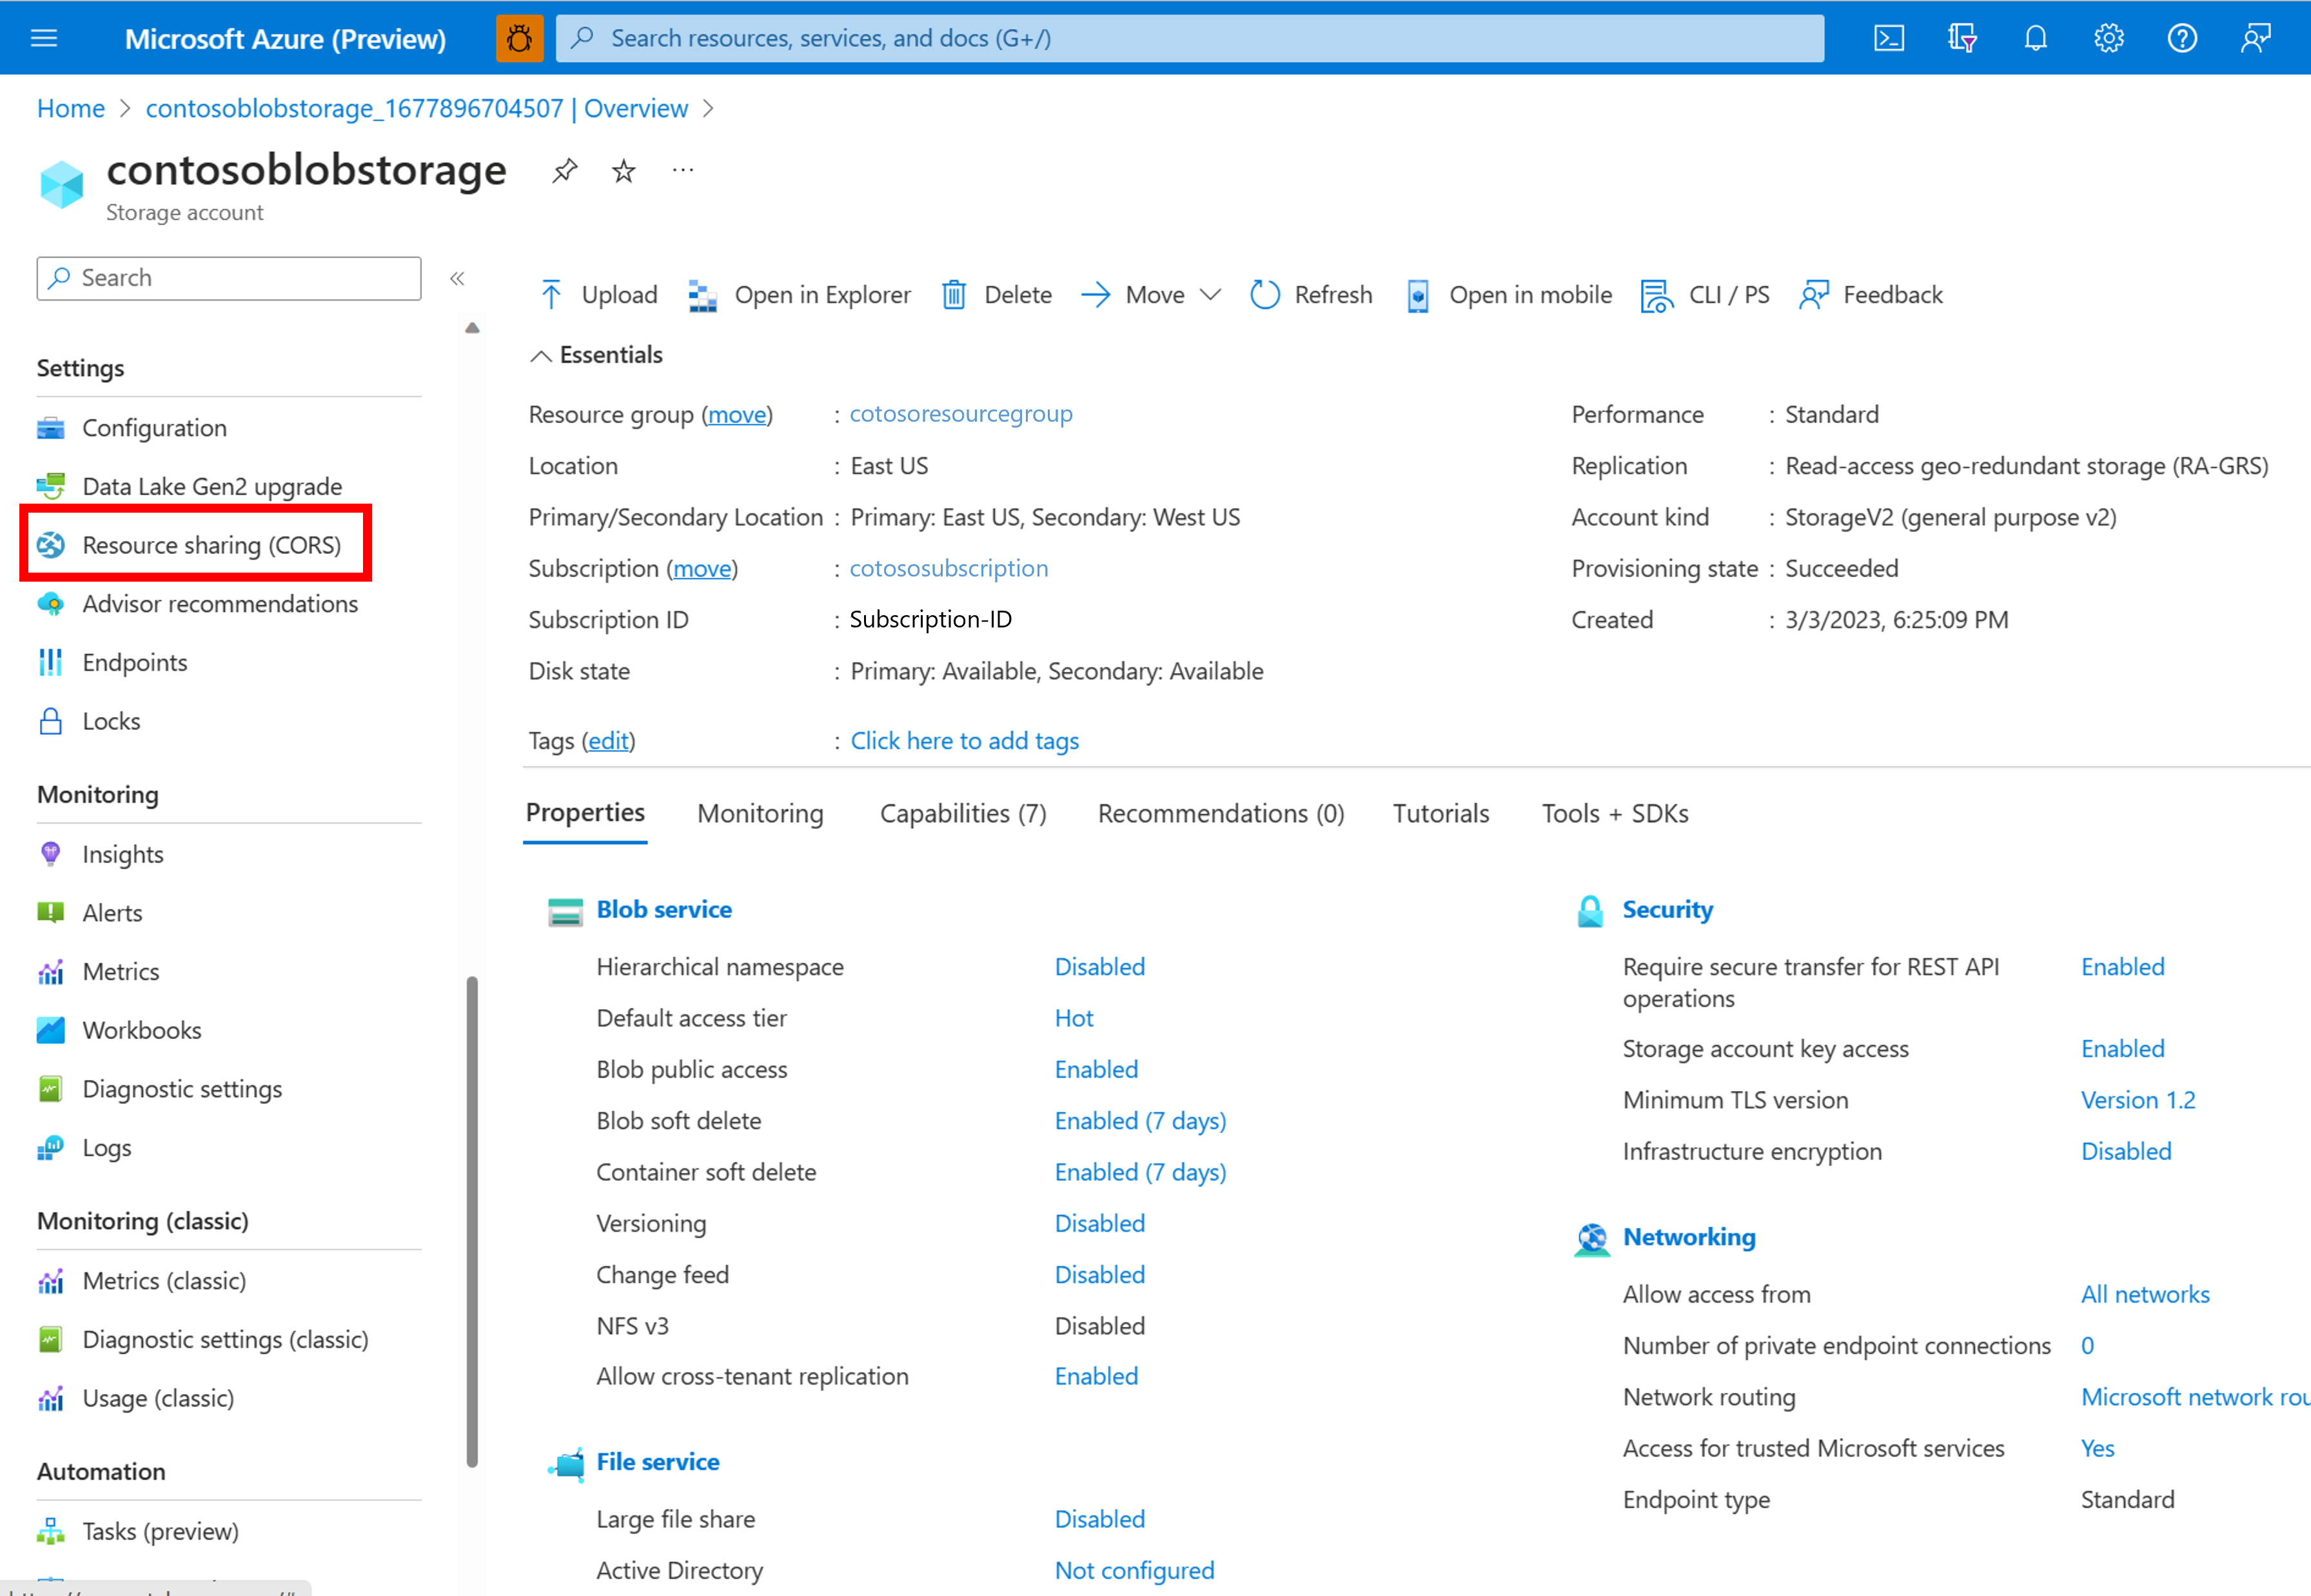
Create a CORS rule by setting the Allowed Origins field to https://portal.vision.cognitive.azure.com.
In the Allowed Methods field, select the GET checkbox to allow an authenticated request from a different domain. In the Max age field, enter the value 9999, and click Save.
Learn more about CORS support for Azure Storage.
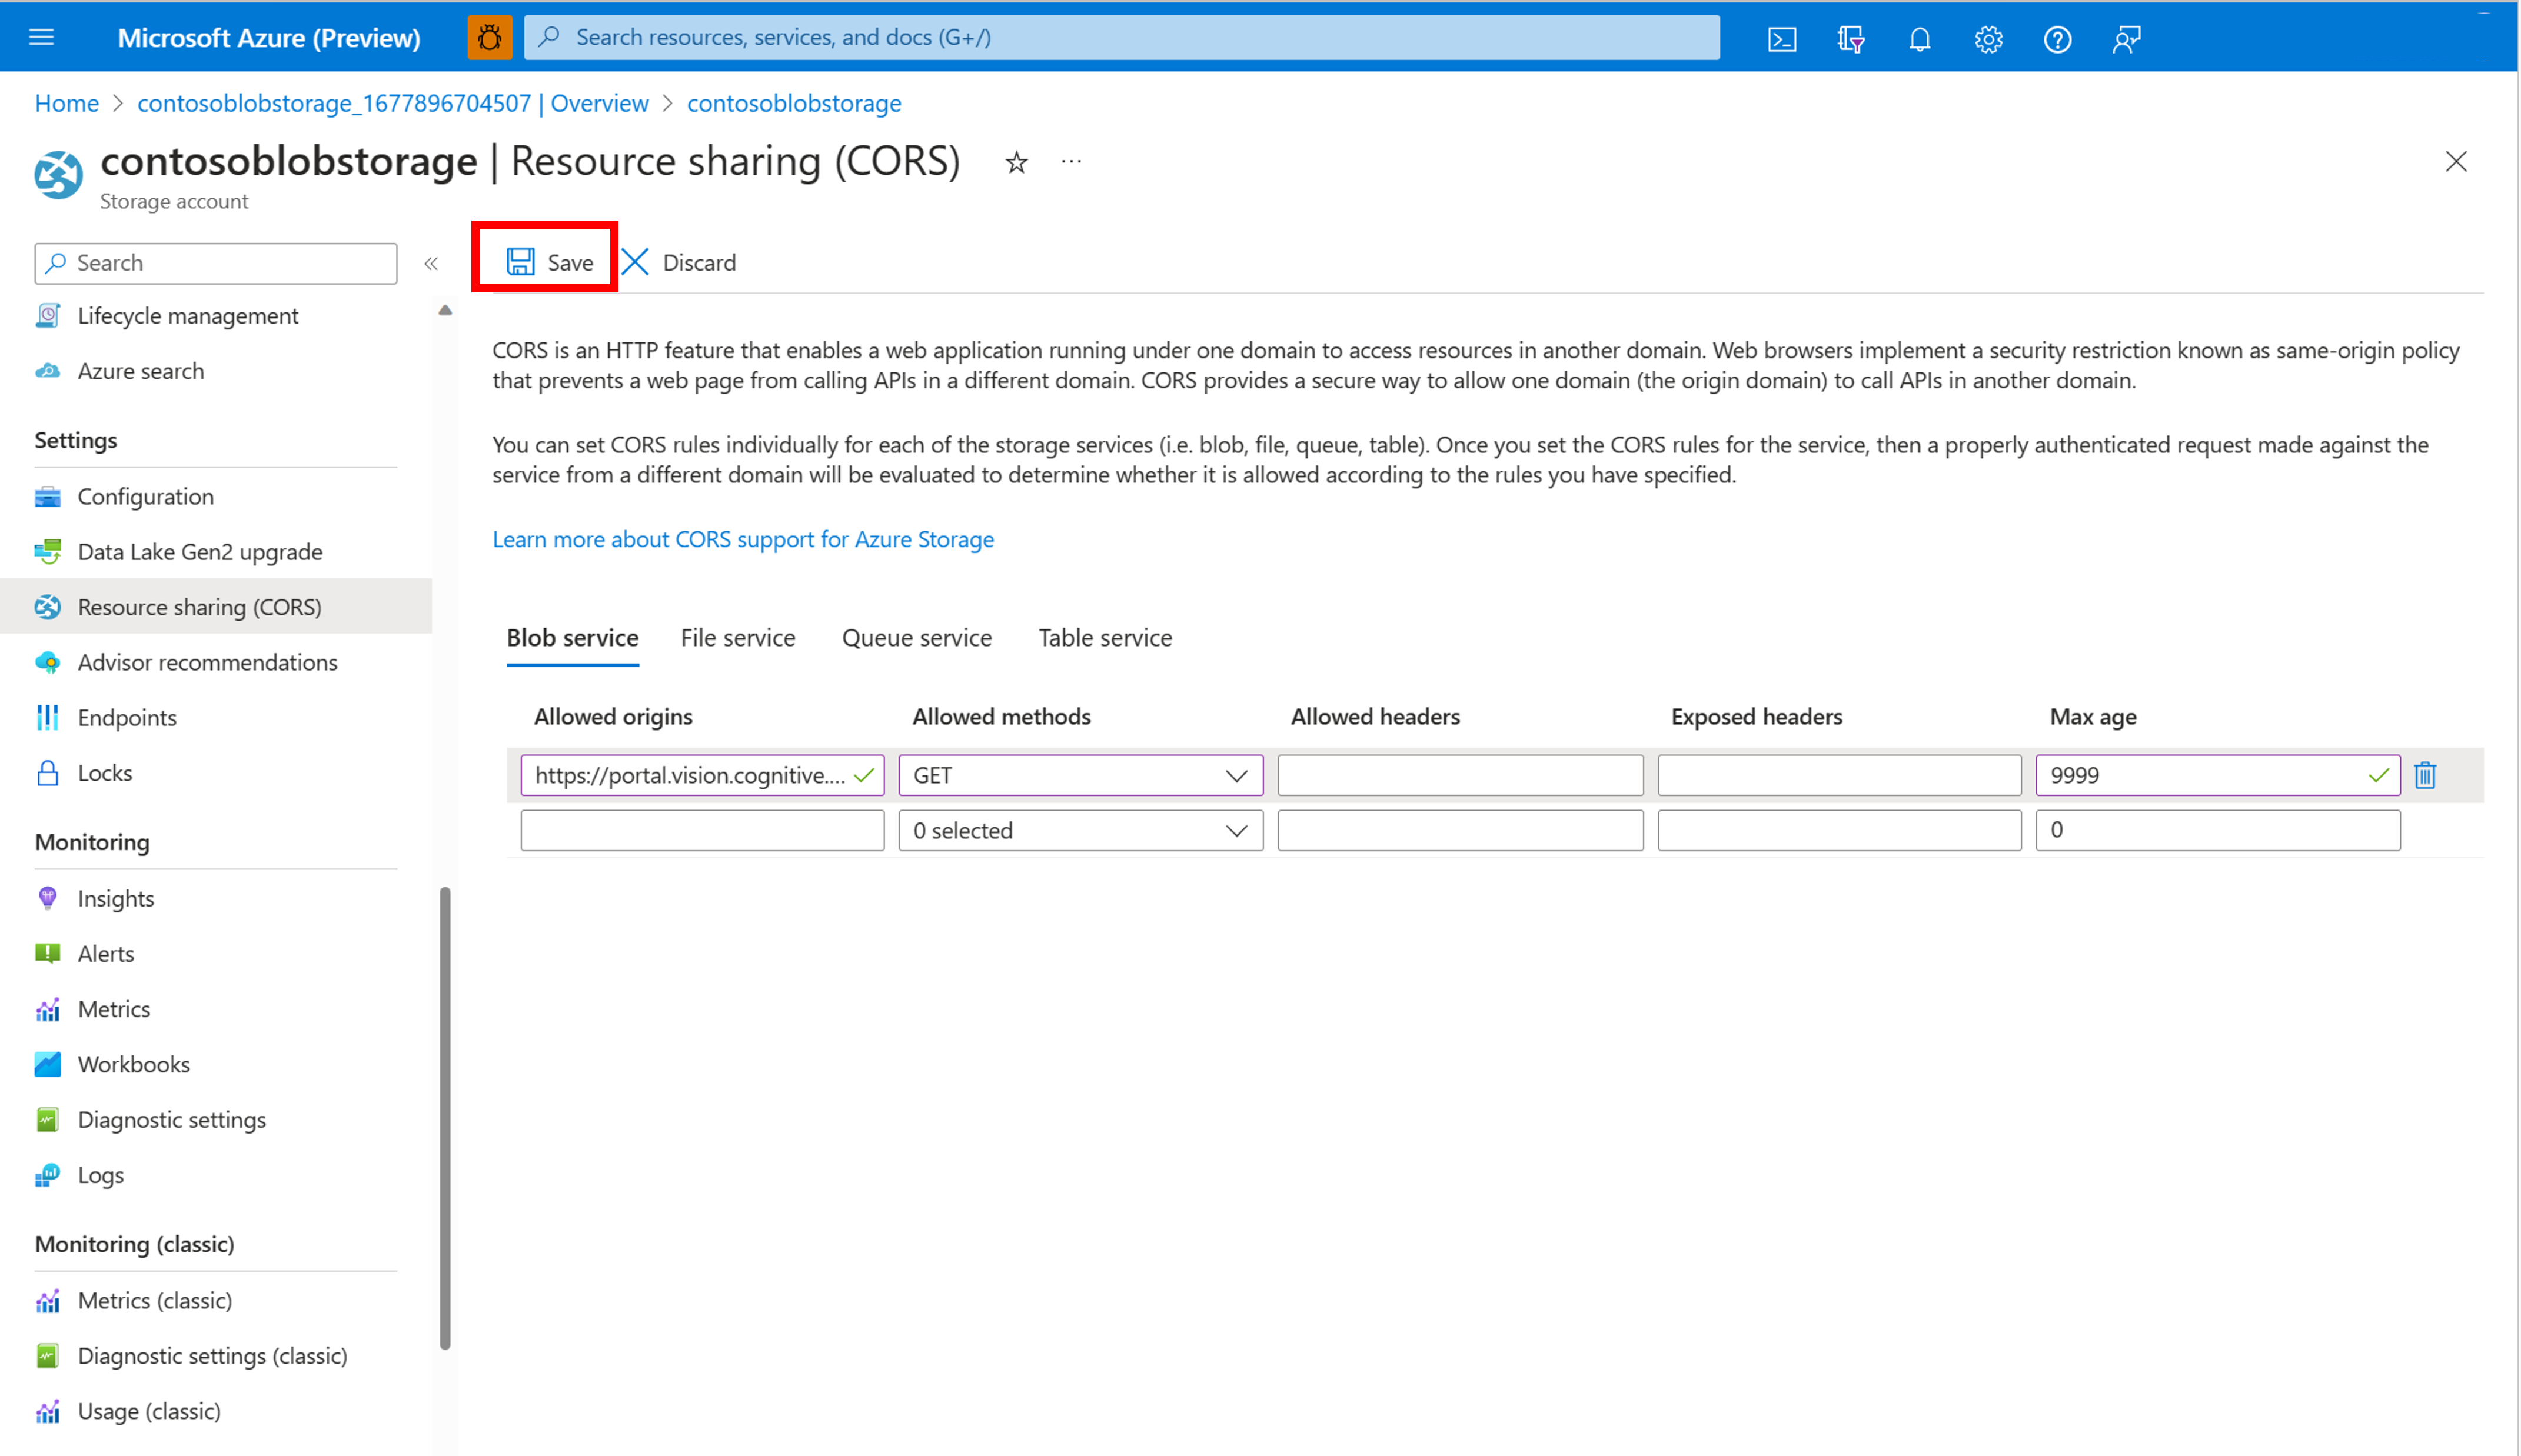
This allows Vision Studio to access images in your blob storage container to extract insights on your data.
Upload images in Vision Studio
In the Search photos with image retrieval section in Vision Studio, select the storage account that you configured with the CORS rule. Select the container in which your images are stored. If you don't have a container, you can create one and upload the images from your local device. If you have updated the CORS rules on the storage account, refresh the Blob container or Video files on container sections.