Note
Access to this page requires authorization. You can try signing in or changing directories.
Access to this page requires authorization. You can try changing directories.
In this guide, we walk you through configuring your Azure AI resources and permissions for custom question and answering projects, enabling you to fine-tune models with Azure AI Search and Custom Question Answering (CQA). Completing this setup is essential for fully integrating your environment with Azure AI services resources. You only need to perform this setup once—afterward, you have seamless access to advanced, AI-powered question answering capabilities.
In addition, we show you how to assign the correct roles and permissions within the Azure portal. These steps help you get started quickly and effectively with Azure AI Language.
Prerequisites
Before you can set up your resources, you need:
- An active Azure subscription. If you don't have one, you can create one for free.
- Requisite permissions. Make sure the person establishing the account and project is assigned as the Azure AI Account Owner role at the subscription level. Alternatively, having either the Contributor or Cognitive Services Contributor role at the subscription scope also meets this requirement. For more information, see Role based access control (RBAC).
- An Azure AI Foundry multi-service resource or an Azure AI Language resource.
- An Azure AI Search resource (required for accessing CQA)
Note
We highly recommend that you use an Azure AI Foundry resource in the AI Foundry; however, you can also follow these instructions using a Language resource.
Step 1: Assign the correct role to your Search resource
Azure RBAC is an authorization system built on Azure Resource Manager. It provides fine-grained access management to Azure resources.
Navigate to the Azure portal.
Go to your Azure Search resource. (See All resources to find your Search resource.)
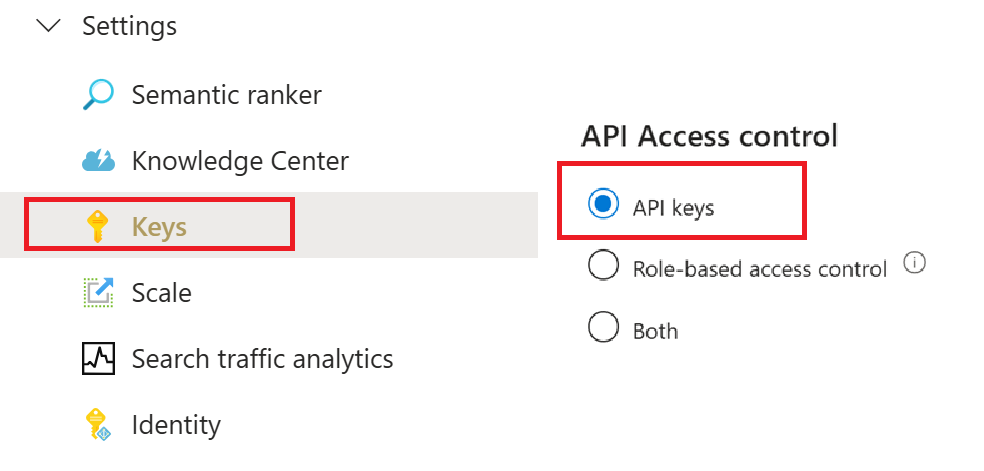
In the Settings section on the left panel, select Keys.
Make sure the API Access control button is set to API keys.
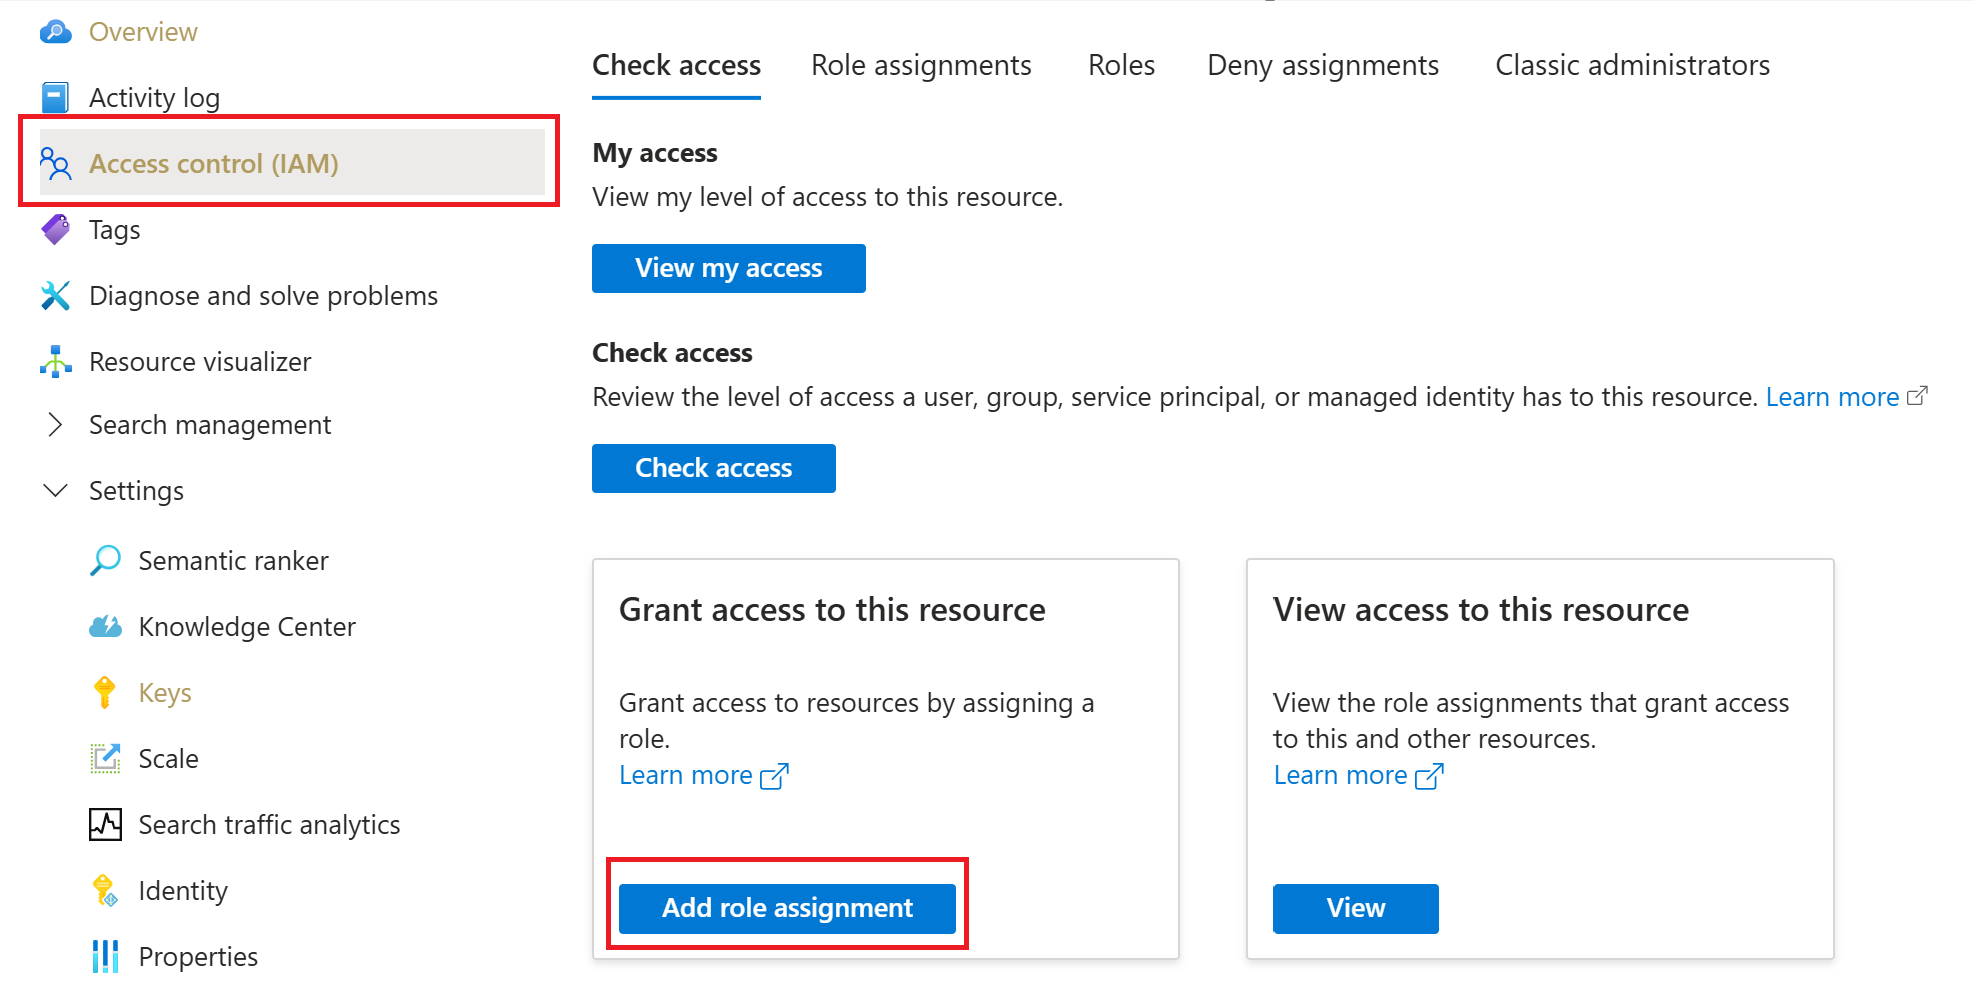
Next, select Access Control (IAM) on the left panel, then select Add role assignment.
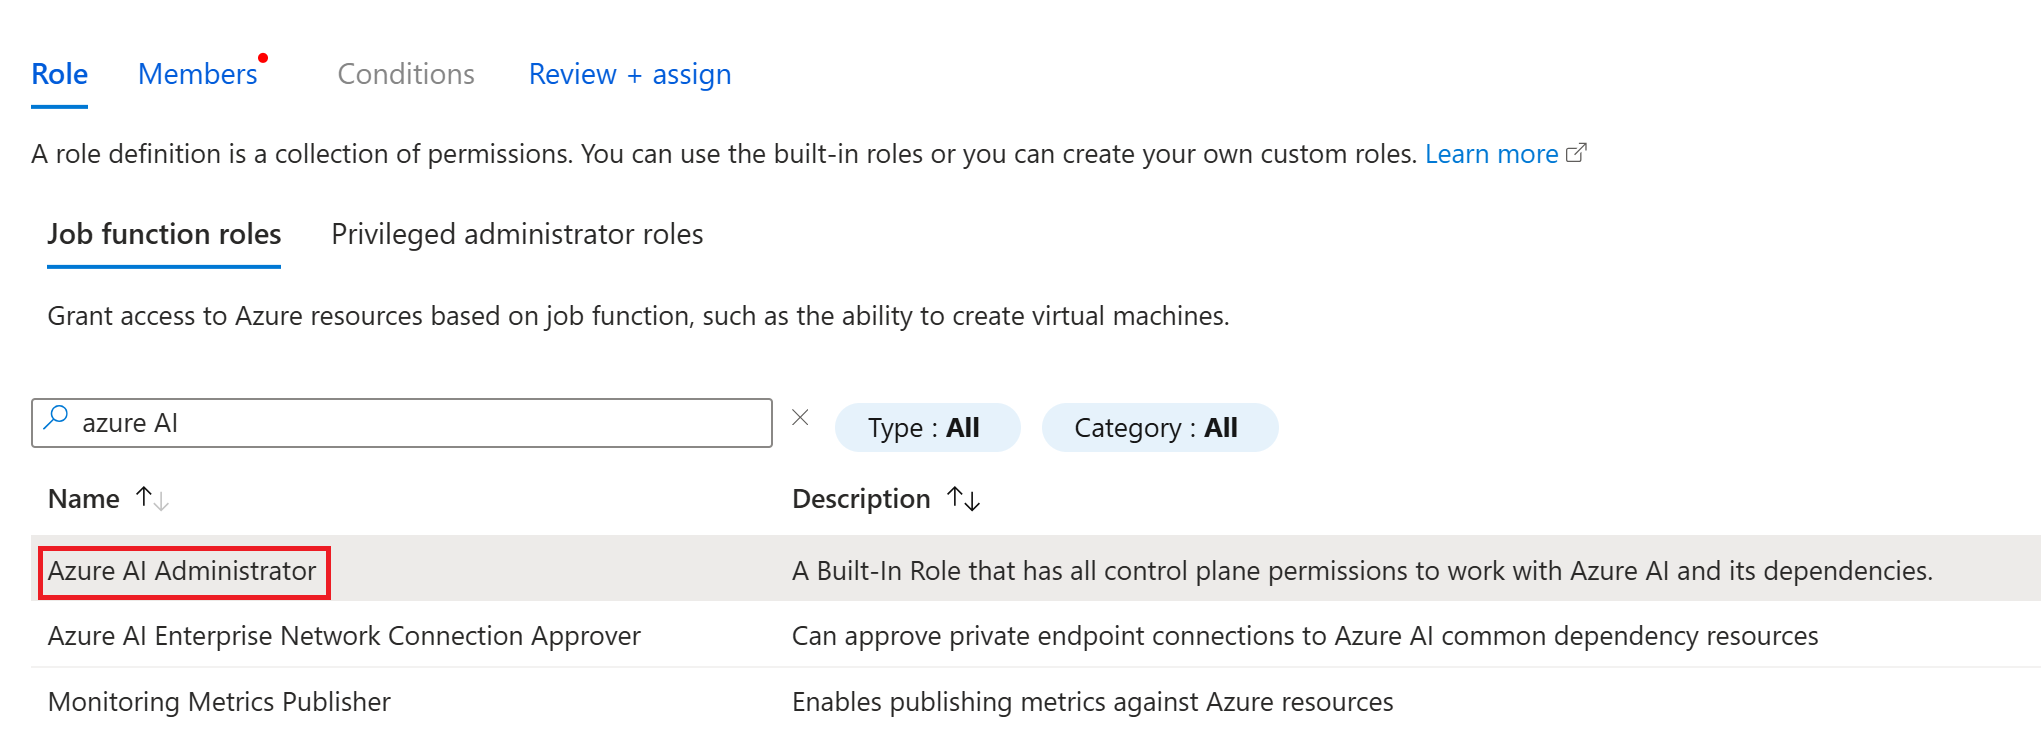
Search and select the Azure AI Administrator role. Select Next.
Navigate to the Members tab and then select Assign access to User, group, or service principal.
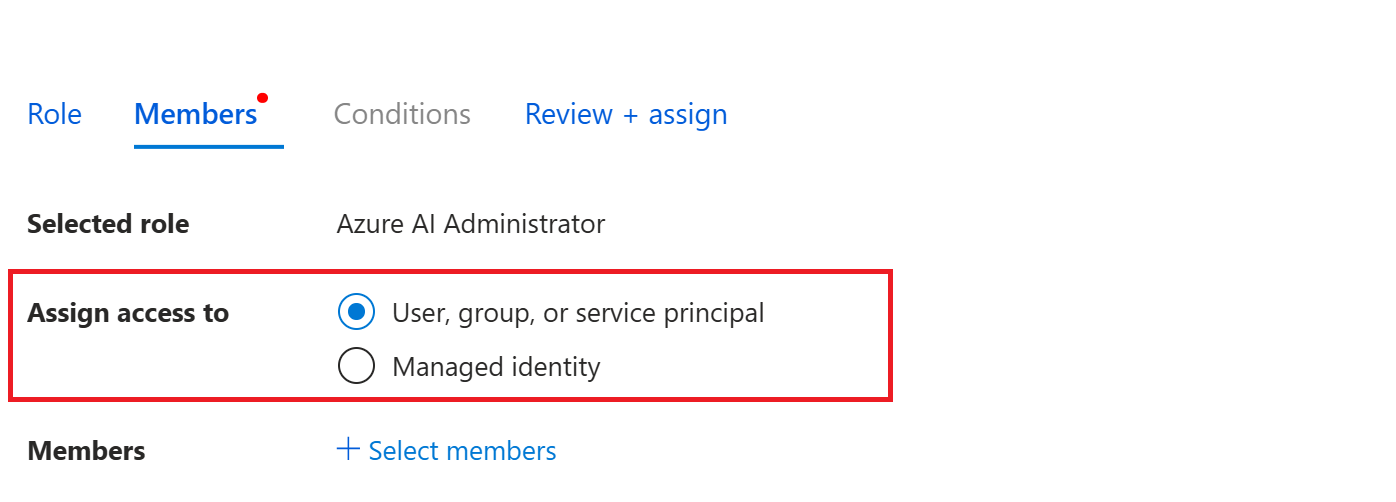
Select Select members, then add your account name, and choose Select.
Finally, select Review + assign to confirm your selection.

Step 2: Configure connections in AI Foundry
Azure AI Foundry offers a unified platform where you can easily build, manage, and deploy AI solutions using a wide range of models and tools. Connections enable authentication and access to both Microsoft and external resources within your Azure AI Foundry projects.
Sign into Azure AI Foundry using your account and required subscription. Then, select the project containing your Azure AI Foundry resource.
Next, navigate to the Management Center in the bottom left corner of the page.
Scroll to the Connected resources section of the Management center.

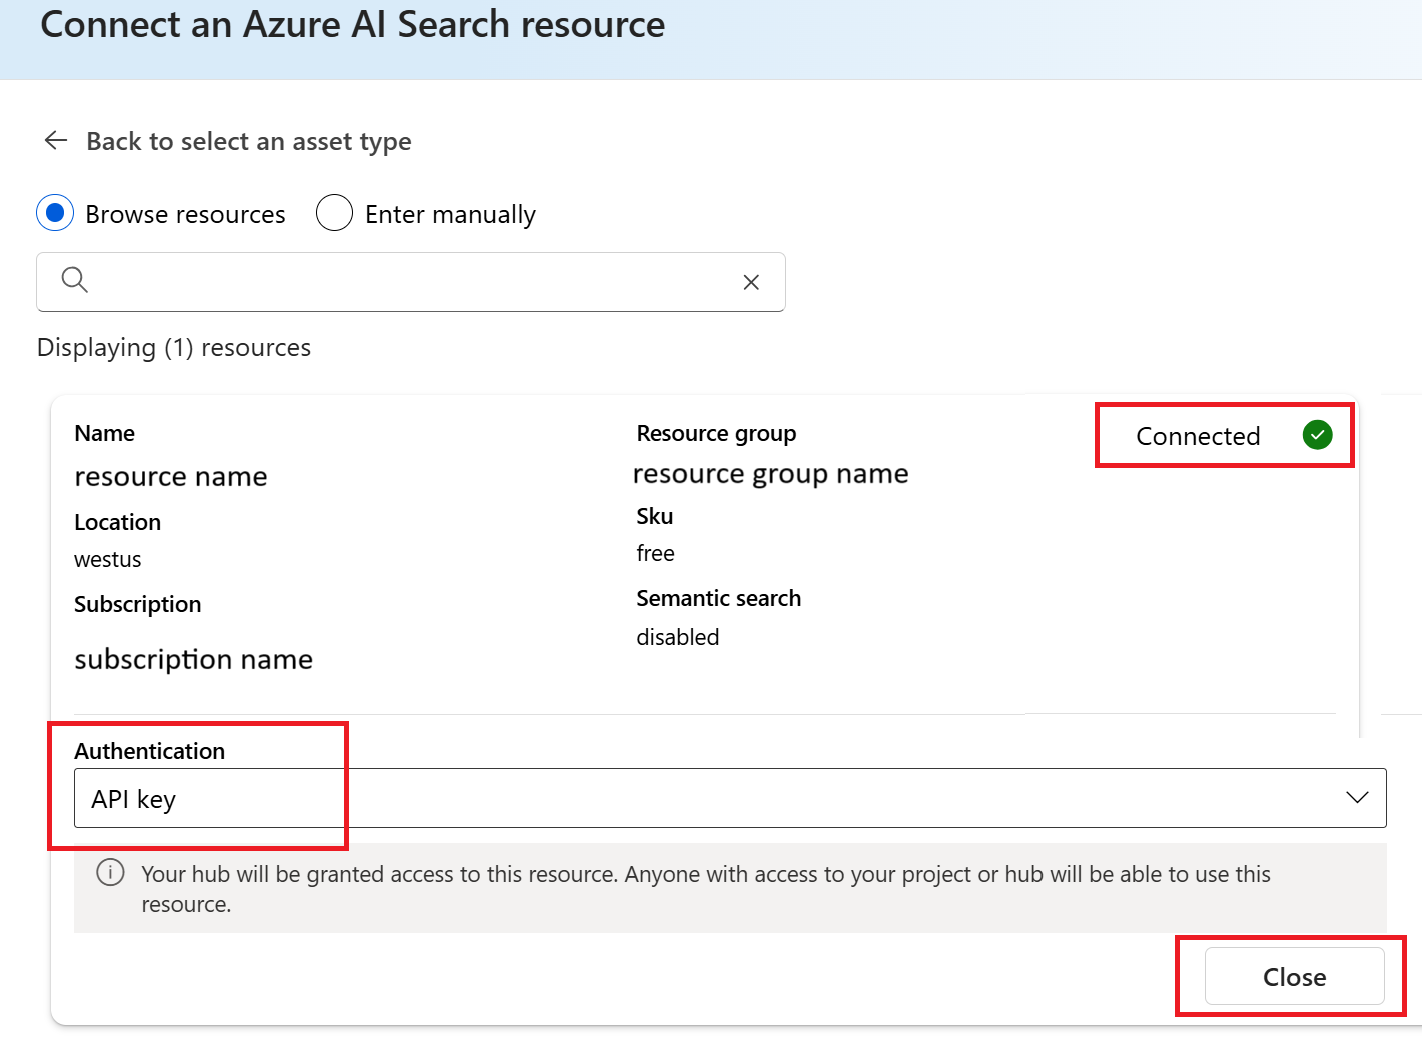
Select the + New connection button.

In the new window, select Azure AI Search as the resource type.
Search for and display the Azure AI Search resource you connected in Step 1.
Ensure the Authentication is set to API key.
Select Add connection then select Close.
Step 3: Create a fine-tuning task with connected resources
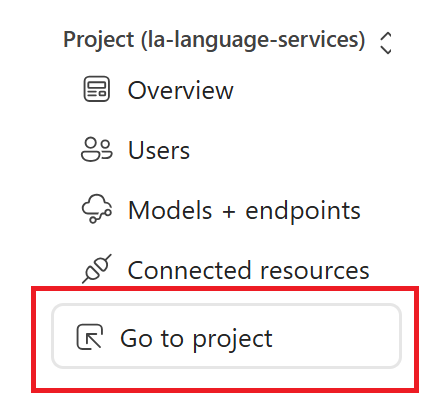
Navigate to Go to project at the end of the left navigation panel.
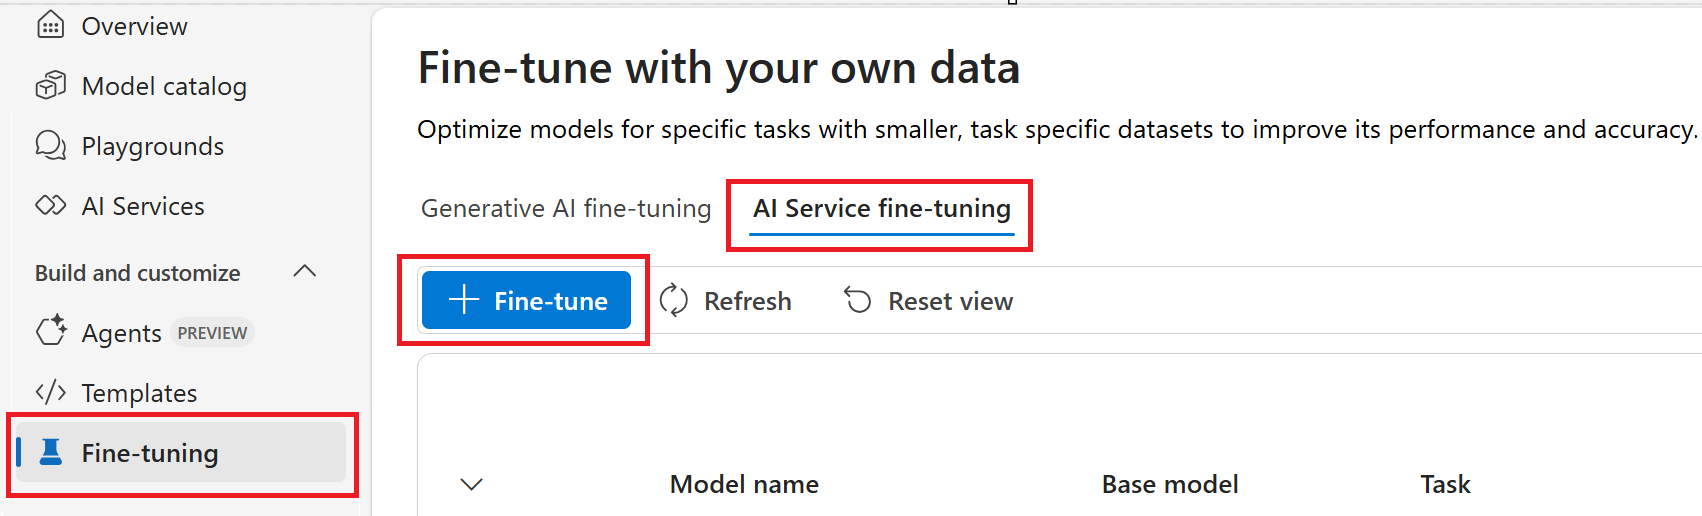
Select Fine-tuning from the left navigation panel, choose the AI Service fine-tuning tab, and then select the + Fine-tune button.
Choose Custom question answering as the task type from the new window, then select Next.
Under Connected service, select your selected Azure AI Foundry resource. Then select your newly connected search resource.
Your resources are now set up properly. Continue with setting up the fine-tuning task and customizing your CQA project.
Change Azure AI Search resource
Warning
If you change the Azure Search service associated with your language resource, you lose access to all the projects already present in it. Make sure you export the existing projects before you change the Azure Search service.
If you create a language resource and its dependencies (such as Search) through the Azure portal, a Search service is created for you and linked to the language resource. After these resources are created, you can update the Search resource in the Features tab.
Go to your language resource in the Azure portal.
Select Features and select the Azure AI Search service you want to link with your language resource.
Note
Your Language resource retains your Azure AI Search keys. If you update your search resource (for example, regenerating your keys), you need to select Update Azure AI Search keys for the current search service.

Select Save.
Next Steps
Create, test, and deploy a custom question answering project