Note
Access to this page requires authorization. You can try signing in or changing directories.
Access to this page requires authorization. You can try changing directories.
You can use Power Automate flows to automate repetitive tasks and bring efficiency to your organization. Using Azure Language in Foundry Tools, you can automate tasks like:
- Send incoming emails to different departments based on their contents.
- Analyze the sentiment of new tweets.
- Extract entities from incoming documents.
- Summarize meetings.
- Remove personal data from files before saving them.
In this tutorial, you'll create a Power Automate flow to extract entities found in text, using Named entity recognition.
Prerequisites
- Azure subscription - Create one for free
- Once you have your Azure subscription, create a Language resource in the Azure portal to get your key and endpoint. After it deploys, select Go to resource.
- You will need the key and endpoint from the resource you create to connect your application to the API. You'll paste your key and endpoint into the code below later in the quickstart.
- You can use the free pricing tier (
Free F0) to try the service, and upgrade later to a paid tier for production.
- Optional for this tutorial: A trained model is required if you're using a custom capability such as custom NER, custom text classification, or conversational language understanding.
Create a Power Automate flow
For this tutorial, you will create a flow that extracts named entities from text.
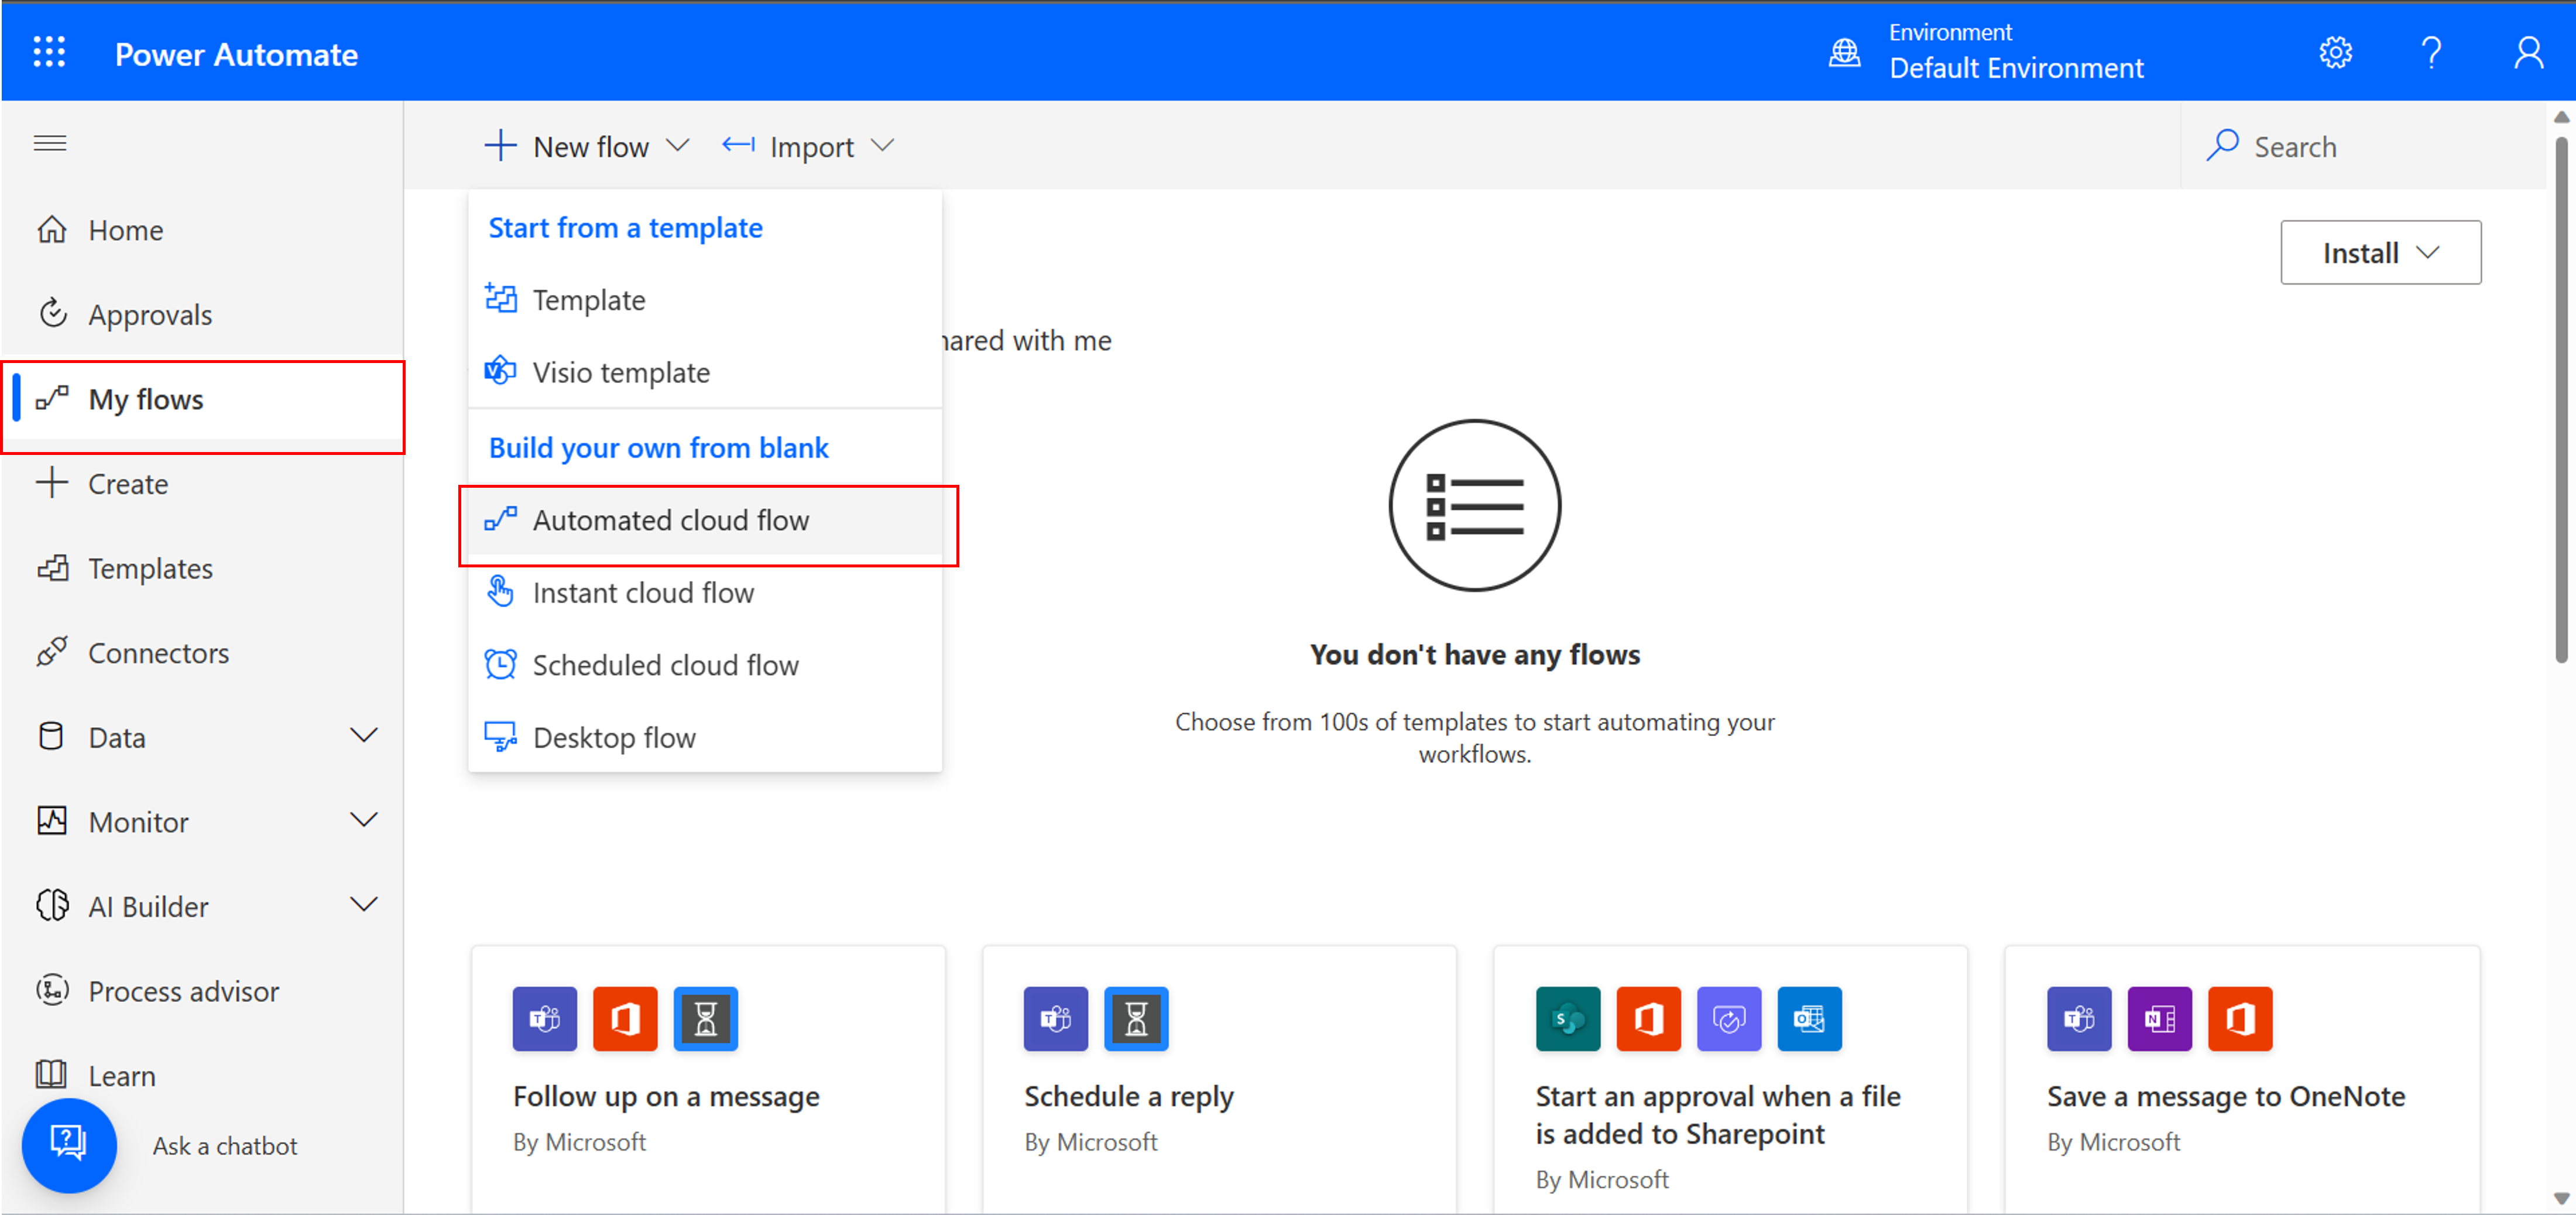
From the left side menu, select My flows. Then select New flow > Automated cloud flow.
Enter a name for your flow such as
LanguageFlow. Then select Skip to continue without choosing a trigger.
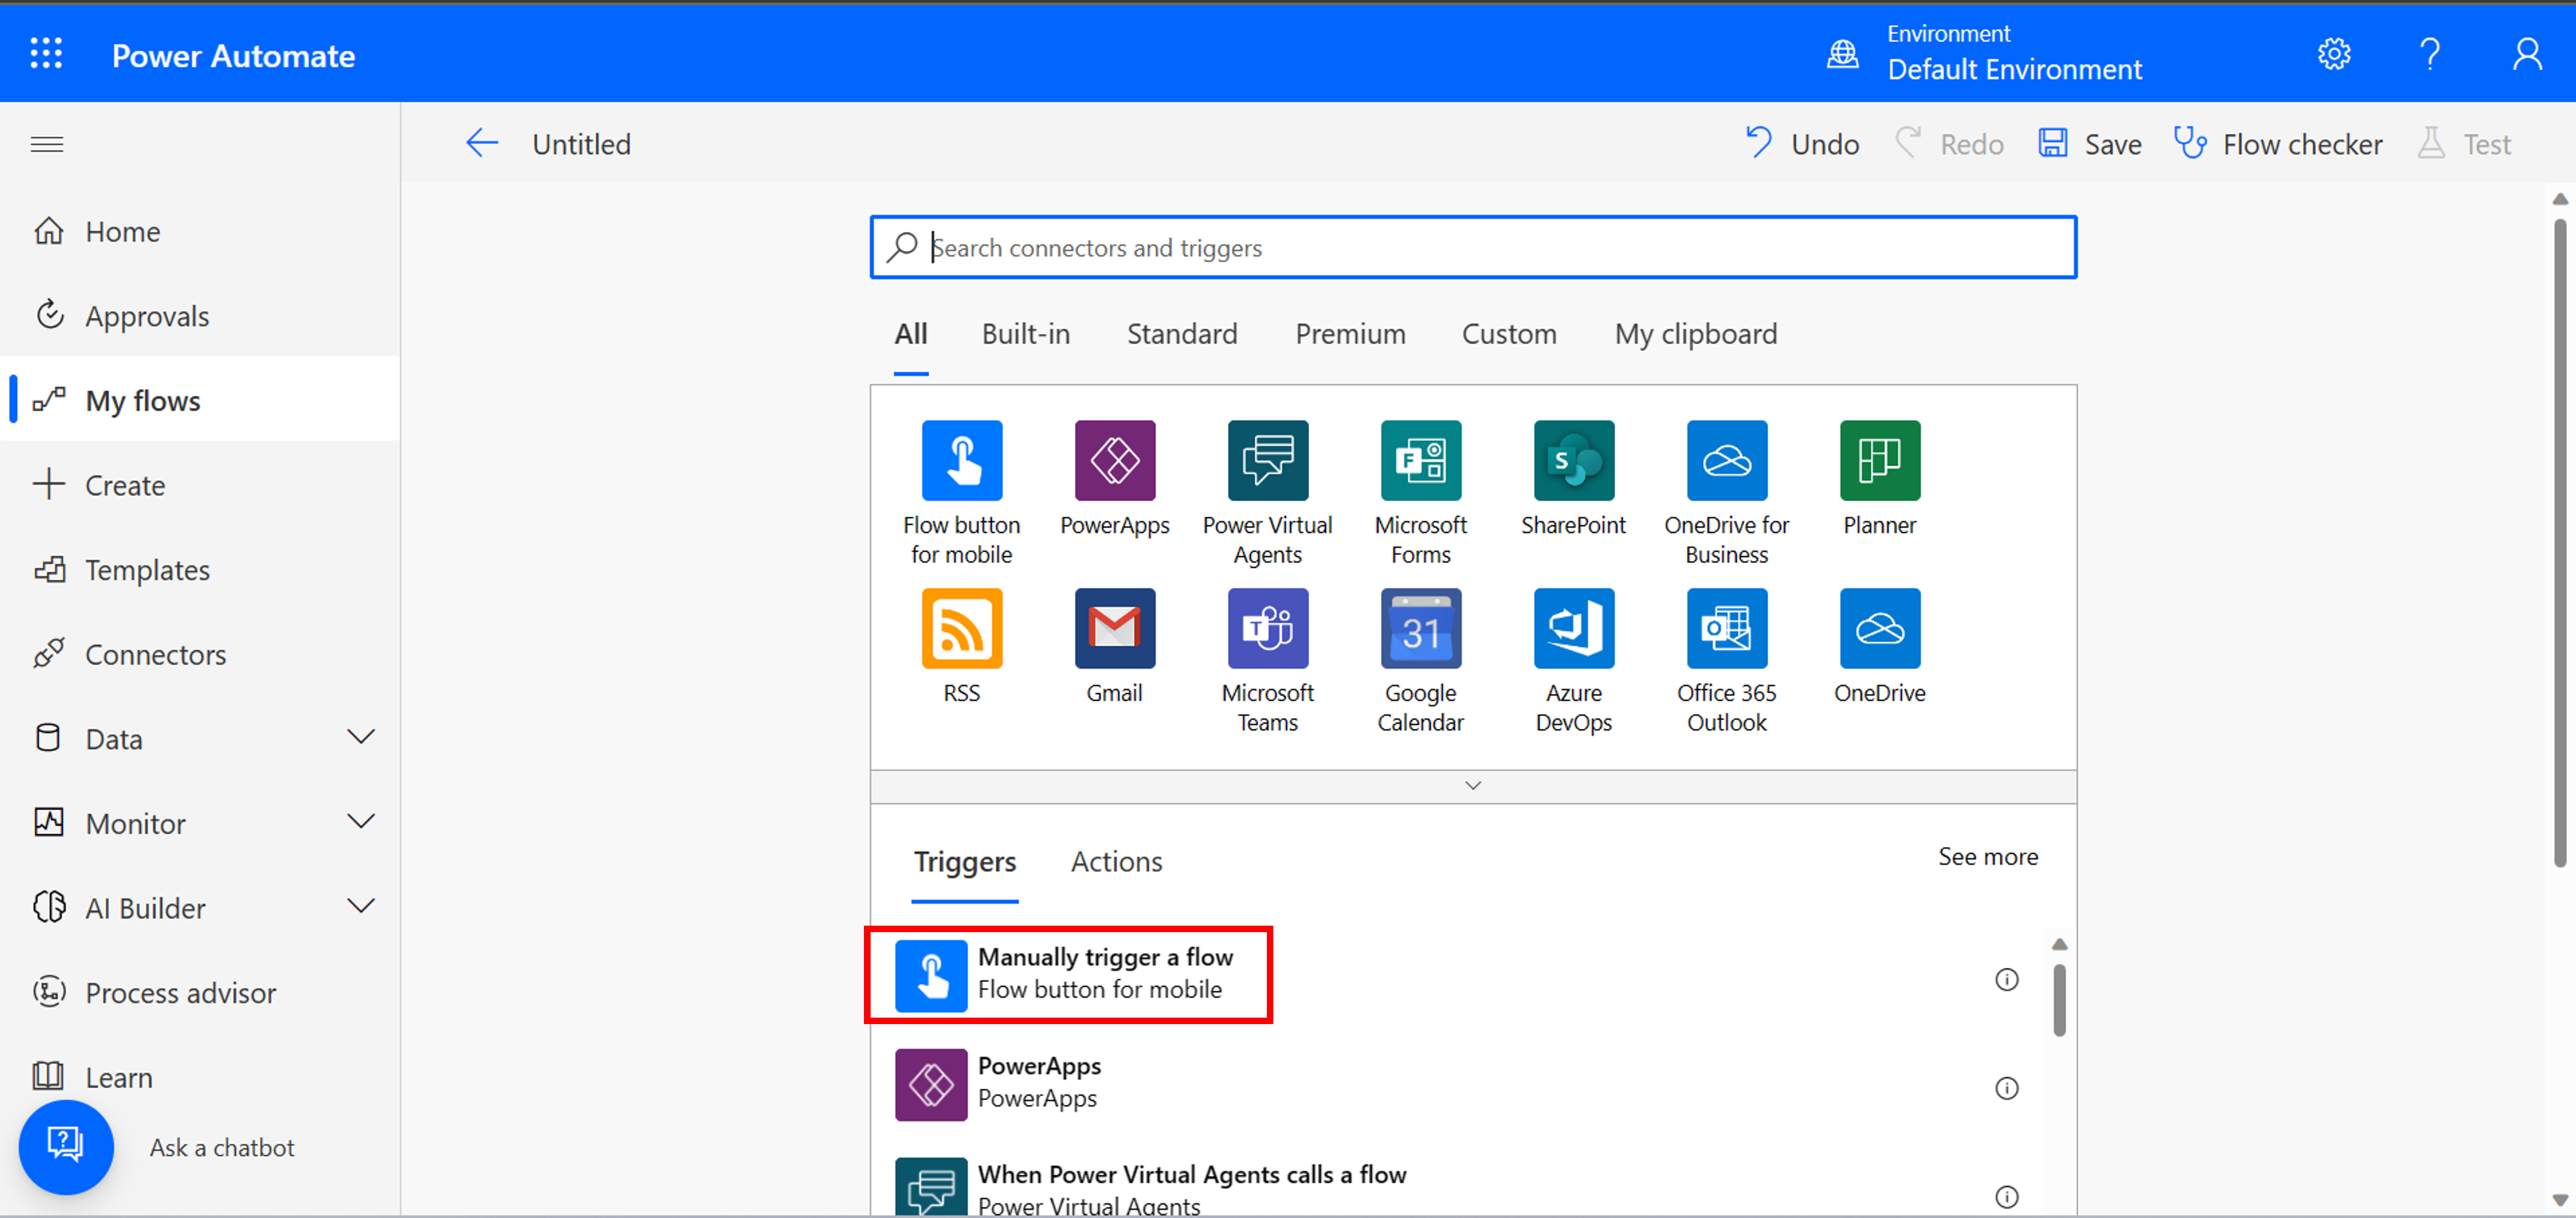
Under Triggers select Manually trigger a flow.
Select + New step to begin adding a Language connector.
Under Choose an operation search for Language. Then select Language. This will narrow down the list of actions to only those that are available for Language.
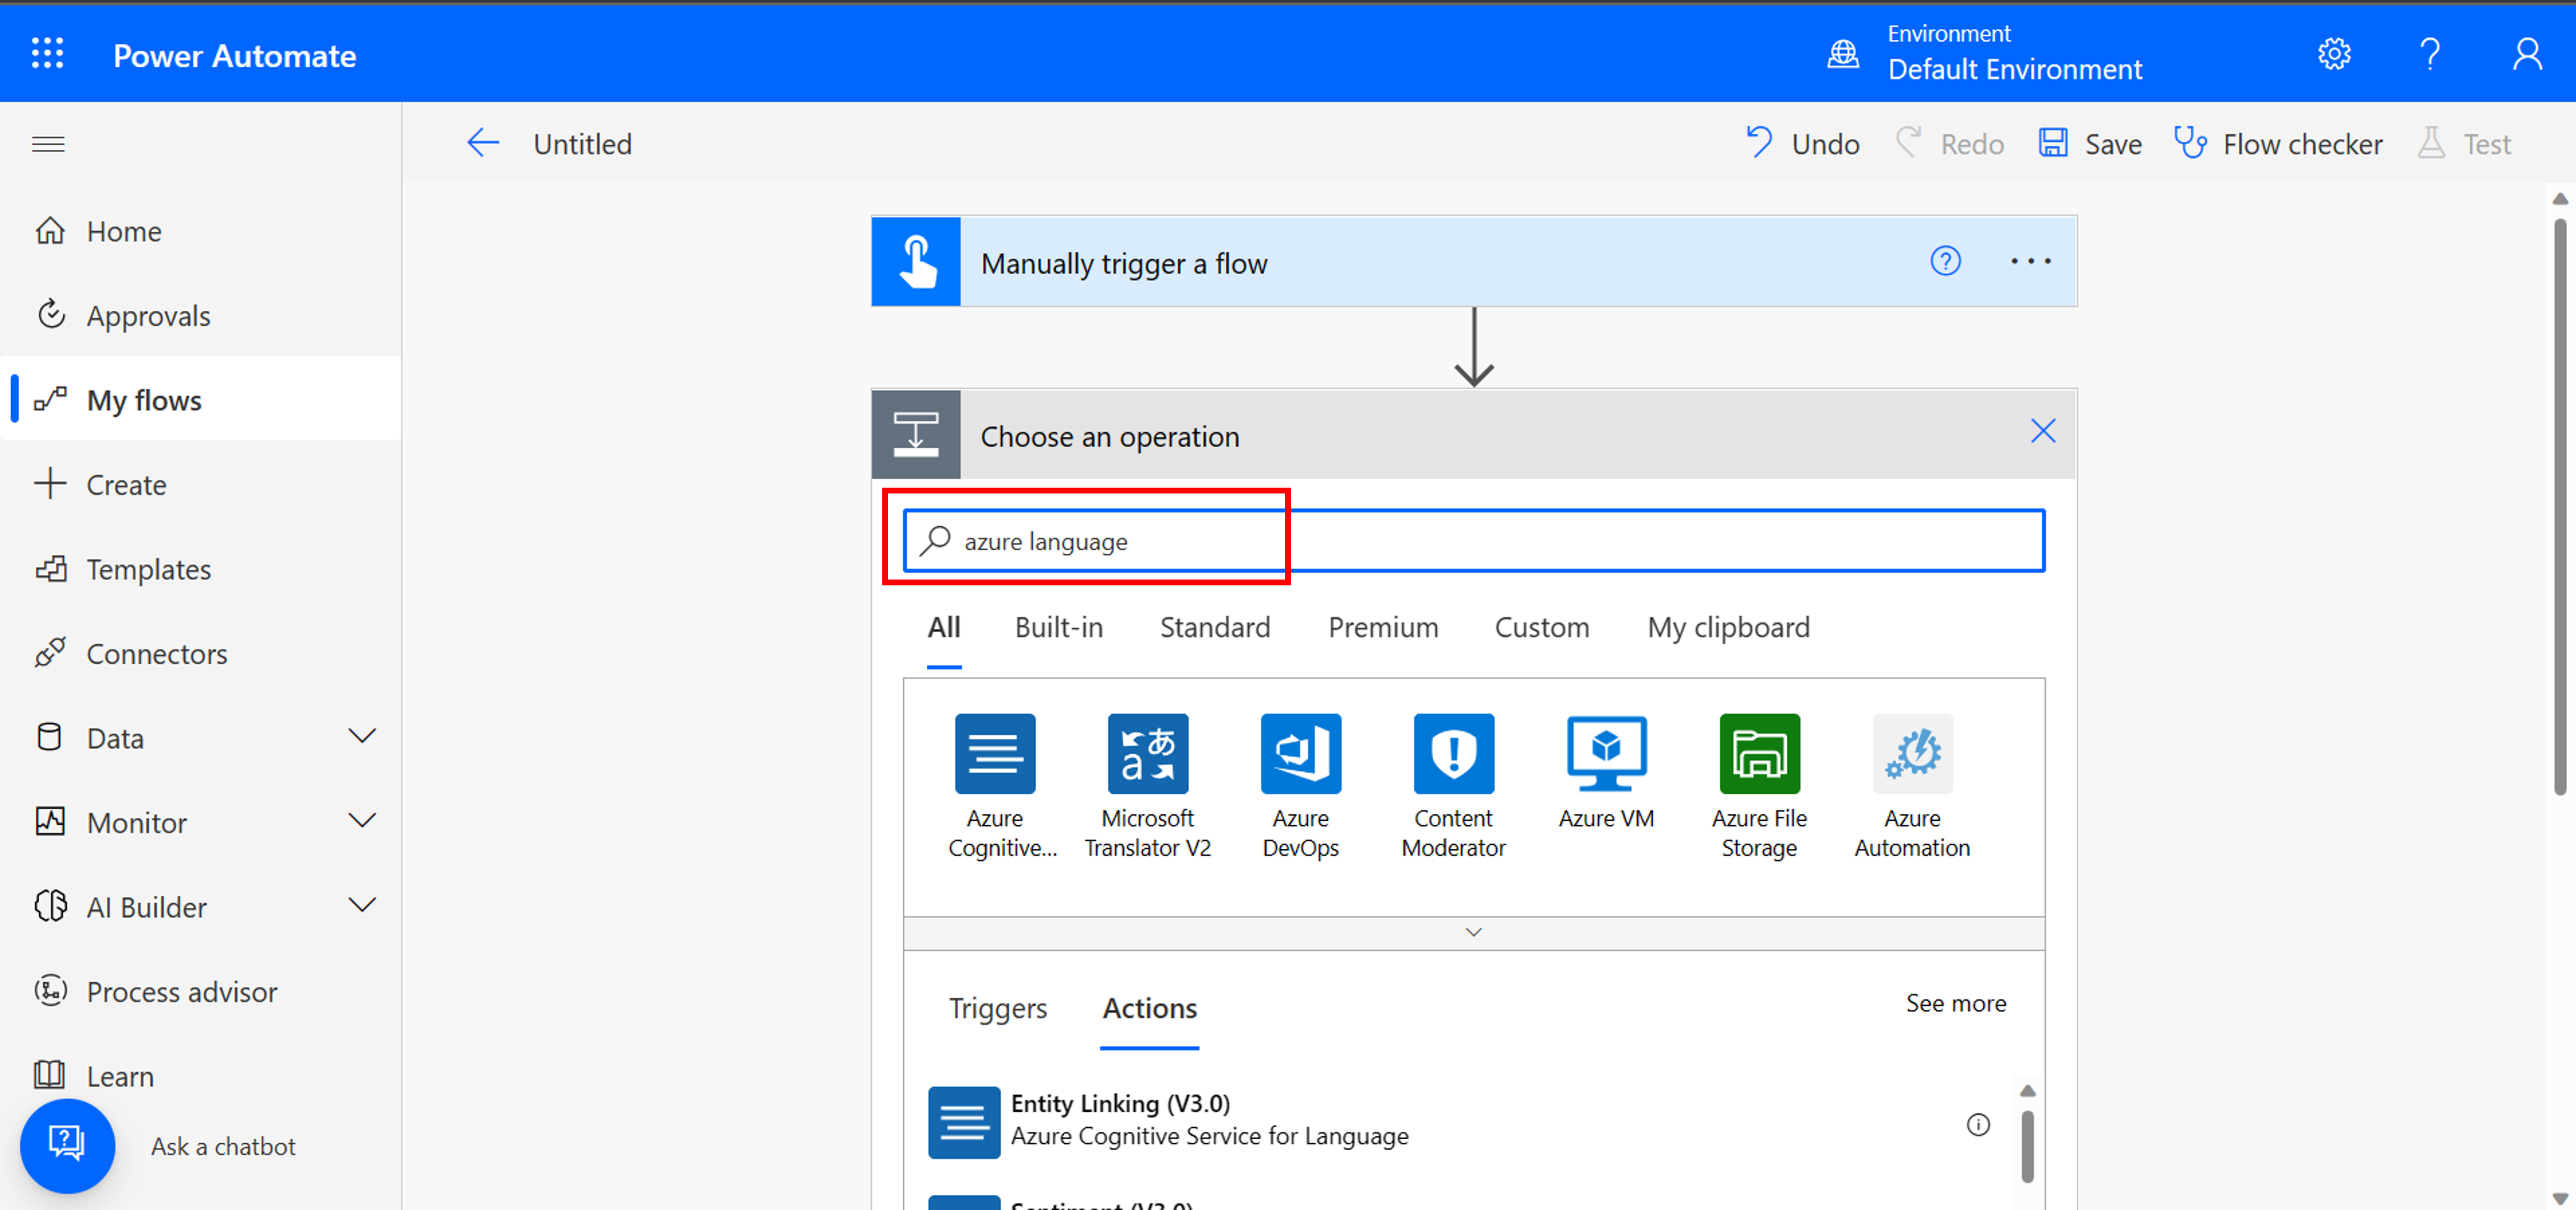
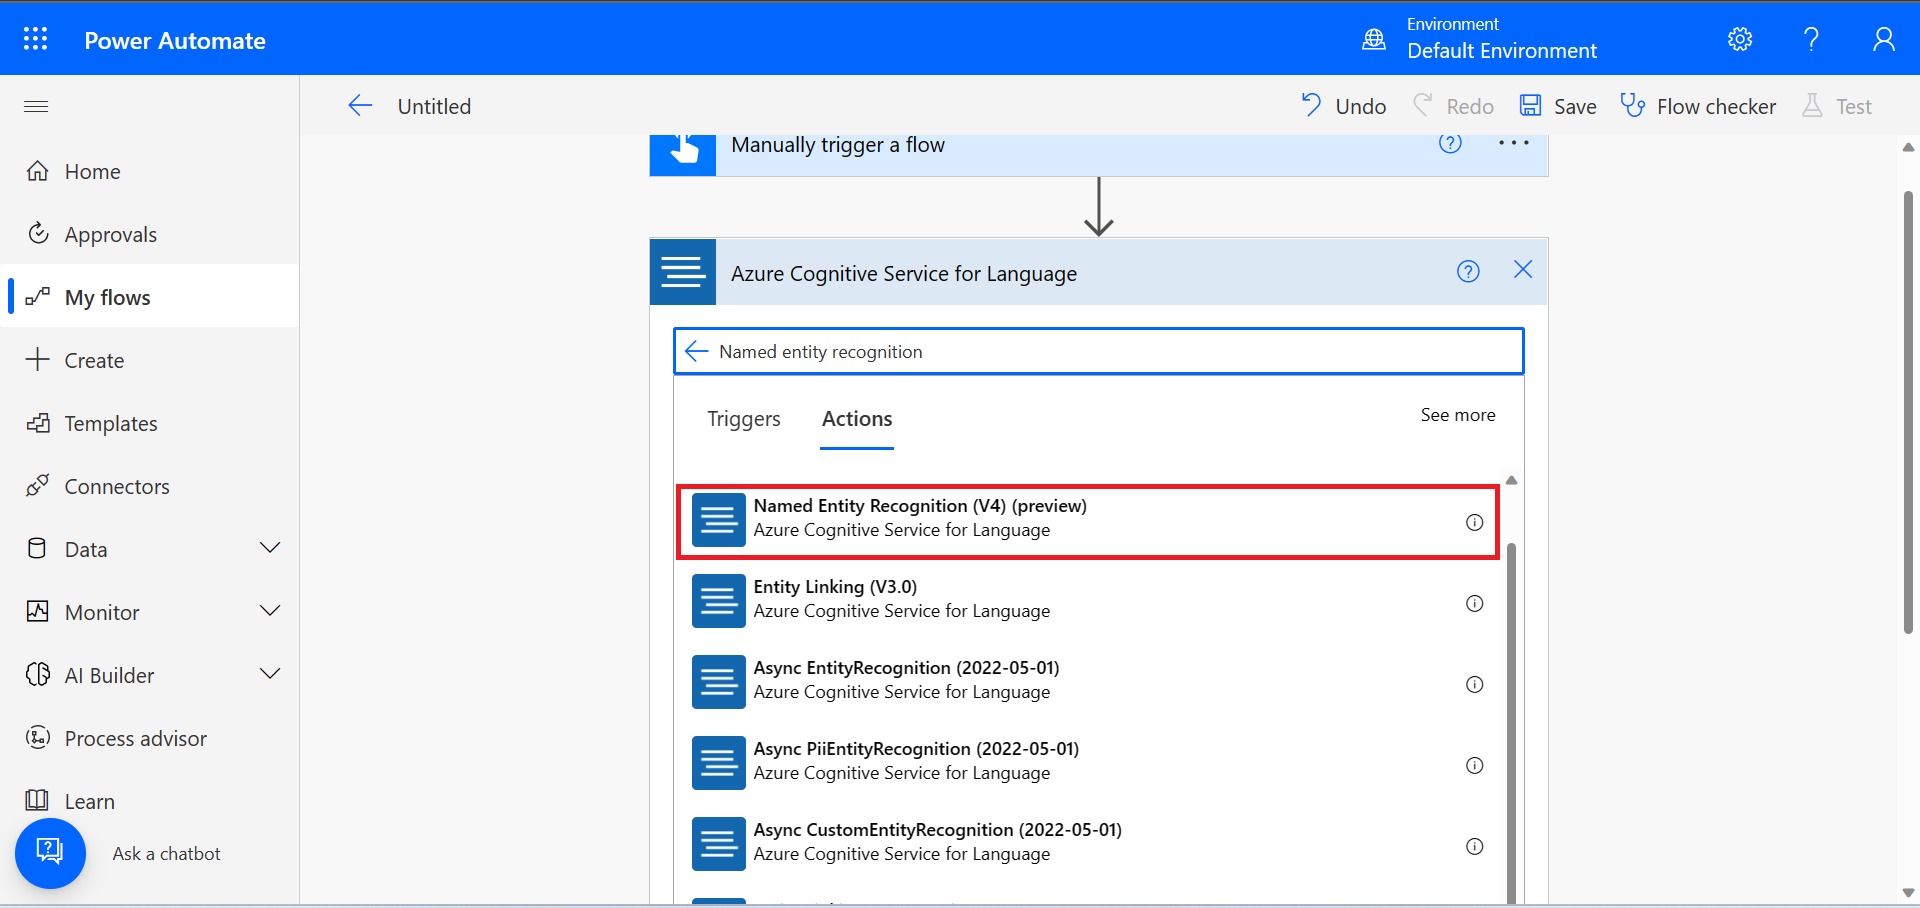
Under Actions search for Named Entity Recognition, and select the connector.
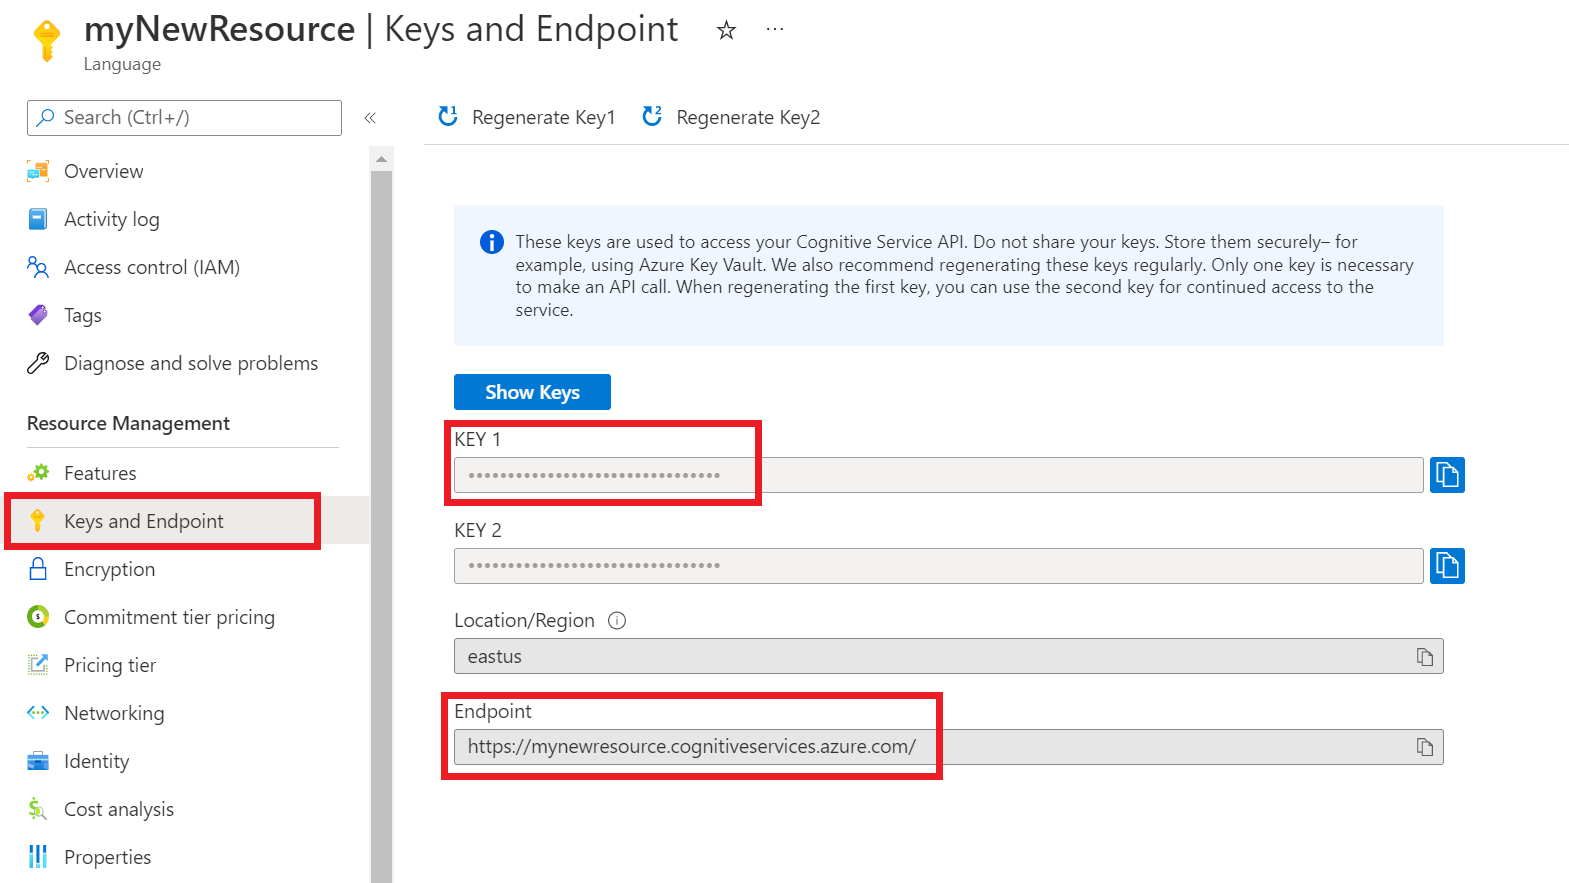
Get the endpoint and key for your Language resource, which will be used for authentication. You can find your key and endpoint by navigating to your resource in the Azure portal, and selecting Keys and Endpoint from the left side menu.
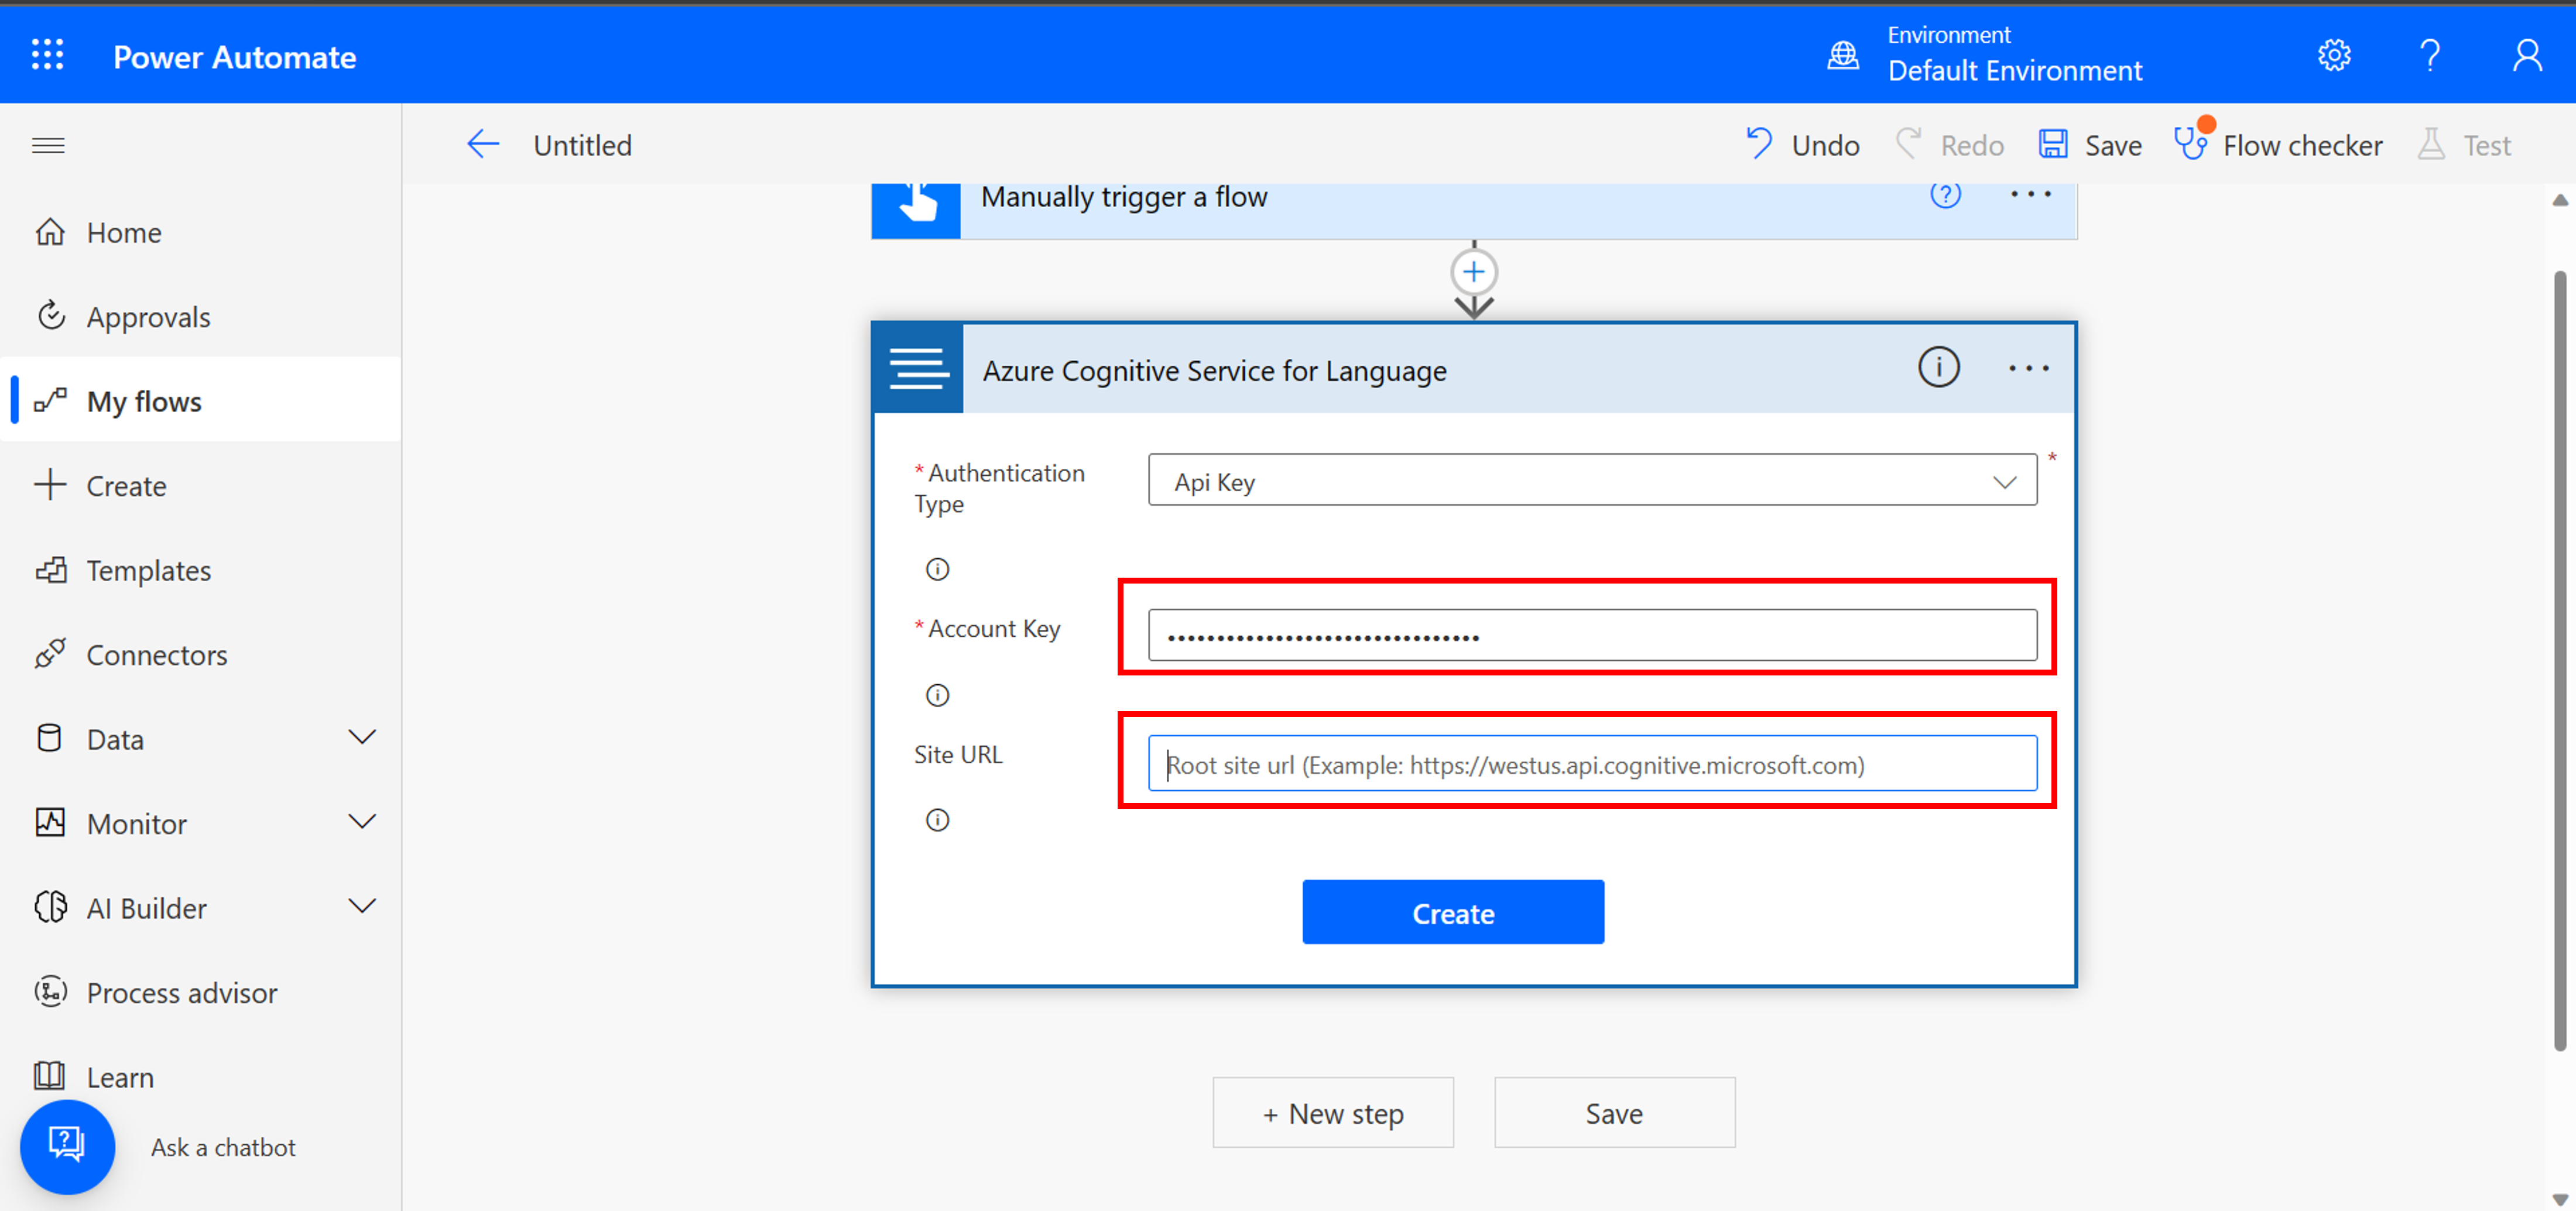
Once you have your key and endpoint, add it to the connector in Power Automate.
Add the data in the connector

Note
You will need deployment name and project name if you're using custom language capability.
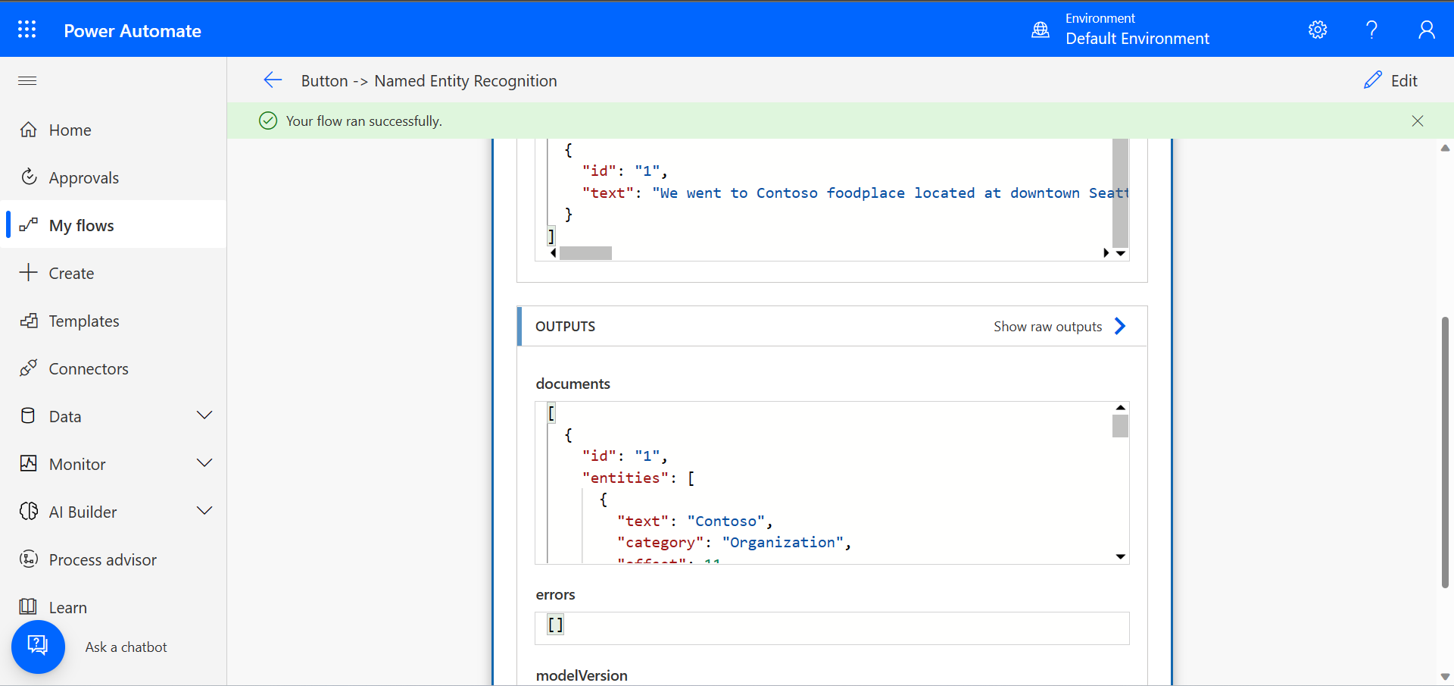
From the top navigation menu, save the flow and select Test the flow. In the window that appears, select Test.

After the flow runs, you can see the response in the outputs field.