Use REST APIs programmatically
Document Translation is a cloud-based feature of the Azure AI Translator service. You can use the Document Translation API to asynchronously translate whole documents in supported languages and various file formats while preserving source document structure and text formatting. In this how-to guide, you learn to use Document Translation APIs with a programming language of your choice and the HTTP REST API.
Prerequisites
Note
Typically, when you create an Azure AI resource in the Azure portal, you have the option to create a multi-service key or a single-service key. However, Document Translation is currently supported in the Translator (single-service) resource only, and is not included in the Azure AI services (multi-service) resource.
Document Translation is supported in the S1 Standard Service Plan (Pay-as-you-go) and C2, C3, C4, and D3 Volume Discount Plans. See Azure AI services pricing—Translator.
To get started, you need:
An active Azure account. If you don't have one, you can create a free account
An Azure Blob Storage account. You also need to create containers in your Azure Blob Storage account for your source and target files:
- Source container. This container is where you upload your files for translation (required).
- Target container. This container is where your translated files are stored (required).
A single-service Translator resource (not a multi-service Azure AI services resource):
Complete the Translator project and instance details fields as follows:
Subscription. Select one of your available Azure subscriptions.
Resource Group. You can create a new resource group or add your resource to a pre-existing resource group that shares the same lifecycle, permissions, and policies.
Resource Region. Choose Global unless your business or application requires a specific region. If you're planning on using a system-assigned managed identity for authentication, choose a geographic region like West US.
Name. Enter the name you chose for your resource. The name you choose must be unique within Azure.
Note
Document Translation requires a custom domain endpoint. The value that you enter in the Name field will be the custom domain name parameter for your endpoint.
Pricing tier. Document Translation isn't supported in the free tier. To try the service, select Standard S1.
Select Review + Create.
Review the service terms and select Create to deploy your resource.
After your resource successfully deploys, select Go to resource to retrieve your key and endpoint.
Retrieve your key and custom domain endpoint
- Requests to the Translator service require a read-only key and custom endpoint to authenticate access. The custom domain endpoint is a URL formatted with your resource name, hostname, and Translator subdirectories and is available in the Azure portal.
If you created a new resource, after it deploys, select Go to resource. If you have an existing Document Translation resource, navigate directly to your resource page.
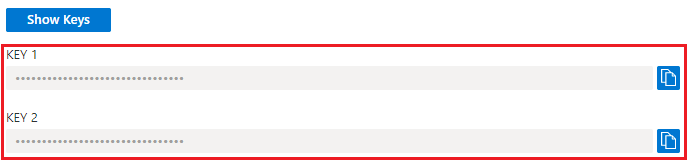
In the left rail, under Resource Management, select Keys and Endpoint.
Copy and paste your
keyanddocument translation endpointin a convenient location, such as Microsoft Notepad. Only one key is necessary to make an API call.You
keyanddocument translation endpointinto the code samples to authenticate your request to the Document Translation service.
Get your key
Requests to the Translator service require a read-only key for authenticating access.
- If you created a new resource, after it deploys, select Go to resource. If you have an existing Document Translation resource, navigate directly to your resource page.
- In the left rail, under Resource Management, select Keys and Endpoint.
- Copy and paste your key in a convenient location, such as Microsoft Notepad.
- You paste it into the code sample to authenticate your request to the Document Translation service.
Create Azure Blob Storage containers
You need to create containers in your Azure Blob Storage account for source and target files.
- Source container. This container is where you upload your files for translation (required).
- Target container. This container is where your translated files are stored (required).
Note
Document Translation supports glossaries as blobs in target containers (not separate glossary containers). If want to include a custom glossary, add it to the target container and include the glossaryUrl with the request. If the translation language pair is not present in the glossary, it will not be applied. See Translate documents using a custom glossary
Create SAS access tokens for Document Translation
The sourceUrl , targetUrl , and optional glossaryUrl must include a Shared Access Signature (SAS) token, appended as a query string. The token can be assigned to your container or specific blobs. See Create SAS tokens for Document Translation process.
- Your source container or blob must designate read and list access.
- Your target container or blob must designate write and list access.
- Your glossary blob must designate read and list access.
Tip
- If you're translating multiple files (blobs) in an operation, delegate SAS access at the container level.
- If you're translating a single file (blob) in an operation, delegate SAS access at the blob level.
- As an alternative to SAS tokens, you can use a system-assigned managed identity for authentication.
HTTP requests
An asynchronous batch translation request is submitted to your Translator service endpoint via a POST request. If successful, the POST method returns a 202 Accepted response code and the service creates a batch request. The translated documents are listed in your target container.
For detailed information regarding Azure AI Translator Service request limits, see Document Translation request limits.
HTTP headers
The following headers are included with each Document Translation API request:
| HTTP header | Description |
|---|---|
| Ocp-Apim-Subscription-Key | Required: The value is the Azure key for your Translator or Azure AI services resource. |
| Content-Type | Required: Specifies the content type of the payload. Accepted values are application/json or charset=UTF-8. |
POST request body properties
- The POST request URL is POST
https://<NAME-OF-YOUR-RESOURCE>.cognitiveservices.azure.com/translator/text/batch/v1.1/batches. - The POST request body is a JSON object named
inputs. - The
inputsobject contains bothsourceURLandtargetURLcontainer addresses for your source and target language pairs. - The
prefixandsuffixare case-sensitive strings to filter documents in the source path for translation. Theprefixfield is often used to delineate subfolders for translation. Thesuffixfield is most often used for file extensions. - A value for the
glossariesfield (optional) is applied when the document is being translated. - The
targetUrlfor each target language must be unique.
Note
If a file with the same name already exists in the destination, the job will fail.
Translate all documents in a container
{
    "inputs": [
        {
            "source": {
                "sourceUrl": "{sourceSASUrl}"
            },
            "targets": [
                {
                    "targetUrl": "{targetSASUrl}",
                    "language": "fr"
                }
            ]
        }
    ]
}
Translate a specific document in a container
- Specify
"storageType": "File". - If you aren't using a system-assigned managed identity for authentication, make sure you created source URL & SAS tokens for the specific blob/document (not for the container).
- Ensure you specified the target filename as part of the target URL – though the SAS token is still for the container.
- This sample request returns a single document translated into two target languages.
{
    "inputs": [
        {
            "storageType": "File",
            "source": {
                "sourceUrl": "{sourceSASUrl}"
            },
            "targets": [
                {
                    "targetUrl": "{targetSASUrl}",
                    "language": "es"
                },
                {
                    "targetUrl": "{targetSASUrl}",
                    "language": "de"
                }
            ]
        }
    ]
}
Translate documents using a custom glossary
{
    "inputs": [
        {
            "source": {
                "sourceUrl": "{sourceSASUrl}"
             },
            "targets": [
                {
                    "targetUrl": "{targetSASUrl}",
                    "language": "es",
                    "glossaries": [
                        {
                            "glossaryUrl": "{glossaryUrl/en-es.xlf}",
                            "format": "xliff"
                        }
                    ]
                }
            ]
        }
    ]
}
Use code to submit Document Translation requests
Set up your coding Platform
- Create a new project.
- Replace Program.cs with the C# code sample.
- Set your endpoint, key, and container URL values in Program.cs.
- Add Newtonsoft.Json package using .NET CLI for processing JSON data.
- Run the program from the project directory.
Important
For the code samples, you'll hard-code your Shared Access Signature (SAS) URL where indicated. Remember to remove the SAS URL from your code when you're done, and never post it publicly. For production, use a secure way of storing and accessing your credentials like Azure Managed Identity. For more information, see Azure Storage security.
You may need to update the following fields, depending upon the operation:
endpointbasePathkeysourceURLtargetURLglossaryURLid(job ID)
Locating the id value
- You can find the job
idin the POSTstart-batch-translationmethod response HeaderOperation-LocationURL value. The alphanumeric string following the/document/parameter is the operation's jobid:
| Response header | Response URL |
|---|---|
| Operation-Location | {document-translation-endpoint}/translator/document/9dce0aa9-78dc-41ba-8cae-2e2f3c2ff8ec?api-version={date} |
- You can also use a get-translations-status request to retrieve a list of translation jobs and their
ids.
Start asynchronous batch translation
    using System;
    using System.Net.Http;
    using System.Threading.Tasks;
    using System.Text;


    class Program
    {

        static readonly string route = "?api-version={date}";

        private static readonly string basePath = "{your-document-translation-endpoint}/translator/document/batches";

        private static readonly string key = "{your-api-key}";

        static readonly string json = ("{\"inputs\": [{\"source\": {\"sourceUrl\": \"https://YOUR-SOURCE-URL-WITH-READ-LIST-ACCESS-SAS\",\"storageSource\": \"AzureBlob\",\"language\": \"en\"}, \"targets\": [{\"targetUrl\": \"https://YOUR-TARGET-URL-WITH-WRITE-LIST-ACCESS-SAS\",\"storageSource\": \"AzureBlob\",\"category\": \"general\",\"language\": \"es\"}]}]}");

        static async Task Main(string[] args)
        {
            using HttpClient client = new HttpClient();
            using HttpRequestMessage request = new HttpRequestMessage();
            {

                StringContent content = new StringContent(json, Encoding.UTF8, "application/json");

                request.Method = HttpMethod.Post;
                request.RequestUri = new Uri(basePath + route);
                request.Headers.Add("Ocp-Apim-Subscription-Key", key);
                request.Content = content;

                HttpResponseMessage  response = await client.SendAsync(request);
                string result = response.Content.ReadAsStringAsync().Result;
                if (response.IsSuccessStatusCode)
                {
                    Console.WriteLine($"Status code: {response.StatusCode}");
                    Console.WriteLine();
                    Console.WriteLine($"Response Headers:");
                    Console.WriteLine(response.Headers);
                }
                else
                    Console.Write("Error");

            }

        }

    }
Get supported document formats
Retrieve a list of supported file formats. If successful, this method returns a 200 OK response code.
using System;
using System.Net.Http;
using System.Threading.Tasks;


class Program
{


    private static readonly string basePath = "{your-document-translation-endpoint}/translator/document/formats";

    static readonly string route = "?api-version={date}&type=document";

    private static readonly string key = "{your-api-key}";

    static async Task Main(string[] args)
    {

        HttpClient client = new HttpClient();
            using HttpRequestMessage request = new HttpRequestMessage();
            {
                request.Method = HttpMethod.Get;
                request.RequestUri = new Uri(basePath + route);
                request.Headers.Add("Ocp-Apim-Subscription-Key", key);


                HttpResponseMessage response = await client.SendAsync(request);
                string result = response.Content.ReadAsStringAsync().Result;

                Console.WriteLine($"Status code: {response.StatusCode}");
                Console.WriteLine($"Response Headers: {response.Headers}");
                Console.WriteLine();
                Console.WriteLine(result);
            }
}
Get status for a translation job
Get the current status for a single job and a summary of all jobs in a Document Translation request. If successful, this method returns a 200 OK response code.
using System;
using System.Net.Http;
using System.Threading.Tasks;


class Program
{


    private static readonly string basePath = "{your-document-translation-endpoint}/translator/document/batches/{id}";

    static readonly string route = "?api-version={date}";

    private static readonly string key = "{your-api-key}";

    static async Task Main(string[] args)
    {

        HttpClient client = new HttpClient();
            using HttpRequestMessage request = new HttpRequestMessage();
            {
                request.Method = HttpMethod.Get;
                request.RequestUri = new Uri(basePath + route);
                request.Headers.Add("Ocp-Apim-Subscription-Key", key);


                HttpResponseMessage response = await client.SendAsync(request);
                string result = response.Content.ReadAsStringAsync().Result;

                Console.WriteLine($"Status code: {response.StatusCode}");
                Console.WriteLine($"Response Headers: {response.Headers}");
                Console.WriteLine();
                Console.WriteLine(result);
            }
    }
}
Get status for a specific document
Brief overview
Retrieve the status for a specific document in a Document Translation request. If successful, this method returns a 200 OK response code.
using System;
using System.Net.Http;
using System.Threading.Tasks;


class Program
{


    private static readonly string basePath = "{document-translation-endpoint}/translator/document/batches/{id}/documents/{documentId}";

    static readonly string route = "?api-version={date}";

    private static readonly string key = "{your-api-key}";

    static async Task Main(string[] args)
    {

        HttpClient client = new HttpClient();
            using HttpRequestMessage request = new HttpRequestMessage();
            {
                request.Method = HttpMethod.Get;
                request.RequestUri = new Uri(basePath + route);
                request.Headers.Add("Ocp-Apim-Subscription-Key", key);


                HttpResponseMessage response = await client.SendAsync(request);
                string result = response.Content.ReadAsStringAsync().Result;

                Console.WriteLine($"Status code: {response.StatusCode}");
                Console.WriteLine($"Response Headers: {response.Headers}");
                Console.WriteLine();
                Console.WriteLine(result);
            }
}
Delete job
Brief overview
Cancel currently processing or queued job. Only documents for which translation isn't started are canceled.
using System;
using System.Net.Http;
using System.Threading.Tasks;


class Program
{


    private static readonly string basePath = "{your-document-translation-endpoint}/translator/document/batches/{id}";

    static readonly string route = "?api-version={date}";

    private static readonly string key = "{your-api-key}";

    static async Task Main(string[] args)
    {

        HttpClient client = new HttpClient();
            using HttpRequestMessage request = new HttpRequestMessage();
            {
                request.Method = HttpMethod.Delete;
                request.RequestUri = new Uri(basePath + route);
                request.Headers.Add("Ocp-Apim-Subscription-Key", key);


                HttpResponseMessage response = await client.SendAsync(request);
                string result = response.Content.ReadAsStringAsync().Result;

                Console.WriteLine($"Status code: {response.StatusCode}");
                Console.WriteLine($"Response Headers: {response.Headers}");
                Console.WriteLine();
                Console.WriteLine(result);
            }
}
Common HTTP status codes
| HTTP status code | Description | Possible reason |
|---|---|---|
| 200 | OK | The request was successful. |
| 400 | Bad Request | A required parameter is missing, empty, or null. Or, the value passed to either a required or optional parameter is invalid. A common issue is a header that is too long. |
| 401 | Unauthorized | The request isn't authorized. Check to make sure your key or token is valid and in the correct region. When managing your subscription on the Azure portal, make sure you're using the Translator single-service resource not the Azure AI services multi-service resource. |
| 429 | Too Many Requests | You exceeded the quota or rate of requests allowed for your subscription. |
| 502 | Bad Gateway | Network or server-side issue. Can also indicate invalid headers. |