Note
Access to this page requires authorization. You can try signing in or changing directories.
Access to this page requires authorization. You can try changing directories.
This article demonstrates how to:
- Run your Java application on Oracle WebLogic Server (WLS).
- Stand up a WebLogic Server cluster on AKS using an Azure Marketplace offer.
- Build an application Docker image that includes WebLogic Deploy Tooling (WDT) models.
- Deploy the containerized application to the WebLogic Server cluster on AKS with connection to Microsoft Azure SQL.
This article uses the Azure Marketplace offer for WebLogic Server to accelerate your journey to AKS. The offer automatically provisions several Azure resources, including the following resources:
- An Azure Container Registry instance
- An AKS cluster
- An Azure App Gateway Ingress Controller (AGIC) instance
- The WebLogic Kubernetes Operator
- A container image including the WebLogic runtime
- A WebLogic Server cluster without an application
Then, the article introduces building an image to update the WebLogic Server cluster. The image provides the application and WDT models.
If you prefer a less automated approach to deploying WebLogic on AKS, see the step-by-step guidance included in the official documentation from Oracle for Azure Kubernetes Service.
If you're interested in providing feedback or working closely on your migration scenarios with the engineering team developing WebLogic on AKS solutions, fill out this short survey on WebLogic migration and include your contact information. The team of program managers, architects, and engineers will promptly get in touch with you to initiate close collaboration.
Important
Starting on November 30, 2025, Azure Kubernetes Service (AKS) no longer supports or provides security updates for Azure Linux 2.0. The Azure Linux 2.0 node image is frozen at the 202512.06.0 release. Beginning on March 31, 2026, node images will be removed, and you'll be unable to scale your node pools. Migrate to a supported Azure Linux version by upgrading your node pools to a supported Kubernetes version or migrating to osSku AzureLinux3. For more information, see the Retirement GitHub issue and the Azure Updates retirement announcement. To stay informed on announcements and updates, follow the AKS release notes.
Prerequisites
- If you don't have an Azure account, create a free account before you begin.
- Ensure the Azure identity you use to sign in and complete this article has either the Owner role in the current subscription or the Contributor and User Access Administrator roles in the current subscription. For an overview of Azure roles, see What is Azure role-based access control (Azure RBAC)? For details on the specific roles required by WLS on AKS, see Azure built-in roles.
- Have the credentials for an Oracle single sign-on (SSO) account. To create one, see Create Your Oracle Account.
- Accept the license terms for WebLogic Server.
- Visit the Oracle Container Registry and sign in.
- If you have a support entitlement, select Middleware, then search for and select weblogic_cpu.
- If you don't have a support entitlement from Oracle, select Middleware, then search for and select weblogic.
- Accept the license agreement.
Note
Get a support entitlement from Oracle before going to production. Failure to do so results in running insecure images that are not patched for critical security flaws. For more information on Oracle's critical patch updates, see Critical Patch Updates, Security Alerts and Bulletins from Oracle.
- Prepare a local machine with Unix-like operating system installed - for example, Ubuntu, Azure Linux, macOS, Windows Subsystem for Linux.
- Azure CLI. Use
az --versionto test whether az works. This document was tested with version 2.55.1. - kubectl. Use
kubectl versionto test whether kubectl works. This document was tested with version v1.21.2. - A Java Development Kit (JDK). The article directs you to install Microsoft Build of OpenJDK 11. Ensure that your
JAVA_HOMEenvironment variable is set correctly in the shells in which you run the commands. - Maven 3.5.0 or higher.
- Ensure that you have the zip/unzip utility installed. Use
zip/unzip -vto test whetherzip/unzipworks.
- Azure CLI. Use
Create an Azure SQL Database
This section creates an Azure SQL Database using Microsoft Entra authentication, with managed identity connection enabled.
Create a resource group
Create a resource group with az group create. Because resource groups must be unique within a subscription, pick a unique name. An easy way to have unique names is to use a combination of your initials, today's date, and some identifier. For example, abc1228rg. This example creates a resource group named abc1228rg in the eastus location:
export RESOURCE_GROUP_NAME="abc1228rg"
az group create \
    --name ${RESOURCE_GROUP_NAME} \
    --location eastus
Create a database server and a database
Create a server with the az sql server create command. This example creates a server named myazuresql20130213 with admin user azureuser and admin password. Replace <your-password> with your password. For more information, see Quickstart: Create a single database - Azure SQL Database.
Note
Even though you're using a username and password here, these credentials are not exposed outside the database. The connection between the application layer and the database is secured with managed identities.
export AZURESQL_SERVER_NAME="myazuresql20130213"
export AZURESQL_ADMIN_USER="azureuser"
export AZURESQL_ADMIN_PASSWORD="<your-password>"
export DATABASE_NAME="mysingledatabase20230213"
az sql server create \
    --resource-group $RESOURCE_GROUP_NAME \
    --name $AZURESQL_SERVER_NAME \
    --location westus \
    --admin-user $AZURESQL_ADMIN_USER \
    --admin-password $AZURESQL_ADMIN_PASSWORD
Create a database with the az sql db create command in the serverless compute tier.
az sql db create \
    --resource-group $RESOURCE_GROUP_NAME \
    --server $AZURESQL_SERVER_NAME \
    --name $DATABASE_NAME \
    --sample-name AdventureWorksLT \
    --edition GeneralPurpose \
    --compute-model Serverless \
    --family Gen5 \
    --capacity 2
Configure a Microsoft Entra administrator
For information on how Azure SQL Server interacts with managed identities, see Connect using Microsoft Entra authentication.
Use the following steps to configure a Microsoft Entra administrator account to Azure SQL server from the Azure portal:
- In the Azure portal, open the Azure SQL server instance
myazuresql20130213. - Select Settings, then select Microsoft Entra ID. On the Microsoft Entra ID page, select Set admin.
- On the Add admin page, search for a user, select the user or group to be an administrator, and then select Select.
- At the top of the Microsoft Entra ID page, select Save. For Microsoft Entra users and groups, the Object ID is displayed next to the admin name.
- The process of changing the administrator might take several minutes. Then, the new administrator appears in the Microsoft Entra ID box.
Create a user-assigned managed identity
Next, in Azure CLI, create an identity in your subscription by using the az identity create command. You use this managed identity to connect to your database.
az identity create \
    --resource-group ${RESOURCE_GROUP_NAME} \
    --name myManagedIdentity
Create a database user for your managed identity
Now, connect as the Microsoft Entra administrator user to your Azure SQL database from the Azure portal, and create a user for your managed identity.
First, create a firewall rule to access the Azure SQL server from portal, as shown in the following steps:
- In the Azure portal, open the Azure SQL server instance
myazuresql20130213. - Select Security, then select Networking.
- Under Firewall rules, select Add your client IPV4 IP address.
- Under Exceptions, select Allow Azure services and resources to access this server.
- Select Save.
After the firewall rule is created, you can access the Azure SQL server from portal. Use the following steps to create a database user:
Select Settings, then select SQL databases. Select
mysingledatabase20230213.Select Query editor. On the Welcome to SQL Database Query Editor page, under Active Directory authentication, find a message like
Logged in as user@contoso.com.Select Continue as user@contoso.com, where
useris your AD admin account name.After signing in, in the Query 1 editor, run the following commands to create a database user for managed identity
myManagedIdentity.CREATE USER "myManagedIdentity" FROM EXTERNAL PROVIDER ALTER ROLE db_datareader ADD MEMBER "myManagedIdentity"; ALTER ROLE db_datawriter ADD MEMBER "myManagedIdentity"; ALTER ROLE db_ddladmin ADD MEMBER "myManagedIdentity"; GOIn the Query 1 editor, select Run to run the SQL commands.
If the commands complete successfully, you can find a message saying
Query succeeded: Affected rows: 0.
Use the following command to get the connection string that you use in the next section:
export CONNECTION_STRING="jdbc:sqlserver://${AZURESQL_SERVER_NAME}.database.windows.net:1433;database=${DATABASE_NAME};encrypt=true;trustServerCertificate=false;hostNameInCertificate=*.database.windows.net;loginTimeout=30;"
echo ${CONNECTION_STRING}

Create a schema for the sample application
Select New Query and then, in the query editor, run the following query:
CREATE TABLE COFFEE (ID NUMERIC(19) NOT NULL, NAME VARCHAR(255) NULL, PRICE FLOAT(32) NULL, PRIMARY KEY (ID));
CREATE TABLE SEQUENCE (SEQ_NAME VARCHAR(50) NOT NULL, SEQ_COUNT NUMERIC(28) NULL, PRIMARY KEY (SEQ_NAME));
INSERT INTO SEQUENCE VALUES ('SEQ_GEN',0);
After a successful run, you should see the message Query succeeded: Affected rows: 1. If you don't see this message, troubleshoot and resolve the problem before proceeding.
You can proceed to deploy WLS on AKS offer.
Deploy WebLogic Server on AKS
Use the following steps to find the WebLogic Server on AKS offer and fill out the Basics pane:
In the search bar at the top of the Azure portal, enter weblogic. In the autosuggested search results, in the Marketplace section, select WebLogic Server on AKS.
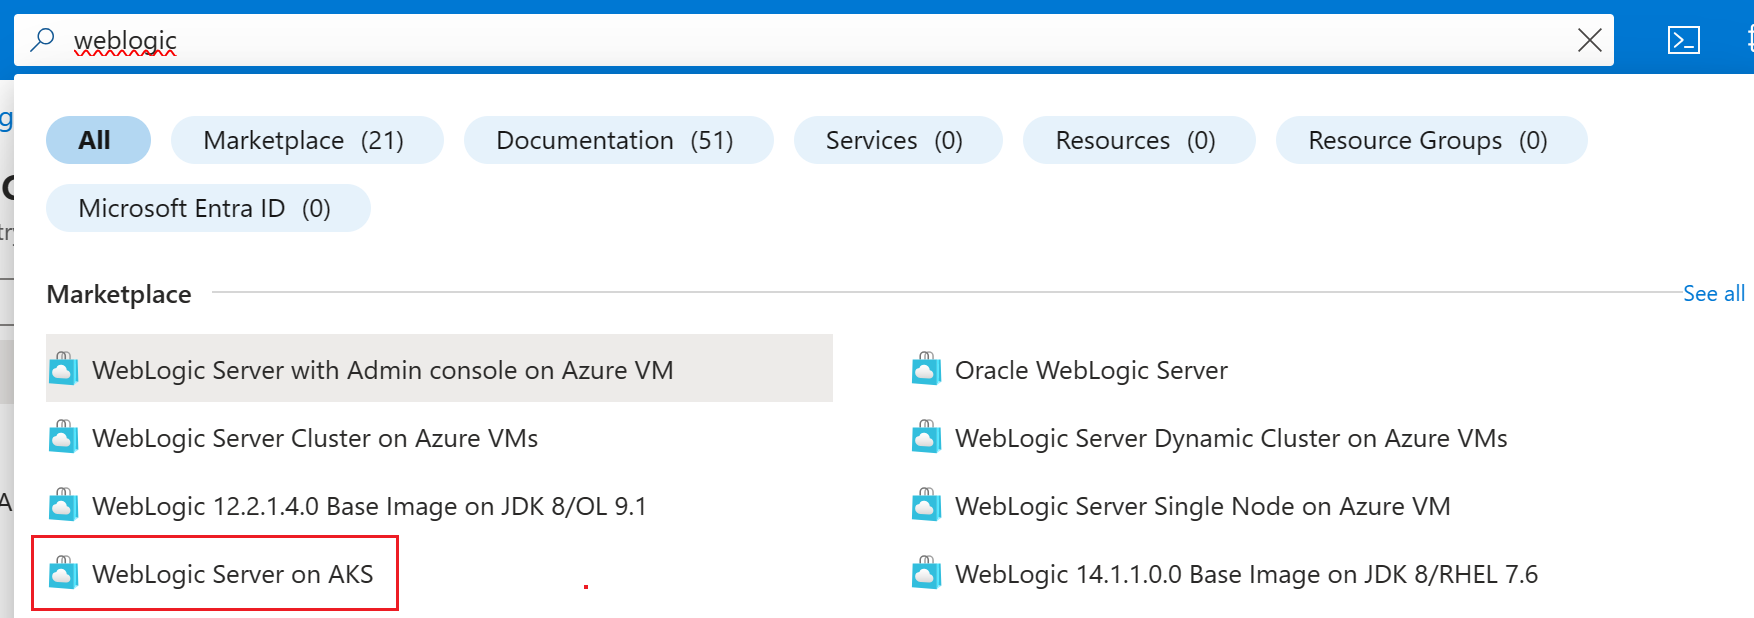
You can also go directly to the WebLogic Server on AKS offer.
On the offer page, select Create.
On the Basics pane, ensure the value shown in the Subscription field is the same one that you logged into in Azure. Make sure you have the roles listed in the prerequisites section for the subscription.
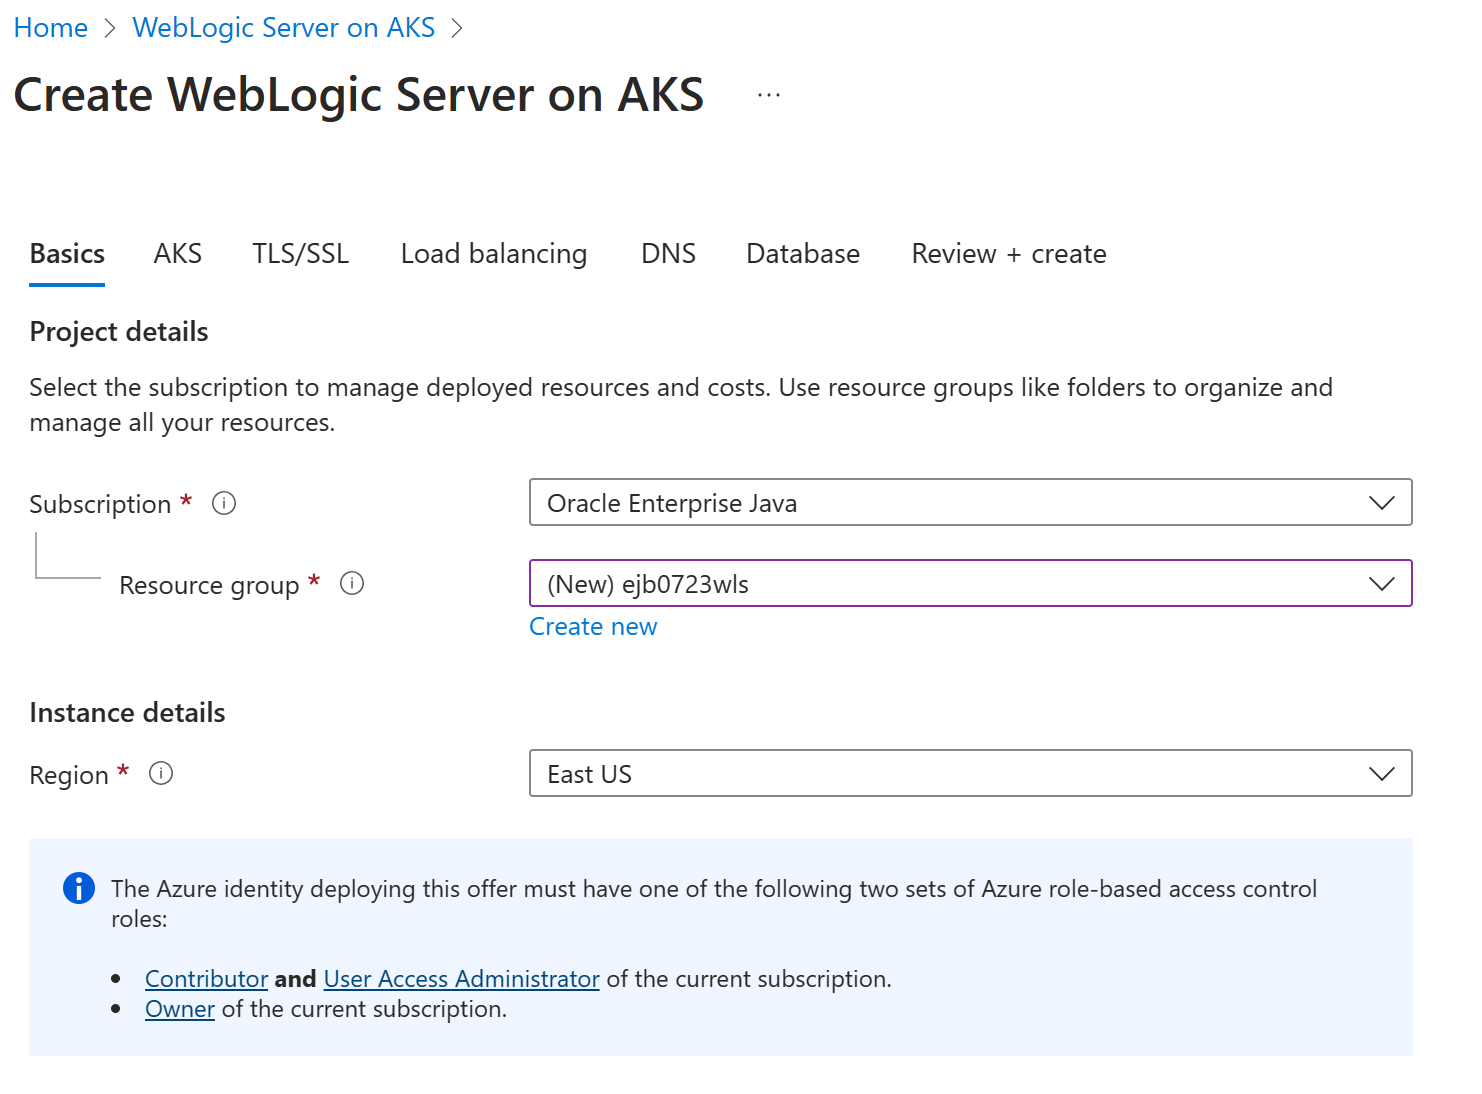
In the Resource group field, select Create new and then fill in a value for the resource group. Because resource groups must be unique within a subscription, pick a unique name. An easy way to have unique names is to use a combination of your initials, today's date, and some identifier - for example,
ejb0723wls.Under Instance details, select the region for the deployment. For a list of Azure regions where AKS is available, see AKS region availability.
Under Credentials for WebLogic, leave the default value for Username for WebLogic Administrator.
Fill in
wlsAksCluster2022for the Password for WebLogic Administrator. Use the same value for the confirmation and Password for WebLogic Model encryption fields.Select Next.


Use the following steps start the deployment process:
Scroll to the section labeled Provide an Oracle Single Sign-On (SSO) account. Fill in your Oracle SSO credentials from the preconditions.
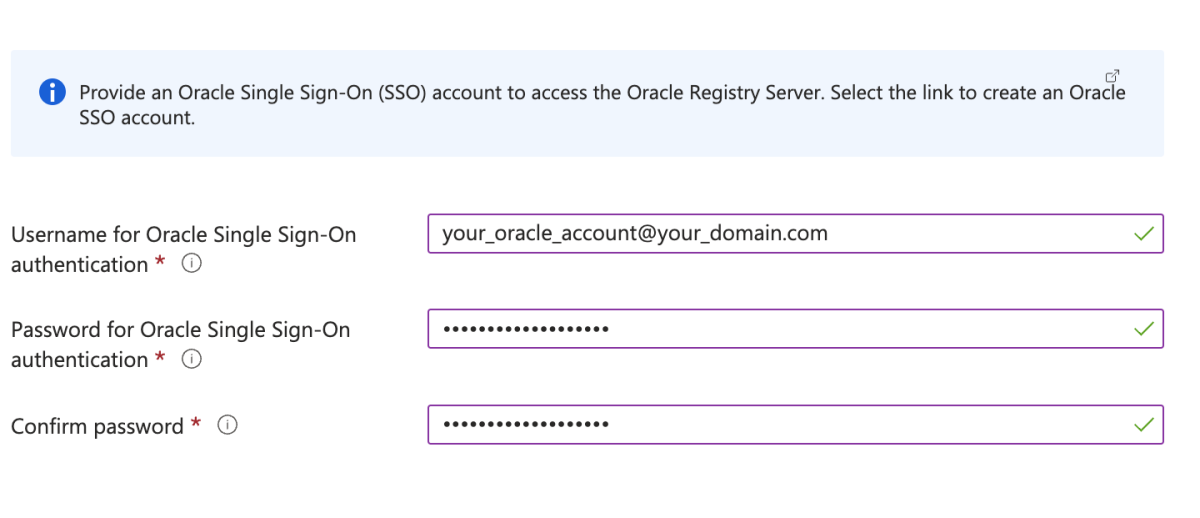
Make sure you note the steps in the info box starting with Before moving forward, you must accept the Oracle Standard Terms and Restrictions.
Depending on whether or not the Oracle SSO account has an Oracle support entitlement, select the appropriate option for Select the type of WebLogic Server Images. If the account has a support entitlement, select Patched WebLogic Server Images. Otherwise, select General WebLogic Server Images.
Leave the value in Select desired combination of WebLogic Server... at its default value. You have a broad range of choices for WebLogic Server, JDK, and OS version.
In the Application section, next to Deploy an application?, select No.

The following steps make it so the WebLogic Server admin console and the sample app are exposed to the public Internet with a built-in Application Gateway ingress add-on. For a more information, see What is Application Gateway Ingress Controller?
Select Next to see the TLS/SSL pane.
Select Next to see the Load balancing pane.
Next to Load Balancing Options, select Application Gateway Ingress Controller.
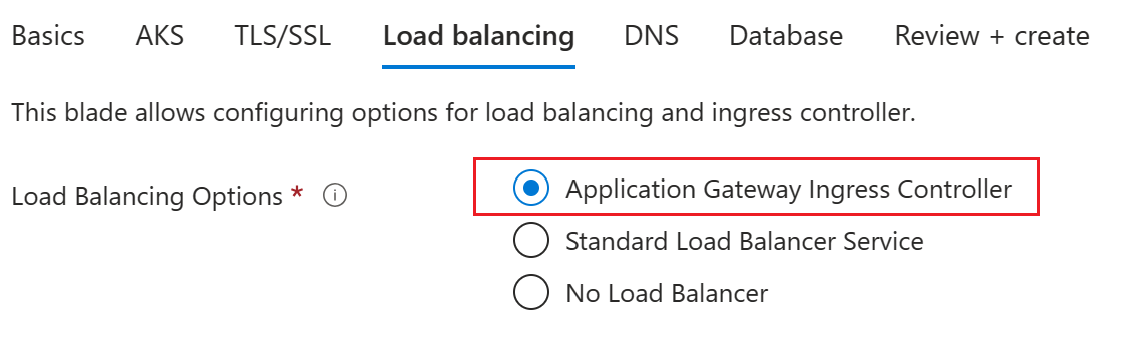
Under the Application Gateway Ingress Controller, you should see all fields prepopulated with the defaults for Virtual network and Subnet. Leave the default values.
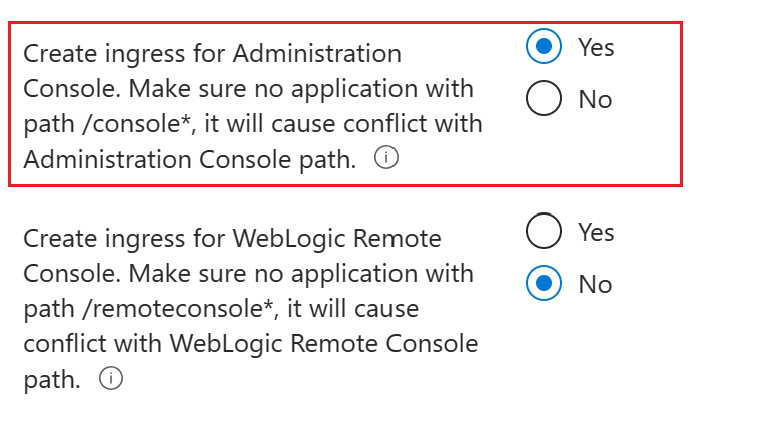
For Create ingress for Administration Console, select Yes.
Select Next to see the DNS pane.
Select Next to see the Database pane.


Use the following steps to configure a database connection using a managed identity:
- For Connect to database?, select Yes.
- Under Connection settings, for Choose database type, open the dropdown menu and then select Microsoft SQL Server (with support for passwordless connection).
- For JNDI Name, input jdbc/WebLogicCafeDB.
- For DataSource Connection String, input the connection string you obtained in last section.
- Select Use passwordless datasource connection.
- For User assigned managed identity, select the managed identity you created in previous step. In this example, its name is
myManagedIdentity. - Select Add.
The Connection settings section should look like the following screenshot:

Use the following steps to complete the deployment:
- Select Review + create. Ensure that validation doesn't fail. If it fails, fix any validation problems, then select Review + create again.
- Select Create.
- Track the progress of the deployment on the Deployment is in progress page.
Depending on network conditions and other activity in your selected region, the deployment might take up to 50 minutes to complete.
Note
If your organization requires you to deploy the workload within a corporate virtual network with no public IPs allowed, you can choose the internal Load Balancer service. To configure the internal Load Balancer service, use the following steps in the Load balancing tab:
For Load Balancing Options, select Standard Load Balancer Service.
Select Use Internal Load Balancer.
Add the following rows to the table:
Service name prefix Target Port wls-admin-internaladmin-server7001 wls-cluster-internalcluster-18001
The Load balancing tab should look like the following screenshot:

After the deployment, you can find the access URLs of the admin server and cluster from the output, labeled adminConsoleExternalUrl and clusterExternalUrl.
Examine the deployment output
Use the steps in this section to verify that the deployment was successful.
If you navigated away from the Deployment is in progress page, the following steps show you how to get back to that page. If you're still on the page that shows Your deployment is complete, you can skip to step 5 after the next screenshot.
In the corner of any Azure portal page, select the hamburger menu and select Resource groups.
In the box with the text Filter for any field, enter the first few characters of the resource group you created previously. If you followed the recommended convention, enter your initials, then select the appropriate resource group.
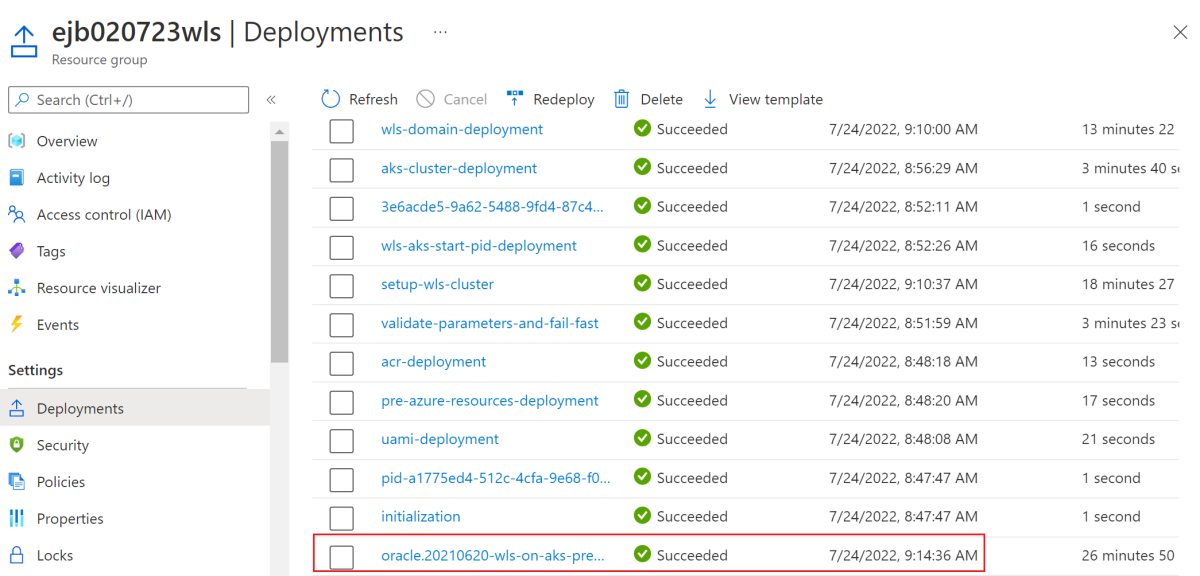
In the navigation pane, in the Settings section, select Deployments. You see an ordered list of the deployments to this resource group, with the most recent one first.
Scroll to the oldest entry in this list. This entry corresponds to the deployment you started in the preceding section. Select the oldest deployment, as shown in the following screenshot.
In the navigation pane, select Outputs. This list shows the output values from the deployment. Useful information is included in the outputs.
The adminConsoleExternalUrl value is the fully qualified, public Internet visible link to the WebLogic Server admin console for this AKS cluster. Select the copy icon next to the field value to copy the link to your clipboard. Save this value aside for later.
The clusterExternalUrl value is the fully qualified, public Internet visible link to the sample app deployed in WebLogic Server on this AKS cluster. Select the copy icon next to the field value to copy the link to your clipboard. Save this value aside for later.
The shellCmdtoOutputWlsImageModelYaml value is the base64 string of the WDT model that is used to build the container image. Save this value aside for later.
The shellCmdtoOutputWlsImageProperties value is the base64 string of the WDT model properties that is used to build the container image. Save this value aside for later.
The shellCmdtoConnectAks value is the Azure CLI command to connect to this specific AKS cluster.

The other values in the outputs are beyond the scope of this article, but are explained in detail in the WebLogic on AKS user guide.
Configure and deploy the sample application
The offer provisions the WebLogic Server cluster via model in image. Currently, the WebLogic Server cluster has no application deployed.
This section updates the WebLogic Server cluster by deploying a sample application using auxiliary image.
Check out the application
In this section, you clone the sample code for this guide. The sample is on GitHub in the weblogic-on-azure repository in the javaee/weblogic-cafe/ folder. Here's the file structure of the application.
weblogic-cafe
├── pom.xml
└── src
    └── main
        ├── java
        │   └── cafe
        │       ├── model
        │       │   ├── CafeRepository.java
        │       │   └── entity
        │       │       └── Coffee.java
        │       └── web
        │           ├── rest
        │           │   └── CafeResource.java
        │           └── view
        │               └── Cafe.java
        ├── resources
        │   ├── META-INF
        │   │   └── persistence.xml
        │   └── cafe
        │       └── web
        │           ├── messages.properties
        │           └── messages_es.properties
        └── webapp
            ├── WEB-INF
            │   ├── beans.xml
            │   ├── faces-config.xml
            │   └── web.xml
            ├── index.xhtml
            └── resources
                └── components
                    └── inputPrice.xhtml
Use the following commands to clone the repository:
# cd <parent-directory-to-check-out-sample-code>
export BASE_DIR=$PWD

git clone --single-branch https://github.com/microsoft/weblogic-on-azure.git --branch 20240201 $BASE_DIR/weblogic-on-azure
If you see a message about being in "detached HEAD" state, this message is safe to ignore. It just means you checked out a tag.
Use the following command to build javaee/weblogic-cafe/:
mvn clean package --file $BASE_DIR/weblogic-on-azure/javaee/weblogic-cafe/pom.xml
The package should be successfully generated and located at $BASE_DIR/weblogic-on-azure/javaee/weblogic-cafe/target/weblogic-cafe.war. If you don't see the package, you must troubleshoot and resolve the issue before you continue.
Use Azure Container Registry to create an auxiliary image
The steps in this section show you how to build an auxiliary image. This image includes the following components:
- The Model in Image model files
- Your application
- The Java Database Connectivity (JDBC) driver archive file
- The WebLogic Deploy Tooling installation
An auxiliary image is a Docker container image containing your app and configuration. The WebLogic Kubernetes Operator combines your auxiliary image with the domain.spec.image in the AKS cluster that contains the WebLogic Server, JDK, and operating system. For more information about auxiliary images, see Auxiliary images in the Oracle documentation.
This section requires a Linux terminal with Azure CLI and kubectl installed.
Use the following steps to build the image:
Use the following commands to create a directory to stage the models and application:
mkdir -p ${BASE_DIR}/mystaging/models
cd ${BASE_DIR}/mystaging/models
Copy the shellCmdtoOutputWlsImageModelYaml value that you saved from the deployment outputs, paste it into the Bash window, and run the command. The command should look similar to the following example:
echo -e IyBDb3B5cmlna...Cgo= | base64 -d > model.yamlThis command produces a ${BASE_DIR}/mystaging/models/model.yaml file with contents similar to the following example:
# Copyright (c) 2020, 2021, Oracle and/or its affiliates.
# Licensed under the Universal Permissive License v 1.0 as shown at https://oss.oracle.com/licenses/upl.

# Based on ./kubernetes/samples/scripts/create-weblogic-domain/model-in-image/model-images/model-in-image__WLS-v1/model.10.yaml
# in https://github.com/oracle/weblogic-kubernetes-operator.

domainInfo:
  AdminUserName: "@@SECRET:__weblogic-credentials__:username@@"
  AdminPassword: "@@SECRET:__weblogic-credentials__:password@@"
  ServerStartMode: "prod"

topology:
  Name: "@@ENV:CUSTOM_DOMAIN_NAME@@"
  ProductionModeEnabled: true
  AdminServerName: "admin-server"
  Cluster:
    "cluster-1":
      DynamicServers:
        ServerTemplate: "cluster-1-template"
        ServerNamePrefix: "@@ENV:MANAGED_SERVER_PREFIX@@"
        DynamicClusterSize: "@@PROP:CLUSTER_SIZE@@"
        MaxDynamicClusterSize: "@@PROP:CLUSTER_SIZE@@"
        MinDynamicClusterSize: "0"
        CalculatedListenPorts: false
  Server:
    "admin-server":
      ListenPort: 7001
  ServerTemplate:
    "cluster-1-template":
      Cluster: "cluster-1"
      ListenPort: 8001
  SecurityConfiguration:
    NodeManagerUsername: "@@SECRET:__weblogic-credentials__:username@@"
    NodeManagerPasswordEncrypted: "@@SECRET:__weblogic-credentials__:password@@"

resources:
  SelfTuning:
    MinThreadsConstraint:
      SampleMinThreads:
        Target: "cluster-1"
        Count: 1
    MaxThreadsConstraint:
      SampleMaxThreads:
        Target: "cluster-1"
        Count: 10
    WorkManager:
      SampleWM:
        Target: "cluster-1"
        MinThreadsConstraint: "SampleMinThreads"
        MaxThreadsConstraint: "SampleMaxThreads"
In a similar way, copy the shellCmdtoOutputWlsImageProperties value, paste it into the Bash window, and run the command. The command should look similar to the following example:
echo -e IyBDb3B5cml...pFPTUK | base64 -d > model.propertiesThis command produces a ${BASE_DIR}/mystaging/models/model.properties file with contents similar to the following example:
# Copyright (c) 2021, Oracle Corporation and/or its affiliates.
# Licensed under the Universal Permissive License v 1.0 as shown at https://oss.oracle.com/licenses/upl.

# Based on ./kubernetes/samples/scripts/create-weblogic-domain/model-in-image/model-images/model-in-image__WLS-v1/model.10.properties
# in https://github.com/oracle/weblogic-kubernetes-operator.

CLUSTER_SIZE=5
Use the following steps to create the application model file.
Use the following commands to copy weblogic-cafe.war and save it to wlsdeploy/applications:
mkdir -p ${BASE_DIR}/mystaging/models/wlsdeploy/applications
cp $BASE_DIR/weblogic-on-azure/javaee/weblogic-cafe/target/weblogic-cafe.war ${BASE_DIR}/mystaging/models/wlsdeploy/applications/weblogic-cafe.war
Use the following commands to create the application model file with the contents shown. Save the model file to ${BASE_DIR}/mystaging/models/appmodel.yaml.
cat <<EOF >appmodel.yaml
appDeployments:
  Application:
    weblogic-cafe:
      SourcePath: 'wlsdeploy/applications/weblogic-cafe.war'
      ModuleType: ear
      Target: 'cluster-1'
EOF
Use the following steps to configure the data source connection.
Use the following steps to download and install the Microsoft SQL Server JDBC driver and Azure Identity Extension that enables database connections using Azure Managed Identity.
Use the following commands to download and install Microsoft SQL Server JDBC driver to
wlsdeploy/externalJDBCLibraries:export DRIVER_VERSION="10.2.1.jre8" export MSSQL_DRIVER_URL="https://repo.maven.apache.org/maven2/com/microsoft/sqlserver/mssql-jdbc/${DRIVER_VERSION}/mssql-jdbc-${DRIVER_VERSION}.jar" mkdir ${BASE_DIR}/mystaging/models/wlsdeploy/externalJDBCLibraries curl -m 120 -fL ${MSSQL_DRIVER_URL} -o ${BASE_DIR}/mystaging/models/wlsdeploy/externalJDBCLibraries/mssql-jdbc-${DRIVER_VERSION}.jarUse the following commands to install Azure Identity Extension to
wlsdeploy/classpathLibraries:curl -LO https://github.com/oracle/weblogic-azure/raw/refs/heads/main/weblogic-azure-aks/src/main/resources/azure-identity-extensions.xml mvn dependency:copy-dependencies -f azure-identity-extensions.xml mkdir -p ${BASE_DIR}/mystaging/models/wlsdeploy/classpathLibraries/azureLibraries mkdir ${BASE_DIR}/mystaging/models/wlsdeploy/classpathLibraries/jackson # fix JARs conflict issue in GA images, put jackson libraries to PRE_CLASSPATH to upgrade the existing libs. mv target/dependency/jackson-annotations-*.jar ${BASE_DIR}/mystaging/models/wlsdeploy/classpathLibraries/jackson/ mv target/dependency/jackson-core-*.jar ${BASE_DIR}/mystaging/models/wlsdeploy/classpathLibraries/jackson/ mv target/dependency/jackson-databind-*.jar ${BASE_DIR}/mystaging/models/wlsdeploy/classpathLibraries/jackson/ mv target/dependency/jackson-dataformat-xml-*.jar ${BASE_DIR}/mystaging/models/wlsdeploy/classpathLibraries/jackson/ # Thoes jars will be appended to CLASSPATH mv target/dependency/*.jar ${BASE_DIR}/mystaging/models/wlsdeploy/classpathLibraries/azureLibraries/Use the following commands to clean up resources:
rm target -f -r
rm azure-identity-extensions.xml
Connect to the AKS cluster by copying the shellCmdtoConnectAks value that you saved aside previously, pasting it into the Bash window, then running the command. The command should look similar to the following example:
az account set --subscription <subscription>;
az aks get-credentials \
    --resource-group <resource-group> \
    --name <name>
You should see output similar to the following example. If you don't see this output, troubleshoot and resolve the problem before continuing.
Merged "<name>" as current context in /Users/<username>/.kube/configExport the database connection model and save it to ${BASE_DIR}/mystaging/models/dbmodel.yaml. The following steps extract the database configuration model from the ConfigMap
sample-domain1-wdt-config-map. The name follows the format<domain-uid>-wdt-config-map, where<domain-uid>is set during the offer deployment. If you modified the default value, replace it with your own domain UID.The data key is <db-secret-name>.yaml. Use the following command to retrieve the database secret name:
export WLS_DOMAIN_UID=sample-domain1
export WLS_DOMAIN_NS=${WLS_DOMAIN_UID}-ns
export DB_K8S_SECRET_NAME=$(kubectl get secret -n ${WLS_DOMAIN_NS} | grep "ds-secret" | awk '{print $1}')
Next, extract the database model with this command:
kubectl get configmap sample-domain1-wdt-config-map -n ${WLS_DOMAIN_NS} -o=jsonpath="{['data']['${DB_K8S_SECRET_NAME}\.yaml']}" >${BASE_DIR}/mystaging/models/dbmodel.yamlFinally, use the following command to verify the content of dbmodel.yaml.
cat ${BASE_DIR}/mystaging/models/dbmodel.yamlThe output of this command should resemble the following structure:
# Copyright (c) 2020, 2021, Oracle and/or its affiliates.
# Licensed under the Universal Permissive License v 1.0 as shown at https://oss.oracle.com/licenses/upl.

resources:
  JDBCSystemResource:
    jdbc/WebLogicCafeDB:
      Target: 'cluster-1'
      JdbcResource:
      JDBCDataSourceParams:
         JNDIName: [
            jdbc/WebLogicCafeDB
         ]
         GlobalTransactionsProtocol: OnePhaseCommit
      JDBCDriverParams:
         DriverName: com.microsoft.sqlserver.jdbc.SQLServerDriver
         URL: '@@SECRET:ds-secret-sqlserver-1727147748:url@@'
         PasswordEncrypted: '@@SECRET:ds-secret-sqlserver-1727147748:password@@'
         Properties:
            user:
            Value: '@@SECRET:ds-secret-sqlserver-1727147748:user@@'
      JDBCConnectionPoolParams:
            TestTableName: SQL SELECT 1
            TestConnectionsOnReserve: true
Use the following commands to create an archive file and then remove the wlsdeploy folder, which you don't need anymore:
cd ${BASE_DIR}/mystaging/models
zip -r archive.zip wlsdeploy

rm -f -r wlsdeploy
Use the following commands to download and install WebLogic Deploy Tooling (WDT) in the staging directory and remove its weblogic-deploy/bin/*.cmd files, which aren't used in UNIX environments:
cd ${BASE_DIR}/mystaging
curl -m 120 -fL https://github.com/oracle/weblogic-deploy-tooling/releases/latest/download/weblogic-deploy.zip -o weblogic-deploy.zip

unzip weblogic-deploy.zip -d .
rm ./weblogic-deploy/bin/*.cmd
Use the following command to clean up the WDT installer:
rm weblogic-deploy.zipUse the following commands to create a docker file:
cd ${BASE_DIR}/mystaging
cat <<EOF >Dockerfile
FROM busybox
ARG AUXILIARY_IMAGE_PATH=/auxiliary
ARG USER=oracle
ARG USERID=1000
ARG GROUP=root
ENV AUXILIARY_IMAGE_PATH=\${AUXILIARY_IMAGE_PATH}
RUN adduser -D -u \${USERID} -G \$GROUP \$USER
COPY --chown=\$USER:\$GROUP ./ \${AUXILIARY_IMAGE_PATH}/
USER \$USER
EOF
Run the
az acr buildcommand using ${BASE_DIR}/mystaging/Dockerfile, as shown in the following example:export ACR_NAME=<value-from-clipboard> export IMAGE="wlsaks-auxiliary-image:1.0"Use the following commands to double-check the staging files:
cd ${BASE_DIR}/mystaging
find -maxdepth 2 -type f -print
These commands produce output similar to the following example:
./models/model.properties
./models/model.yaml
./models/appmodel.yaml
./models/dbmodel.yaml
./models/archive.zip
./Dockerfile
./weblogic-deploy/VERSION.txt
./weblogic-deploy/LICENSE.txt
Build the image with
az acr build, as shown in the following example:az acr build -t ${IMAGE} --build-arg AUXILIARY_IMAGE_PATH=/auxiliary -r ${ACR_NAME} --platform linux/amd64 .When you build the image successfully, the output looks similar to the following example:
...
Step 1/9 : FROM busybox
latest: Pulling from library/busybox
Digest: sha256:9ae97d36d26566ff84e8893c64a6dc4fe8ca6d1144bf5b87b2b85a32def253c7
Status: Image is up to date for busybox:latest
---> 65ad0d468eb1
Step 2/9 : ARG AUXILIARY_IMAGE_PATH=/auxiliary
---> Running in 1f8f4e82ccb6
Removing intermediate container 1f8f4e82ccb6
---> 947fde618be9
Step 3/9 : ARG USER=oracle
---> Running in dda021591e41
Removing intermediate container dda021591e41
---> f43d84be4517
Step 4/9 : ARG USERID=1000
---> Running in cac4df6dfd13
Removing intermediate container cac4df6dfd13
---> e5513f426c74
Step 5/9 : ARG GROUP=root
---> Running in 8fec1763270c
Removing intermediate container 8fec1763270c
---> 9ef233dbe279
Step 6/9 : ENV AUXILIARY_IMAGE_PATH=${AUXILIARY_IMAGE_PATH}
---> Running in b7754f58157a
Removing intermediate container b7754f58157a
---> 4a26a97eb572
Step 7/9 : RUN adduser -D -u ${USERID} -G $GROUP $USER
---> Running in b6c1f1a81af1
Removing intermediate container b6c1f1a81af1
---> 97d3e5ad7540
Step 8/9 : COPY --chown=$USER:$GROUP ./ ${AUXILIARY_IMAGE_PATH}/
---> 21088171876f
Step 9/9 : USER $USER
---> Running in 825e0abc9f6a
Removing intermediate container 825e0abc9f6a
---> b81d6430fcda
Successfully built b81d6430fcda
Successfully tagged wlsaksacru6jyly7kztoqu.azurecr.io/wlsaks-auxiliary-image:1.0
2024/08/28 03:06:19 Successfully executed container: build
2024/08/28 03:06:19 Executing step ID: push. Timeout(sec): 3600, Working directory: '', Network: ''
2024/08/28 03:06:19 Pushing image: wlsaksacru6jyly7kztoqu.azurecr.io/wlsaks-auxiliary-image:1.0, attempt 1
The push refers to repository [wlsaksacru6jyly7kztoqu.azurecr.io/wlsaks-auxiliary-image]
ee589b3cda86: Preparing
c1fd1adab3b9: Preparing
d51af96cf93e: Preparing
c1fd1adab3b9: Pushed
d51af96cf93e: Pushed
ee589b3cda86: Pushed
1.0: digest: sha256:c813eb75576eb07a179c3cb4e70106ca7dd280f933ab33a2f6858de673b12eac size: 946
2024/08/28 03:06:21 Successfully pushed image: wlsaksacru6jyly7kztoqu.azurecr.io/wlsaks-auxiliary-image:1.0
2024/08/28 03:06:21 Step ID: build marked as successful (elapsed time in seconds: 8.780235)
2024/08/28 03:06:21 Populating digests for step ID: build...
2024/08/28 03:06:22 Successfully populated digests for step ID: build
2024/08/28 03:06:22 Step ID: push marked as successful (elapsed time in seconds: 1.980158)
2024/08/28 03:06:22 The following dependencies were found:
2024/08/28 03:06:22
- image:
   registry: wlsaksacru6jyly7kztoqu.azurecr.io
   repository: wlsaks-auxiliary-image
   tag: "1.0"
   digest: sha256:c813eb75576eb07a179c3cb4e70106ca7dd280f933ab33a2f6858de673b12eac
runtime-dependency:
   registry: registry.hub.docker.com
   repository: library/busybox
   tag: latest
   digest: sha256:9ae97d36d26566ff84e8893c64a6dc4fe8ca6d1144bf5b87b2b85a32def253c7
git: {}

Run ID: ca1 was successful after 14s
The image is pushed to ACR after a success build.
You can run
az acr repository showto test whether the image is pushed to the remote repository successfully, as shown in the following example:az acr repository show --name ${ACR_NAME} --image ${IMAGE}This command should produce output similar to the following example:
{
   "changeableAttributes": {
      "deleteEnabled": true,
      "listEnabled": true,
      "readEnabled": true,
      "writeEnabled": true
   },
   "createdTime": "2024-01-24T06:14:19.4546321Z",
   "digest": "sha256:a1befbefd0181a06c6fe00848e76f1743c1fecba2b42a975e9504ba2aaae51ea",
   "lastUpdateTime": "2024-01-24T06:14:19.4546321Z",
   "name": "1.0",
   "quarantineState": "Passed",
   "signed": false
}
Apply the auxiliary image
In the previous steps, you created the auxiliary image including models and WDT. Apply the auxiliary image to the WebLogic Server cluster with the following steps.
Apply the auxiliary image by patching the domain custom resource definition (CRD) using the
kubectl patchcommand.The auxiliary image is defined in
spec.configuration.model.auxiliaryImages, as shown in the following example:spec: clusters: - name: sample-domain1-cluster-1 configuration: model: auxiliaryImages: - image: wlsaksacrafvzeyyswhxek.azurecr.io/wlsaks-auxiliary-image:1.0 imagePullPolicy: IfNotPresent sourceModelHome: /auxiliary/models sourceWDTInstallHome: /auxiliary/weblogic-deployUse the following commands to increase the
restartVersionvalue and usekubectl patchto apply the auxiliary image to the domain CRD using the definition shown:export VERSION=$(kubectl -n ${WLS_DOMAIN_NS} get domain ${WLS_DOMAIN_UID} -o=jsonpath='{.spec.restartVersion}' | tr -d "\"") export VERSION=$((VERSION+1)) export ACR_LOGIN_SERVER=$(az acr show --name ${ACR_NAME} --query "loginServer" --output tsv) cat <<EOF >patch-file.json [ { "op": "replace", "path": "/spec/restartVersion", "value": "${VERSION}" }, { "op": "add", "path": "/spec/configuration/model/auxiliaryImages", "value": [{"image": "$ACR_LOGIN_SERVER/$IMAGE", "imagePullPolicy": "IfNotPresent", "sourceModelHome": "/auxiliary/models", "sourceWDTInstallHome": "/auxiliary/weblogic-deploy"}] }, { "op": "remove", "path": "/spec/configuration/model/configMap" } ] EOF kubectl -n ${WLS_DOMAIN_NS} patch domain ${WLS_DOMAIN_UID} \ --type=json \ --patch-file patch-file.jsonBecause the database connection is configured in the auxiliary image, run the following command to remove the ConfigMap:
kubectl delete configmap sample-domain1-wdt-config-map -n ${WLS_DOMAIN_NS}
Before you proceed, wait until the following command produces the following output for the admin server and managed servers:
kubectl get pod -n ${WLS_DOMAIN_NS} -w
NAME                             READY   STATUS    RESTARTS   AGE
sample-domain1-admin-server      1/1     Running   0          20m
sample-domain1-managed-server1   1/1     Running   0          19m
sample-domain1-managed-server2   1/1     Running   0          18m
It might take 5-10 minutes for the system to reach this state. The following list provides an overview of what's happening while you wait:
- You should see the
sample-domain1-introspectorrunning first. This software looks for changes to the domain custom resource so it can take the necessary actions on the Kubernetes cluster. - When changes are detected, the domain introspector kills and starts new pods to roll out the changes.
- Next, you should see the
sample-domain1-admin-serverpod terminate and restart. - Then, you should see the two managed servers terminate and restart.
- Only when all three pods show the
1/1 Runningstate, is it ok to proceed.
Verify the functionality of the deployment
Use the following steps to verify the functionality of the deployment by viewing the WebLogic Server admin console and the sample app:
Paste the adminConsoleExternalUrl value into the address bar of an Internet-connected web browser. You should see the familiar WebLogic Server admin console sign-in screen.
Sign in with the username
weblogicand the password you entered when deploying WebLogic Server from the Azure portal. Recall that this value iswlsAksCluster2022.In the Domain Structure box, select Services.
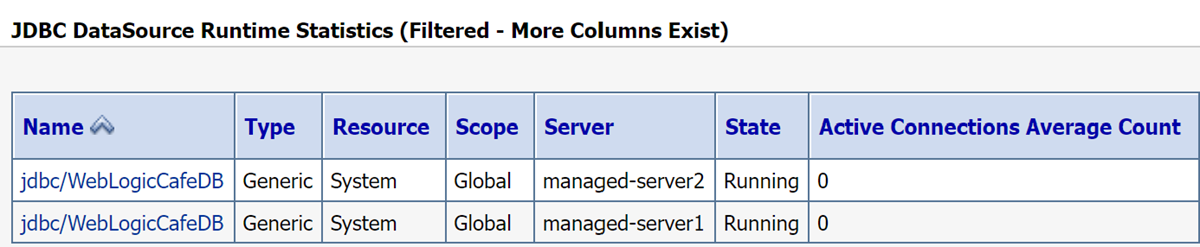
Under the Services, select Data Sources.
In the Summary of JDBC Data Sources panel, select Monitoring. Your screen should look similar to the following example. You find the state of data source is running on managed servers.
In the Domain Structure box, select Deployments.
In the Deployments table, there should be one row. The name should be the same value as the
Applicationvalue in your appmodel.yaml file. Select the name.Select the Testing tab.
Select weblogic-cafe.
In the Settings for weblogic-cafe panel, select the Testing tab.
Expand the + icon next to weblogic-cafe. Your screen should look similar to the following example. In particular, you should see values similar to
http://sample-domain1-managed-server1:8001/weblogic-cafe/index.xhtmlin the Test Point column.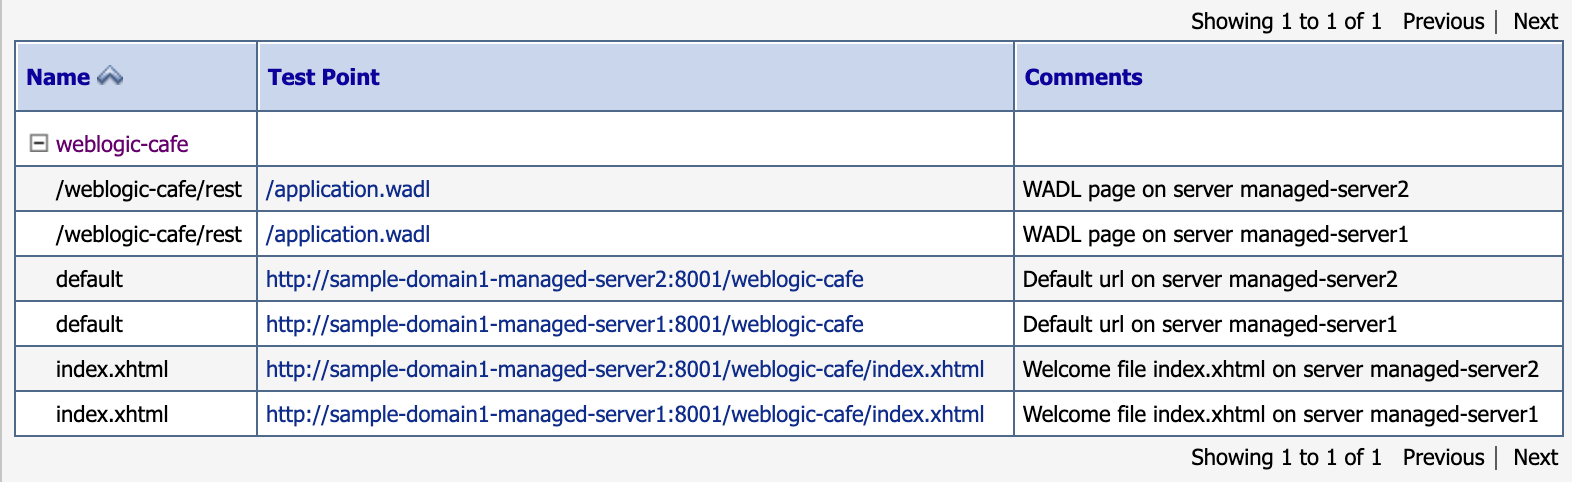
Note
The hyperlinks in the Test Point column are not selectable because we did not configure the admin console with the external URL on which it is running. This article shows the WebLogic Server admin console merely by way of demonstration. Don't use the WebLogic Server admin console for any durable configuration changes when running WebLogic Server on AKS. The cloud-native design of WebLogic Server on AKS requires that any durable configuration must be represented in the initial docker images or applied to the running AKS cluster using CI/CD techniques such as updating the model, as described in the Oracle documentation.
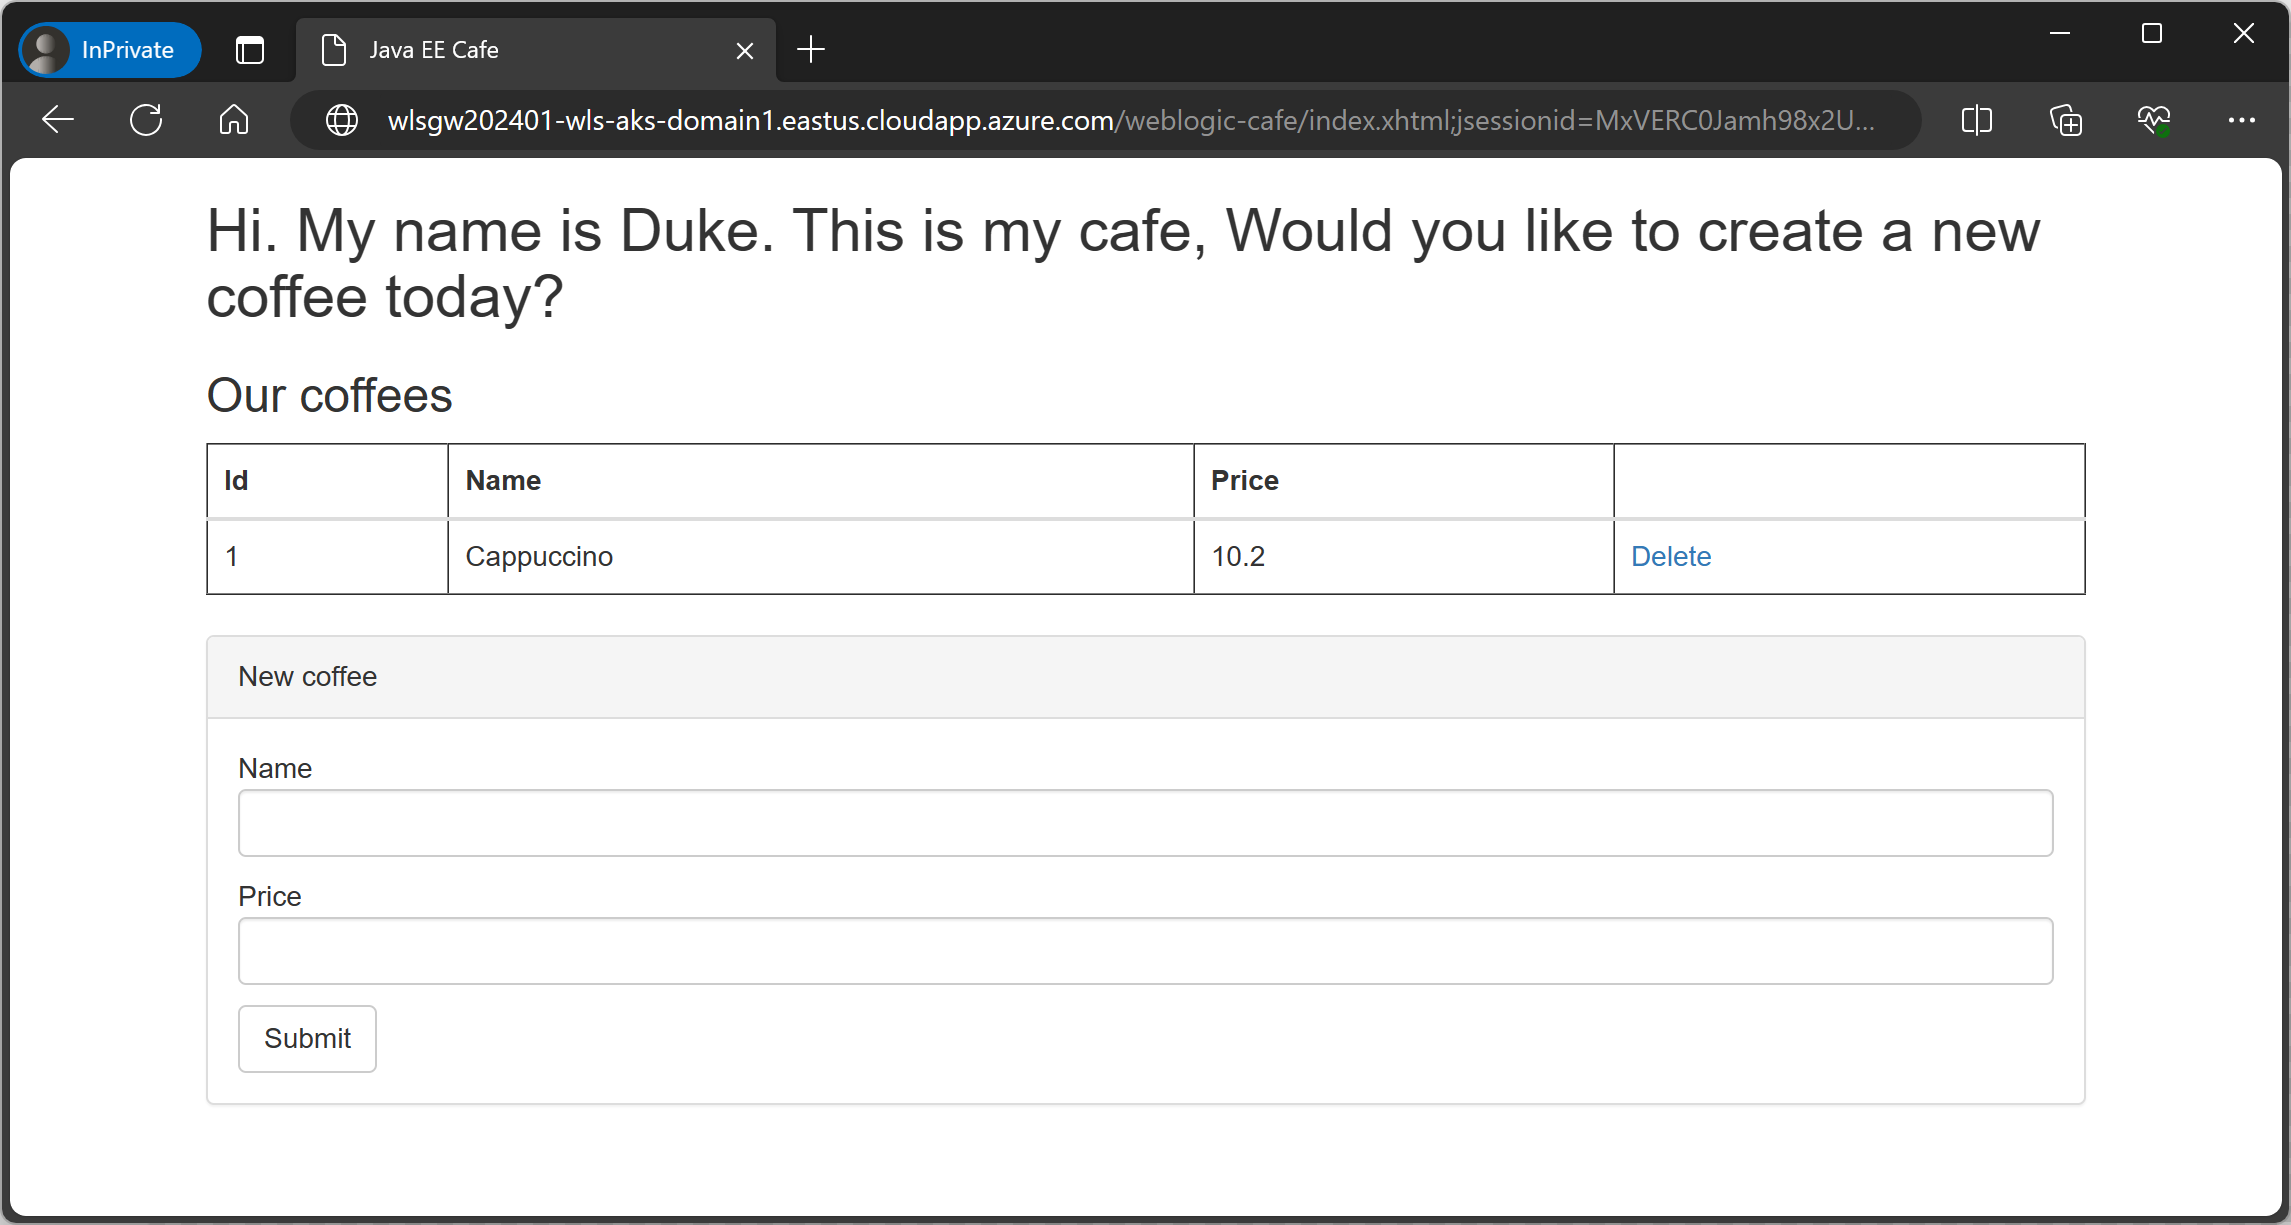
Understand the
context-pathvalue of the sample app you deployed. If you deployed the recommended sample app, thecontext-pathisweblogic-cafe.Construct a fully qualified URL for the sample app by appending the
context-pathto the clusterExternalUrl value. If you deployed the recommended sample app, the fully qualified URL should be something likehttp://wlsgw202401-wls-aks-domain1.eastus.cloudapp.azure.com/weblogic-cafe/.Paste the fully qualified URL in an Internet-connected web browser. If you deployed the recommended sample app, you should see results similar to the following screenshot:
Clean up resources
To avoid Azure charges, you should clean up unnecessary resources. When you no longer need the cluster, use the az group delete command. The following command removes the resource group, container service, container registry, database, and all related resources:
az group delete --name <resource-group-name> --yes --no-wait
az group delete --name <db-resource-group-name> --yes --no-wait
Next steps
Learn more about running WebLogic Server on AKS or virtual machines by following these links:
For more information about the Oracle WebLogic offers at Azure Marketplace, see Oracle WebLogic Server on Azure. These offers are all Bring-Your-Own-License. They assume that you already have the appropriate licenses with Oracle and are properly licensed to run offers in Azure.