Note
Access to this page requires authorization. You can try signing in or changing directories.
Access to this page requires authorization. You can try changing directories.
This article provides alternate ways of connecting to Azure Arc, which can be applicable to clusters that are connected via a proxy.
Connect an AKS Edge Essentials cluster to Arc using a proxy
Prerequisites
- An Azure subscription with either the Owner role or a combination of Contributor and User Access Administrator roles. You can check your access level by navigating to your subscription, selecting Access control (IAM) on the left-hand side of the Azure portal, and then selecting View my access. Read the Azure Resource Manager documentation for more information about managing resource groups.
- Enable all required resource providers in the Azure subscription such as Microsoft.HybridCompute, Microsoft.GuestConfiguration, Microsoft.HybridConnectivity, Microsoft.Kubernetes, and Microsoft.KubernetesConfiguration.
- Create and verify a resource group for AKS Edge Essentials Azure resources.
Note
You must have the Contributor role to be able to delete the resources within the resource group. Commands to disconnect from Arc will fail without this role assignment.
Step 1: configure your cluster for Azure connectivity
Download the Azure/AKS-Edge GitHub repo, if you haven't done so earlier. Navigate to the Code tab and click the Download Zip button to download the repository as a .zip file. Extract the .zip file to a local folder.
Provide details of your Azure subscription in the aide-userconfig.json file under the
Azuresection as described in the following table. To successfully connect to Azure using Azure Arc-enabled kubernetes, you need a service principal that provides role-based access to resources on Azure. If you already have the service principal ID and password, you can update all the fields in the aide-userconfig.json file. If you don't have a service principal, you can provide a name, and the script in the next step creates one and populates theAuthsection for you.Attribute Value type Description Azure.ClusterNamestring Provide a name for your cluster. By default, hostname_clusteris the name used.Azure.Locationstring The location of your resource group. Choose the location closest to your deployment. Azure.SubscriptionNamestring Your subscription name. Azure.SubscriptionIdGUID Your subscription ID. In the Azure portal, select the subscription you're using, then copy/paste the subscription ID string into the JSON. Azure.TenantIdGUID Your tenant ID. In the Azure portal, search "Azure Active Directory," which should take you to the Default Directory page. From here, you can copy/paste the tenant ID string into the JSON file. Azure.ResourceGroupNamestring The name of the Azure resource group to host your Azure resources for AKS Edge Essentials. You can use an existing resource group, or if you add a new name, the system creates one for you. Azure.ServicePrincipalNamestring Azure service principal name. Azure.Auth.ServicePrincipalIdGUID The AppID of the Azure service principal to use as credentials. AKS Edge Essentials uses this service principal to connect your cluster to Arc. You can use an existing service principal or if you add a new name, the system creates one for you in the next step. Azure.Auth.Passwordstring The password (in clear text) for the Azure service principal to use as credentials. AksEdgeConfigFilestring The file name for the AKS Edge Essentials configuration ( aksedge-config.json). TheAksEdgeAzureSetup.ps1script updates theArcsection of this JSON file with the required information.Note
This procedure is required to be done only once per Azure subscription and doesn't need to be repeated for each Kubernetes cluster.
Run or double-click the AksEdgePrompt.cmd file to open an elevated PowerShell window with the required modules loaded. An overview of the PC information and the installed software versions is displayed.
Run the AksEdgeAzureSetup.ps1 script in the tools\scripts\AksEdgeAzureSetup folder. This script prompts you to log in with your credentials for setting up your Azure subscription:
# prompts for interactive login for service principal creation with Contributor role at resource group level
..\tools\scripts\AksEdgeAzureSetup\AksEdgeAzureSetup.ps1 .\aide-userconfig.json -spContributorRole

# (or) alternative option

# Prompts for interactive login for service principal creation with minimal privileges
..\tools\scripts\AksEdgeAzureSetup\AksEdgeAzureSetup.ps1 .\aide-userconfig.json
Make sure that the credentials are valid, using the AksEdgeAzureSetup-Test.ps1 script. This script signs in to Azure using the new service principal credentials and checks the status of Azure resources:
# Test the credentials
..\tools\scripts\AksEdgeAzureSetup\AksEdgeAzureSetup-Test.ps1 .\aide-userconfig.json
Step 2: connect your cluster to Azure
Load the JSON configuration into the AksEdgeShell using
Read-AideUserConfigand verify that the values are updated usingGet-AideUserConfig. Alternatively, you can reopen AksEdgePrompt.cmd to use the updated JSON configuration:Read-AideUserConfig Get-AideUserConfigImportant
Each time you modify aide-userconfig.json, run
Read-AideUserConfigto reload, or close and re-open AksEdgePrompt.cmd.Run
Initialize-AideArc. This installs Azure CLI (if not already installed), signs in to Azure with the given credentials, and validates the Azure configuration (resource providers and resource group status):Initialize-AideArcRun
Connect-AideArcto install and connect the host machine to the Arc-enabled server and to connect the existing cluster to Arc-enabled Kubernetes:# Connect Arc-enabled server and Arc-enabled Kubernetes Connect-AideArcAlternatively, you can connect them individually using
Connect-AideArcServerfor Arc-enabled servers, andConnect-AideArcKubernetesfor Arc-enabled Kubernetes:# Connect Arc-enabled server Connect-AideArcServer # Connect Arc-enabled Kubernetes Connect-AideArcKubernetesNote
This step can take up to 10 minutes and PowerShell might be stuck on "Establishing Azure Connected Kubernetes for
your cluster name". The PowerShell command outputsTrueand returns to the prompt when the process is completed. A bearer token is saved in servicetoken.txt in the tools folder.
Step 3: view your cluster on Azure
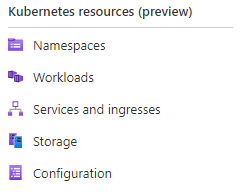
On the left panel, select the Namespaces blade under Kubernetes resources (preview):
To view your Kubernetes resources, you need a bearer token:
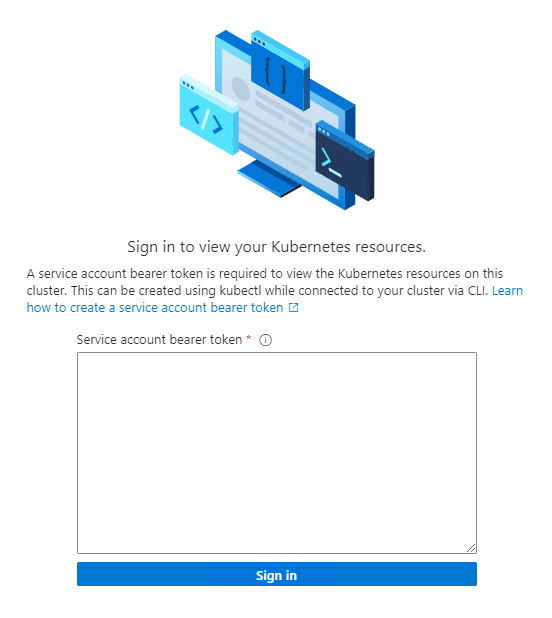
In your PowerShell window, run
Get-AksEdgeManagedServiceToken, copy the full string, and paste it into the Azure portal:
Now you can view resources on your cluster. The following image shows the Workloads blade, showing the same as
kubectl get pods --all-namespaces: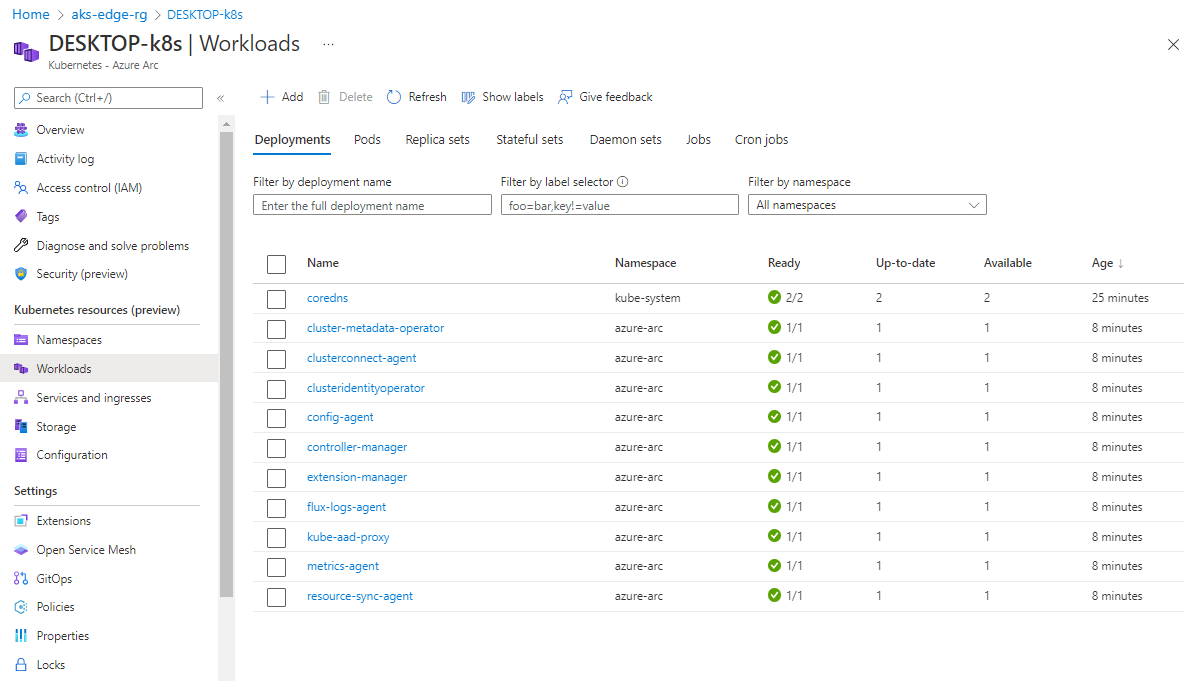


Disconnect AKS Edge Essentials cluster from Arc when using a proxy
Run Disconnect-AideArc to disconnect from the Arc-enabled server and Arc-enabled Kubernetes:
# Disconnect Arc-enabled server and Arc-enabled Kubernetes
Disconnect-AideArc
Alternatively, you can disconnect them individually using Connect-AideArcServer for Arc-enabled servers and Connect-AideArcKubernetes for Arc-enabled Kubernetes:
# Disconnect Arc-enabled server
Disconnect-AideArcServer
# Disconnect Arc-enabled Kubernetes
Disconnect-AideArcKubernetes
Connect host machine to Arc
You can connect the host machine using
Connect-AideArcServerfor Arc-enabled servers:# Connect Arc-enabled server Connect-AideArcServerTo disconnect the host machine from Arc, use
Disconnect-AideArcServerfor Arc-enabled servers:# Disconnect Arc-enabled server Disconnect-AideArcServerYou can also uninstall the Arc for Server agent following the steps here. For a complete clean-up through the Azure portal, delete the service principal and resource group you created for this example.