Deploy Java app with Open Liberty or WebSphere Liberty on Azure Kubernetes Service cluster
Applies to: AKS on Azure Stack HCI 22H2, AKS on Windows Server
This article demonstrates how to:
- Run your Java, Java EE, Jakarta EE, or MicroProfile application on the Open Liberty or WebSphere Liberty runtime.
- Build the application Docker image using Open Liberty container images.
- Deploy the containerized application to an on-premises AKS cluster in AKS enabled by Azure Arc using the Open Liberty Operator.
The Open Liberty Operator simplifies the deployment and management of applications running on Kubernetes clusters. With Open Liberty Operator, you can also perform more advanced operations, such as gathering traces and dumps.
For more information about Open Liberty, see the Open Liberty project page. For more information about IBM WebSphere Liberty, see the WebSphere Liberty product page.
This article is divided into two main parts:
Part 1 focuses on deploying the necessary artifacts in Azure. This deployment includes a resource group and Azure Container Registry. To perform these tasks, you can use either Azure Cloud Shell (easiest), which includes the latest version of Azure CLI, or a local system with the following tools installed:
- Prepare a local machine with a Unix-like operating system installed (for example, Ubuntu, macOS, Windows Subsystem for Linux).
- Install Azure CLI following the previous guidance.
- Install a Java SE implementation (for example, AdoptOpenJDK OpenJDK 8 LTS/OpenJ9).
- Install Maven 3.5.0 or higher.
- Install Docker for your operating system.
Part 2 focuses on deploying the application from your Azure Container Registry down into the AKS Arc environment. For this, you cannot use Azure Cloud Shell. For the AKS Arc environment, the following items are required:
- An AKS cluster with at least one Linux worker node that's up and running.
- You configured your local
kubectlenvironment to point to your AKS cluster. You can use the Get-AksHciCredential PowerShell command to access your cluster usingkubectl. - Git command-line tools installed on your system. On a Windows system, you can use Git Bash as the main console, and within the Git Bash console, call PowerShell and Azure when required.
Create a resource group in Azure
An Azure resource group is a logical group in which Azure resources are deployed and managed.
You can create a resource group called java-liberty-project when you use the az group create command in the eastus location. This resource group is used later for creating the Azure Container Registry instance:
RESOURCE_GROUP_NAME=java-liberty-project
az group create --name $RESOURCE_GROUP_NAME --location eastus
Create a Container Registry instance in Azure
Use the az acr create command to create the Azure Container Registry instance. The following example creates a Container Registry instance named youruniquecontainerregistryname. Make sure youruniquecontainerregistryname is unique within Azure:
REGISTRY_NAME=youruniquecontainerregistryname
az acr create --resource-group $RESOURCE_GROUP_NAME --name $REGISTRY_NAME --sku Basic --admin-enabled
After a short time, you should see JSON output that looks similar to the following example:
"provisioningState": "Succeeded",
"publicNetworkAccess": "Enabled",
"resourceGroup": "java-liberty-project",
Connect to the Container Registry instance in Azure
You must sign in to the Container Registry instance before you can push an image to it. Run the following commands to verify the connection. Make a note of your login details. You use those later when connecting to AKS:
LOGIN_SERVER=$(az acr show -n $REGISTRY_NAME --query 'loginServer' -o tsv)
USER_NAME=$(az acr credential show -n $REGISTRY_NAME --query 'username' -o tsv)
PASSWORD=$(az acr credential show -n $REGISTRY_NAME --query 'passwords[0].value' -o tsv)

echo $LOGIN_SERVER
echo $USER_NAME
echo $PASSWORD

docker login $LOGIN_SERVER -u $USER_NAME -p $PASSWORD
You should see Login Succeeded at the end of the command output if you've logged into the Container Registry instance successfully.
Build application image in Azure
To deploy and run your Liberty application on the AKS cluster, you must first containerize your application as a Docker image using Open Liberty container images or WebSphere Liberty container images:
- Clone the sample code for this guide. The sample is on GitHub.
- Change directory to
javaee-app-simple-clusterof your local clone. - Run
mvn clean packageto package the application. - Run
mvn liberty:devto test the application. You should see The defaultServer server is ready to run a smarter planet in the command output if the command was successful. Use CTRL-C to stop the application. - Run one of the following commands to build the application image and push it to the Container Registry instance.
Build with the Open Liberty base image if you prefer to use Open Liberty as a lightweight open source Java runtime:
# Build and tag application image. This causes the Container Registry instance to pull the necessary Open Liberty base images.
az acr build -t javaee-cafe-simple:1.0.0 -r $REGISTRY_NAME .
Build with the WebSphere Liberty base image if you prefer to use a commercial version of Open Liberty:
# Build and tag application image. This causes the Container Registry instance to pull the necessary WebSphere Liberty base images.
az acr build -t javaee-cafe-simple:1.0.0 -r $REGISTRY_NAME --file=Dockerfile-wlp .
Connect to your AKS cluster
To manage a Kubernetes cluster, you use kubectl, the Kubernetes command-line client. Once it's installed on Windows, kubectl can be run from the command prompt, PowerShell console, and Git Bash.
As a prerequisite, you should have configured your local kubectl environment to point to your AKS cluster. You can use the Get-AksHciCredential PowerShell command to access your cluster using kubectl:
Get-AksHciCredential -name AksHciClusterName
Note
The preceding command uses the default location for the Kubernetes configuration file, which is %USERPROFILE%.kube. You can specify a different location for your Kubernetes configuration file using -outputLocation.
Back in your console, to verify the connection to your cluster, use the kubectl get command to return a list of the cluster nodes:
kubectl get nodes
The following example output shows the single node created in the previous steps. Make sure the status of the node is Ready:
NAME                                STATUS   ROLES   AGE     VERSION
aks-nodepool1-xxxxxxxx-yyyyyyyyyy   Ready    agent   76s     v1.18.10
Install Open Liberty Operator
After creating the cluster and connecting to it, install the Open Liberty Operator by running the following commands:
OPERATOR_NAMESPACE=default
WATCH_NAMESPACE='""'

# Install Custom Resource Definitions (CRDs) for OpenLibertyApplication
kubectl apply -f https://raw.githubusercontent.com/OpenLiberty/open-liberty-operator/master/deploy/releases/0.7.1/openliberty-app-crd.yaml

# Install cluster-level role-based access
curl -L https://raw.githubusercontent.com/OpenLiberty/open-liberty-operator/master/deploy/releases/0.7.1/openliberty-app-cluster-rbac.yaml \
      | sed -e "s/OPEN_LIBERTY_OPERATOR_NAMESPACE/${OPERATOR_NAMESPACE}/" \
      | kubectl apply -f -

# Install the operator
curl -L https://raw.githubusercontent.com/OpenLiberty/open-liberty-operator/master/deploy/releases/0.7.1/openliberty-app-operator.yaml \
      | sed -e "s/OPEN_LIBERTY_WATCH_NAMESPACE/${WATCH_NAMESPACE}/" \
      | kubectl apply -n ${OPERATOR_NAMESPACE} -f -
Deploy application on the AKS cluster
Follow these steps to deploy the Liberty application on the AKS cluster. You must retrieve your login details from your earlier session.
If you used Azure Cloud Shell earlier, and are now using a separate console to connect to AKS, you must specify your credentials again:
LOGIN_SERVER=YourLoginServerFromEarlier
USER_NAME=YourUsernameFromEarlier
PASSWORD=YourPwdFromEarlier
Create a pull secret so that the AKS cluster is authenticated to pull the image from the Container Registry instance.
kubectl create secret docker-registry acr-secret \
   --docker-server=${LOGIN_SERVER} \
   --docker-username=${USER_NAME} \
   --docker-password=${PASSWORD}
Again, if you used Azure Cloud Shell earlier, and you're now using a separate tool or session to connect to AKS, you must clone the sample code for this guide. The sample is on GitHub.
Verify the current working directory is javaee-app-simple-cluster of your local clone.
Run the following commands to deploy your Liberty application with three replicas to the AKS cluster. Command output is also shown inline:
# Create OpenLibertyApplication "javaee-app-simple-cluster"
cat openlibertyapplication.yaml | sed -e "s/\${Container_Registry_URL}/${LOGIN_SERVER}/g" | sed -e "s/\${REPLICAS}/3/g" | kubectl apply -f -

openlibertyapplication.openliberty.io/javaee-app-simple-cluster created

# Check if OpenLibertyApplication instance is created
kubectl get openlibertyapplication javaee-app-simple-cluster

NAME                        IMAGE                                                   EXPOSED   RECONCILED   AGE
javaee-app-simple-cluster   youruniquecontainerregistryname.azurecr.io/javaee-cafe-simple:1.0.0             True         59s

# Check if deployment created by Operator is ready
kubectl get deployment javaee-app-simple-cluster --watch

NAME                        READY   UP-TO-DATE   AVAILABLE   AGE
javaee-app-simple-cluster   0/3     3            0           20s
Wait until you see 3/3 in the READY column and 3 in the AVAILABLE column. Then you can use CTRL-C to stop the
kubectlwatch process.
Test the application
When the application runs, a Kubernetes load balancer service exposes the application front end to the internet. This process can take a while to complete.
To monitor progress, use the kubectl get service command with the --watch argument.
kubectl get service javaee-app-simple-cluster --watch

NAME                        TYPE           CLUSTER-IP     EXTERNAL-IP     PORT(S)          AGE
javaee-app-simple-cluster   LoadBalancer   10.109.118.3   192.168.0.152   80:30580/TCP     68s
Once the EXTERNAL-IP address changes from pending to an actual public IP address, use CTRL-C to stop the kubectl watch process.
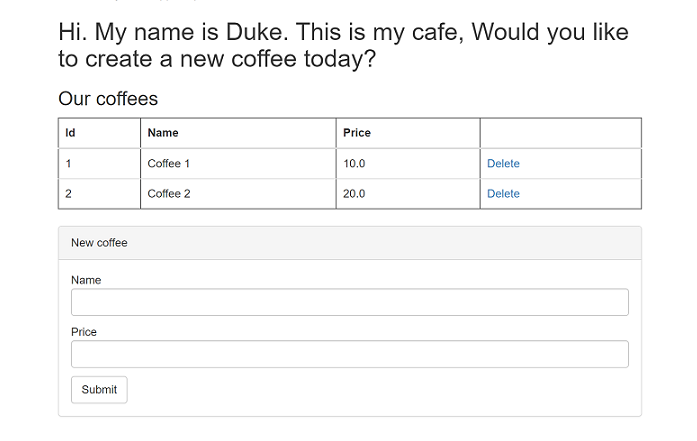
Open a web browser to the external IP address of your service (192.168.0.152 in this example) to see the application home page. You should see the pod name of your application replicas displayed at the top left of the page. Wait for a few minutes, and then refresh the page to see a different pod name displayed as a result of load balancing provided by the AKS cluster.
Note
Currently, the application doesn't use HTTPS. You should enable TLS with your own certificates.
Clean up the resources
To avoid Azure charges, you should clean up unnecessary resources. When you no longer need the cluster, use the az group delete command to remove the resource group, container registry, and related Azure resources:
RESOURCE_GROUP_NAME=java-liberty-project
az group delete --name $RESOURCE_GROUP_NAME --yes --no-wait
To clean up the resources deployed on AKS, run the following commands from your local console:
kubectl delete -f https://raw.githubusercontent.com/OpenLiberty/open-liberty-operator/master/deploy/releases/0.7.1/openliberty-app-crd.yaml
kubectl delete -f https://raw.githubusercontent.com/OpenLiberty/open-liberty-operator/master/deploy/releases/0.7.1/openliberty-app-operator.yaml
kubectl delete -f openlibertyapplication.yaml
Next steps
For more information, see the references used in this guide:
Feedback
Coming soon: Throughout 2024 we will be phasing out GitHub Issues as the feedback mechanism for content and replacing it with a new feedback system. For more information see: https://aka.ms/ContentUserFeedback.
Submit and view feedback for