Note
Access to this page requires authorization. You can try signing in or changing directories.
Access to this page requires authorization. You can try changing directories.
In this article, you learn how to access and manage your Azure Kubernetes Service (AKS) resources using the Azure portal.
Before you begin
To view Kubernetes resources in the Azure portal, you need an AKS cluster. Any cluster is supported, but if you're using Microsoft Entra integration, your cluster must use AKS-managed Microsoft Entra integration. If your cluster uses legacy Microsoft Entra ID, you can upgrade your cluster in the portal or with the Azure CLI. You can also use the Azure portal to create a new AKS cluster.
View Kubernetes resources
In the Azure portal, navigate to your AKS cluster resource.
From the service menu, select Kubernetes resources. The Kubernetes resources list displays the following categories:
- Namespaces shows information about the namespaces of your cluster.
- Workloads shows information about deployments, pods, replica sets, stateful sets, daemon sets, jobs, and cron jobs deployed to your cluster.
- Services and ingresses shows all of your cluster's service and ingress resources.
- Storage shows your Azure storage classes and persistent volume information.
- Configuration shows your cluster's config maps and secrets.
- Custom resources shows any custom resources deployed to your cluster.
- Events shows all events related to your cluster.
- Run command allows you to remotely invoke commands, like
kubectlandhelm, on your cluster through the Azure API without directly connecting to the cluster.


Deploy a sample application
In this section, we deploy the Azure Store application from the AKS quickstart.
Connect to your cluster
To deploy the Azure Store application, you need to connect to your AKS cluster. Follow these steps to connect to your cluster using the Azure portal:
- From the Overview page of your AKS cluster, select Connect.
- Follow the instructions to connect to your cluster using Cloud Shell, Azure CLI, or Run command.
Deploy the Azure Store application
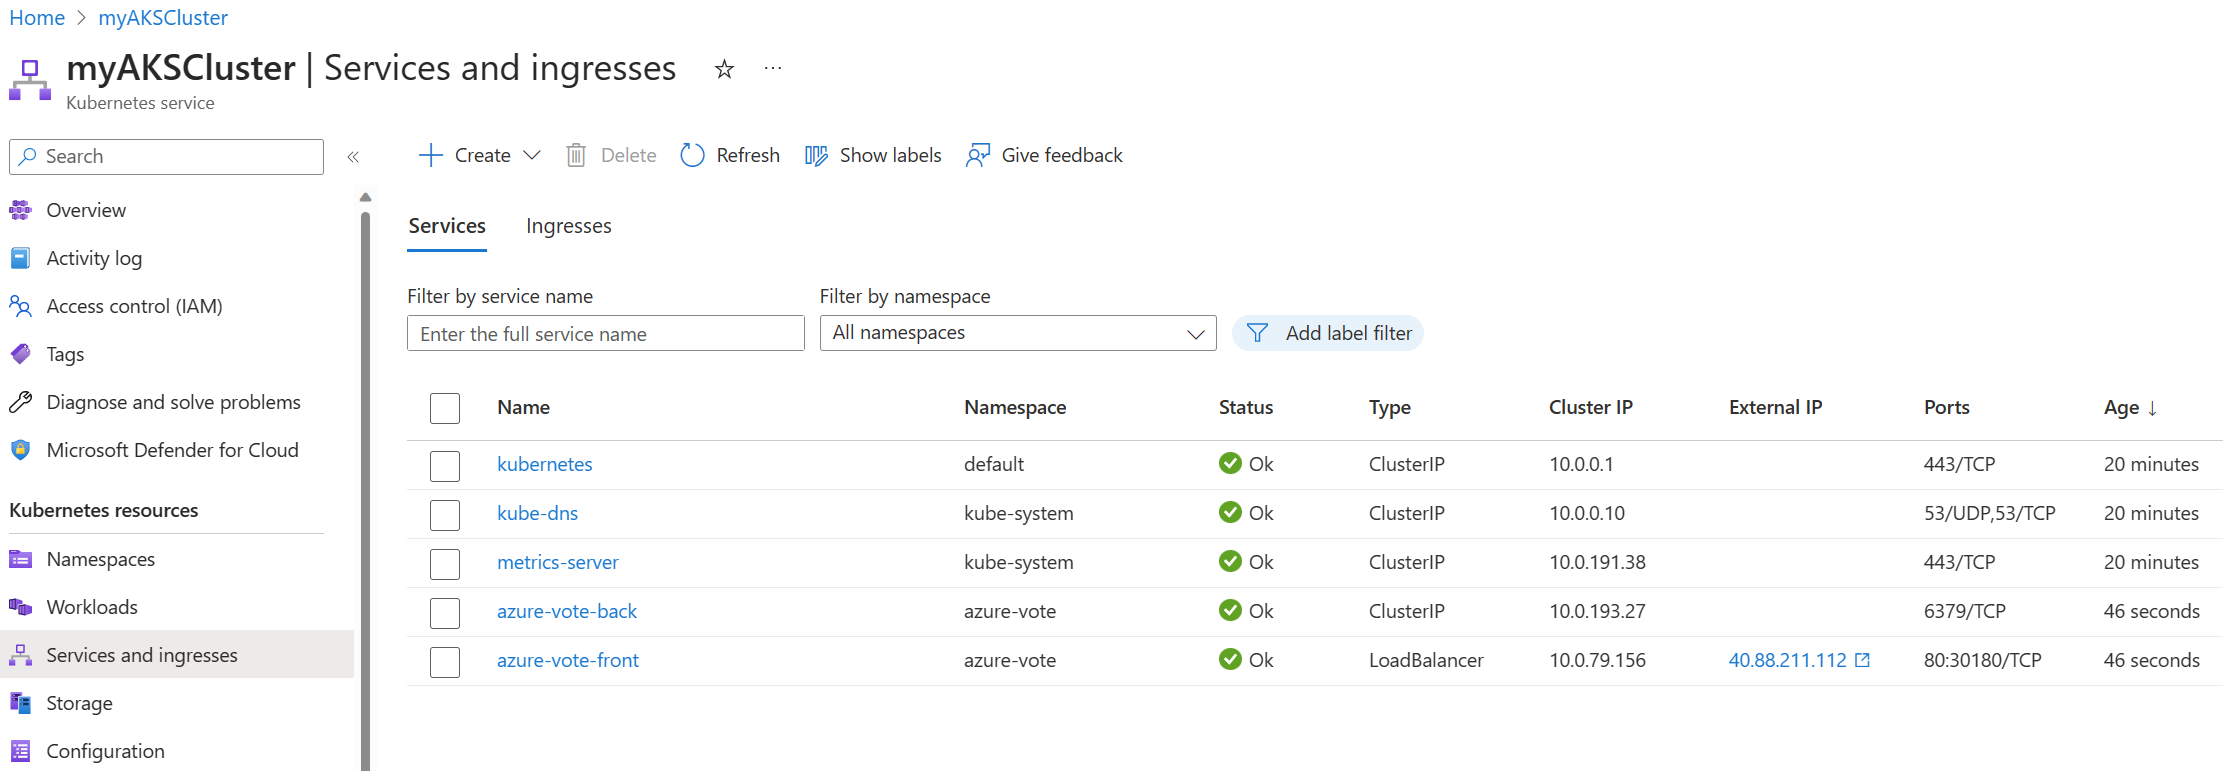
From the Kubernetes resources list, select Services and ingresses.
Select Create > Apply a YAML.
Copy and paste the following YAML into the editor:
apiVersion: apps/v1
kind: StatefulSet
metadata:
  name: rabbitmq
spec:
  serviceName: rabbitmq
  replicas: 1
  selector:
    matchLabels:
      app: rabbitmq
  template:
    metadata:
      labels:
        app: rabbitmq
    spec:
      nodeSelector:
        "kubernetes.io/os": linux
      containers:
        - name: rabbitmq
          image: mcr.microsoft.com/azurelinux/base/rabbitmq-server:3.13
          ports:
            - containerPort: 5672
              name: rabbitmq-amqp
            - containerPort: 15672
              name: rabbitmq-http
          env:
            - name: RABBITMQ_DEFAULT_USER
              value: "username"
            - name: RABBITMQ_DEFAULT_PASS
              value: "password"
          resources:
            requests:
              cpu: 10m
              memory: 128Mi
            limits:
              cpu: 250m
              memory: 256Mi
          volumeMounts:
            - name: rabbitmq-enabled-plugins
              mountPath: /etc/rabbitmq/enabled_plugins
              subPath: enabled_plugins
      volumes:
        - name: rabbitmq-enabled-plugins
          configMap:
            name: rabbitmq-enabled-plugins
            items:
              - key: rabbitmq_enabled_plugins
                path: enabled_plugins
---
apiVersion: v1
data:
  rabbitmq_enabled_plugins: |
    [rabbitmq_management,rabbitmq_prometheus,rabbitmq_amqp1_0].
kind: ConfigMap
metadata:
  name: rabbitmq-enabled-plugins
---
apiVersion: v1
kind: Service
metadata:
  name: rabbitmq
spec:
  selector:
    app: rabbitmq
  ports:
    - name: rabbitmq-amqp
      port: 5672
      targetPort: 5672
    - name: rabbitmq-http
      port: 15672
      targetPort: 15672
  type: ClusterIP
---
apiVersion: apps/v1
kind: Deployment
metadata:
  name: order-service
spec:
  replicas: 1
  selector:
    matchLabels:
      app: order-service
  template:
    metadata:
      labels:
        app: order-service
    spec:
      nodeSelector:
        "kubernetes.io/os": linux
      containers:
        - name: order-service
          image: ghcr.io/azure-samples/aks-store-demo/order-service:latest
          ports:
            - containerPort: 3000
          env:
            - name: ORDER_QUEUE_HOSTNAME
              value: "rabbitmq"
            - name: ORDER_QUEUE_PORT
              value: "5672"
            - name: ORDER_QUEUE_USERNAME
              value: "username"
            - name: ORDER_QUEUE_PASSWORD
              value: "password"
            - name: ORDER_QUEUE_NAME
              value: "orders"
            - name: FASTIFY_ADDRESS
              value: "0.0.0.0"
          resources:
            requests:
              cpu: 1m
              memory: 50Mi
            limits:
              cpu: 100m
              memory: 256Mi
      initContainers:
        - name: wait-for-rabbitmq
          image: busybox
          command: ["sh", "-c", "until nc -zv rabbitmq 5672; do echo waiting for rabbitmq; sleep 2; done;"]
          resources:
            requests:
              cpu: 1m
              memory: 50Mi
            limits:
              cpu: 100m
              memory: 256Mi
---
apiVersion: v1
kind: Service
metadata:
  name: order-service
spec:
  type: ClusterIP
  ports:
    - name: http
      port: 3000
      targetPort: 3000
  selector:
    app: order-service
---
apiVersion: apps/v1
kind: Deployment
metadata:
  name: product-service
spec:
  replicas: 1
  selector:
    matchLabels:
      app: product-service
  template:
    metadata:
      labels:
        app: product-service
    spec:
      nodeSelector:
        "kubernetes.io/os": linux
      containers:
        - name: product-service
          image: ghcr.io/azure-samples/aks-store-demo/product-service:latest
          ports:
            - containerPort: 3002
          resources:
            requests:
              cpu: 1m
              memory: 1Mi
            limits:
              cpu: 2m
              memory: 20Mi
---
apiVersion: v1
kind: Service
metadata:
  name: product-service
spec:
  type: ClusterIP
  ports:
    - name: http
      port: 3002
      targetPort: 3002
  selector:
    app: product-service
---
apiVersion: apps/v1
kind: Deployment
metadata:
  name: store-front
spec:
  replicas: 1
  selector:
    matchLabels:
      app: store-front
  template:
    metadata:
      labels:
        app: store-front
    spec:
      nodeSelector:
        "kubernetes.io/os": linux
      containers:
        - name: store-front
          image: ghcr.io/azure-samples/aks-store-demo/store-front:latest
          ports:
            - containerPort: 8080
              name: store-front
          env:
            - name: VUE_APP_ORDER_SERVICE_URL
              value: "http://order-service:3000/"
            - name: VUE_APP_PRODUCT_SERVICE_URL
              value: "http://product-service:3002/"
          resources:
            requests:
              cpu: 1m
              memory: 200Mi
            limits:
              cpu: 1000m
              memory: 512Mi
---
apiVersion: v1
kind: Service
metadata:
  name: store-front
spec:
  ports:
    - port: 80
      targetPort: 8080
  selector:
    app: store-front
  type: LoadBalancer
Select Add.
Once the application finishes deploying, you see the following services in the Services list:
- order-service
- product-service
- rabbitmq
- store-front

Monitor deployment insights
Enable the monitoring add-on on your AKS cluster
AKS clusters with Container Insights enabled can access various deployment insights in the Azure portal. If you don't have monitoring enabled on your cluster, you can enable it using the following steps:
From the service menu of your AKS cluster resource, select Monitoring > Insights > Configure monitoring.
On the Configure Container Insights page, select Configure.
It might take a few minutes for the monitoring solution to deploy and begin collecting data.
View deployment insights
- From the service menu of your AKS cluster resource, select Workloads.
- Select a deployment from the list to view deployment insights, such as CPU and memory usage.
Note
You can also select Monitoring > Insights to view more in-depth information about specific nodes and containers.
Clean up resources
If you no longer need the Azure Store application, you can delete the services to avoid incurring Azure costs.
- From the Kubernetes resources list, select Services and ingresses.
- Select the services you want to delete, and then select Delete.
Troubleshooting
Unauthorized access
To access the Kubernetes resources, you need access to the AKS cluster, Kubernetes API, and Kubernetes objects. Make sure you're either a cluster administrator or a user with the appropriate permissions to access the AKS cluster. For more information, see Access and identity options for AKS.
Enable resource view
You might need to enable the Kubernetes resource view for existing clusters.
Tip
You can add the AKS feature for API server authorized IP ranges to limit API server access to only the firewall's public endpoint. Another option is to update the --api-server-authorized-ip-ranges/-ApiServerAccessAuthorizedIpRange to include access for a local client computer or the IP address range from which you're browsing the Azure portal. To allow this access, you need the computer's public IPv4 address. You can find this address using the following Azure CLI or Azure PowerShell commands, or you can search "what is my IP address" in your browser.
Retrieve your IP address using the following command:
CURRENT_IP=$(dig +short myip.opendns.com @resolver1.opendns.com)Add your IP address to the AKS approved list using the
az aks updatecommand with the--api-server-authorized-ip-rangesparameter.az aks update --resource-group <resource-group-name> --name <aks-cluster-name> --api-server-authorized-ip-ranges $CURRENT_IP/32
Next steps
This article showed you how to access Kubernetes resources from the Azure portal. For more information about AKS, Core concepts for Azure Kubernetes Service (AKS).
Collaborate with us on GitHub
The source for this content can be found on GitHub, where you can also create and review issues and pull requests. For more information, see our contributor guide.

Azure Kubernetes Service