Note
Access to this page requires authorization. You can try signing in or changing directories.
Access to this page requires authorization. You can try changing directories.
Create your API center to start an inventory of your organization's APIs. Azure API Center enables tracking APIs in a centralized location for discovery, reuse, and governance.
After creating your API center, follow the steps in the tutorials to add custom metadata, APIs, versions, definitions, and other information.
In this quickstart, you create an Azure API center using the Azure API Center extension for Visual Studio Code. The extension provides a streamlined way to set up your API center and to build, register, govern, and discover your APIs.
Prerequisites
If you don't have an Azure subscription, create an Azure free account before you begin.
At least a Contributor role assignment or equivalent permissions in the Azure subscription.
Extension setup
Set up the extension by following these steps:
Install the Azure API Center extension for Visual Studio Code from the Visual Studio Code Marketplace. Install other extensions as needed.
Note
The
[PREVIEW]notation indicates features available only in the prerelease version of the Azure API Center extension. When you install the extension from the Visual Studio Code Marketplace, you can choose to install the release version or a prerelease version (as available). To switch between installed versions, select the extension's Manage button (gear icon) in the Extensions view in Visual Studio Code.In Visual Studio Code, in the Activity bar, select API Center:

If you're not signed in to your Azure account, select Sign in to Azure, and follow the prompts to sign in.
Select an Azure subscription with the API center (or API centers) that has the APIs you want to view. If you have multiple accounts, you can filter on specific subscriptions.
Create an API center
In the Azure API Center view, right-click your subscription and select Create API Center Service in Azure.
Alternatively, use the Ctrl+Shift+P keyboard shortcut to open the Command Palette. Type Azure API Center: Create API Center Service in Azure and hit Enter.
Enter a name for your API center.
Select a location for the resource.
The extension will show progress and notify you when the resource is ready. The API center is created in the Free plan in a resource group of the same name.
Verify your API center
Once deployment completes, refresh the Azure API Center view. Your new API center appears in the list and is ready to use.
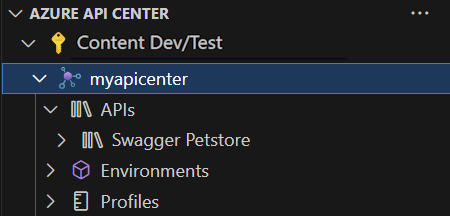
Expand the resource to start registering APIs and explore features. Find Azure API Center commands in the Command Palette by typing Azure API Center.
If you want to interact with the API center in the Azure portal, right-click the API center name and select Open in Azure Portal.