Note
Access to this page requires authorization. You can try signing in or changing directories.
Access to this page requires authorization. You can try changing directories.
This article shows you how to migrate an active DNS name to Azure App Service without any downtime.
When you migrate a live site and its DNS domain name to App Service, that DNS name is already serving live traffic. You can avoid downtime in DNS resolution during the migration by preemptively binding the active DNS name to your App Service app.
If you're not concerned about downtime in DNS resolution, see Map an existing custom DNS name to Azure App Service.
Prerequisites
To complete the steps, make sure that your App Service app isn't in the Free tier.
1. Get a domain verification ID
When you preemptively bind a custom domain, you accomplish both of the following before making any changes to your existing DNS records:
- Verify domain ownership by adding a domain verification ID with your domain provider.
- Enable the domain name in your App Service app.
When you later migrate your custom DNS name from the old site to the App Service app, there will be no downtime in DNS resolution.
In the Azure portal, open the management pane of the App Service app.
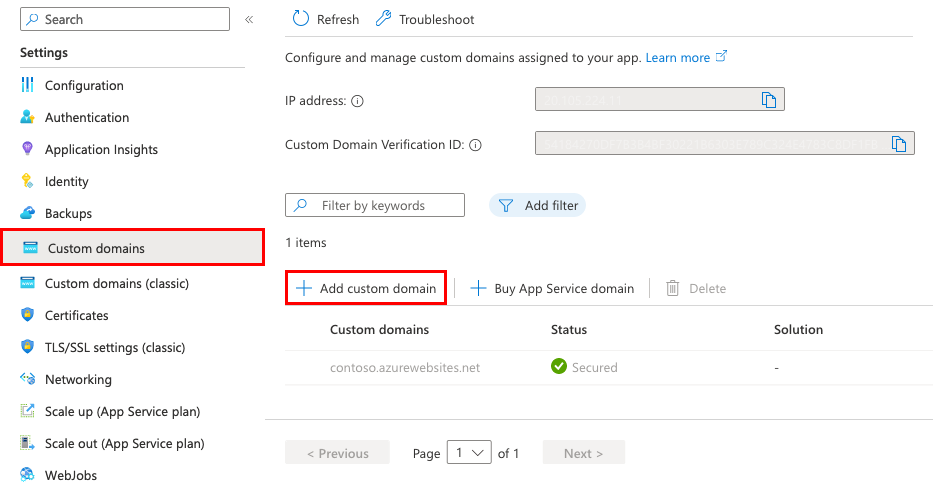
In the left pane of your app page, select Custom domains.
From the Custom domains pane, copy the ID in the Custom Domain Verification ID box. You use this ID in later steps.

2. Create the DNS records
Sign in to the website of your domain provider.
You can use Azure DNS to manage DNS records for your domain and configure a custom DNS name for Azure App Service. For more information, see Tutorial: Host your domain in Azure DNS.
Find the page for managing DNS records.
Every domain provider has its own DNS records interface, so consult the provider's documentation. Look for areas of the site labeled Domain Name, DNS, or Name Server Management.
Often, you can find the DNS records page by viewing your account information and then looking for a link like My domains. Go to that page, and then look for a link that's named something like Zone file, DNS Records, or Advanced configuration.
The following screenshot is an example of a DNS records page:
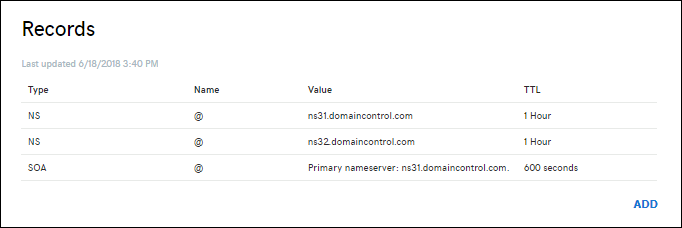
To create a record, select Add or select the appropriate widget.
Note
For certain providers, such as GoDaddy, changes to DNS records don't become effective until you select a separate Save Changes link.
Add a TXT record for domain verification. The host name for the TXT record depends on the type of DNS record that you want to map. See the following table (@ typically represents the root domain):
| DNS record example | TXT host | TXT value |
|---|---|---|
\@ (root) |
_asuid_ |
Domain verification ID shown in the Custom domains management pane |
www (sub) |
_asuid.www_ |
Domain verification ID shown in the Custom domains management pane |
\* (wildcard) |
_asuid_ |
Domain verification ID shown in the Custom domains management pane |
Note
Wildcard * records don't validate subdomains with an existing CNAME record. You might need to explicitly create a TXT record for each subdomain.
3. Enable the domain for your app
On the Custom domains pane, select Add custom domain.
To configure a third-party domain, in Domain provider, select All other domain services.
For TLS/SSL certificate, select Add certificate later. You can add an App Service managed certificate after you complete the domain migration.
For TLS/SSL type, select the binding type you want.
Setting Description Custom domain The domain name for which you're adding the TLS/SSL binding. Private Certificate Thumbprint The certificate to bind. TLS/SSL Type SNI SSL: Multiple Server Name Indication (SNI) SSL bindings might be added. This option allows multiple TLS/SSL certificates to secure multiple domains on the same IP address. Most modern browsers (including Internet Explorer, Chrome, Firefox, and Opera) support SNI (for more information, see Server Name Indication).
IP SSL: Only one IP SSL binding can be added. This option allows only one TLS/SSL certificate to secure a dedicated public IP address. After you configure the binding, follow the steps in Remap records for IP-based SSL.
IP-based SSL is supported only in Standard tier or above.Type the fully qualified domain name that you want to migrate and that corresponds to the
TXT recordthat you created. For example:contoso.com,www.contoso.com, or*.contoso.com.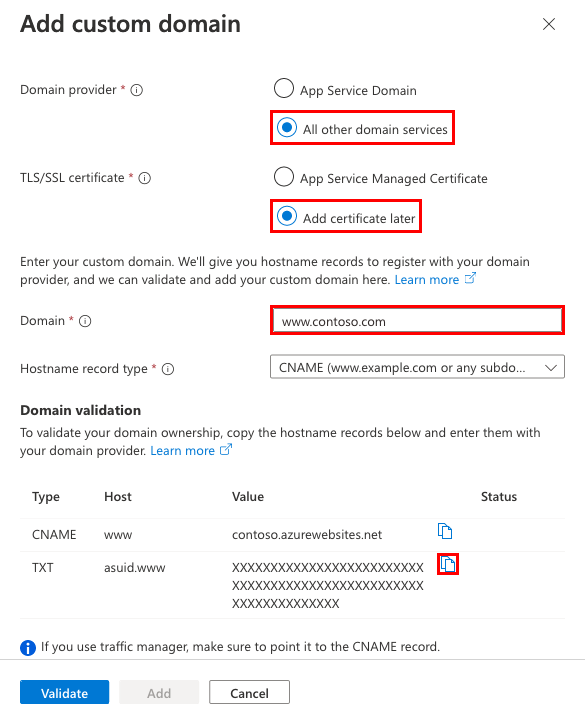
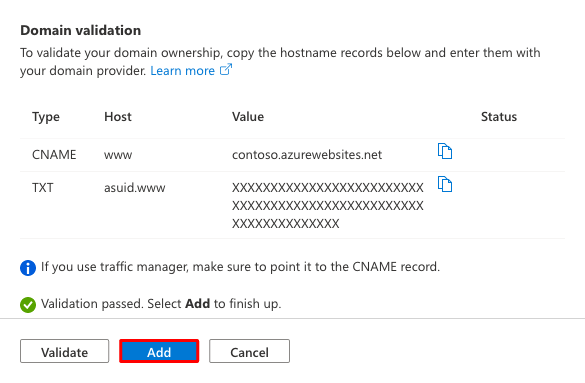
Select Validate. Although the dialog shows two records that you need for your app's custom domain to function, the validation passes with just the domain verification ID (the
TXT record).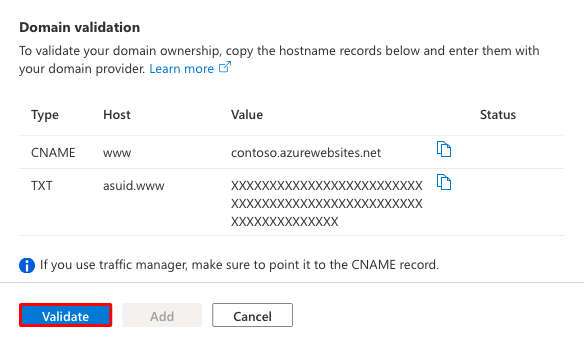
If the Domain validation section shows green check marks, then you configured the domain verification ID correctly. Select Add. If it shows any red X marks, fix the errors on your domain provider's website.
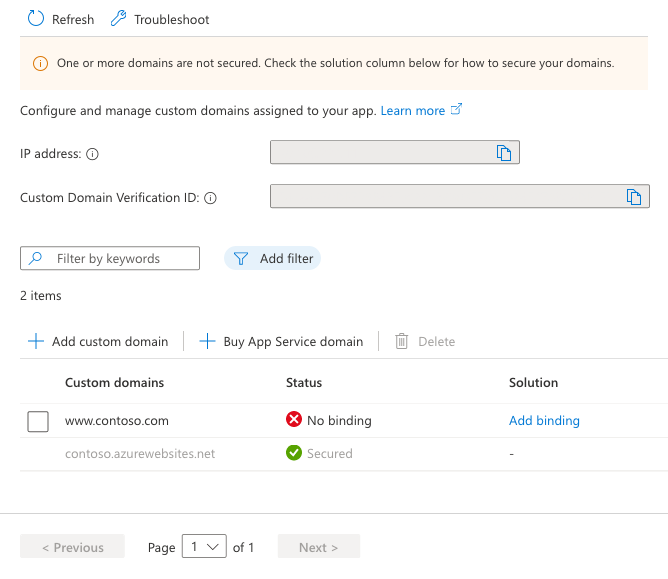
You should see the custom domain in the list. You might also see a red X with No binding.
Because you selected Add certificate later, you see a red X with No binding. It remains until you add a private certificate for the domain and configure the binding.
Note
Unless you configure a certificate binding for your custom domain, any HTTPS request from a browser to the domain receives an error or warning, depending on the browser.
4. Remap the active DNS name
Remap your active DNS record to point to App Service. Until this step is complete, it still points to your old site.
A recordonly: Get the App Service app's external IP address. On the Custom domains pane, copy the app's IP address.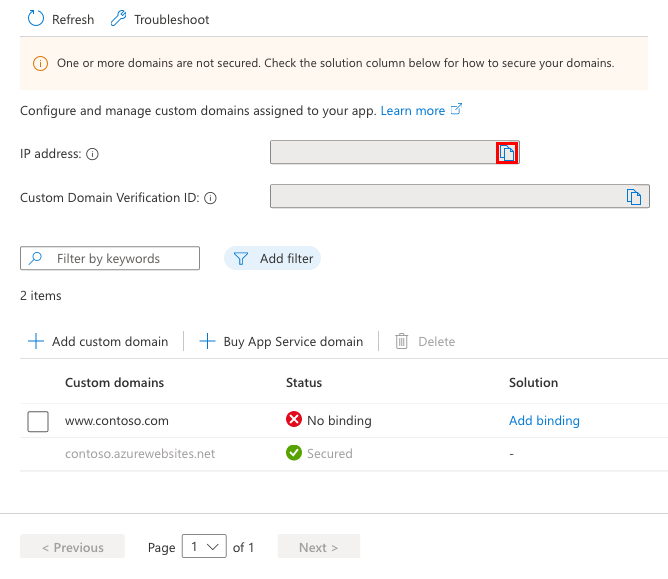
On the DNS records pane of your domain provider, select the DNS record to remap.
Remap the
AorCNAME recordlike the examples in the following table:FQDN example Record type Host Value contoso.com(root)A@IP address from Copy the app's IP address www\.contoso.com(sub)CNAMEwww_<app-name>.azurewebsites.net_\*.contoso.com(wildcard)CNAME_\*__<app-name>.azurewebsites.net_Save your settings.
DNS queries should start resolving to your App Service app immediately after DNS propagation happens.
Frequently asked questions
- Can I add an App Service managed certificate when migrating a live domain?
- How do I migrate a domain from another app?
Can I add an App Service managed certificate when migrating a live domain?
You can add an App Service managed certificate to a migrated live domain, but only after you remap the active DNS name. To add the App Service managed certificate, see Create a free managed certificate.
How do I migrate a domain from another app?
You can migrate an active custom domain in Azure between subscriptions or within the same subscription. However, to achieve a migration without downtime, the source app and the target app must be assigned the same custom domain at a certain time. Therefore, you need to make sure that the two apps aren't deployed to the same deployment unit (internally known as a webspace). A domain name can be assigned to only one app in each deployment unit.
You can find the deployment unit for your app by looking at the domain name of the FTP/S URL <deployment-unit>.ftp.azurewebsites.windows.net. Make sure the deployment unit is different between the source app and the target app. The deployment unit of an app is determined by the App Service plan it's in. Azure randomly selects it when you create the plan and it can't be changed. When you create two apps in the same resource group and the same region, Azure puts them in the same deployment unit. However, there's no way to make sure that the opposite is true. In other words, the only way to create a plan in a different deployment unit is to keep creating a plan in a new resource group or region until you get a different deployment unit.
Related content
Learn how to bind a custom TLS/SSL certificate to App Service: