Note
Access to this page requires authorization. You can try signing in or changing directories.
Access to this page requires authorization. You can try changing directories.
Important
As of July 28, 2025, changes to App Service Managed Certificates (ASMC) impact how certificates are issued and renewed in certain scenarios. While most customers don’t need to take action, we recommend reviewing our ASMC detailed blog post for more information.
The default domain name that comes with your app might not represent your brand the way you want. In this tutorial, you configure App Service with a www domain you own, such as www.contoso.com, and secure the custom domain with an App Service managed certificate.
The default name is already secured by a wildcard certificate for all App Service apps, but your custom domain needs to be TLS secured with a separate certificate. The easiest way is to use a managed certificate from App Service. It's free and easy to use, and it provides the basic functionality to secure a custom domain in App Service. For more information, see Add and manage TLS/SSL certificates in Azure App Service.
Prerequisites
- Create an app using Azure App Service.
- Make sure you can edit the DNS records for your custom domain. To edit DNS records, you need access to the DNS registry for your domain provider, such as GoDaddy. For example, to add DNS entries for
www.contoso.com, you must be able to configure the DNS settings for thecontoso.comroot domain. Your custom domains must be in a public DNS zone; private DNS zone is only supported on Internal Load Balancer (ILB) App Service Environment (ASE). - If you don't have a custom domain yet, you can purchase an App Service domain.
Scale up your app
You need to scale your app up to Basic tier. Basic tier fulfills the minimum pricing tier requirement for custom domains (Shared) and certificates (Basic).
Step 1: In the Azure portal:
- Enter the name of your app in the search bar at the top.
- Select your named resource with the type App Service.

Step 2: In your app's management page:
- Under Settings in the sidebar menu, select Scale up (App Service plan).
- Select the checkbox for Basic B1.
- Choose Select. When the app update is complete, you see a notification.

For more information on app scaling, see Scale up an app in Azure App Service.
Configure a custom domain
Step 1: In your app's management page:
- Under Settings in the sidebar menu, select Custom domains.
- Select + Add custom domain.

Step 2: In the Add custom domain dialog:
- For Domain provider, select All other domain services.
- For TLS/SSL certificate, select App Service Managed Certificate.
- For Domain, specify a fully qualified domain name you want based on the domain you own. For example, if you own
contoso.com, you can usewww.contoso.com. - Don't select Validate yet.

For each custom domain in App Service, you need to register two DNS records with your domain provider. The Domain validation section shows you these two DNS records. Select the respective Copy button to help you with the next step.
Create the DNS records
Sign in to the website of your domain provider.
- Find the page for managing DNS records, Domain Name, DNS, or Name Server Management (the exact page differs by domain provider).
- Select Add or the appropriate widget to create a DNS record.
- Select the DNS record type based on the Domain validation section in the Azure portal (CNAME, A, or TXT).
- Configure the DNS record based on the Host and Value columns from the Domain validation section in the Azure portal.
- Be sure to add two different records for your custom domain.
- For certain providers, changes to DNS records don't become effective until you select a separate Save Changes link.
The screenshot shows what your DNS records should look like for a
wwwsubdomain after you're finished.

Validate and complete
Step 1: Back in the Add custom domain dialog in the Azure portal, select Validate.

Step 2: If the Domain validation section shows green check marks next for both domain records, then you've configured them correctly. Select Add. If it shows any red X, fix any errors in the DNS record settings in your domain provider's website.

Step 3: You should see the custom domain added to the list. You might also see a red X with No binding. Wait a few minutes for App Service to create the managed certificate for your custom domain. When the process is complete, the red X becomes a green check mark with Secured.

Test in a browser
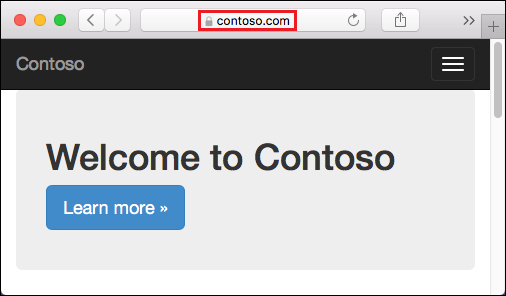
Browse to the DNS names that you configured earlier (like www.contoso.com). The address bar should now show the security lock icon for your app's URL, indicating that it's secured by TLS.
If you receive an HTTP 404 (Not Found) error when you browse to the URL of your custom domain, the browser client might have cached the old IP address of your custom domain. Clear the cache, and try navigating to the URL again. On a Windows machine, you can clear the cache by using ipconfig /flushdns in the terminal or in the Run dialog box.
Frequently asked questions
- What if I don't have a custom domain yet?
- Does this managed certificate expire?
- What else can I do with the App Service managed certificate for my app?
- How do I use a certificate I already have to secure my custom domain?
What if I don't have a custom domain yet?
The <app-name>.azurewebsites.net name is always assigned to your app as long as you don't delete it. If you want, you can purchase an App Service domain. An App Service domain is managed by Azure and is integrated with App Service, making it easier to manage together with your apps.
Does this managed certificate expire?
The App Service managed certificate doesn't expire as long as it's configured for a custom domain in an App Service app.
What else can I do with the App Service managed certificate for my app?
The managed certificate is provided for free for the sole purpose of securing your app's configured custom domain. It comes with many limitations. To do more, such as download the certificate, or use it in your application code, you can upload your own certificate, purchase an App Service certificate, or import a Key Vault certificate. For more information, see Add a private certificate to your app.
How do I use a certificate I already have to secure my custom domain?
See Add a private certificate to your app and Secure a custom DNS name with a TLS/SSL binding in Azure App Service.