Note
Access to this page requires authorization. You can try signing in or changing directories.
Access to this page requires authorization. You can try changing directories.
In this tutorial, you learn how to integrate your App Service app with your business processes by using Azure Logic Apps. You create a logic app that sends email via Gmail from your Azure App Service app.
There are other ways to send emails from a web app, such as using Simple Mail Transfer Protocol (SMTP) configuration in your language framework. However, Logic Apps provides a simple configuration interface for many business integrations without adding complexity to your code.
You can use the steps demonstrated in this tutorial to implement several common web app scenarios, such as:
- Sending confirmation email for a transaction.
- Adding users to Facebook group.
- Connecting to external systems like SAP and Salesforce.
- Exchanging standard B2B messages.
Prerequisites
You must have the following prerequisites to complete this tutorial:
A Gmail account.
An Azure account with permission to create resources.
A deployed Azure App Service app in the language of your choice. You can use the sample app from one of the following tutorials:
Create the logic app
Create a multitenant Consumption app in Azure Logic Apps by following the instructions at Create a Consumption logic app resource. When the app is created, select Go to resource.
On your logic app page, select Logic app designer under Development Tools in the left navigation menu.
Add the trigger
Select Add a trigger on the logic app designer canvas.
On the Add a trigger screen under Built-in tools, select Request, and on the next screen select When a HTTP request is received.

The trigger appears on the designer canvas.
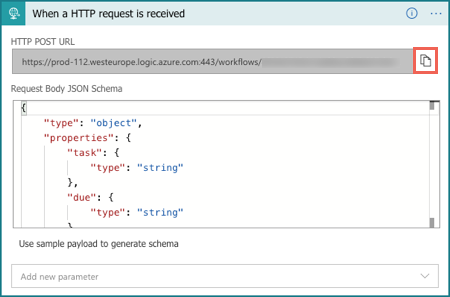
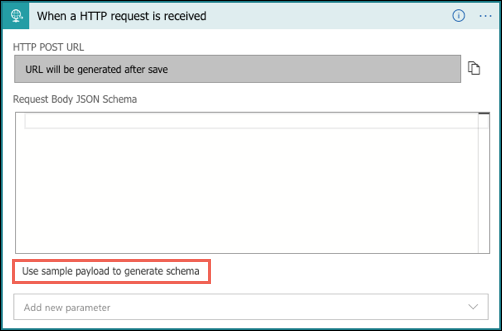
On the When a HTTP request is received screen, select Use sample payload to generate schema.

Paste the following code in the Enter or paste a sample JSON payload screen, and then select Done.
{
    "task": "<description>",
    "due": "<date>",
    "email": "<email-address>"
}
Azure generates the schema for the request data you entered. In practice, you can capture the actual request data from your application code and use it to generate the JSON schema.
On the Logic App designer top toolbar, select Save.
The generated HTTP URL now appears under HTTP URL on the When a HTTP request is received screen. Select the copy icon to copy the URL to use later.
The HTTP request definition is a trigger for anything you want to do in this logic app workflow, such as sending mail. Later you invoke this URL in your App Service app. For more information on the request trigger, see Receive and respond to inbound HTTPS calls sent to workflows in Azure Logic Apps.
Create the email
Add a send email action and populate the email with the three HTTP request properties you entered earlier.
On the designer canvas, select the + under the trigger and select Add an action.
On the Add an action screen, enter gmail in the search box, and then select Send email (V2).
Tip
You can search for other types of integrations, such as SendGrid, MailChimp, Microsoft 365, and SalesForce. For more information, see Managed connectors for Azure Logic Apps.
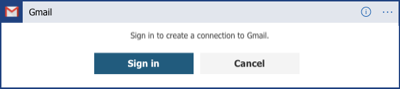
On the Create connection screen, select Sign in to authenticate access to the Gmail account you want to send the email from.
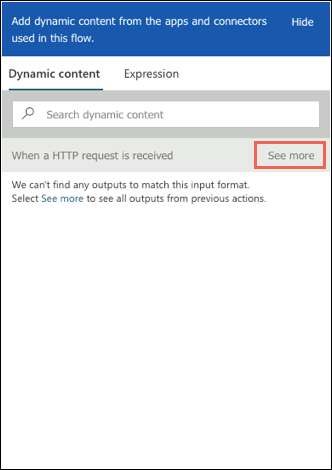
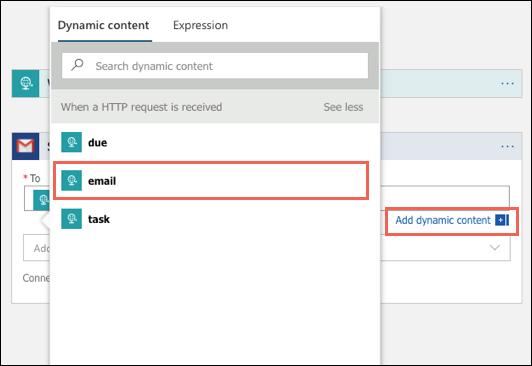
After you sign in, select inside the To field on the Send email (V2) screen to display the dynamic content icon. Select the upper, lightning bolt part of the icon.
The dynamic content list appears, showing the three HTTP request properties you entered earlier. Select email from the list.
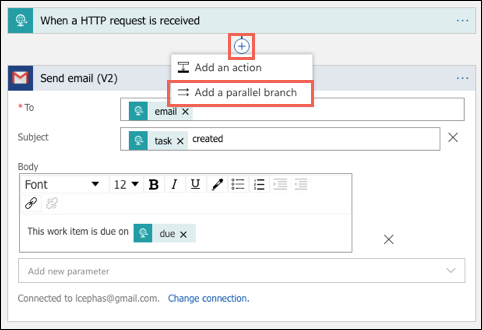
On the Send email (V2) screen, the email item appears in the To field. Drop down the list under Advanced parameters, and select Subject and Body.
The Subject and Body fields appear on the Send email (V2) screen. Select in the Subject field to display the dynamic content icon, and select task from the dynamic content list.
In the Subject field next to task, type a space followed by created.
Select inside the Body field, display the dynamic content list, and select due.
In the Body field, move the cursor before due and enter This work item is due on followed by a space.

Add a response
Add an asynchronous HTTP response to the HTTP trigger.
On the designer canvas, select the + between the HTTP request trigger and the Gmail action, and select Add a parallel branch.
On the Add an action screen, enter response in the search field, and then select Response.
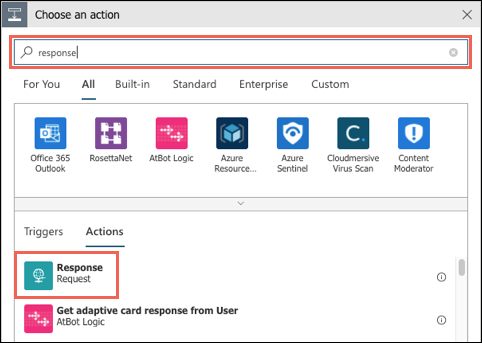
By default, the response action sends an
HTTP 200, which is sufficient for this tutorial. For more information, see Receive and respond to inbound HTTPS calls sent to workflows in Azure Logic Apps.Select Save on the Logic app designer toolbar.
Add the HTTP request code to your App Service app
You should avoid putting sensitive information like the request trigger URL directly into your App Service app code. Instead, you can reference the URL as an environment variable from App Service app settings. The following command creates an environment variable called LOGIC_APP_URL for your logic app HTTP URL.
In Azure Cloud Shell, run the following Azure CLI command to create the app setting. Replace
<app-name>and<resource-group-name>with your App Service app and resource group names. Replace<http-url>with the HTTP URL you copied from your logic app.az webapp config appsettings set --name <app-name> --resource-group <resource-group-name> --settings LOGIC_APP_URL="<http-url>"In your code, make a standard HTTP post to the logic app URL using an HTTP client language available to your language framework, with the following configuration:
Make sure the request contains the heading
Content-Type: application/json.Use the same JSON format that you supplied to your logic app in the request body:
{
    "task": "<description>",
    "due": "<date>",
    "email": "<email-address>"
}
To optimize performance, send the request asynchronously if possible.
For logging instructions, check the documentation for your preferred framework.
Example request/response code samples
Select your preferred language/framework to see an example request and response. Some examples require using or installing code packages.
In ASP.NET Core, you can send the HTTP post with the System.Net.Http.HttpClient class. The following code sample requires using System.Net.Http and System.Text.Json. The HttpResponseMessage requires dependency injection (DI) configuration to access app settings. For more information, see Access environment variables.
// requires using System.Net.Http;
var client = new HttpClient();
// requires using System.Text.Json;
var jsonData = JsonSerializer.Serialize(new
{
    email = "someone@example.com",
    due = "4/1/2025",
    task = "My new task!"
});

HttpResponseMessage result = await client.PostAsync(
    // Requires DI configuration to access app settings
    _configuration["LOGIC_APP_URL"],
    new StringContent(jsonData, Encoding.UTF8, "application/json"));

var statusCode = result.StatusCode.ToString();
Note
This demo code is written for simplicity. In practice, you don't instantiate an HttpClient object for each request. Follow the guidance at Use IHttpClientFactory to implement resilient HTTP requests.
Tip
If you're using the sample app from Tutorial: Build an ASP.NET Core and SQL Database app in Azure App Service, you could use this code to send an email confirmation in the Create action after you add a Todo item.