Note
Access to this page requires authorization. You can try signing in or changing directories.
Access to this page requires authorization. You can try changing directories.
In this tutorial, you learn how to integrate your App Service app with your business processes. This is common to web app scenarios, such as:
- Send confirmation email for a transaction
- Add user to Facebook group
- Connect to third-party systems like SAP, Salesforce, etc.
- Exchange standard B2B messages
In this tutorial, you send emails with Gmail from your App Service app by using Azure Logic Apps. There are other ways to send emails from a web app, such as SMTP configuration provided by your language framework. However, Azure Logic Apps brings a lot more power to your App Service app without adding complexity to your code. Azure Logic Apps provides a simple configuration interface for the most popular business integrations, and your app can call them anytime with an HTTP request.
Prerequisite
Deploy an app with the language framework of your choice to App Service. To follow a tutorial to deploy a sample app, see below:
Create the logic app
In the Azure portal, create a Consumption logic app resource by following the instructions in Create an example Consumption workflow. When page with the common triggers and templates gallery opens, return to this tutorial.
Under the Start with a common trigger section, select the trigger named When an HTTP request is received .

In the trigger information box, select Use sample payload to generate schema.
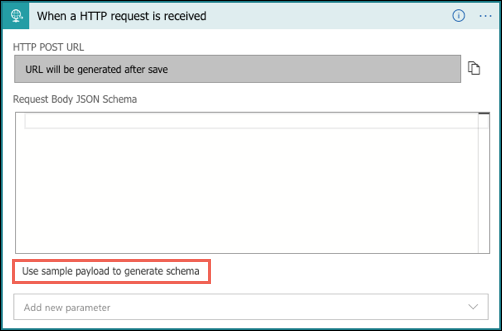
Copy the following sample JSON into the textbox and select Done.
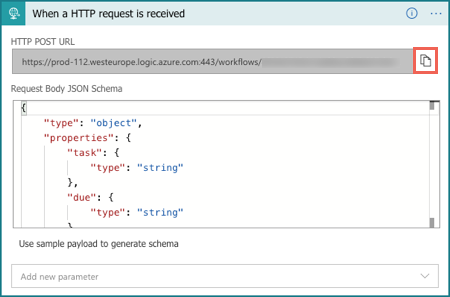
{
    "task": "<description>",
    "due": "<date>",
    "email": "<email-address>"
}
The schema is now generated for the request data you want. In practice, you can just capture the actual request data your application code generates and let Azure generate the JSON schema for you.
On workflow designer toolbar, select Save.
You can now see the URL of your HTTP request trigger. Select the copy icon to copy it for later use.
This HTTP request definition is a trigger to anything you want to do in this logic app workflow, be it Gmail or anything else. Later you will invoke this URL in your App Service app. For more information on the request trigger, see the HTTP request/response reference.
Under the trigger, select New step. Under the Choose an operation search box, select All.
In the search box, enter Gmail. Find and select the action named Send email (V2).
Tip
You can search for other types of integrations, such as SendGrid, MailChimp, Microsoft 365, and SalesForce. For more information, see Managed connectors for Azure Logic Apps.
In the Gmail action, select Sign in to authenticate access to the Gmail account from where you want to send the email.

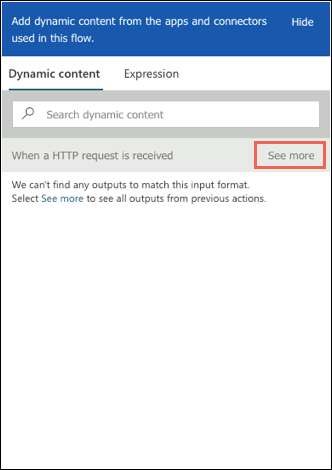
After you sign in, select inside the To box, which automatically opens the dynamic content list. In this list, next to the When an HTTP request is received action, select See more.
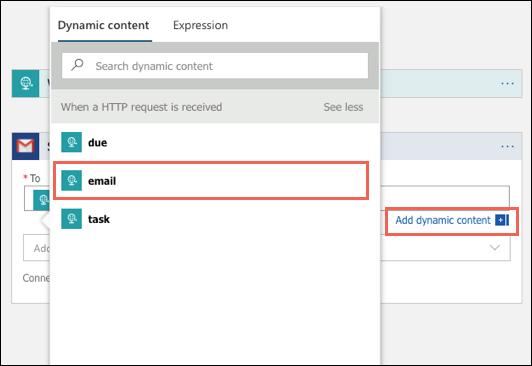
You should now see the three properties from your sample JSON data you used earlier. In this step, you use these properties from the HTTP request to construct an email.
For the To field value, select email. If you want, close the dynamic content list by selecting Add dynamic content.
From the Add new parameter list, select Subject and Body.
Select inside the Subject box, and in the same way, select task. With the cursor still in the Subject box, type created.
Select inside in the Body box, and in the same way, select due. Move the cursor to the left of due, and type This work item is due on.
Tip
If you want to edit HTML content directly in the email body, on the designer toolbar, select Code view. Just make sure that you preserve the dynamic content code (for example,
@{triggerBody()?['due']})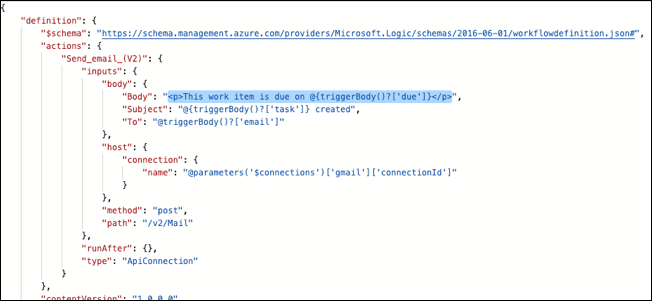
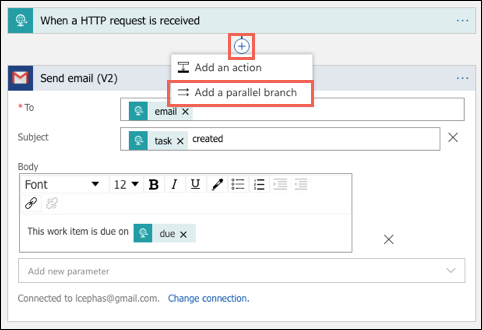
Next, add an asynchronous HTTP response to the HTTP trigger. Between the HTTP trigger and the Gmail action, select the + sign, and select Add a parallel branch.
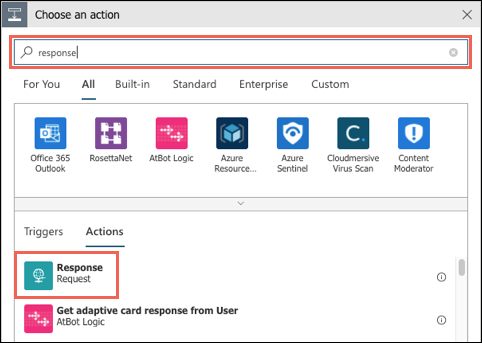
In the search box, search for response, then select the Response action.
By default, the response action sends an HTTP 200. That's good enough for this tutorial. For more information, see the HTTP request/response reference.
On the designer toolbar, select Save again.
Add HTTP request code to app
Make sure you have copied the URL of the HTTP request trigger from earlier. Because it contains sensitive information, it's best practice that you don't put it into the code directly. With App Service, you can reference it as an environment variable instead, using app settings.
In the Cloud Shell, create the app setting with the following command (replace <app-name>, <resource-group-name>, and <logic-app-url>):
az webapp config appsettings set --name <app-name> --resource-group <resource-group-name> --settings LOGIC_APP_URL="<your-logic-app-url>"
In your code, make a standard HTTP post to the URL using any HTTP client language that's available to your language framework, with the following configuration:
The request body contains the same JSON format that you supplied to your logic app:
{
    "task": "<description>",
    "due": "<date>",
    "email": "<email-address>"
}
The request contains the heading
Content-Type: application/json.To optimize performance, send the request asynchronously if possible.
Select the preferred language/framework tab below to see an example.
In ASP.NET, you can send the HTTP post with the System.Net.Http.HttpClient class. For example:
// requires using System.Net.Http;
var client = new HttpClient();
// requires using System.Text.Json;
var jsonData = JsonSerializer.Serialize(new
{
    email = "a-valid@emailaddress.com",
    due = "4/1/2020",
    task = "My new task!"
});

HttpResponseMessage result = await client.PostAsync(
    // requires using System.Configuration;
    ConfigurationManager.AppSettings["LOGIC_APP_URL"],
    new StringContent(jsonData, Encoding.UTF8, "application/json"));

var statusCode = result.StatusCode.ToString();
If you're testing this code on the sample app for Tutorial: Build an ASP.NET app in Azure with SQL Database, you could use it to send an email confirmation in the Create action, after the Todo item is added. To use the asynchronous code above, convert the Create action to asynchronous.