Get started: Document Intelligence Studio
This content applies to:![]() v4.0 (preview) | Previous versions:
v4.0 (preview) | Previous versions: ![]() v3.1 (GA)
v3.1 (GA) ![]() v3.0 (GA)
v3.0 (GA)
Document Intelligence Studio is an online tool for visually exploring, understanding, and integrating features from the Document Intelligence service in your applications. You can get started by exploring the pretrained models with sample or your own documents. You can also create projects to build custom template models and reference the models in your applications using the Python SDK and other quickstarts.
Prerequisites for new users
- An active Azure account. If you don't have one, you can create a free account.
- A Document Intelligence or multi-service resource.
Tip
Create an Azure AI services resource if you plan to access multiple Azure AI services under a single endpoint/key. For Document Intelligence access only, create a Document Intelligence resource. Please note that you'll need a single-service resource if you intend to use Microsoft Entra authentication.
Azure role assignments
For document analysis and prebuilt models, following role assignments are required for different scenarios.
- Basic
- Cognitive Services User: you need this role to Document Intelligence or Azure AI services resource to enter the analyze page.
- Advanced
- Contributor: you need this role to create resource group, Document Intelligence service, or Azure AI services resource.
Models
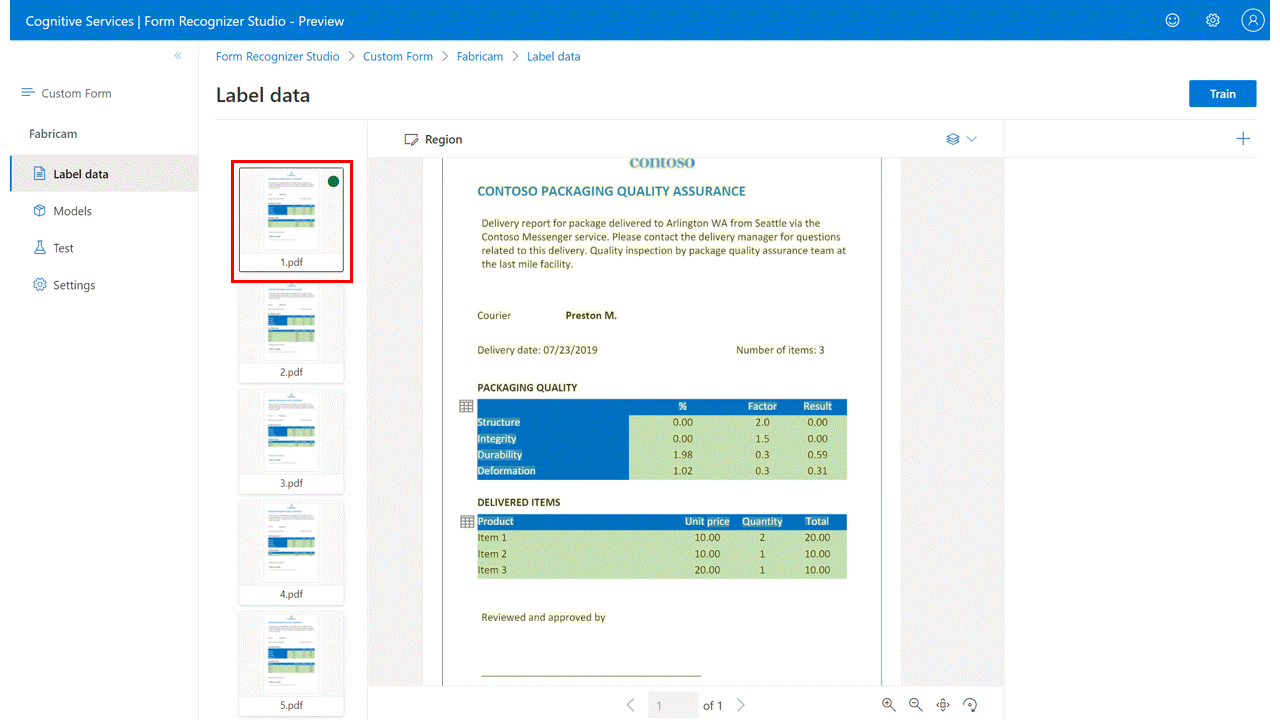
Prebuilt models help you add Document Intelligence features to your apps without having to build, train, and publish your own models. You can choose from several prebuilt models, each of which has its own set of supported data fields. The choice of model to use for the analyze operation depends on the type of document to be analyzed. Document Intelligence currently supports the following prebuilt models:
Document analysis
- Layout: extract text, tables, selection marks, and structure information from documents (PDF, TIFF) and images (JPG, PNG, BMP).
- Read: extract text lines, words, their locations, detected languages, and handwritten style if detected from documents (PDF, TIFF) and images (JPG, PNG, BMP).
Prebuilt
- Invoice: extract text, selection marks, tables, key-value pairs, and key information from invoices.
- Receipt: extract text and key information from receipts.
- Health insurance card: extract insurer, member, prescription, group number and other key information from US health insurance cards.
- W-2: extract text and key information from W-2 tax forms.
- ID document: extract text and key information from driver licenses and international passports.
Custom
- Custom extraction models: extract information from forms and documents with custom extraction models. Quickly train a model by labeling as few as five sample documents.
- Custom classification model: train a custom classifier to distinguish between the different document types within your applications. Quickly train a model with as few as two classes and five samples per class.
After you've completed the prerequisites, navigate to Document Intelligence Studio.
Select a Document Intelligence service feature from the Studio home page.
This step is a one-time process unless you've already selected the service resource from prior use. Select your Azure subscription, resource group, and resource. (You can change the resources anytime in "Settings" in the top menu.) Review and confirm your selections.
Select the Analyze button to run analysis on the sample document or try your document by using the Add command.
Use the controls at the bottom of the screen to zoom in and out and rotate the document view.
Observe the highlighted extracted content in the document view. Hover your mouse over the keys and values to see details.
In the output section's Result tab, browse the JSON output to understand the service response format.
In the Code tab, browse the sample code for integration. Copy and download to get started.
Added prerequisites for custom projects
In addition to the Azure account and a Document Intelligence or Azure AI services resource, you need:
Azure Blob Storage container
A standard performance Azure Blob Storage account. You create containers to store and organize your training documents within your storage account. If you don't know how to create an Azure storage account with a container, following these quickstarts:
- Create a storage account. When creating your storage account, make sure to select Standard performance in the Instance details → Performance field.
- Create a container. When creating your container, set the Public access level field to Container (anonymous read access for containers and blobs) in the New Container window.
Azure role assignments
For custom projects, the following role assignments are required for different scenarios.
- Basic
- Cognitive Services User: You need this role for Document Intelligence or Azure AI services resource to train the custom model or do analysis with trained models.
- Storage Blob Data Contributor: You need this role for the Storage Account to create a project and label data.
- Advanced
- Storage Account Contributor: You need this role for the Storage Account to set up CORS settings (this is a one-time effort if the same storage account is reused).
- Contributor: You need this role to create a resource group and resources.
Configure CORS
CORS (Cross Origin Resource Sharing) needs to be configured on your Azure storage account for it to be accessible from the Document Intelligence Studio. To configure CORS in the Azure portal, you need access to the CORS tab of your storage account.
Select the CORS tab for the storage account.
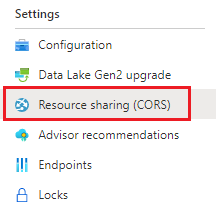
Start by creating a new CORS entry in the Blob service.
Set the Allowed origins to
https://documentintelligence.ai.azure.com.
Tip
You can use the wildcard character '*' rather than a specified domain to allow all origin domains to make requests via CORS.
Select all the available 8 options for Allowed methods.
Approve all Allowed headers and Exposed headers by entering an * in each field.
Set the Max Age to 120 seconds or any acceptable value.
Select the save button at the top of the page to save the changes.
CORS should now be configured to use the storage account from Document Intelligence Studio.
Sample documents set
Sign in to the Azure portal and navigate to Your storage account > Data storage > Containers.
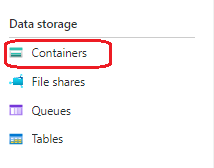
Select a container from the list.
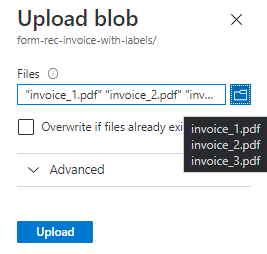
Select Upload from the menu at the top of the page.

The Upload blob window appears.
Select your file(s) to upload.
Note
By default, the Studio will use documents that are located at the root of your container. However, you can use data organized in folders by specifying the folder path in the Custom form project creation steps. See Organize your data in subfolders
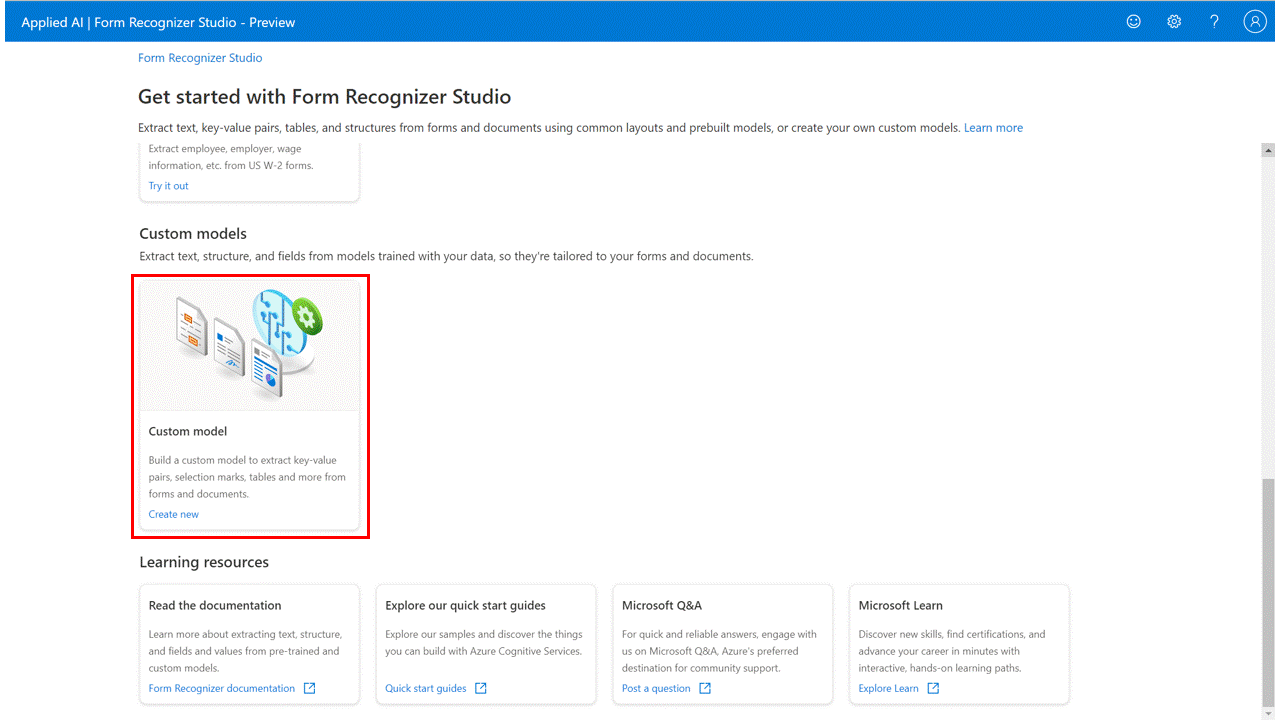
Custom models
To create custom models, you start with configuring your project:
From the Studio home, select the Custom model card to open the Custom models page.
Use the "Create a project" command to start the new project configuration wizard.
Enter project details, select the Azure subscription and resource, and the Azure Blob storage container that contains your data.
Review and submit your settings to create the project.
To quickstart the labeling process, use the auto label feature to label using already trained model or one of our prebuilt models.
For manual labeling from scratch, define the labels and their types that you're interested in extracting.
Select the text in the document and select the label from the drop-down list or the labels pane.
Label four more documents to get at least five documents labeled.
Select the Train command and enter model name, select whether you want the neural (recommended) or template model to start training your custom model.
Once the model is ready, use the Test command to validate it with your test documents and observe the results.
Labeling as tables
Note
- With the release of API versions 2022-06-30-preview and later, custom template models will add support for cross page tabular fields (tables).
- With the release of API versions 2022-06-30-preview and later, custom neural models will support tabular fields (tables) and models trained with API version 2022-08-31, or later will accept tabular field labels.
Use the Delete command to delete models that aren't required.
Download model details for offline viewing.
Select multiple models and compose them into a new model to be used in your applications.
Using tables as the visual pattern:
For custom form models, while creating your custom models, you may need to extract data collections from your documents. Data collections may appear in a couple of formats. Using tables as the visual pattern:
Dynamic or variable count of values (rows) for a given set of fields (columns)
Specific collection of values for a given set of fields (columns and/or rows)
Label as dynamic table
Use dynamic tables to extract variable count of values (rows) for a given set of fields (columns):
Add a new "Table" type label, select "Dynamic table" type, and name your label.
Add the number of columns (fields) and rows (for data) that you need.
Select the text in your page and then choose the cell to assign to the text. Repeat for all rows and columns in all pages in all documents.
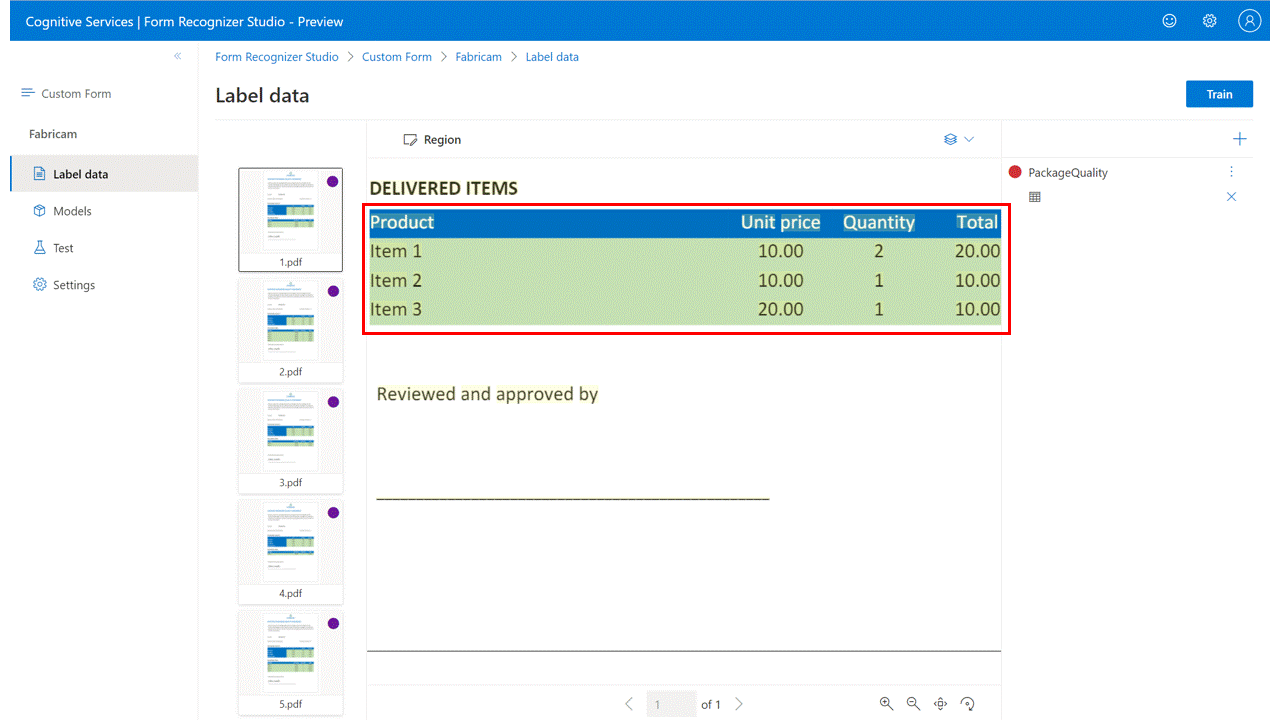
Label as fixed table
Use fixed tables to extract specific collection of values for a given set of fields (columns and/or rows):
Create a new "Table" type label, select "Fixed table" type, and name it.
Add the number of columns and rows that you need corresponding to the two sets of fields.
Select the text in your page and then choose the cell to assign it to the text. Repeat for other documents.
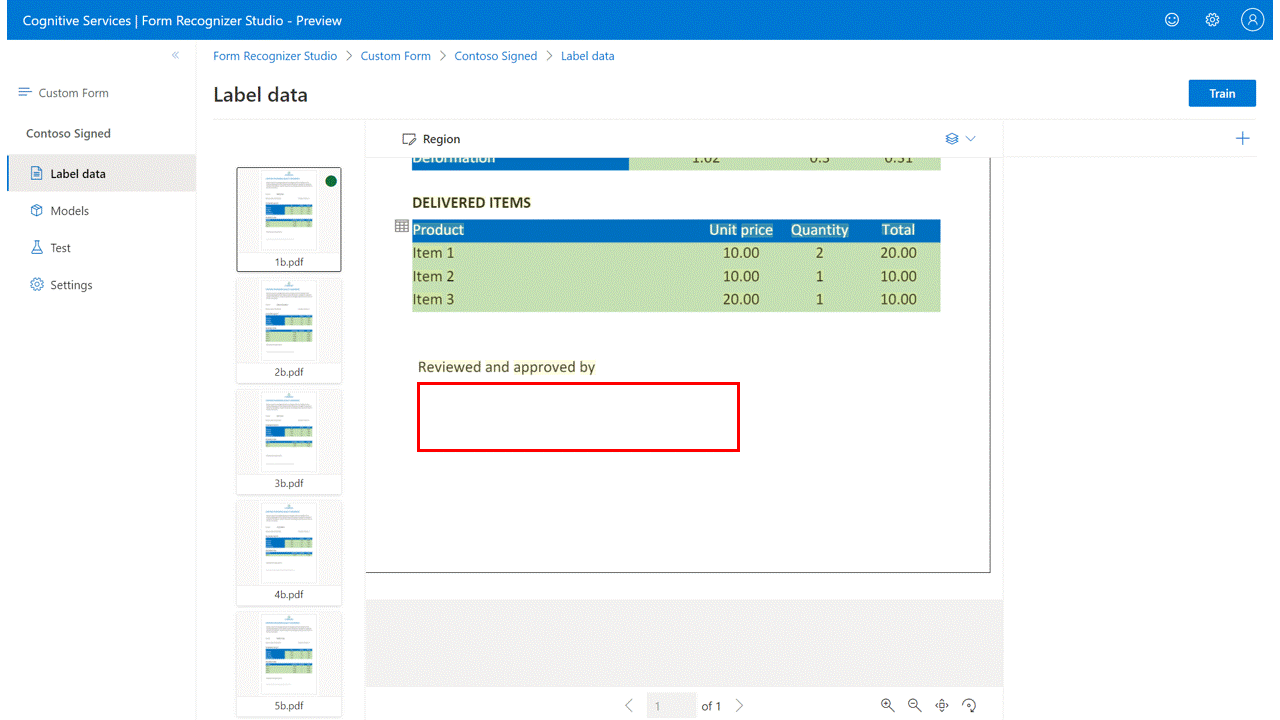
Signature detection
Note
Signature fields are currently only supported for custom template models. When training a custom neural model, labeled signature fields are ignored.
To label for signature detection: (Custom form only)
In the labeling view, create a new "Signature" type label and name it.
Use the Region command to create a rectangular region at the expected location of the signature.
Select the drawn region and choose the Signature type label to assign it to your drawn region. Repeat for other documents.
Next steps
- Follow our Document Intelligence v3.1 migration guide to learn the differences from the previous version of the REST API.
- Explore our v3.0 SDK quickstarts to try the v3.0 features in your applications using the new SDKs.
- Refer to our v3.0 REST API quickstarts to try the v3.0 features using the new REST API.
Feedback
Coming soon: Throughout 2024 we will be phasing out GitHub Issues as the feedback mechanism for content and replacing it with a new feedback system. For more information see: https://aka.ms/ContentUserFeedback.
Submit and view feedback for