Note
Access to this page requires authorization. You can try signing in or changing directories.
Access to this page requires authorization. You can try changing directories.
This content applies to:![]() v4.0 (GA) | Previous versions:
v4.0 (GA) | Previous versions: ![]() v3.1 (GA)
v3.1 (GA) ![]() v3.0 (GA)
v3.0 (GA)
Azure Document Intelligence in Foundry Tools Studio is an online tool that you can use to visually explore, understand, and integrate features from Document Intelligence into your applications. This quickstart aims to show you how to set up a custom project in Document Intelligence Studio.
Prerequisites
For information on subscription, resource, and authentication setup, see Get started with Document Intelligence Studio.
Prerequisites for new users
In addition to an Azure account and the Document Intelligence or Microsoft Foundry resource, you need an Azure Blob Storage container and Azure role assignments.
Azure Blob Storage container
You need a standard performance Azure Blob Storage account. You can create containers to store and organize your training documents within your storage account. If you don't know how to create an Azure storage account with a container, follow these quickstarts:
- Create a storage account: When you create your storage account, in the Instance details > Performance field, select Standard performance.
- Create a container: When you create your container, on the New Container pane, set the Public access level field to Container (anonymous read access for containers and blobs).
Azure role assignments
For custom projects, the following role assignments are required for different scenarios:
Basic
- Cognitive Services User: You need this role for the Document Intelligence or Microsoft Foundry resource to train the custom model or do analysis with trained models.
- Storage Blob Data Contributor: You need this role for the storage account to create a project and label data.
Advanced
- Storage Account Contributor: You need this role for the storage account to set up cross-origin resource sharing (CORS) settings. (This action is a one-time effort if the same storage account is reused.)
- Contributor: You need this role to create a resource group and resources.
Note
If local (key-based) authentication is disabled for your Document Intelligence service resource and storage account, be sure to obtain Cognitive Services User and Storage Blob Data Contributor roles, respectively, so that you have enough permissions to use Document Intelligence Studio. The Storage Account Contributor and Contributor roles allow you to list keys, but they don't give you permission to use the resources when key access is disabled.
Configure CORS
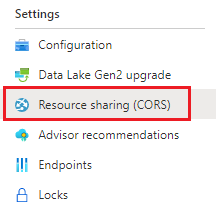
Cross-origin resource sharing must be configured on your Azure storage account for it to be accessible from Document Intelligence Studio. To configure CORS in the Azure portal, you need access to the CORS tab of your storage account.
Select the CORS tab for the storage account.
Start by creating a new CORS entry on the Blob service tab.
Set Allowed origins to
https://documentintelligence.ai.azure.com.
You can use the wildcard character
*instead of a specified domain to allow all origin domains to make requests via CORS.Select all the available eight options for Allowed methods.
Approve all Allowed headers and Exposed headers by entering an asterisk (*) in each field.
Set Max Age to 120 seconds or any acceptable value.
To save the changes, select Save at the top of the page.
CORS should now be configured to use the storage account from Document Intelligence Studio.
Sample documents set
Sign in to the Azure portal. Go to your storage account and select Data storage > Containers.
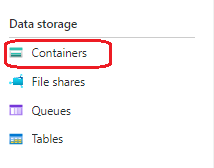
Select a container from the list.
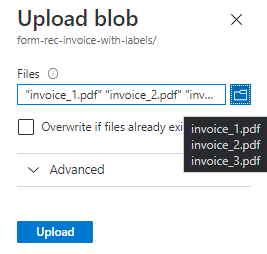
On the menu at the top of the page, select Upload.

On the Upload blob pane, select your files to upload.
Note
By default, Document Intelligence Studio uses documents that are located at the root of your container. You can use data organized in folders by specifying the folder path in the steps for creating a custom form project. For more information, see Organize your data in subfolders.
Use Document Intelligence Studio features
Autolabel documents with prebuilt models or one of your own models
On the labeling page for the custom extraction model, you can now autolabel your documents by using one of the Document Intelligent Service prebuilt models or your trained models.

For some documents, duplicate labels after running autolabel are possible. Make sure to modify the labels so that there are no duplicate labels on the labeling page afterwards.

Autolabel tables
On the labeling page for the custom extraction model, you can now autolabel the tables in the document without having to label the tables manually.

Add test files directly to your training dataset
After you train a custom extraction model, use the test page to improve your model quality by uploading test documents to the training dataset, if needed.
If a low confidence score is returned for some labels, make sure to correctly label your content. If not, add them to the training dataset and relabel to improve the model quality.

Make use of the document list options and filters in custom projects
Use the labeling page for the custom extraction model to go through your training documents with ease by making use of the search, filter, and sort-by features.
Use the grid view to preview documents, or use the list view to scroll through documents more easily.

Project sharing
Share custom extraction projects with ease. For more information, see Project sharing with custom models.
Related content
- Follow the Document Intelligence v3.1 migration guide to learn the differences from the previous version of the REST API.
- Explore the v4.0 SDK quickstarts to try the v3.0 features in your applications by using the new client libraries.
- Refer to the v4.0 REST API quickstarts to try the v3.0 features by using the new REST API.
- Get started with Document Intelligence Studio.