Note
Access to this page requires authorization. You can try signing in or changing directories.
Access to this page requires authorization. You can try changing directories.
Applies to: ✔️ Windows VMs ✔️ Linux VMs ✔️ Windows Registry ✔️ Windows Files ✔️ Linux Files ✔️ Windows Software
This article describes how to manage change tracking, and includes the procedure on how you can change a workspace and configure data collection rule.
Note
Before using the procedures in this article, ensure that you've enabled Change Tracking and Inventory on your VMs. For detailed information on how you can enable, see Enable change tracking and inventory from portal
Configure Windows, Linux files, and Windows Registry using Data Collection Rules
To manage tracking and inventory, ensure that you enable Change tracking with AMA on your VM.
In the Azure portal, select the virtual machine.
Select a specific VM for which you would like to configure the Change tracking settings.
Under Operations, select Change tracking.
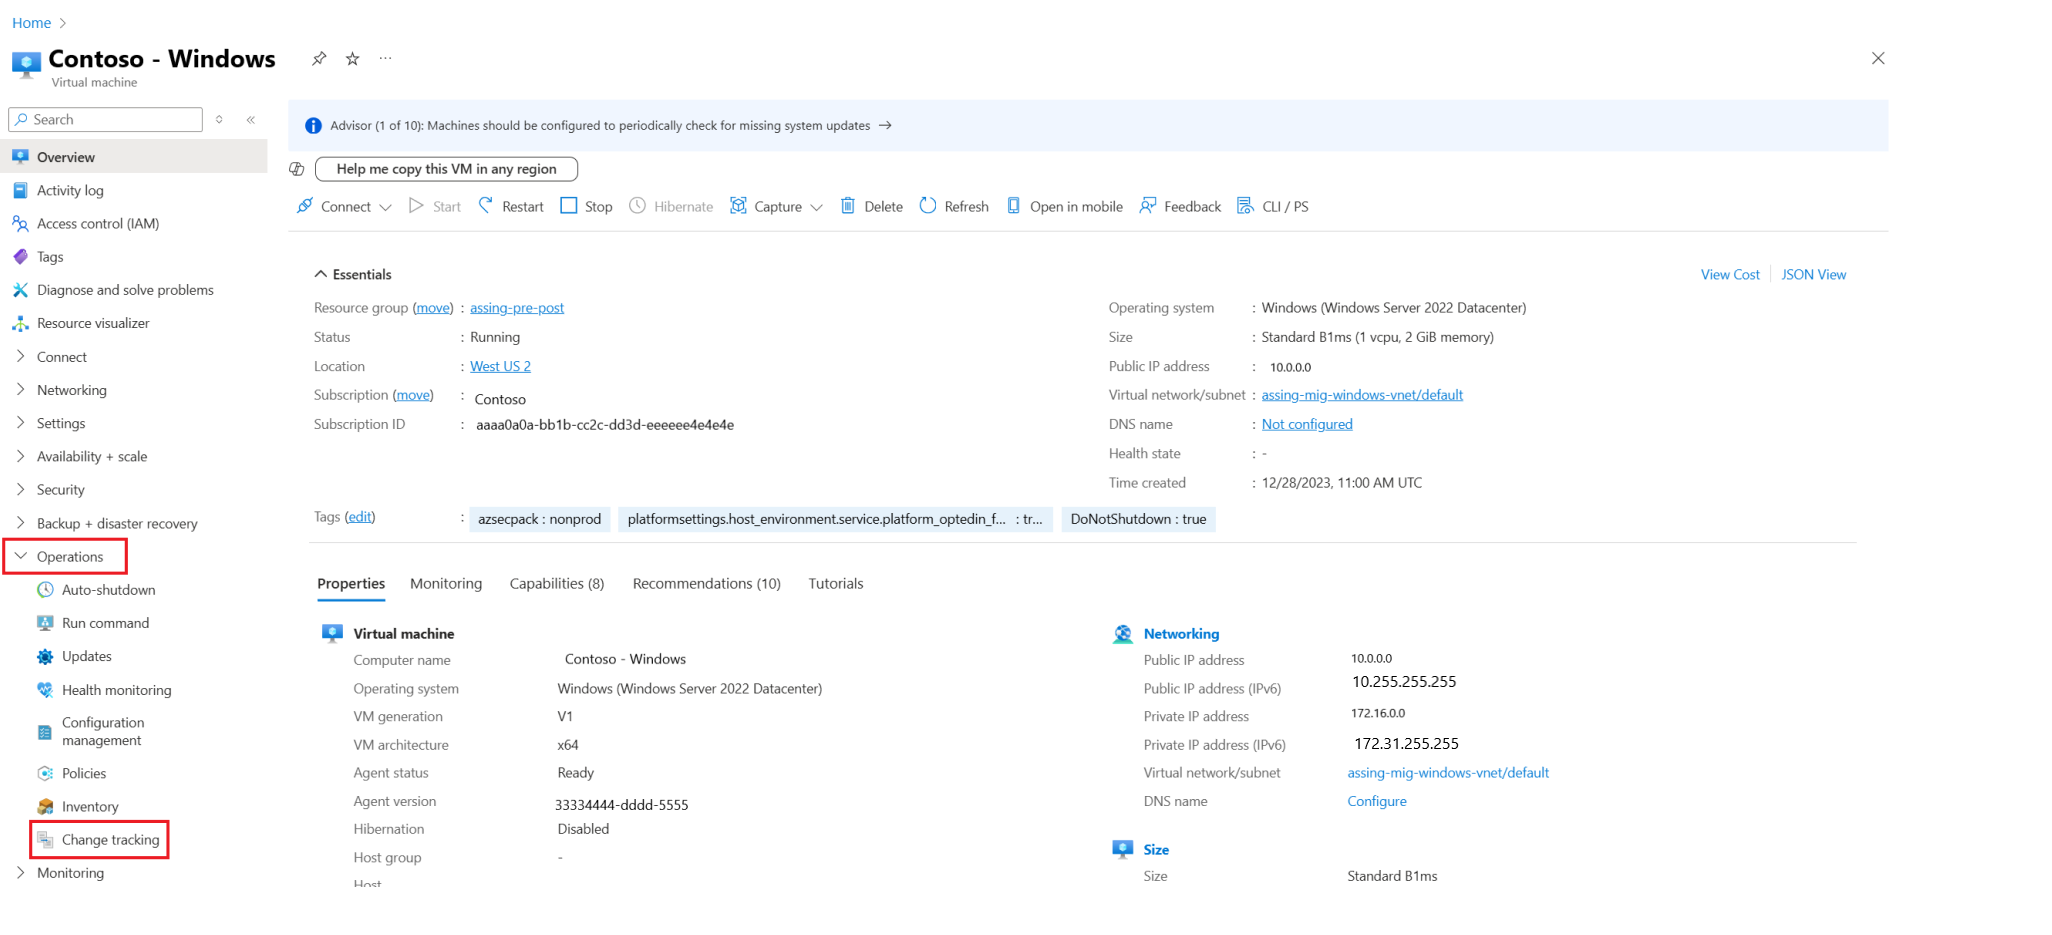
Select Settings to view the Data Collection Rule Configuration (DCR) page. Here, you can do the following actions:
- Configure changes on a VM at a granular level.
- Select the filter to configure the workspace.
- Use the filter to view all the DCRs that are configured to the specific LA workspace level.
Note
The settings that you configure are applicable to all the VMs that are attached to a specific DCR. For more information about DCR, see Data collection rules in Azure Monitor.
Select Add to configure new file settings
In the Add Windows File setting pane, enter the information for the file or folder to track and click Save. The following table defines the properties that you can use for the information.
Property Description Enabled True if the setting is applied, and false otherwise. Item Name Friendly name of the file to be tracked. Group A group name to group files logically Path The path to check for the file, for example, c:\temp*.txt. You can also use environment variables, such as %winDir%\System32\*.*. Path Type The type of path. Possible values are File and Folder. Recursion True if recursion is used when looking for the item to be tracked, and False otherwise.

You can now view the virtual machines configured to the DCR.
Configure file content changes
To configure file content changes, follow these steps:
In your virtual machine, under Operations, select Change tracking > Settings.
In the Data Collection Rule Configuration (Preview) page, select File Content > Link to link the storage account.
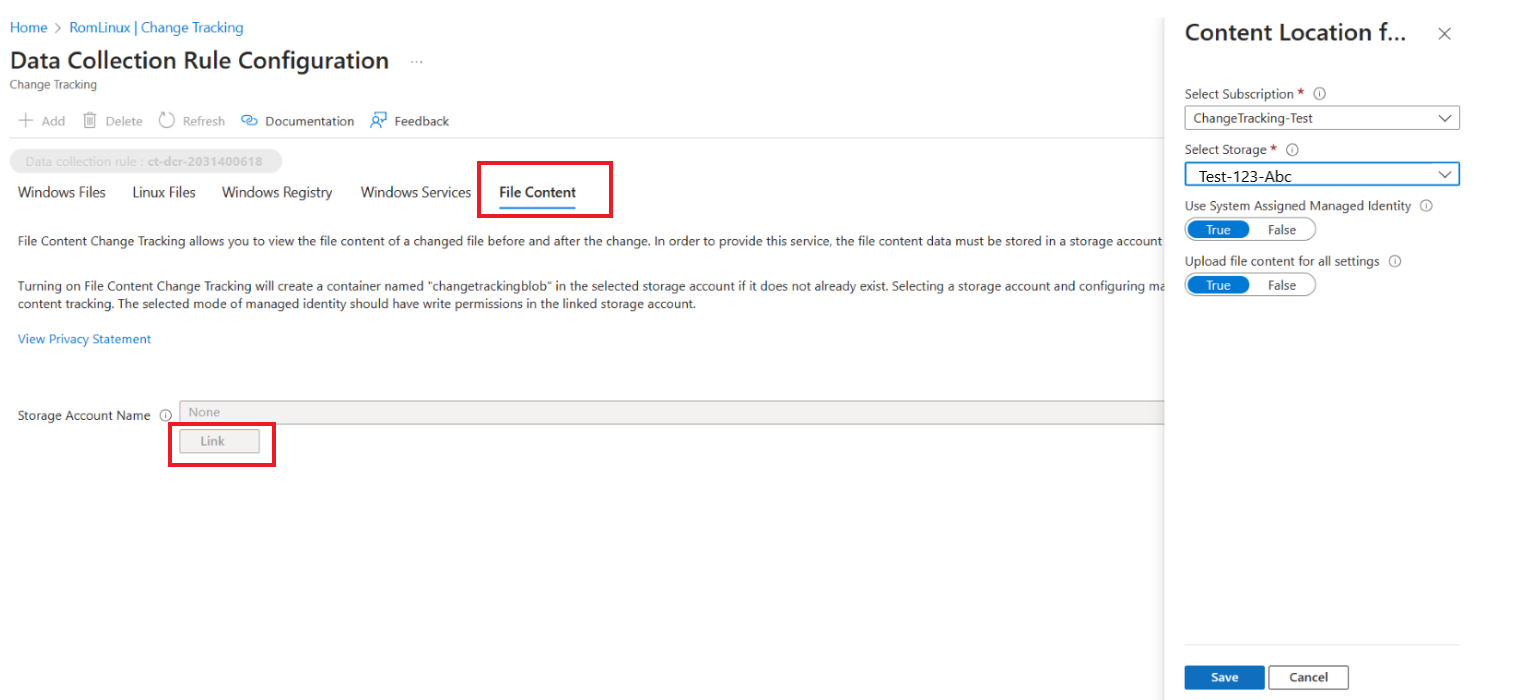
In Content Location for Change Tracking screen, select your Subscription, Storage and confirm if you are using System Assigned Managed Identity.
Select Upload file content for all settings, and then select Save. It ensures that the file content changes for all the files residing in this DCR will be tracked.

When the storage account is linked using the system assigned managed identity, a blob is created.
From Azure portal, go to Storage accounts, and select the storage account.
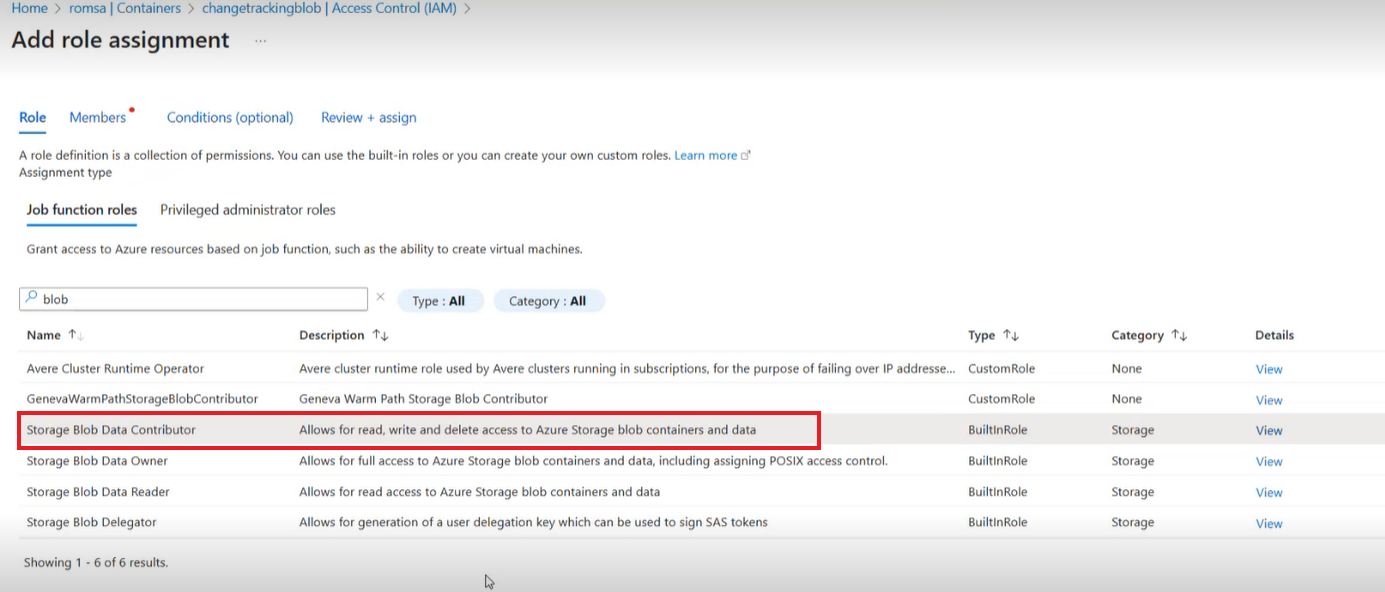
In the storage account page, under Data storage, select Containers > Changetracking blob > Access Control (IAM).
In the Changetrackingblob | Access Control (IAM) page, select Add and then select Add role assignment.

In the Add role assignment page, use the search for Blob Data contributor to assign a storage Blob contributor role for the specific VM. This permission provides access to read, write, and delete storage blob containers and data.
Select the role and assign it to your virtual machine.


Upgrade the extension version
Note
Ensure that ChangeTracking-Linux/ ChangeTracking-Windows extension version is upgraded to the current general release version: GA Extension Version
Use the following command to upgrade the extension version:
az vm extension set -n {ExtensionName} --publisher Microsoft.Azure.ChangeTrackingAndInventory --ids {VirtualMachineResourceId}
The extension for Windows is Vms - ChangeTracking-Windowsand for Linux is Vms - ChangeTracking-Linux.
Configure using wildcards
To configure the monitoring of files and folders using wildcards, do the following:
- Wildcards are required for tracking multiple files.
- Wildcards can only be used in the last segment of a path, such as C:\folder\file or /etc/.conf*
- If an environment variable includes a path that is not valid, validation will succeed but the path will fail when inventory runs.
- When setting the path avoid general paths such as c:.** which will result in too many folders being traversed.
Disable Change Tracking from a virtual machine
To remove change tracking with Azure Monitoring Agent from a virtual machine, follow these steps:
Disassociate Data Collection Rule (DCR) from a VM
In Azure portal, select Virtual Machines and in the search, select the specific Virtual Machine.
In the Virtual Machine page, under Operations, select Change tracking or in the search, enter Change tracking and select it from the search result.
Select Settings > DCR to view all the virtual machines associated with the DCR.
Select the specific VM for which you want to disable the DCR.
Select Delete.

A notification appears to confirm the disassociation of the DCR for the selected VM.

Uninstall change tracking extension
In the Azure portal, select Virtual Machines and in the search, select the specific VM for which you have already disassociated the DCR.
In the Virtual Machines page, under Settings, select Extensions + applications.
In the VM |Extensions + applications page, under Extensions tab, select MicrosoftAzureChangeTrackingAndInventoryChangeTracking-Windows/Linux.
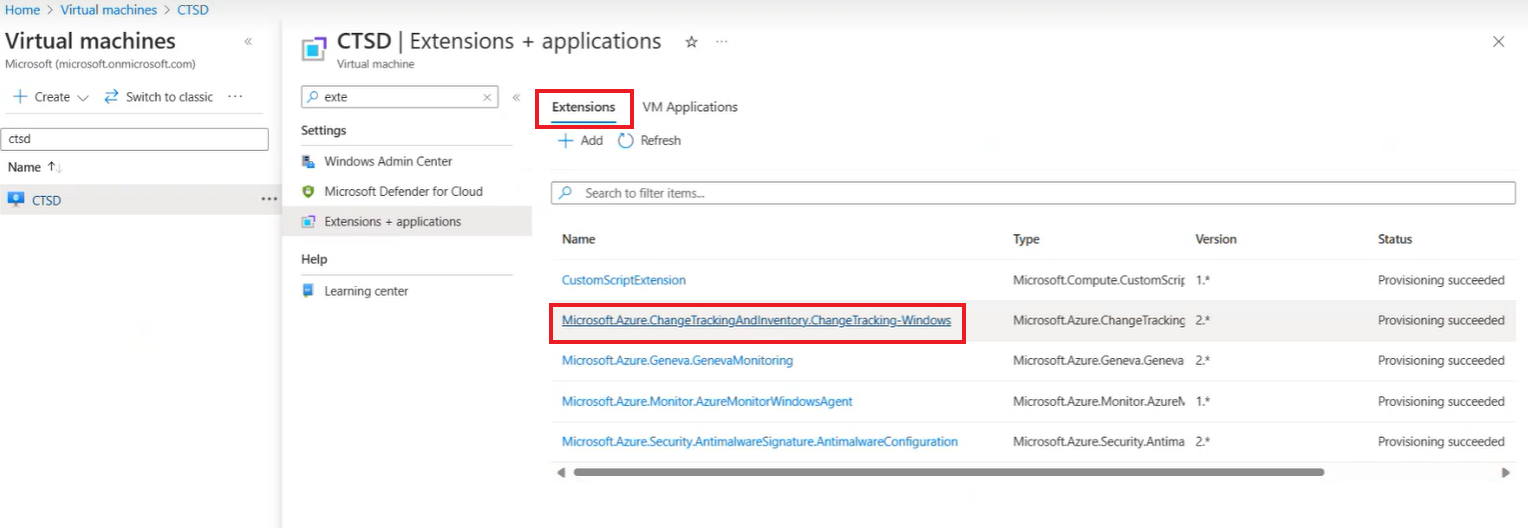
Select Uninstall.

Next steps
- To learn about alerts, see Configuring alerts.