Enable Change Tracking and Inventory using Azure Monitoring Agent
Applies to: ✔️ Windows VMs ✔️ Linux VMs ✔️ Windows Registry ✔️ Windows Files ✔️ Linux Files ✔️ Windows Software ✔️ File Content Changes
This article describes how you can enable Change Tracking and Inventory for single and multiple Azure Virtual Machines (VMs) from the Azure portal.
Prerequisites
- An Azure subscription. If you don't have one yet, you can activate your MSDN subscriber benefits or sign up for a free account.
- A virtual machine configured in the specified region.
Enable Change Tracking and Inventory
This section provides detailed procedure on how you can enable change tracking on a single VM and multiple VMs.
Sign in to Azure portal and navigate to Virtual machines.
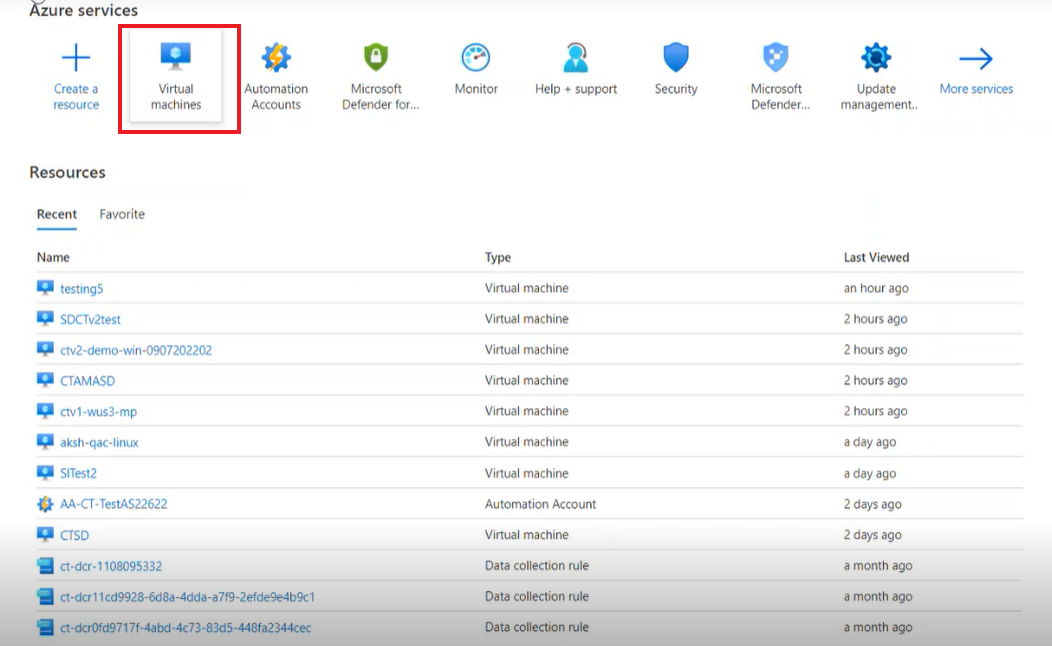
Select the virtual machine for which you want to enable Change Tracking.
In the search, enter Change tracking to view the change tracking and inventory page.
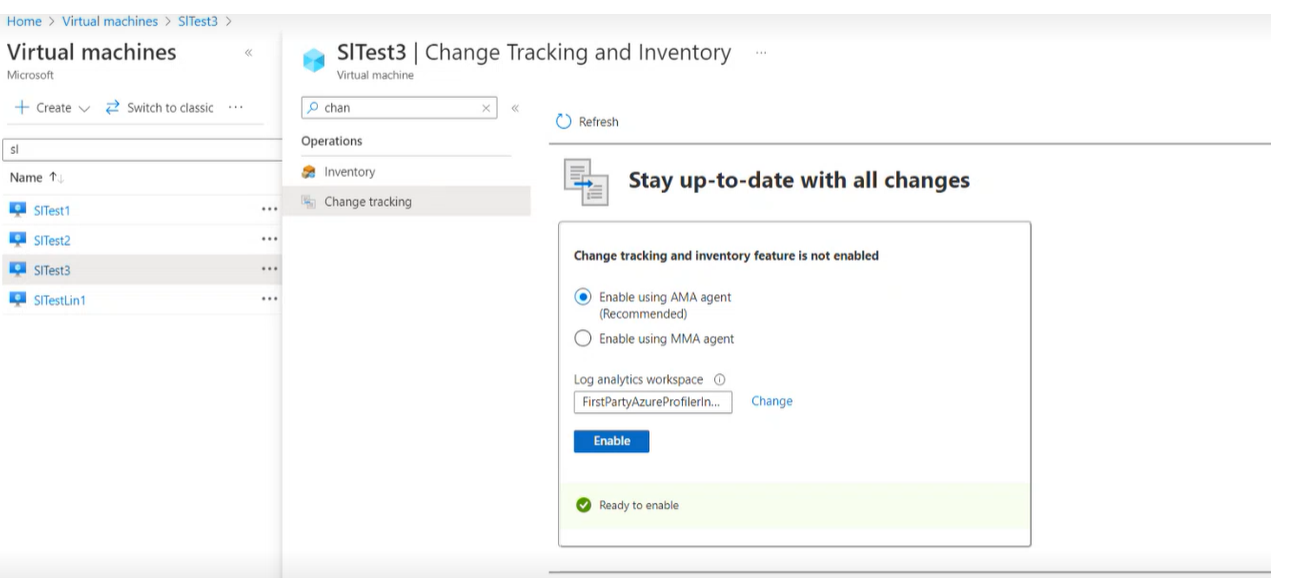
In the Stay up-to-date with all changes layout, select Enable using AMA agent (Recommended) option and Enable.
It will initiate the deployment and the notification appears on the top right corner of the screen.


Note
It usually takes up to two to three minutes to successfully onboard and enable the virtual machine(s). After you enable a virtual machine for change tracking, you can make changes to the files, registries, or software for the specific VM.
Enable Change Tracking at scale using Azure Monitoring Agent
Prerequisite
- You must create the Data collection rule.
Enable Change tracking
Using the Deploy if not exist (DINE) policy, you can enable Change tracking with Azure Monitoring Agent at scale and in the most efficient manner.
In Azure portal, select Policy.
In the Policy page, under Authoring, select Definitions
In Policy | Definitions page, under the Definition Type category, select Initiative and in Category, select Change Tracking and Inventory. You'll see a list of three policies:
Select Enable Change Tracking and Inventory for Arc-enabled virtual machines.
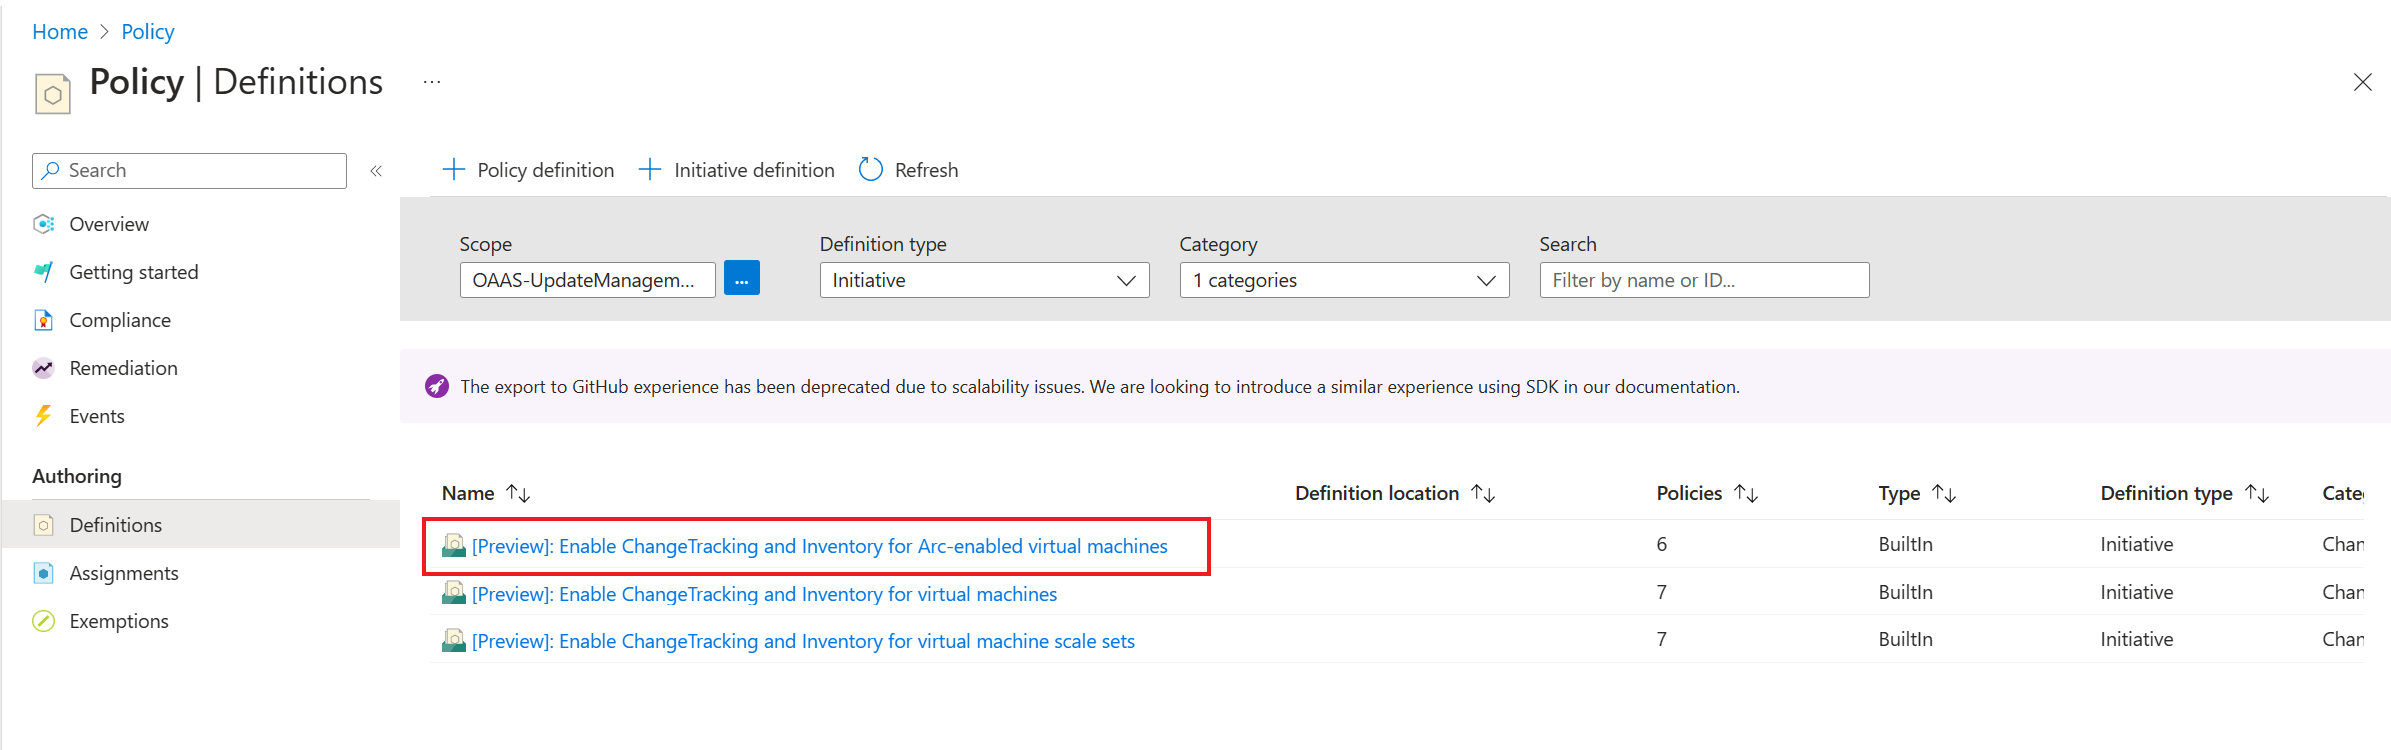
Select Enable Change Tracking and Inventory for virtual machines to enable the change tracking on Azure virtual machines. This initiative consists of three policies:
Assign Built in User-Assigned Managed identity to Virtual machines
Configure ChangeTracking Extension for Windows virtual machines
Configure ChangeTracking Extension for Linux virtual machines
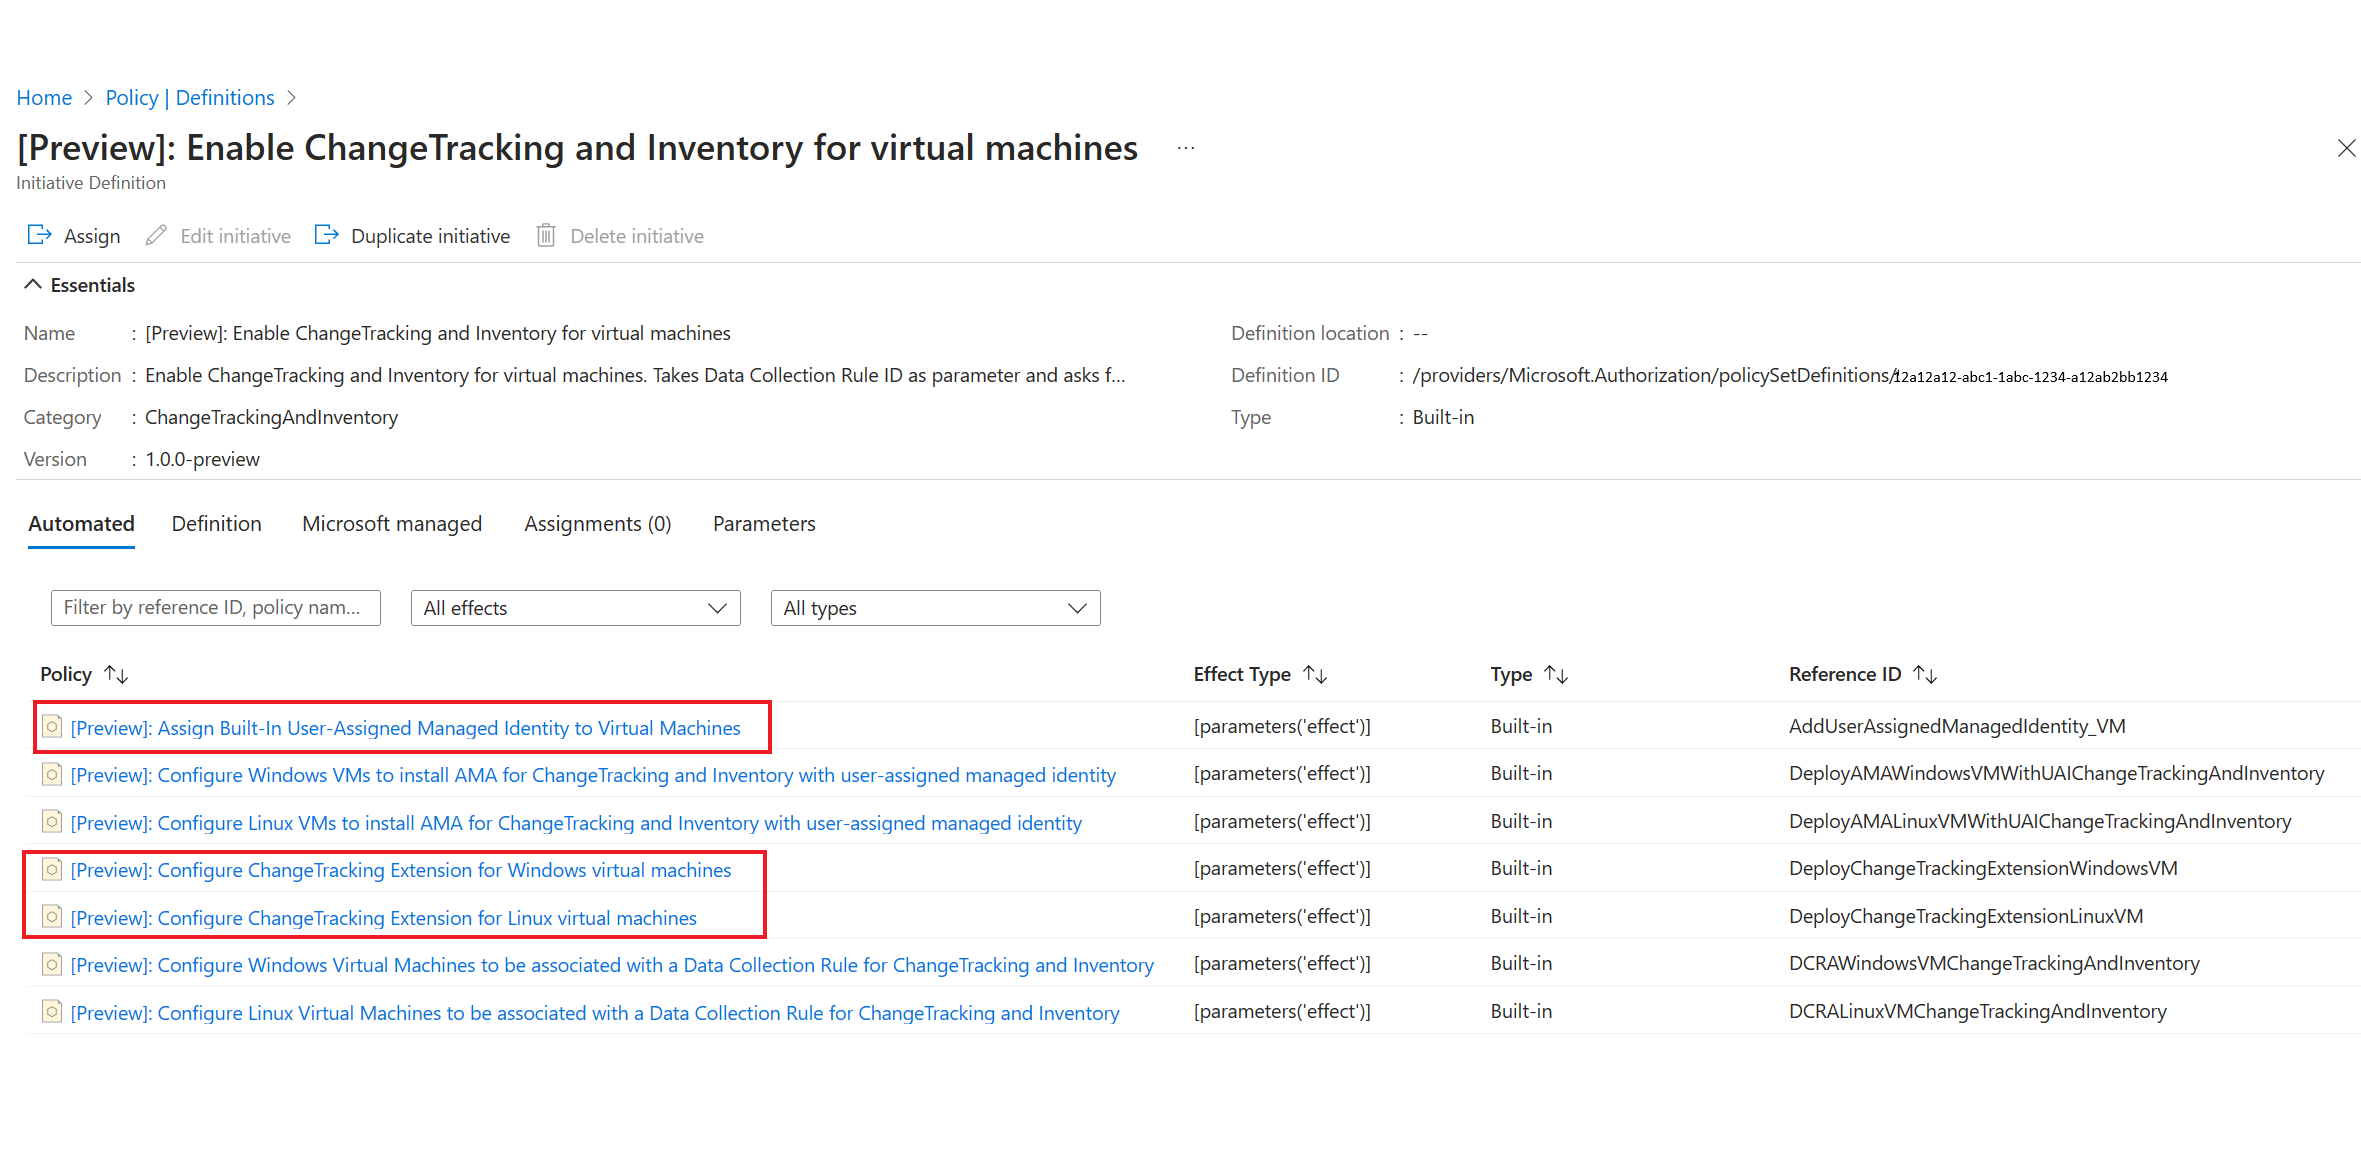
Select Assign to assign the policy to a resource group. For example, Assign Built in User-Assigned Managed identity to virtual machines.
Note
The Resource group contains virtual machines and when you assign the policy, it will enable change tracking at scale to a resource group. The virtual machines that are on-boarded to the same resource group will automatically have the change tracking feature enabled.
In the Enable Change Tracking and Inventory for virtual machines page, enter the following options:
- In Basics, you can define the scope. Select the three dots to configure a scope. In the Scope page, provide the Subscription and Resource group.
- In Parameters, select the option in the Bring your own user assigned managed identity.
- Provide the Data Collection Rule Resource id. Learn more on how to obtain the Data Collection Rule Resource ID after you create the Data collection rule.
- Select Review + create.


Create data collection rule
Download CtDcrCreation.json file on your machine.
Go to Azure portal and in the search, enter Deploy a custom template.
In the Custom deployment page > select a template, select Build your own template in the editor.
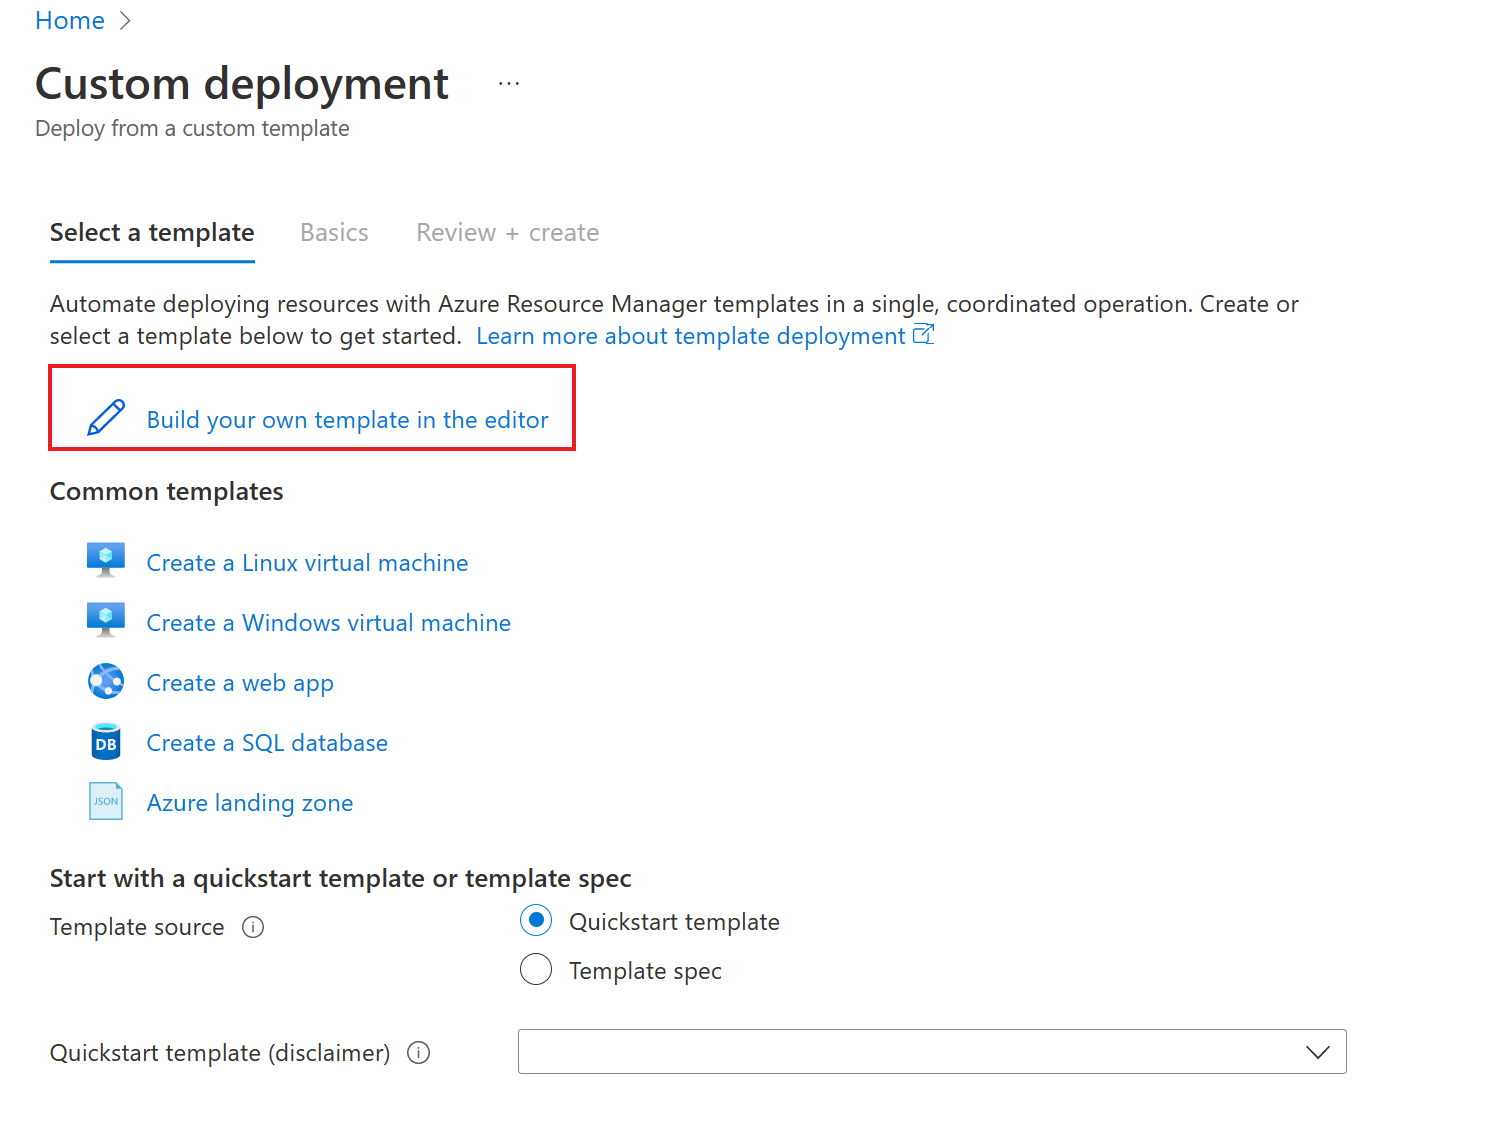
In the Edit template, select Load file to upload the CtDcrCreation.json file.
Select Save.
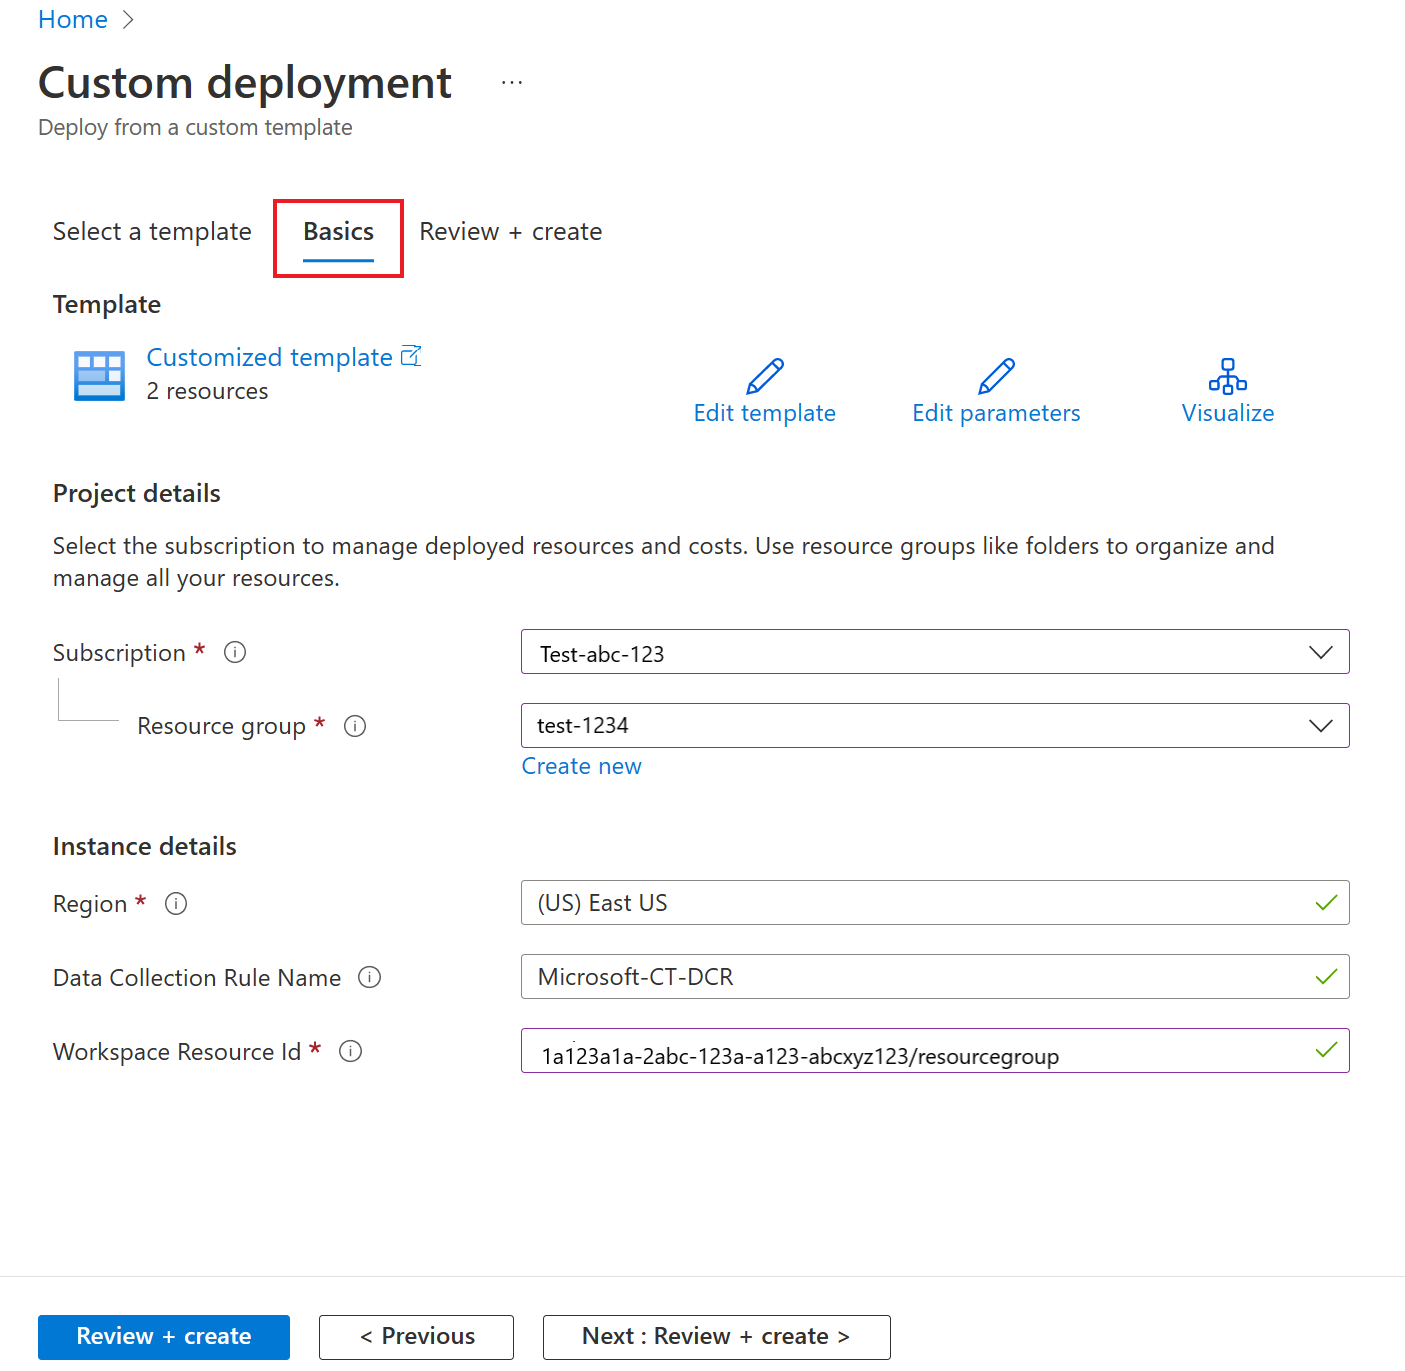
In the Custom deployment > Basics tab, provide Subscription and Resource group where you want to deploy the Data Collection Rule. The Data Collection Rule Name is optional. The resource group must be same as the resource group associated with the Log Analytic workspace id chosen here.
Note
- Ensure that the name of your Data Collection Rule is unique in that resource group, else the deployment will overwrite the existing Data Collection Rule.
- The Log Analytics Workspace Resource Id specifies the Azure resource ID of the Log Analytics workspace used to store change tracking data. Ensure that location of workspace is from the Change tracking supported regions
Select Review+create > Create to initiate the deployment of CtDcrCreation.
After the deployment is complete, select CtDcr-Deployment to see the DCR Name. Use the Resource ID of the newly created Data Collection Rule for Change tracking and inventory deployment through policy.

Next steps
- For details of working with the feature, see Manage Change Tracking.
- To troubleshoot general problems with the feature, see Troubleshoot Change Tracking and Inventory issues.
Feedback
Coming soon: Throughout 2024 we will be phasing out GitHub Issues as the feedback mechanism for content and replacing it with a new feedback system. For more information see: https://aka.ms/ContentUserFeedback.
Submit and view feedback for