Manage Runtime environment and associated runbooks
This article provides information on how to create Runtime Environment and perform various operations through Azure portal and REST API.
Prerequisites
An Azure Automation account in supported public region (except Central India, Germany North, Italy North, Israel Central, Poland Central, UAE Central, and Government clouds).
Switch between Runtime environment and old experience
Runtime environment experience
Select Overview and then select Try Runtime environment experience.
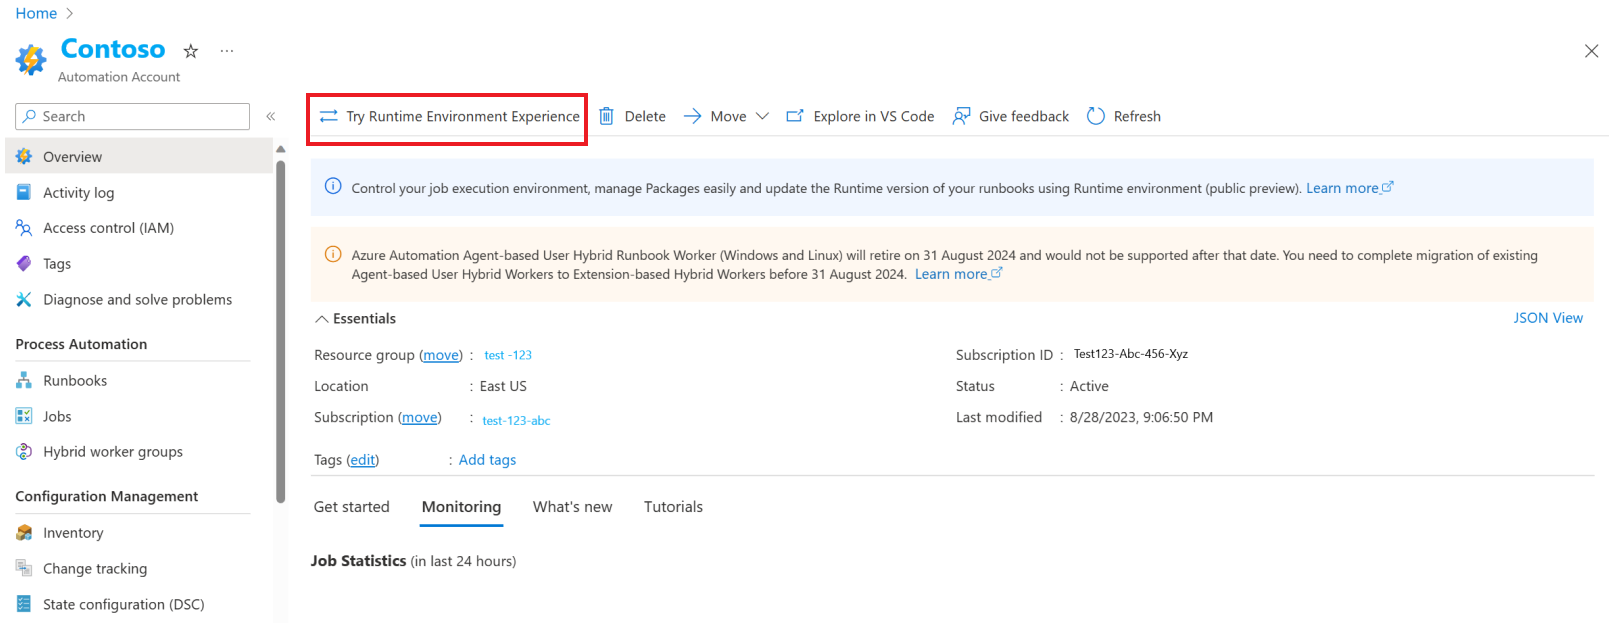
Under Process Automation, you have the Runtime Environments (Preview) and the Modules and Python packages under Shared resources are removed as the Runtime environment allows management of Packages required during Runbook execution.
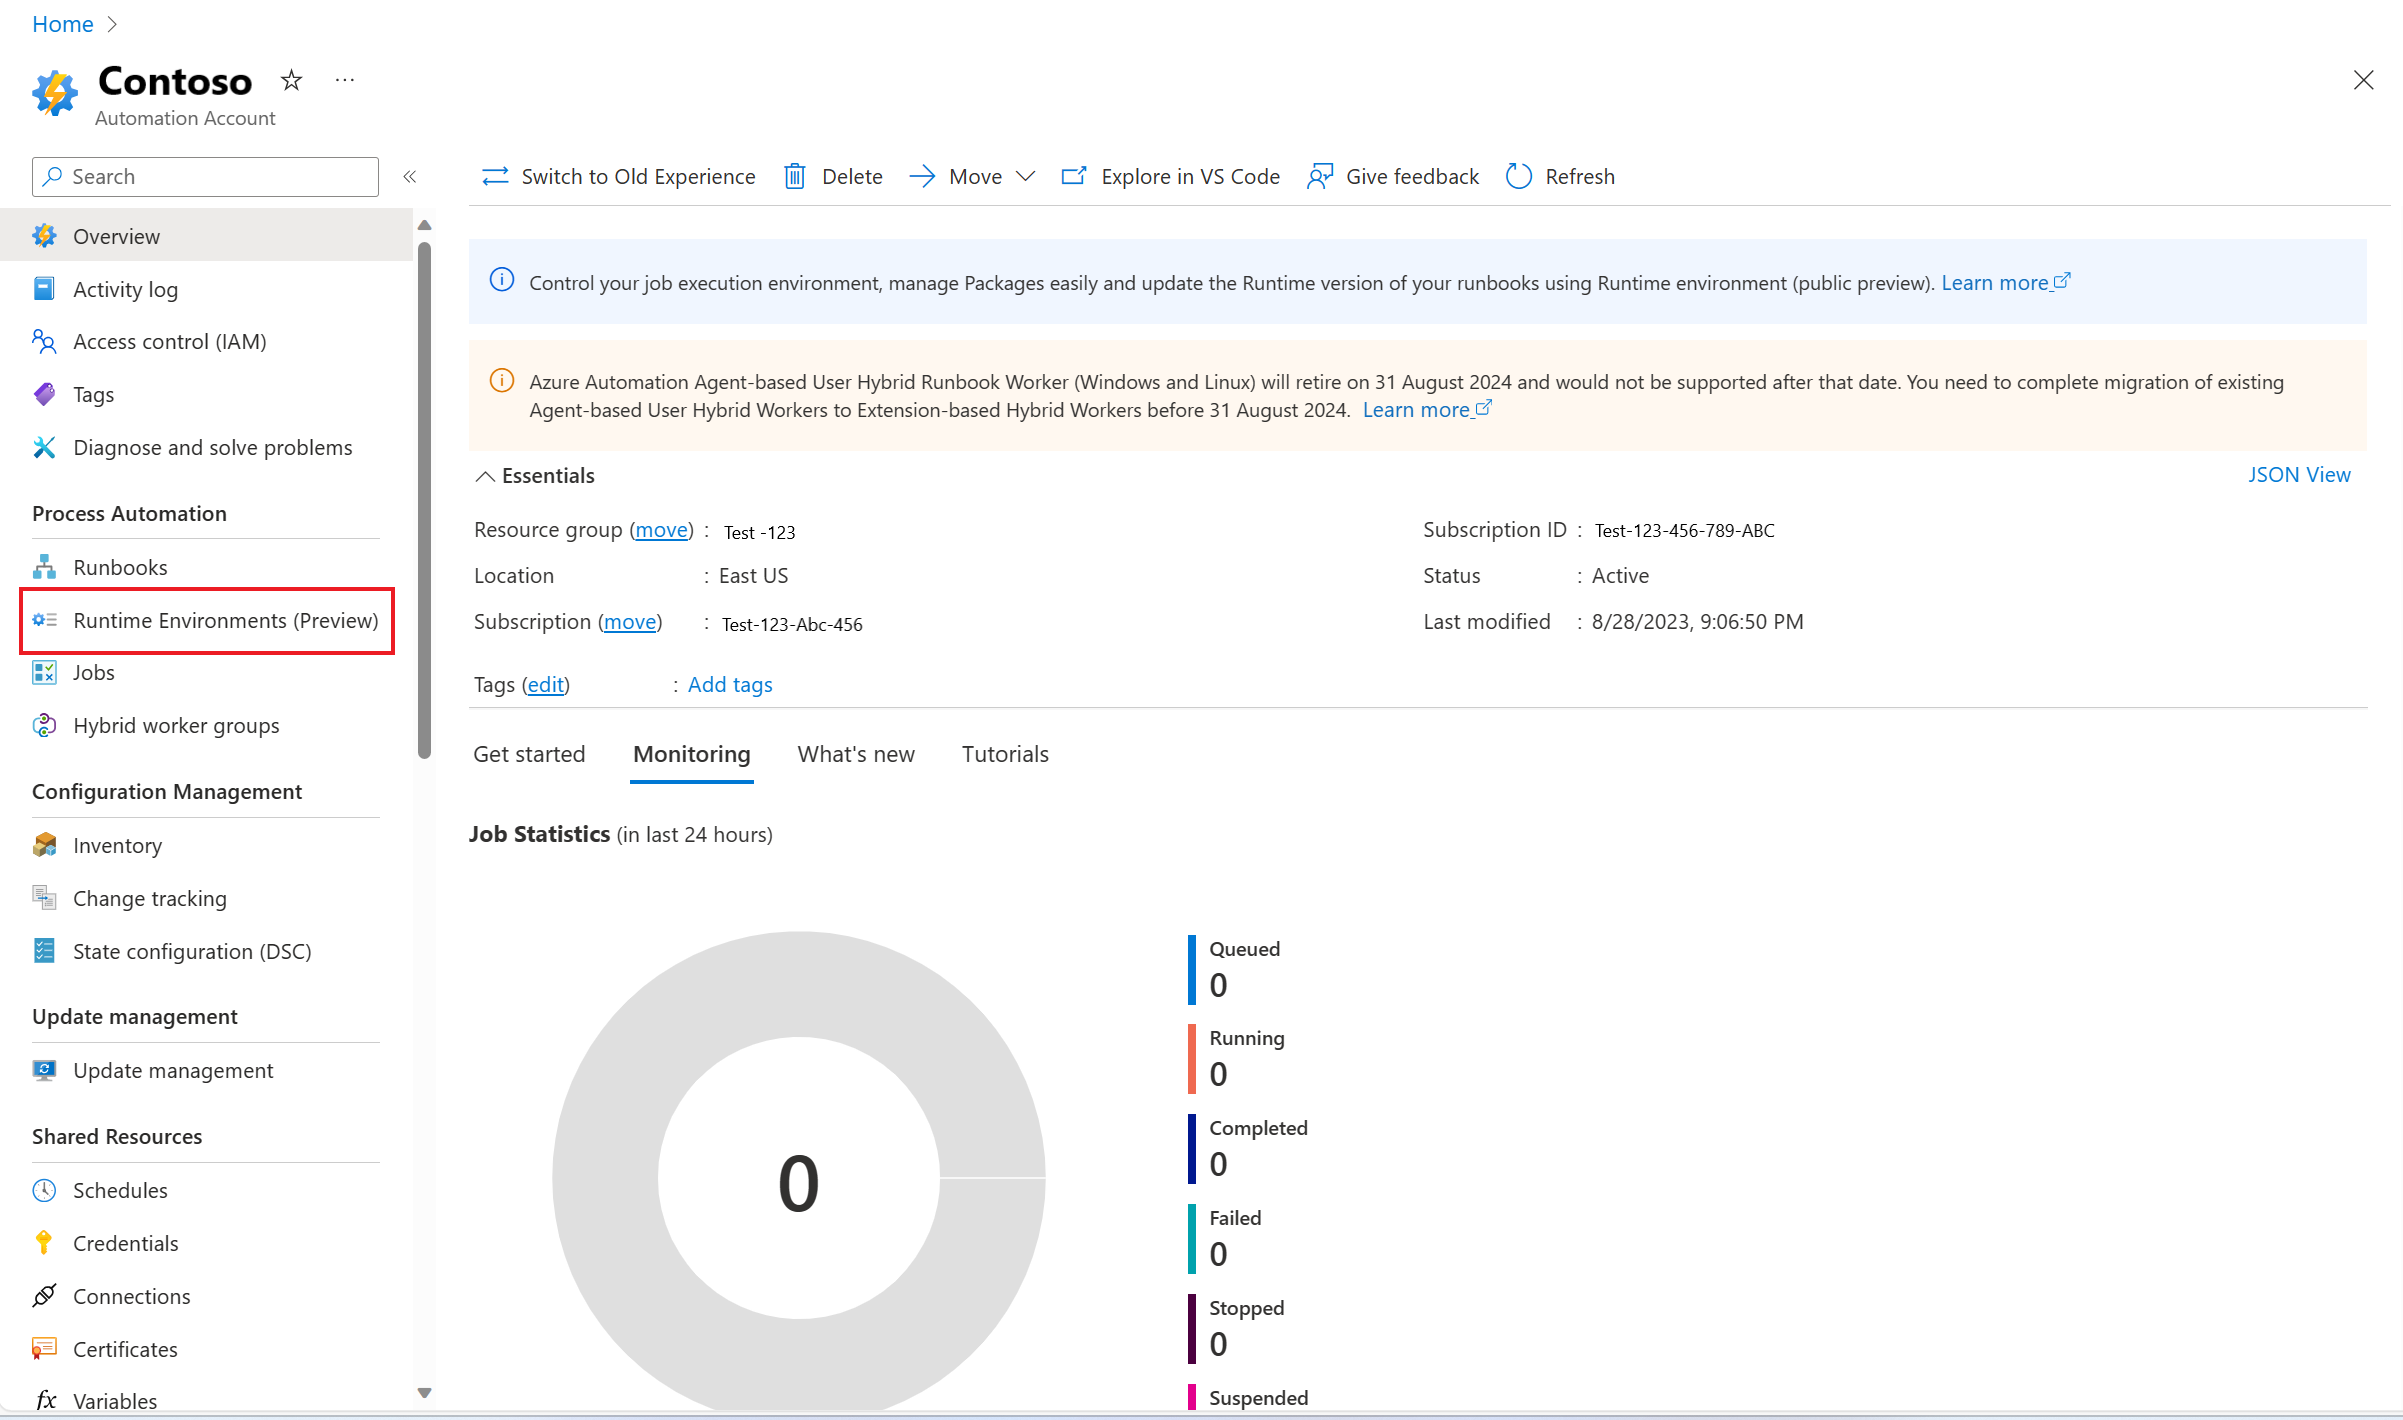
To revert to the old experience for managing Modules and Packages, select Overview in the left pane and then select Switch to Old Experience.
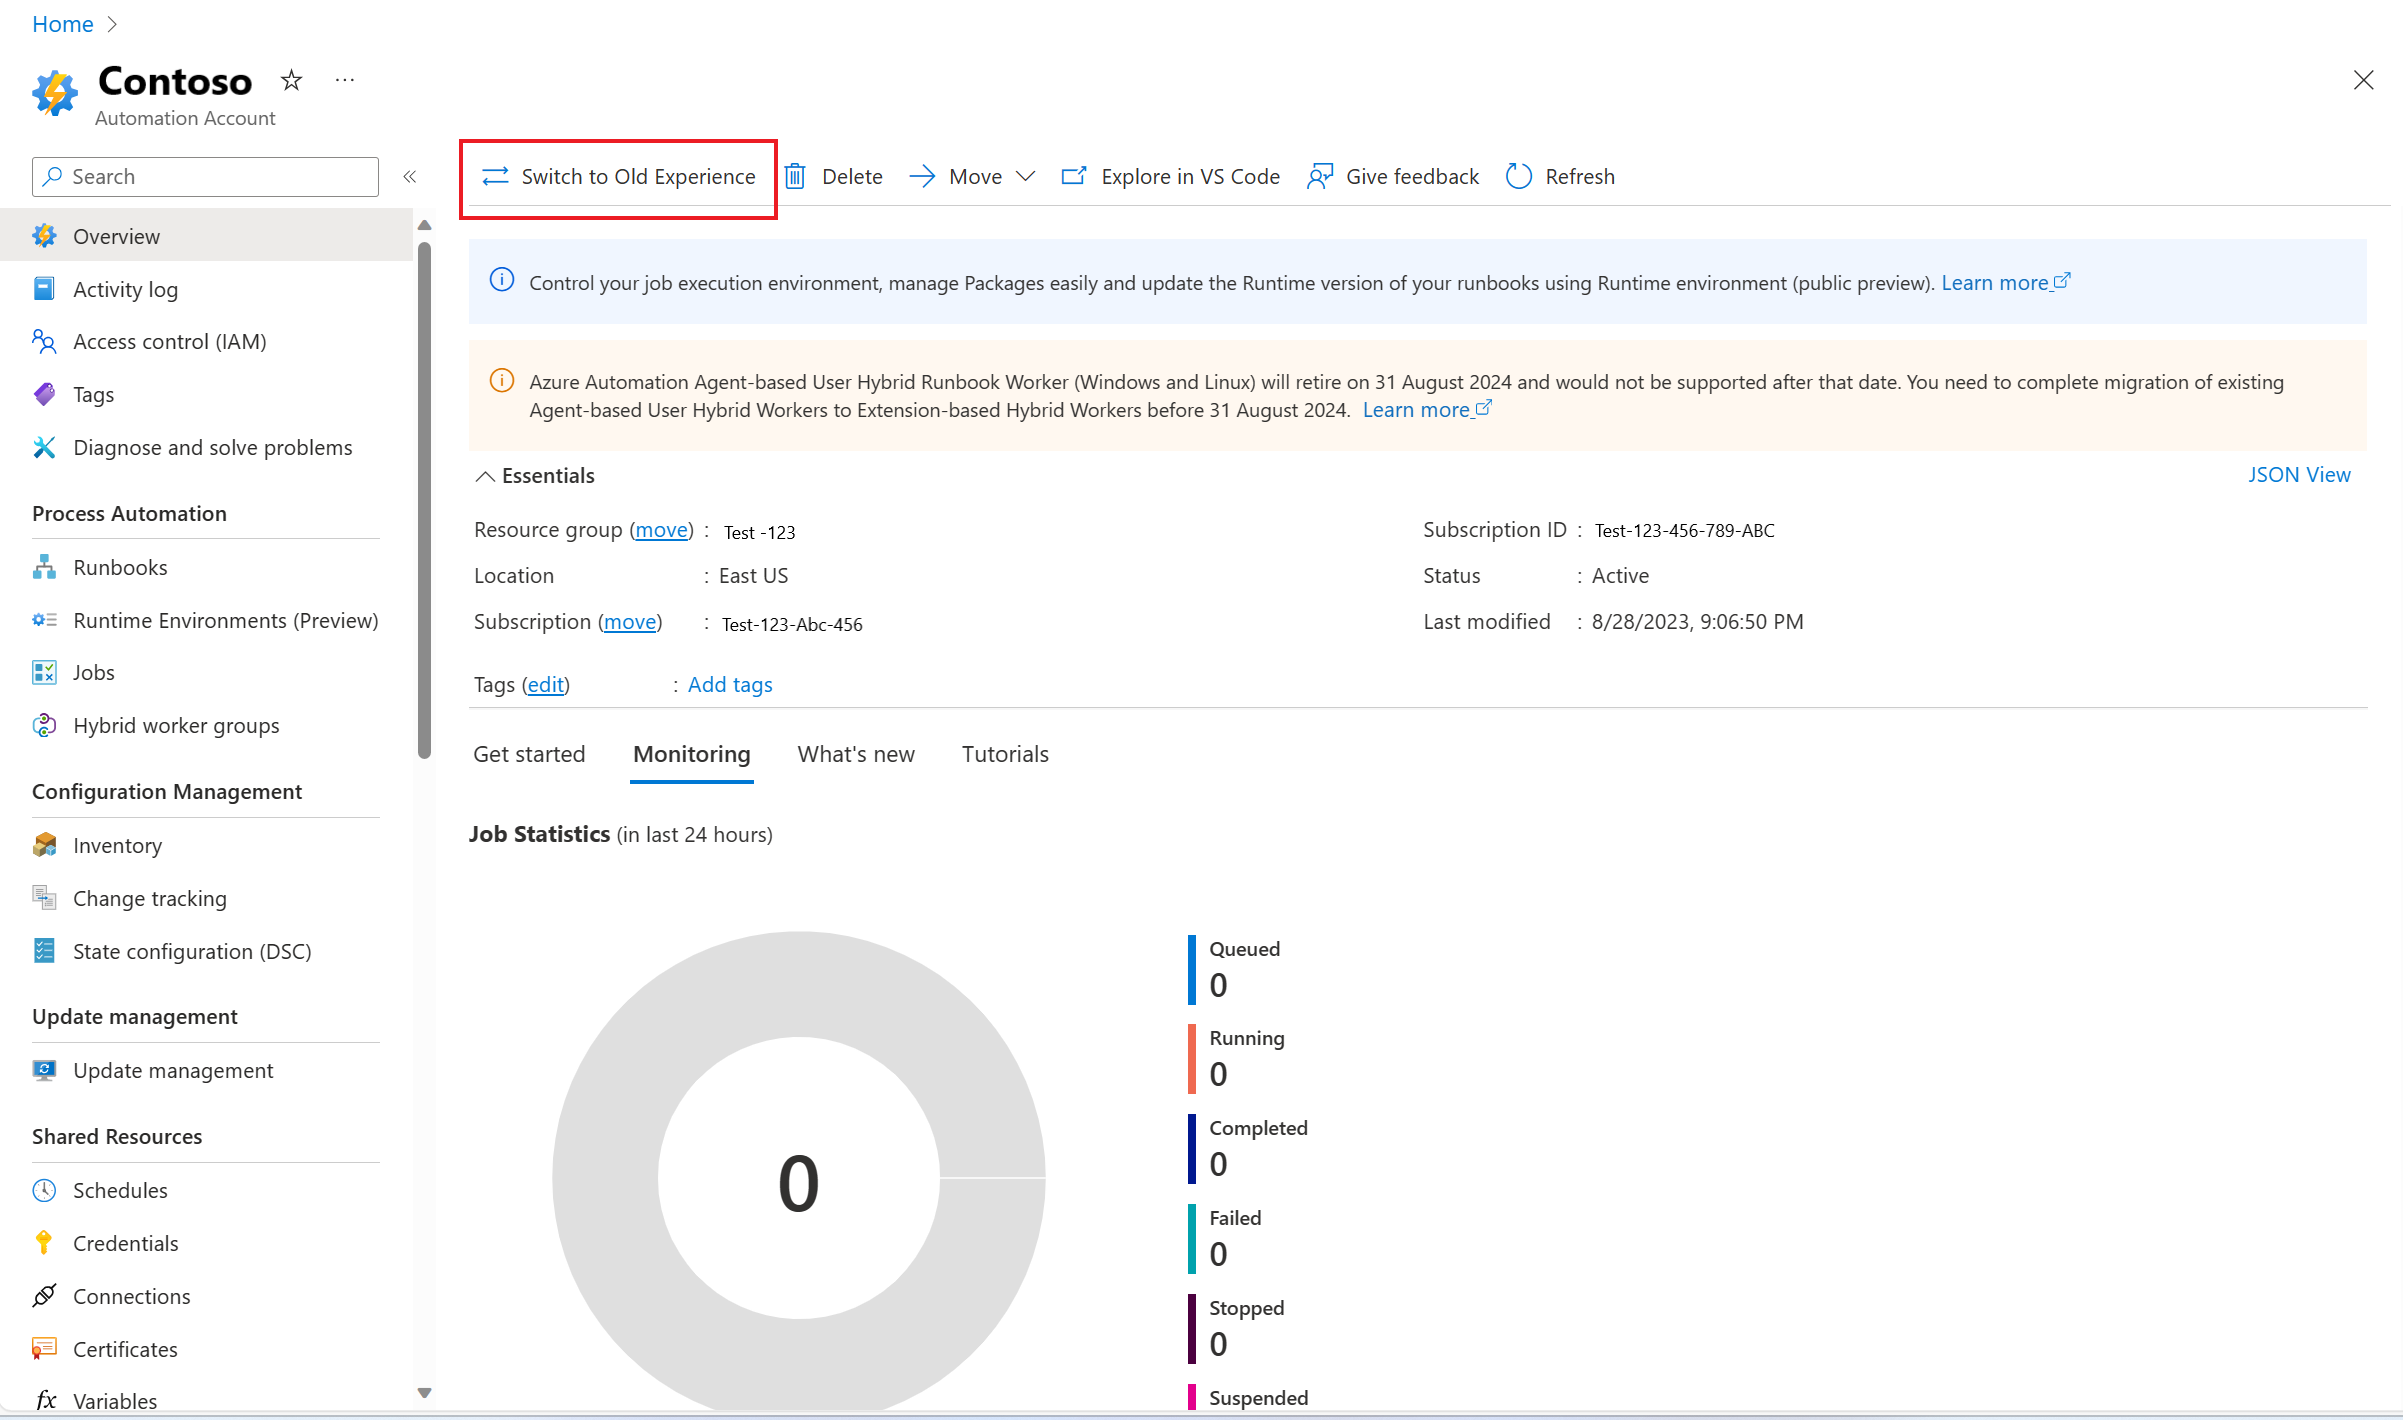


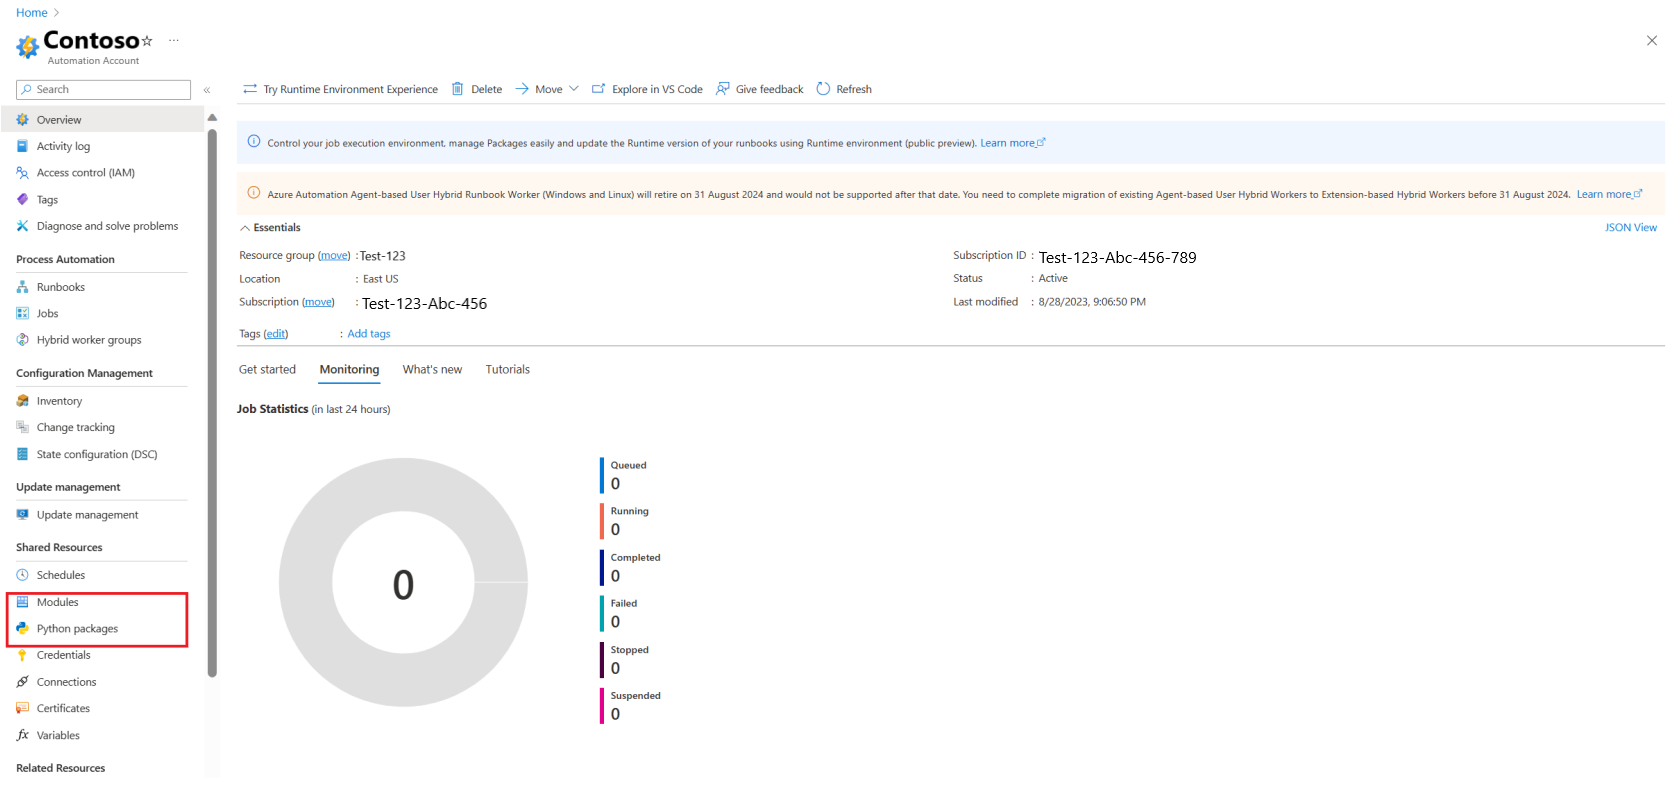
Old experience
Go to your Automation account, under Process Automation, the Runtime environments (preview) is removed and under Shared resources, Modules and Python packages can be seen.

Note
Runbook updates persist between new Runtime environment experience and old experience. Any changes done in the Runtime environment linked to a runbook would persist during runbook execution in old experience.
Manage Runtime environment
Create Runtime environment
Sign in to the Azure portal and select your Automation account.
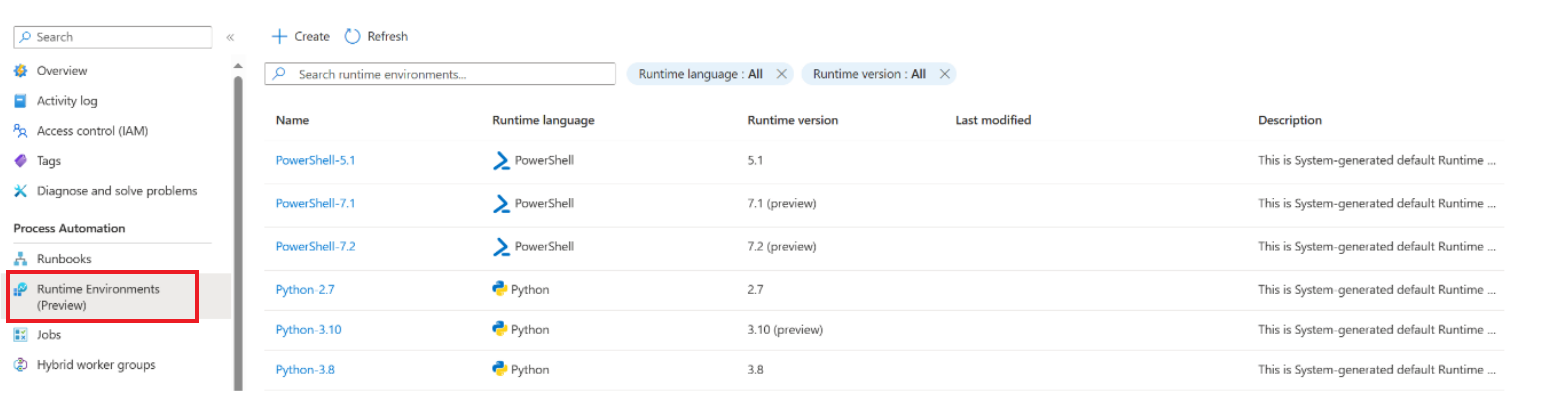
Under Process Automation, select Runtime Environments (preview) and then select Create.
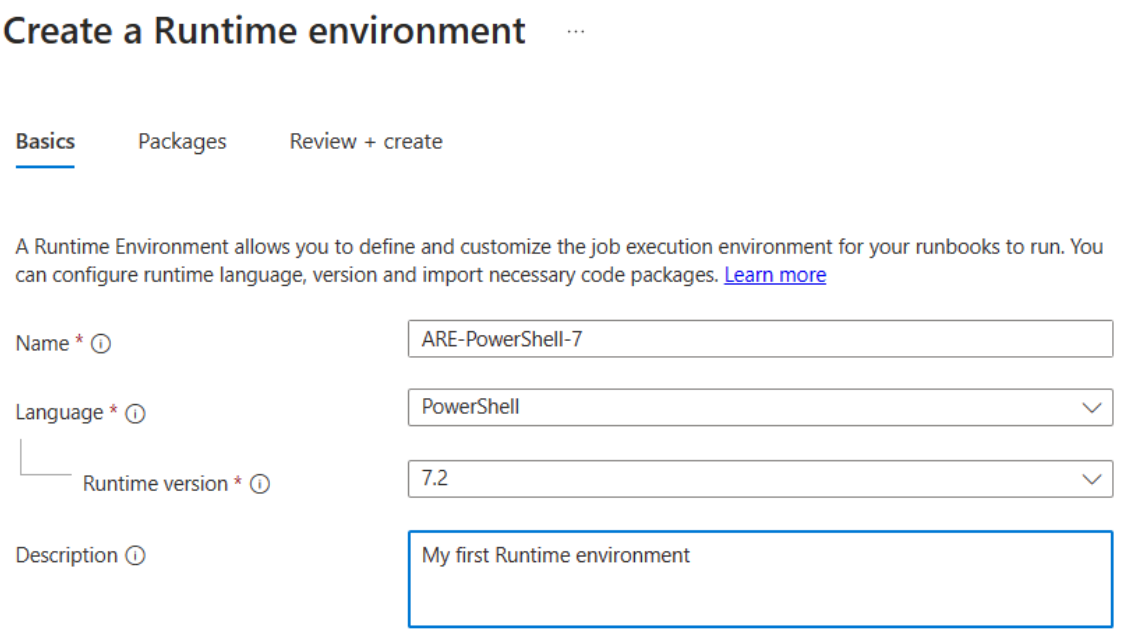
On Basics, provide the following details:
Name for the Runtime environment. It must begin with alphabet and can contain only alphabets, numbers, underscores, and dashes.
From the Language drop-down, select the scripting language for Runtime environment.
- Choose PowerShell for PowerShell scripting language or Python for Python scripting language.
Select Runtime version for scripting language.
- For PowerShell - choose 5.1, 7.2
- For Python - choose 3.8, 3.10 (preview)
Provide appropriate Description.
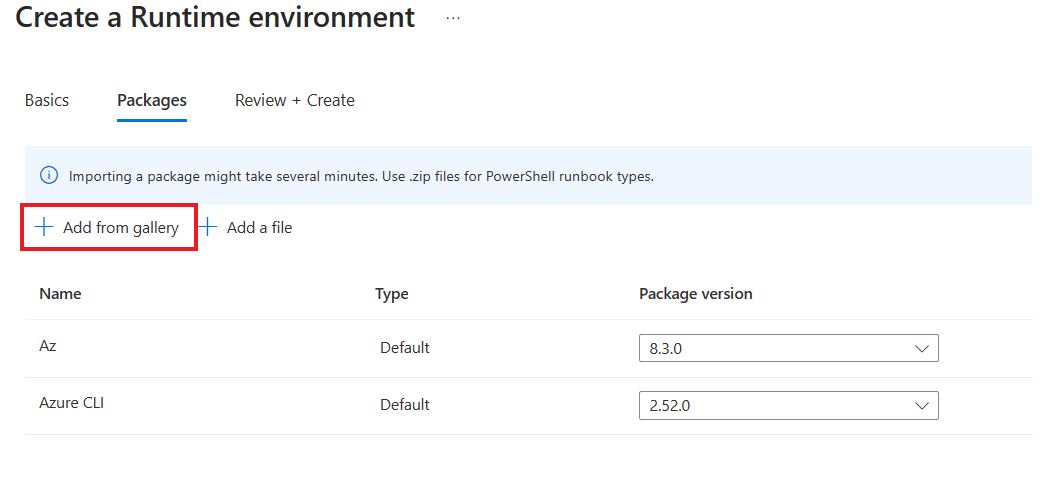
Select Next and in the Packages tab, upload the packages required during the runbook execution. The Az PowerShell package is uploaded by default for all PowerShell Runtime environments, which includes all cmdlets for managing Azure resources. You can choose the version of Az package from the dropdown. Select None if you don't want the Package to be uploaded during runbook execution.
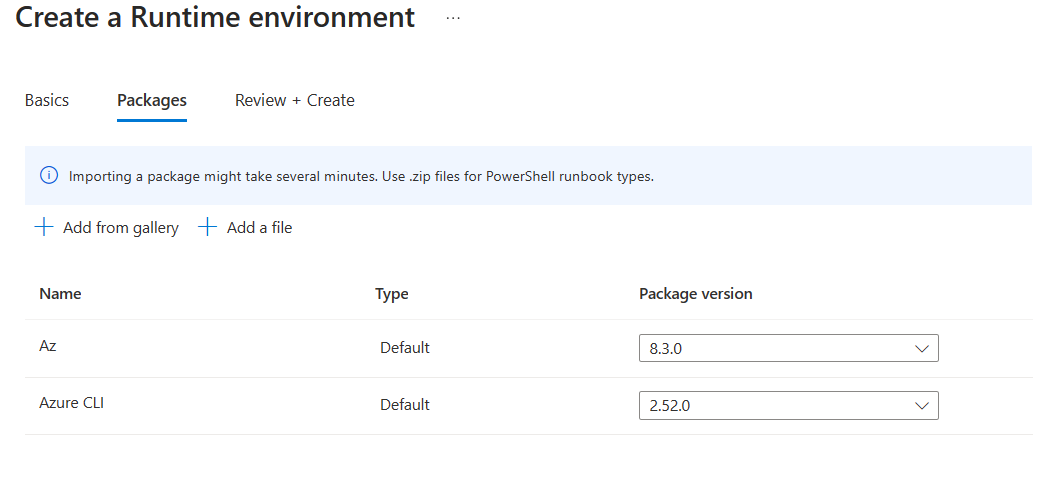
Note
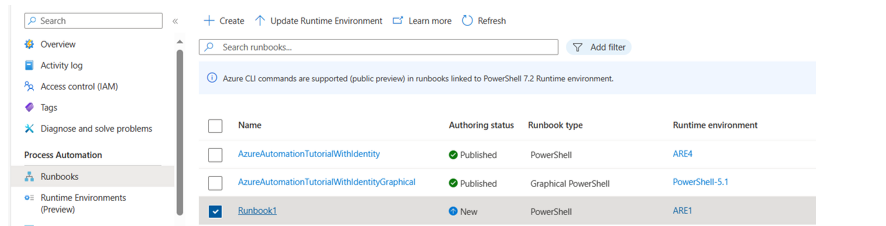
Azure CLI commands are supported (preview) in runbooks associated with PowerShell 7.2 Runtime environment. Azure CLI commands version 2.56.0 are available as a default package in PowerShell 7.2 Runtime environment.
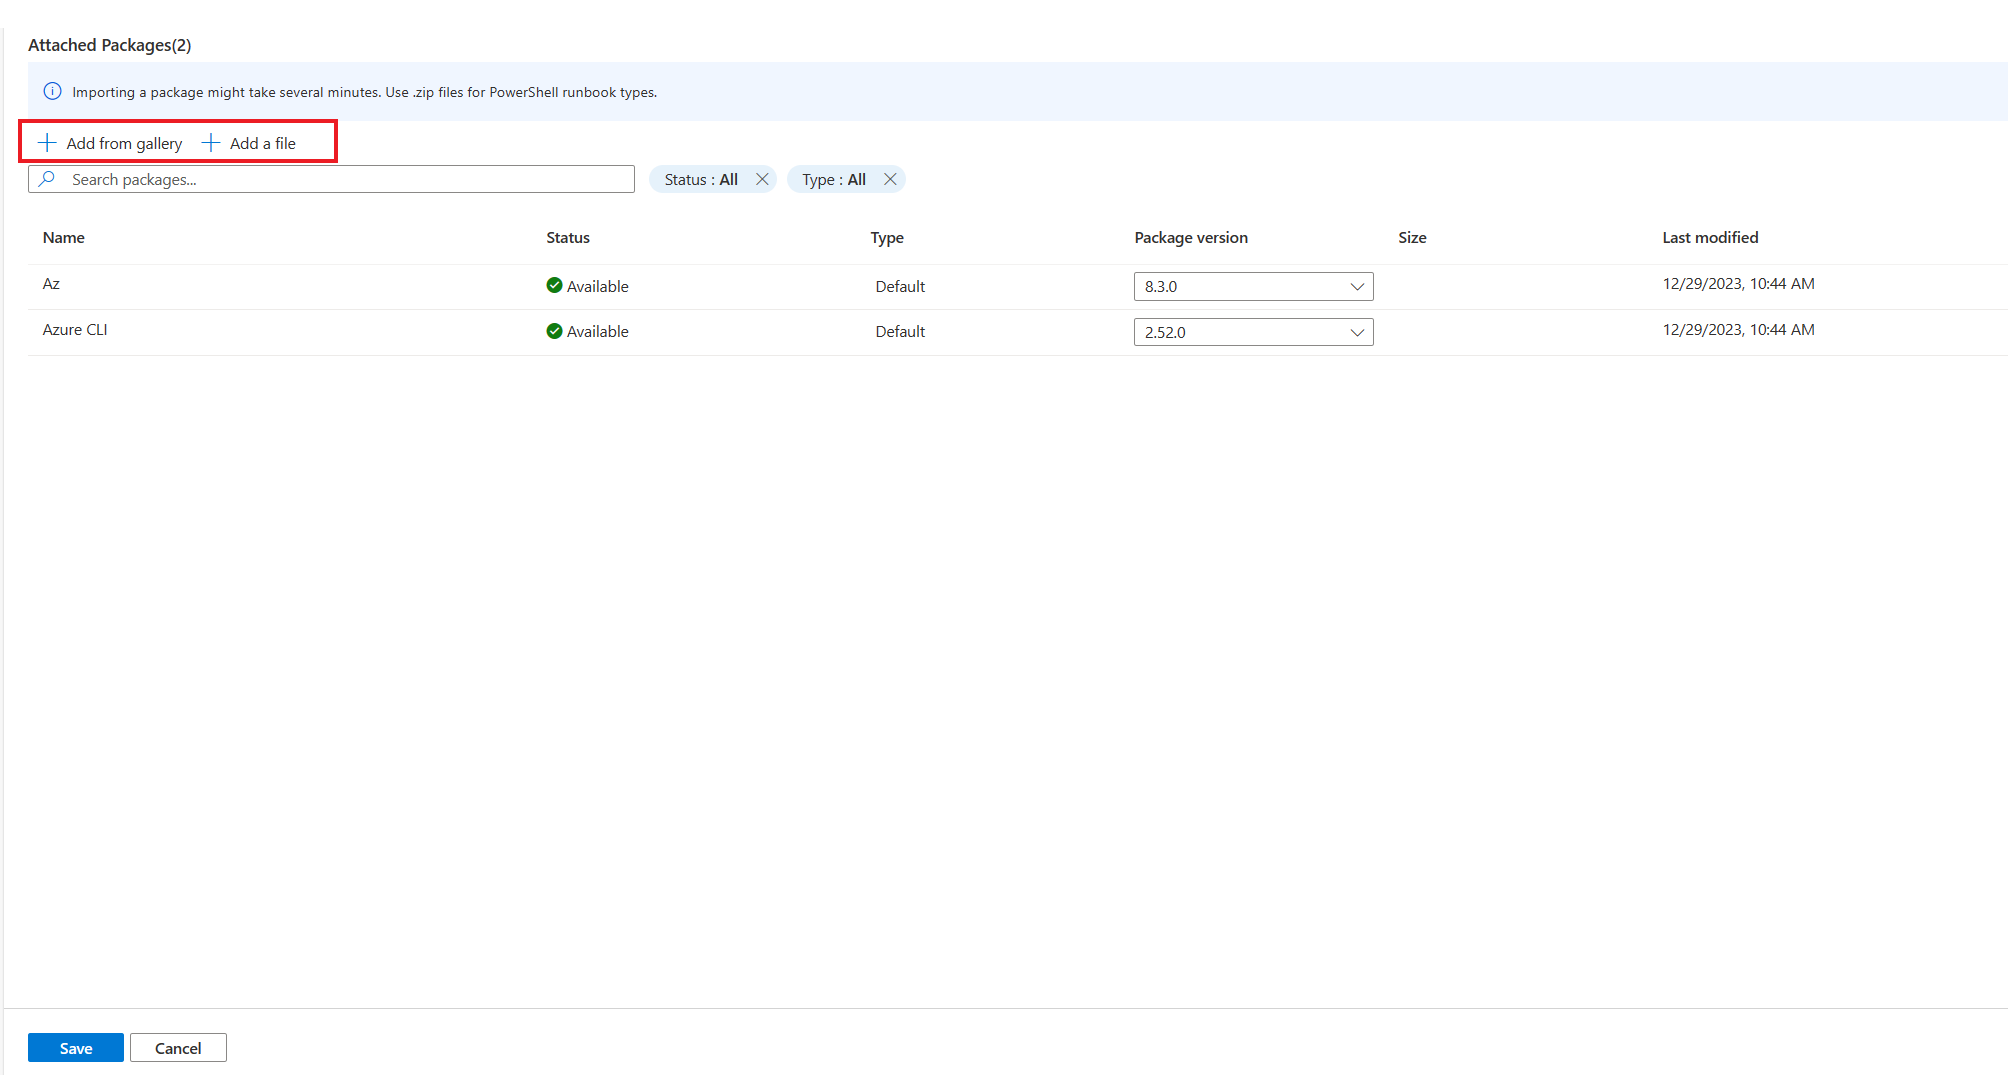
To upload more Packages required during runbook execution. Select Add a file to add the file(s) stored locally on your computer or select Add from gallery to upload packages from PowerShell gallery.
Note
- When you import a package, it might take several minutes. 100MB is the maximum total size of the files that you can import.
- Use .zip files for PowerShell runbook types.
- For Python 3.8 packages, use .tar.gz or .whl files targeting cp38-amd64.
- For Python 3.10 (preview) packages, use .whl files targeting cp310 Linux OS.
Select Next and in the Review + Create tab, verify that the settings are correct. When you select Create, Azure runs validation on Runtime environment settings that you have chosen. If the validation passes, you can proceed to create Runtime environment else, the portal indicates the settings that you need to modify.

In the Runtime Environments (preview) page, you can view the newly created Runtime environment for your Automation account. If you don't find the newly created Runtime environments in the list, select Refresh.
View Runtime environment
Get the Runtime environment properties from the Automation account.
GET
https://management.azure.com/subscriptions/<subscriptionId>/resourceGroups/<resourceGroup>/providers/Microsoft.Automation/automationAccounts/<accountName>/runtimeEnvironments/<runtimeEnvironmentName>?api-version=2023-05-15-preview
List Runtime environments
To list all the Runtime environments from the Automation account:
In your Automation account, under Process Automation, select Runtime Environments (preview).

View components of Az PowerShell package
To view all the component packages of Az PowerShell package, run Get-Module -ListAvailable cmdlet in a PowerShell runbook.
Job output would show all the component packages and their versions.

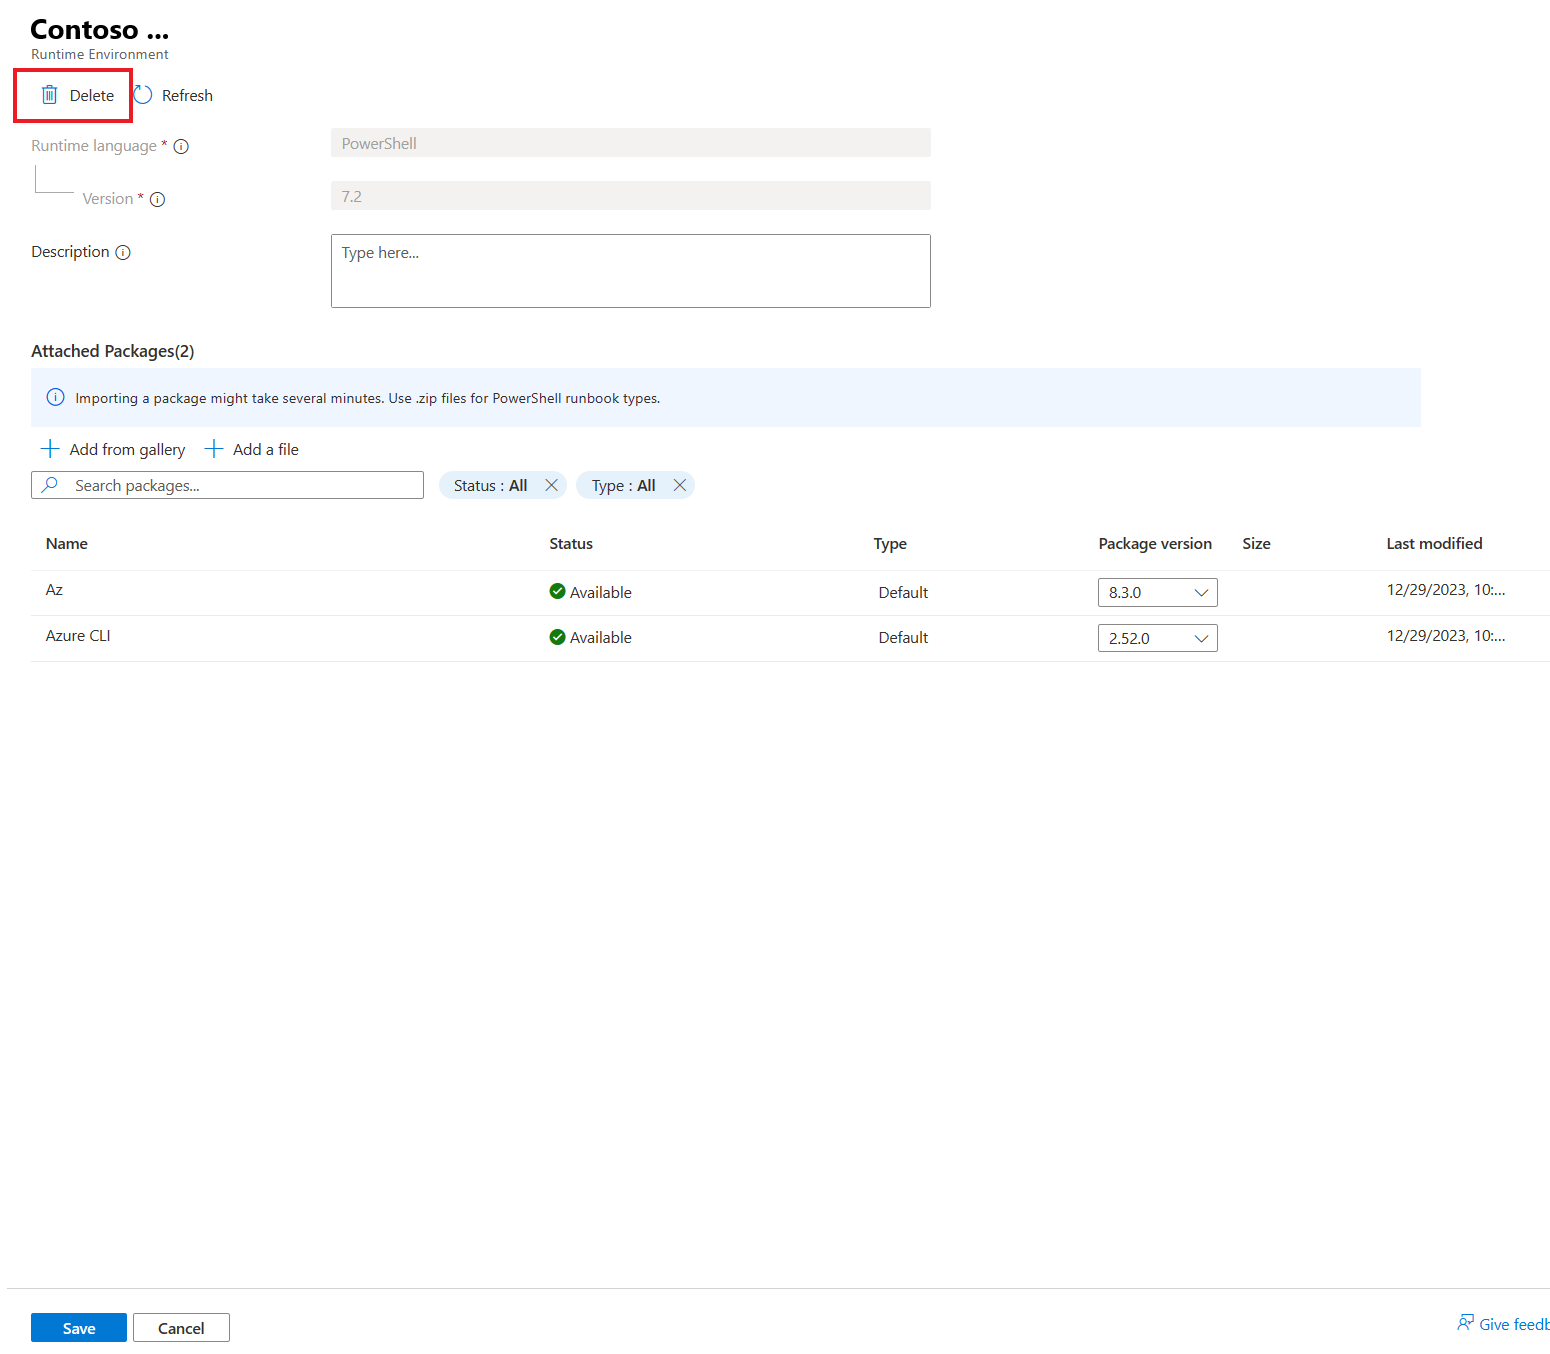
Delete Runtime environment
To delete the Runtime environment from the Automation account, follow these steps:
In your Automation account, under Process Automation, select Runtime Environments (preview).
Select the runtime environment that you want to delete.
Select Delete to delete the Runtime environment.

Update Runtime environment
Runtime language and Runtime version are immutable properties. However, you can update the version of modules and add or remove packages in the Runtime environment. Runbooks linked to the Runtime environment are automatically updated with the new settings.
In your Automation account, under Process Automation, select Runtime Environments (preview).
Select the Runtime environment that you want to update.
Select the version from dropdown to update the version of existing packages.
Select Save.
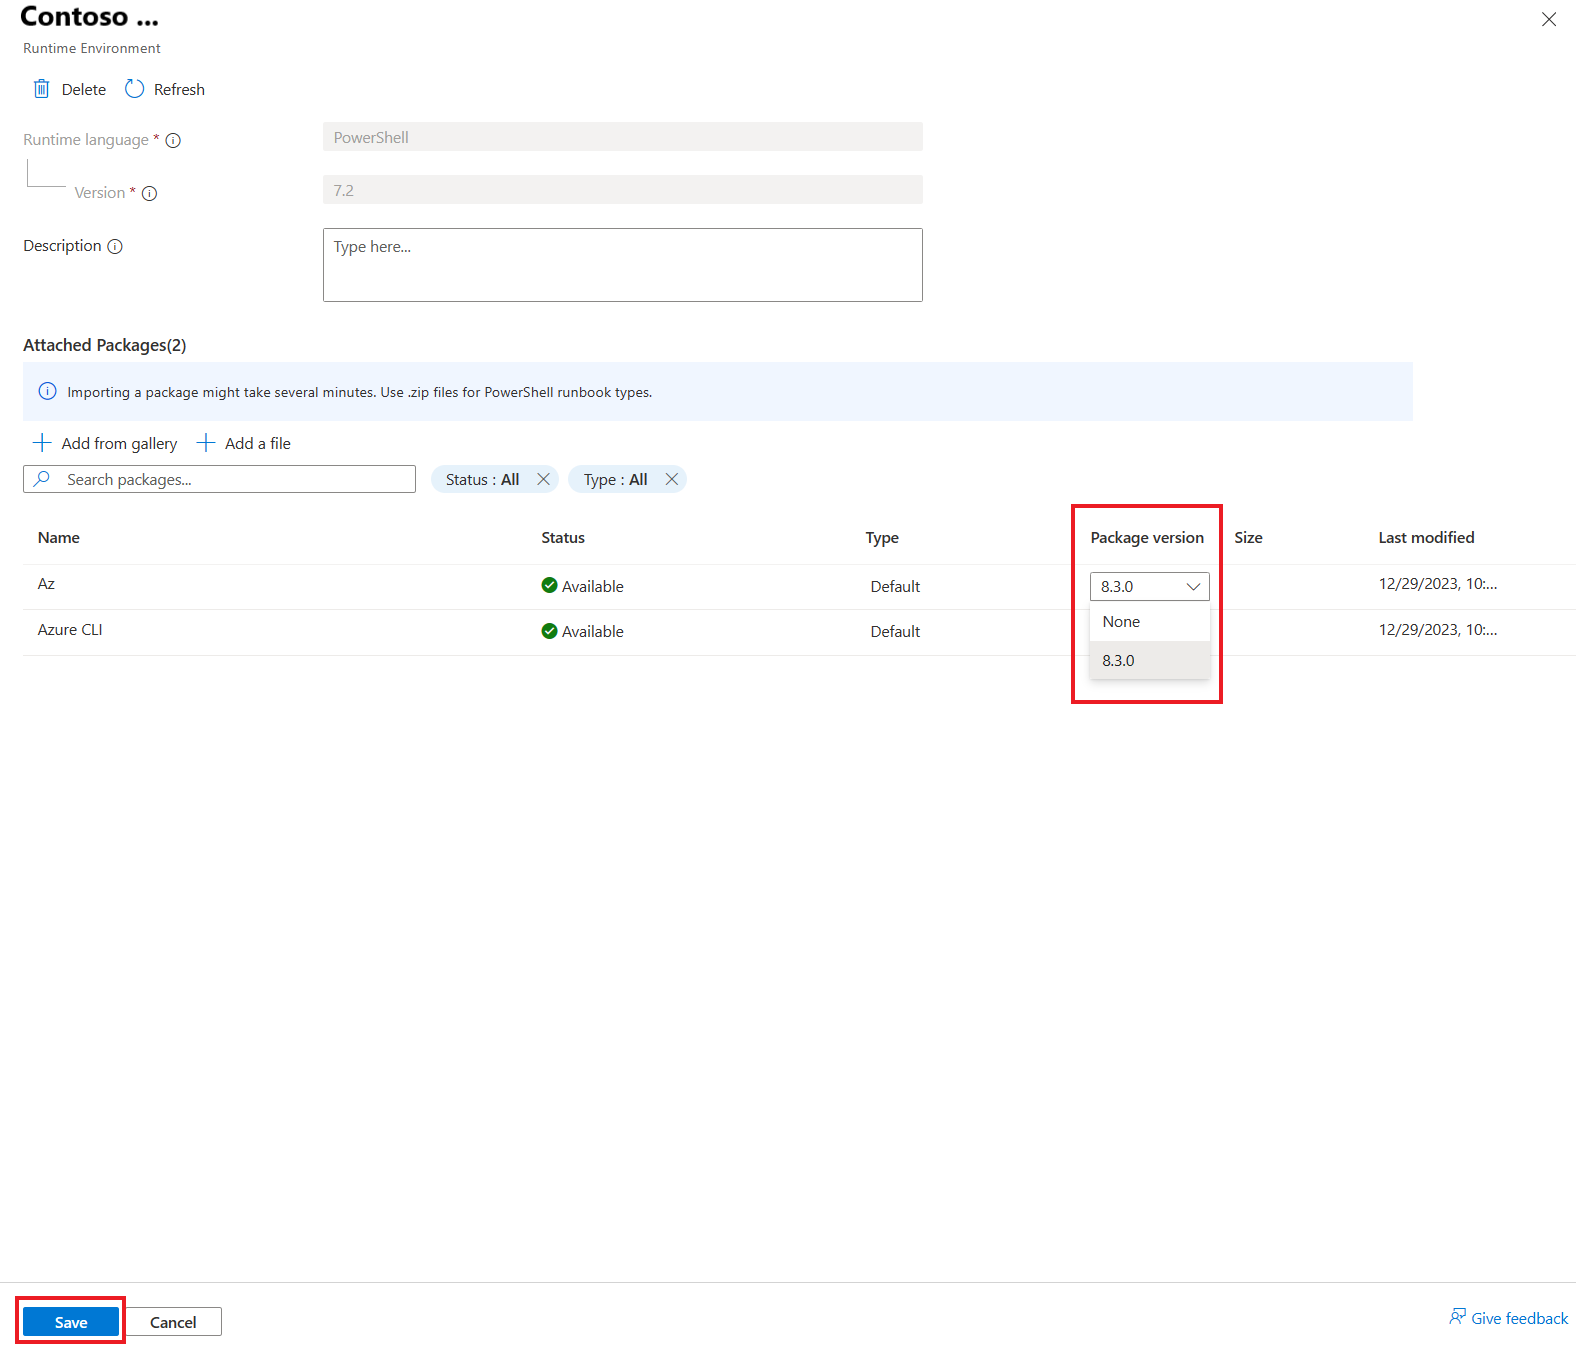
Select Add a file to upload packages from your local computer or Add from gallery to upload packages from PowerShell Gallery.
Note
You can add up to 10 packages at a time to Runtime environment. Ensure that you Save after adding 10 packages.


Manage Runbooks linked to Runtime environment
Create Runbook
You can create a new PowerShell runbook configured with Runtime environment.
Prerequisite
- Ensure that you have created a Runtime environment before creating a runbook.
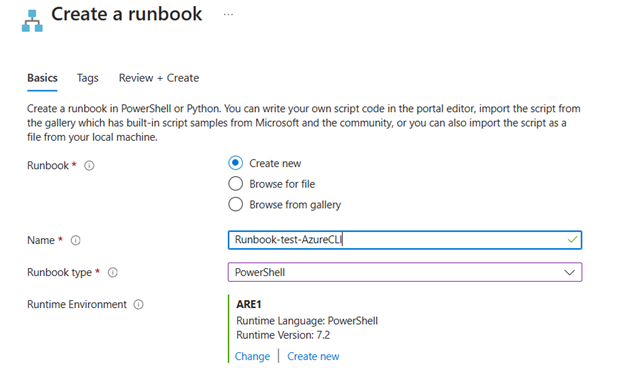
To create a new runbook linked to the Runtime environment, follow these steps:
In your Automation account, under Process Automation, select Runbooks.
Select Create.
In the Basics tab, you can either create a new runbook or upload a file from your local computer or from PowerShell gallery.
Provide a Name for the runbook. It must begin with a letter and can contain only letters, numbers, underscores, and dashes.
From the Runbook type dropdown, select the type of runbook that you want to create.
Select Runtime environment to be configured for the runbook. You can either Select from existing Runtime environments or Create new Runtime environment and link it to the Runbook. The list of runtime environments is populated based on the Runbook type selected in step b.
Provide appropriate Description.
Note
For PowerShell Runbook Type, only the PowerShell Runtime environment would be listed for selection. For Python Runbook Type, only the Python Runtime environments would be listed for selection.
Add Tags to the runbook, review the settings and select Create to create a new runbook.

This runbook is linked to the selected Runtime environment. All the packages in the chosen Runtime environment would be available during execution of the runbook.
Update Runbook
You can update runbook by changing the Runtime environment linked to the runbook. You can choose single or multiple runbooks for update. Runbook in running status would not be impacted by changing the Runtime environment linked to that runbook.
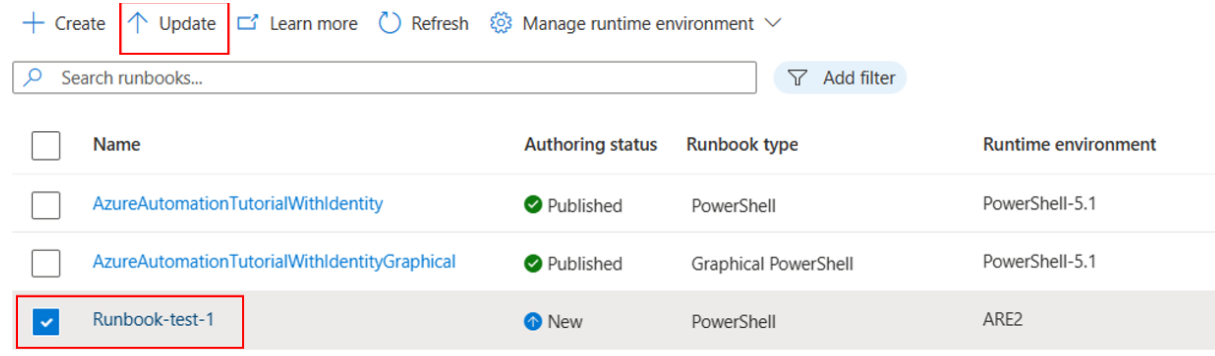
In your Automation account, under Process Automation, select Runbooks.
Select the checkbox for the runbook(s) that you want to update.
Select Update.
Select the Runtime environment from the dropdown to which you want to link the runbook(s).
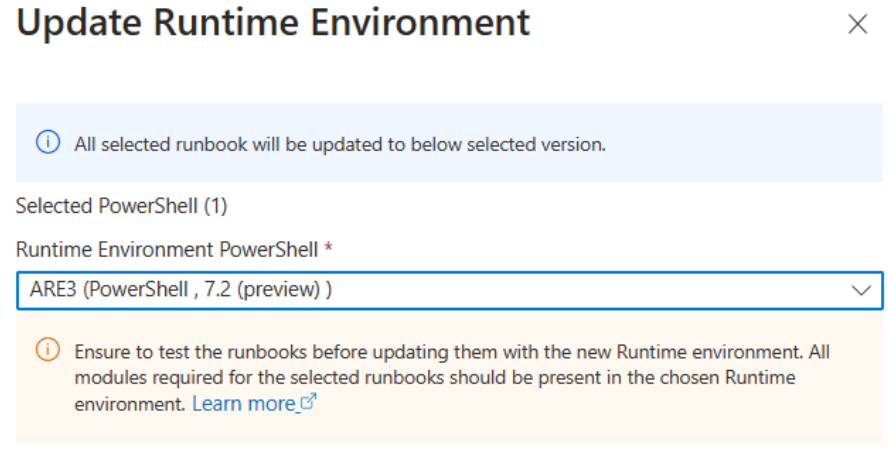
Select Update to update selected runbook(s) with new Runtime environment.


Check if the runbook executes as expected after update. If the runbook fails to provide the expected outcome, you can again update the Runtime environment to the old experience by following the steps 1-4.
Note
Runbook updates persist between new Runtime environment experience and old experience. Any changes done in Runtime environment linked to a runbook would persist during runbook execution in old experience.
Test Runbook update
Run a test job for a runbook with a different Runtime environment. This scenario is useful when a runbook needs to be tested with a Runtime environment before update.
You can update runbooks by changing the Runtime environment linked to that runbook. We recommend you to test runbook execution before publishing the changes. It's to ensure the runbook works as expected.
To test runbook execution before publishing Runtime environment changes, follow these steps:
Go to Runbooks page, and select runbook for which you want to update the Runtime environment.
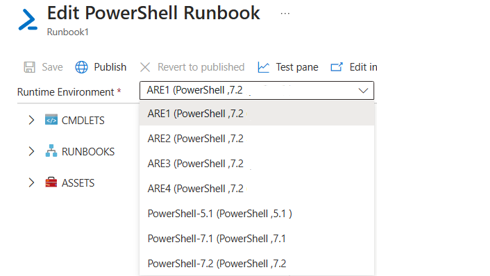
In the Edit runbook page, select Edit in Portal to open the text editor.
The Runtime environment field shows the existing configuration. Select the new Runtime environment from the dropdown list.
Select Test pane to test runbook execution with the updated Runtime environment. Select Start to begin the test run.
Close the test pane and make the required changes in Runbook code or Runtime environment if necessary.
Select Publish to update the Runtime environment linked to the runbook.
Select Yes to override the previously published version and confirm the changes.


Create Cloud Job
Currently, runbooks linked to Runtime environment would run on Azure.
Link existing runbooks to System-generated Runtime environments
All existing runbooks in your Azure Automation account would be automatically linked to System-generated Runtime environments. These system-generated Runtime environments are created based on Runtime language, version and Modules/Packages present in your respective Azure Automation account. Learn more. To update existing runbooks, change the Runtime environment by following the steps mentioned here.
Next steps
- For an overview Runtime Environment.
- To troubleshoot issues with runbook execution, see Troubleshoot runbook issues.
Feedback
Coming soon: Throughout 2024 we will be phasing out GitHub Issues as the feedback mechanism for content and replacing it with a new feedback system. For more information see: https://aka.ms/ContentUserFeedback.
Submit and view feedback for