Note
Access to this page requires authorization. You can try signing in or changing directories.
Access to this page requires authorization. You can try changing directories.
This step sets up a back-end storage system for your vFXT cluster.
Tip
If you created a new Azure Blob container along with the Avere vFXT cluster, that container is already configured and ready to use.
Follow these instructions if you did not create a new Blob container with your cluster, or if you want to add an additional hardware or cloud-based storage system.
There are two main tasks:
Create a core filer, which connects your vFXT cluster to an existing storage system or an Azure Storage account container.
Create a namespace junction, which defines the path that clients will mount.
These steps use the Avere Control Panel. Read Access the vFXT cluster to learn how to use it.
Create a core filer
"Core filer" is a vFXT term for a back-end storage system. The storage can be a hardware NAS appliance like NetApp or Isilon, or it can be a cloud object store. More information about core filers can be found in the Avere cluster settings guide.
To add a core filer, choose one of the two main types of core filers:
- NAS core filer - describes how to add a NAS core filer
- Azure Storage cloud core filer - describes how to add an Azure Blob storage container as a cloud core filer
NAS core filer
A NAS core filer can be an on-premises NetApp or Isilon appliance, or a NAS endpoint in the cloud. The storage system must have a reliable high-speed connection to the Avere vFXT cluster - for example, a 1GBps ExpressRoute connection (not a VPN) - and it must give the cluster root access to the NAS exports being used.
Follow these steps to add a NAS core filer:
From the Avere Control Panel, click the Settings tab at the top.
Click Core Filer > Manage Core Filers on the left.
Click Create.
Fill in the required information in the wizard:
Name your core filer.
Provide a fully qualified domain name (FQDN) if available. Otherwise, provide an IP address or hostname that resolves to your core filer.
Choose your filer class from the list. If unsure, choose Other.
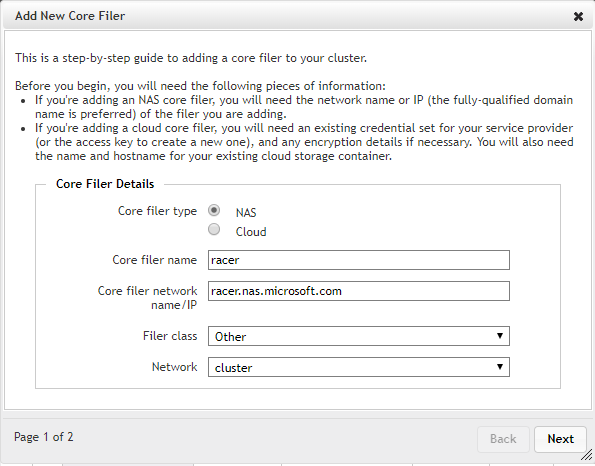
Click Next and choose a cache policy.
Click Add Filer.
For more detailed information, refer to Adding a new NAS core filer in the Avere cluster settings guide.
Next, proceed to Create a junction.
Azure Blob Storage cloud core filer
To use Azure Blob storage as your vFXT cluster's back-end storage, you need an empty container to add as a core filer.
Adding Blob storage to your cluster requires these tasks:
- Create a storage account (step 1, below)
- Create an empty Blob container (steps 2-3)
- Add the storage access key as a cloud credential for the vFXT cluster (steps 4-6)
- Add the Blob container as a core filer for the vFXT cluster (steps 7-9)
- Create a namespace junction that clients use to mount the core filer (Create a junction, same for both hardware and cloud storage)
Tip
If you create a new Blob container when you create an Avere vFXT for Azure cluster, the deployment template automatically configures the container as a core filer. (This is also true if you use the creation script, which is available on request.) You do not need to configure the core filer afterward.
The cluster creation tool does these configuration tasks for you:
- Creates a new Blob container in the provided storage account
- Defines the container as a core filer
- Creates a namespace junction to the container
- Creates a storage service endpoint inside the cluster's virtual network
To add Blob storage after creating the cluster, follow these steps.
Create a general-purpose V2 storage account with these settings:
- Subscription - same as the vFXT cluster
- Resource group - same as the vFXT cluster group (optional)
- Location - same as the vFXT cluster
- Performance - Standard (Premium storage is unsupported)
- Account kind - General-purpose V2 (StorageV2)
- Replication - Locally redundant storage (LRS)
- Access tier - Hot
- Secure transfer required - disable this option (non-default value)
- Virtual networks - not required
You can use the Azure portal or click the "Deploy to Azure" button below.

After the account is created, browse to the storage account page.
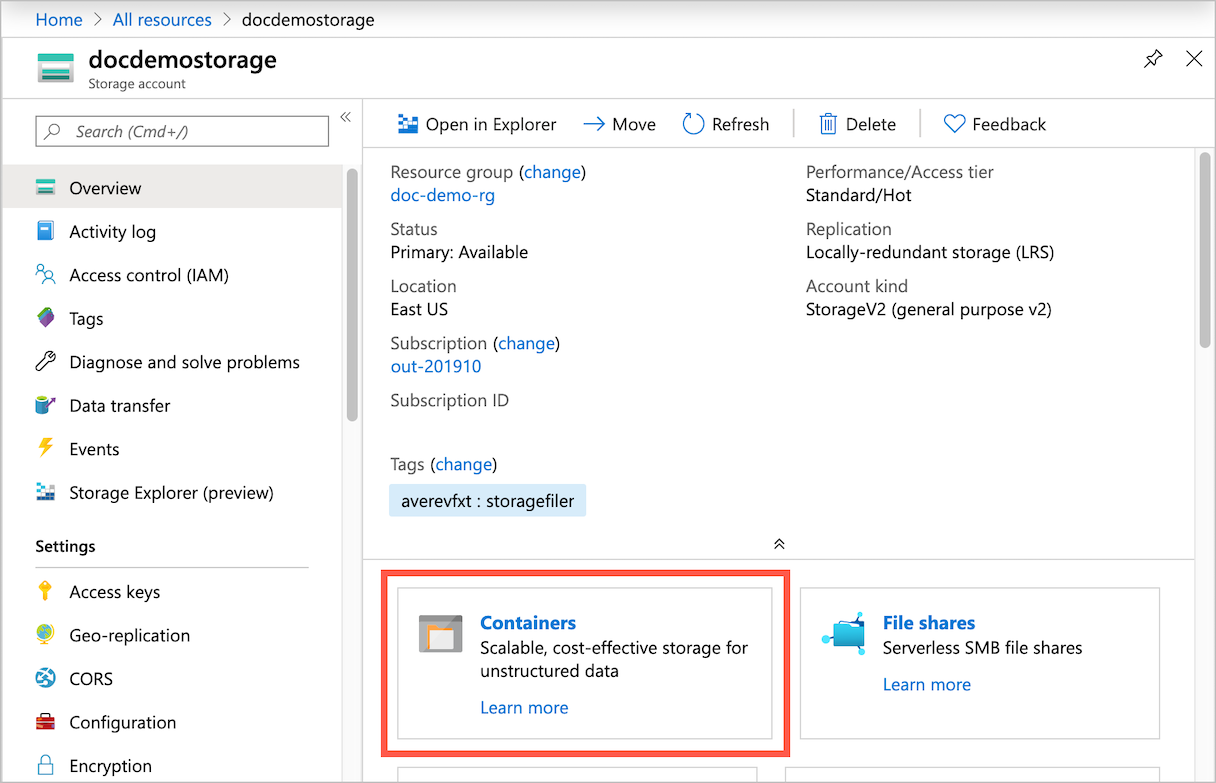
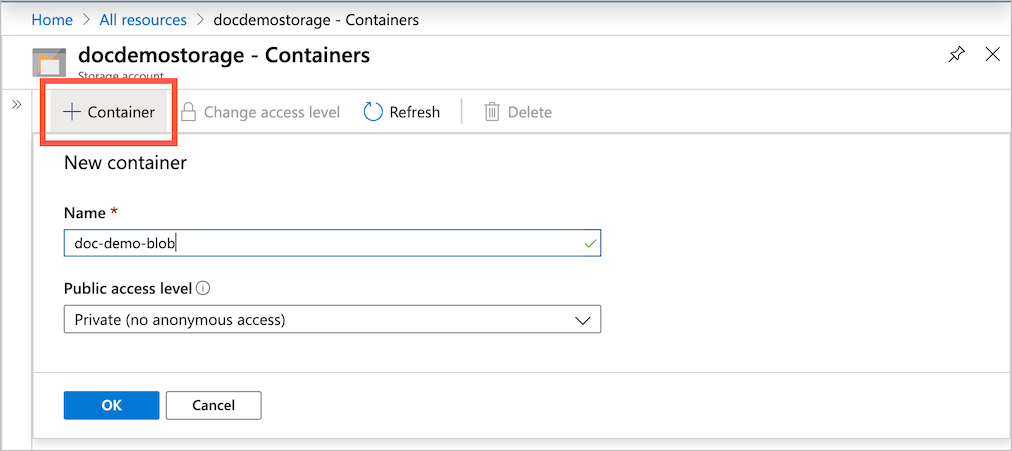
Create a new Blob container: Click Containers on the overview page and then click +Container. Use any container name, and make sure access is set to Private.
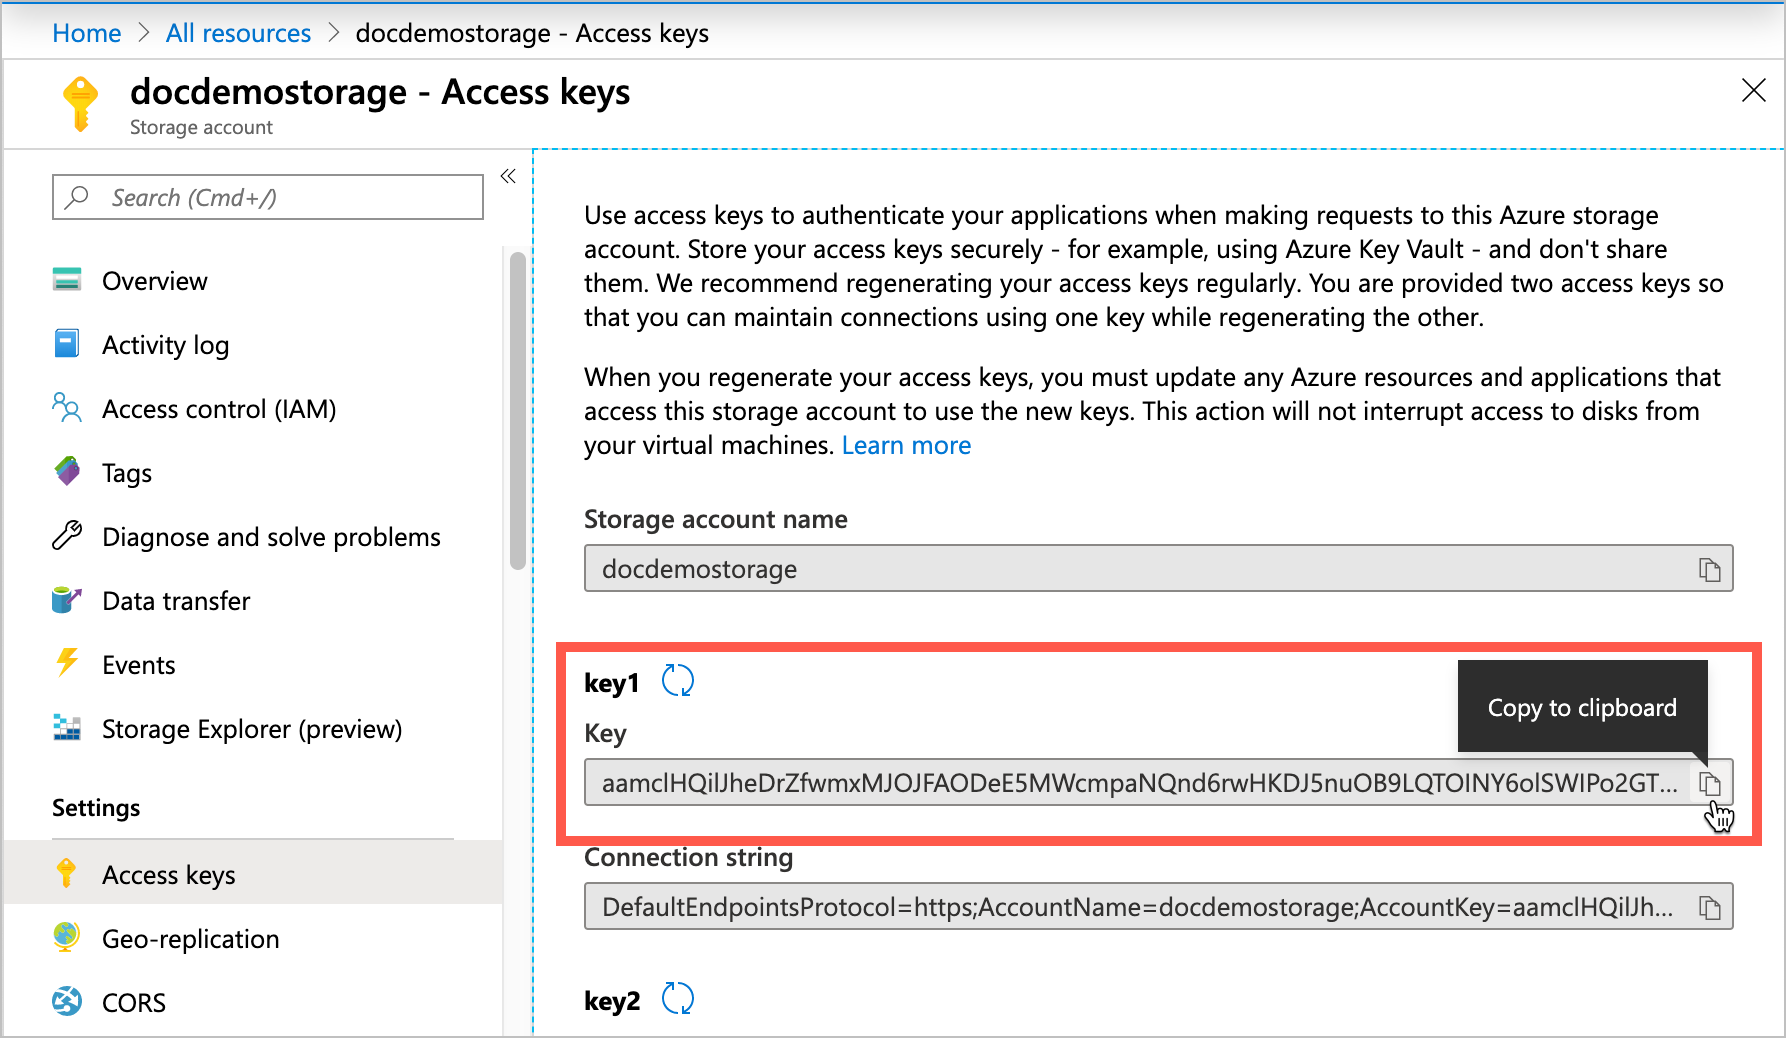
Get the Azure Storage account key by clicking Access keys under Settings. Copy one of the keys provided.
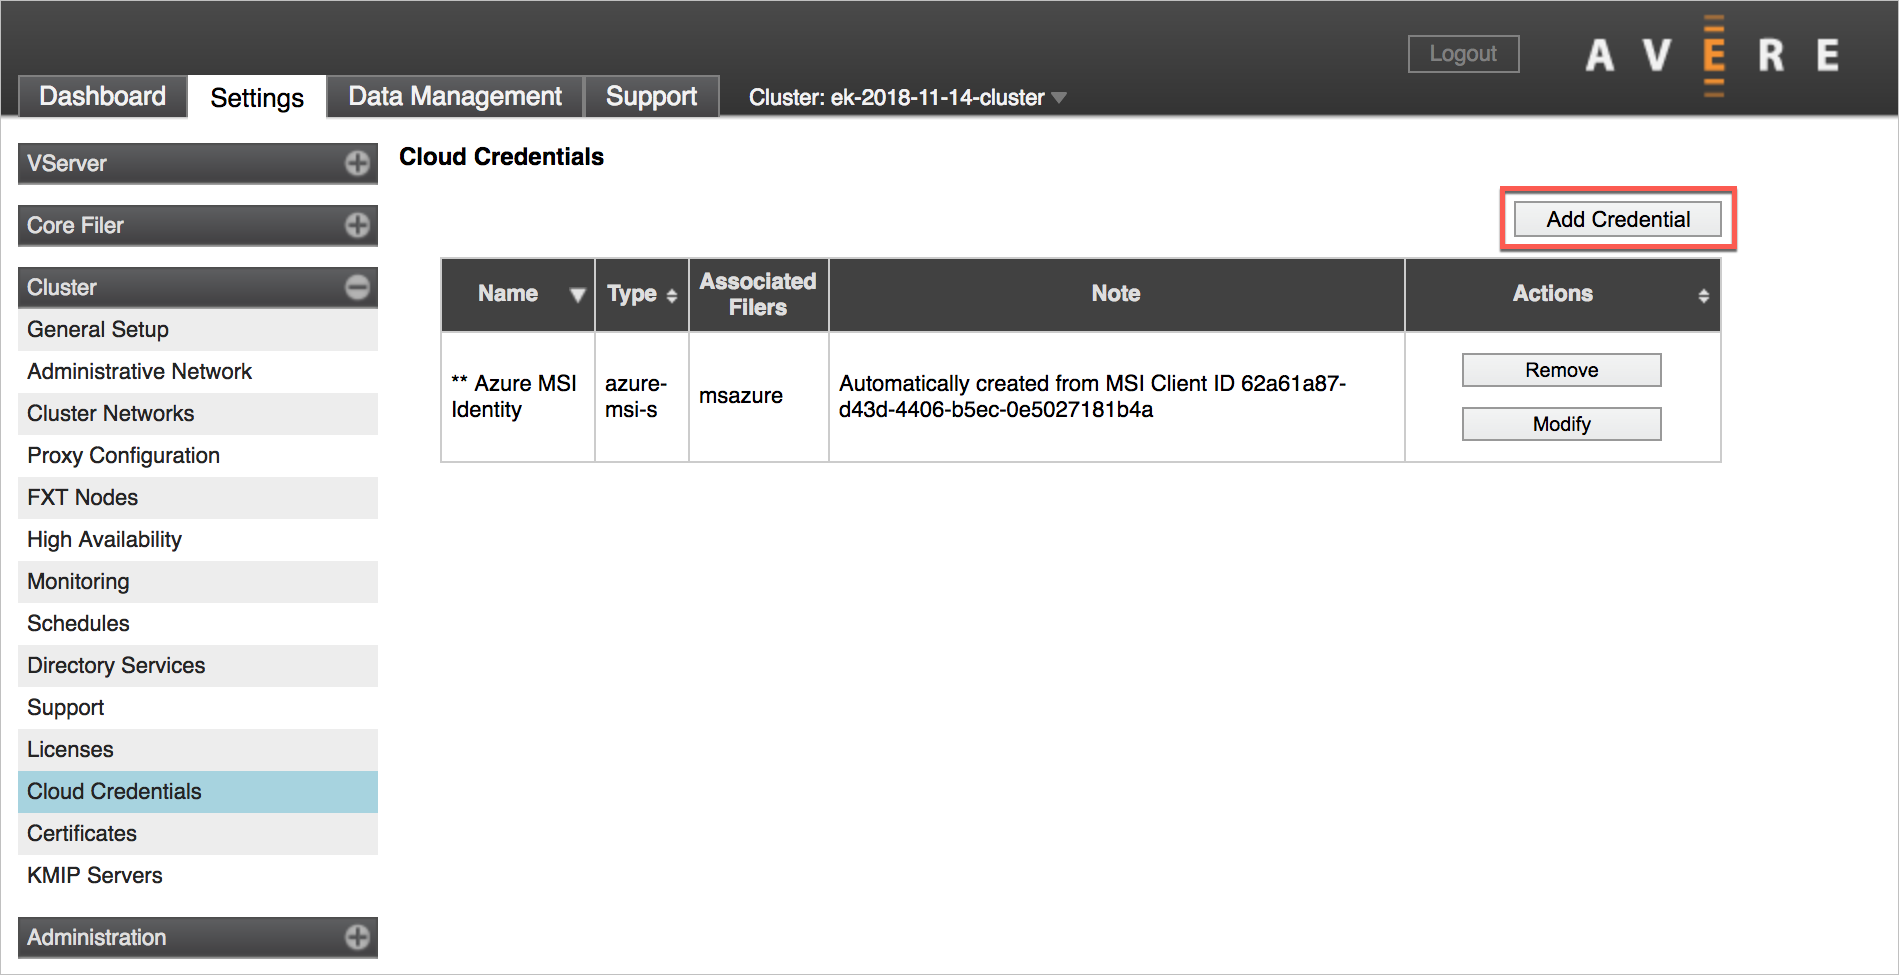
Open the Avere Control Panel for your cluster. Click Settings, then open Cluster > Cloud Credentials on the left navigation pane. On the Cloud Credentials page, click Add Credential.
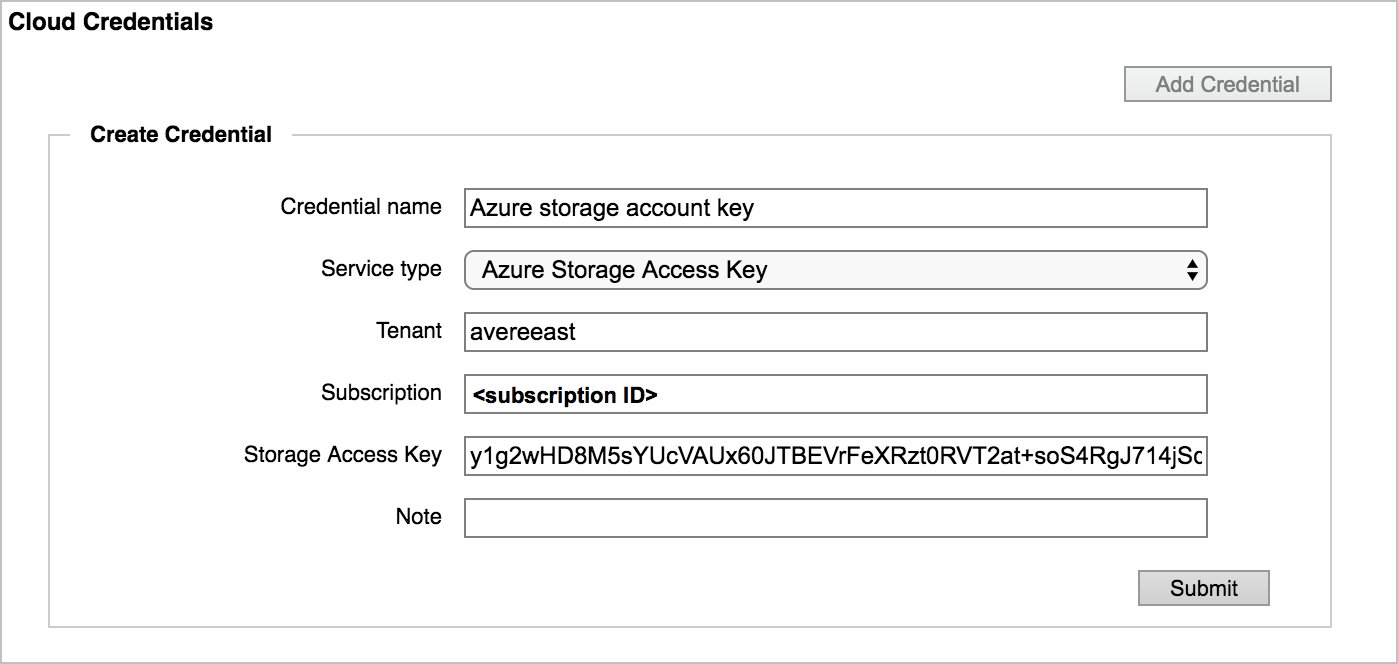
Fill in the following information to create a credential for the cloud core filer:
Field Value Credential name any descriptive name Service type (select Azure Storage access key) Tenant storage account name Subscription subscription ID Storage Access Key Azure storage account key (copied in the previous step) Click Submit.
Next, create the core filer. In the left side of the Avere Control Panel, click Core Filer > Manage Core Filers.
Click the Create button on the Manage Core Filers settings page.
Fill out the wizard:
- Select filer type Cloud.
- Name the new core filer and click Next.
- Accept the default cache policy and continue to the third page.
- In Service type, choose Azure storage.
- Choose the credential created earlier.
- Set Bucket contents to Empty
- Change Certificate verification to Disabled
- Change Compression mode to None
- Click Next.
- On the fourth page, enter the name of the container in Bucket name as storage_account_name/container_name.
- Optionally, set Encryption type to None. Azure Storage is encrypted by default.
- Click Add Filer.
For more detailed information, read Adding a new cloud core filer in the Avere cluster configuration guide.
The page will refresh, or you can refresh the page to display your new core filer.
Next, you need to Create a junction.
Create a junction
A junction is a path that you create for clients. Clients mount the path and arrive at the destination you choose.
For example, you could create /vfxt/files to map to your NetApp core filer /vol0/data export and the /project/resources subdirectory.
More information about junctions can be found in the namespace section of the Avere cluster configuration guide.
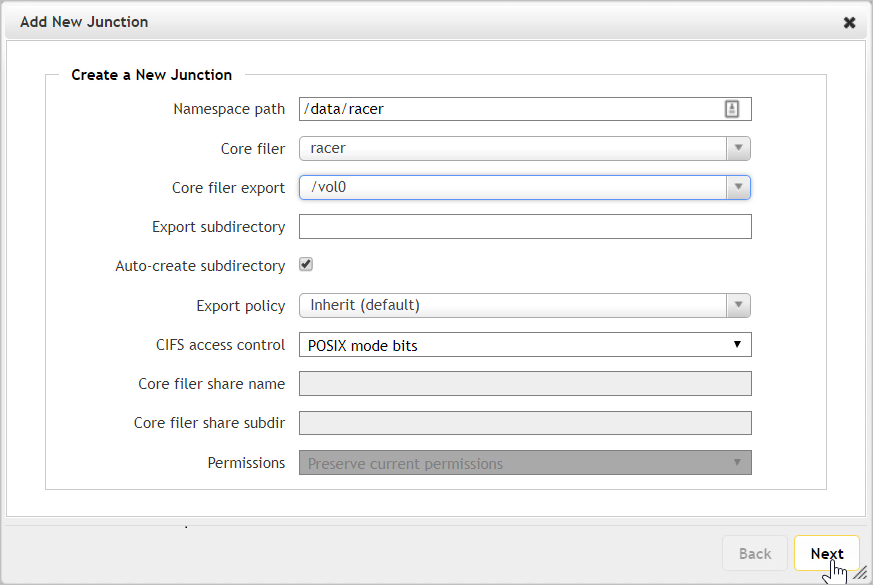
Follow these steps in the Avere Control Panel interface:
Click VServer > Namespace in the upper left.
Provide a namespace path beginning with / (forward slash), like
/vfxt/data.Choose your core filer.
Choose the core filer export.
Click Next.
The junction will appear after a few seconds. Create additional junctions as needed.
After the junction has been created, clients use the namespace path to access the files from the storage system.
Next steps
- Mount the Avere vFXT cluster
- Learn efficient ways to move data to a new Blob container