Note
Access to this page requires authorization. You can try signing in or changing directories.
Access to this page requires authorization. You can try changing directories.
This tutorial shows how you can enable dynamic configuration updates in an ASP.NET Core app. It builds on the web app introduced in the quickstarts. Your app will leverage the App Configuration provider library for its built-in configuration caching and refreshing capabilities. Before you continue, finish Create an ASP.NET Core app with App Configuration first.
In this tutorial, you learn how to:
- Set up your app to update its configuration in response to changes in an App Configuration store.
- Inject the latest configuration into your app.
Prerequisites
Finish the quickstart: Create an ASP.NET Core app with App Configuration.
Reload data from App Configuration
Open Program.cs, and update the
AddAzureAppConfigurationmethod you added during the quickstart. You can connect to App Configuration using either Microsoft Entra ID (recommended) or a connection string. The following code snippet demonstrates using Microsoft Entra ID.You use the
DefaultAzureCredentialto authenticate to your App Configuration store. While completing the quickstart listed in the prerequisites, you already assigned your credential the App Configuration Data Reader role.// Load configuration from Azure App Configuration builder.Configuration.AddAzureAppConfiguration(options => { options.Connect(new Uri(endpoint), new DefaultAzureCredential()) // Load all keys that start with `TestApp:` and have no label. .Select("TestApp:*", LabelFilter.Null) // Reload configuration if any selected key-values have changed. .ConfigureRefresh(refreshOptions => refreshOptions.RegisterAll()); });The
Selectmethod is used to load all key-values whose key name starts with TestApp: and that have no label. You can call theSelectmethod more than once to load configurations with different prefixes or labels. If you share one App Configuration store with multiple apps, this approach helps load configuration only relevant to your current app instead of loading everything from your store.Inside the
ConfigureRefreshmethod, you call theRegisterAllmethod to instruct the App Configuration provider to reload the entire configuration whenever it detects a change in any of the selected key-values (those starting with TestApp: and having no label). For more information about monitoring configuration changes, see Best practices for configuration refresh.Tip
You can add a call to the
refreshOptions.SetRefreshIntervalmethod to specify the minimum time between configuration refreshes. In this example, you use the default value of 30 seconds. Adjust to a higher value if you need to reduce the number of requests made to your App Configuration store.Add Azure App Configuration middleware to the service collection of your app.
Update Program.cs with the following code.
// Existing code in Program.cs
// ... ...

builder.Services.AddRazorPages();

// Add Azure App Configuration middleware to the container of services.
builder.Services.AddAzureAppConfiguration();

// Bind configuration "TestApp:Settings" section to the Settings object
builder.Services.Configure<Settings>(builder.Configuration.GetSection("TestApp:Settings"));

var app = builder.Build();

// The rest of existing code in program.cs
// ... ...
Call the
UseAzureAppConfigurationmethod. It enables your app to use the App Configuration middleware to update the configuration for you automatically.Update Program.cs with the following code.
// Existing code in Program.cs
// ... ...

var app = builder.Build();

if (!app.Environment.IsDevelopment())
{
    app.UseExceptionHandler("/Error");
    app.UseHsts();
}

// Use Azure App Configuration middleware for dynamic configuration refresh.
app.UseAzureAppConfiguration();

// The rest of existing code in program.cs
// ... ...
You've set up your app to use the options pattern in ASP.NET Core during the quickstart. When the underlying configuration of your app is updated from App Configuration, your strongly typed Settings object obtained via IOptionsSnapshot<T> is updated automatically. Note that you shouldn't use the IOptions<T> if dynamic configuration update is desired because it doesn't read configuration data after the app has started.
Request-driven configuration refresh
The configuration refresh is triggered by the incoming requests to your web app. No refresh will occur if your app is idle. When your app is active, the App Configuration middleware monitors any keys you registered for refreshing in the ConfigureRefresh call. The middleware is triggered upon every incoming request to your app. However, the middleware will only send requests to check the value in App Configuration when the refresh interval you set has passed.
- If a request to App Configuration for change detection fails, your app will continue to use the cached configuration. New attempts to check for changes will be made periodically while there are new incoming requests to your app.
- The configuration refresh happens asynchronously to the processing of your app's incoming requests. It will not block or slow down the incoming request that triggered the refresh. The request that triggered the refresh may not get the updated configuration values, but later requests will get new configuration values.
- To ensure the middleware is triggered, call the
app.UseAzureAppConfiguration()method as early as appropriate in your request pipeline so another middleware won't skip it in your app.
Build and run the app locally
To build the app by using the .NET CLI, run the following command in the command shell:
dotnet buildAfter the build successfully completes, run the following command to run the web app locally:
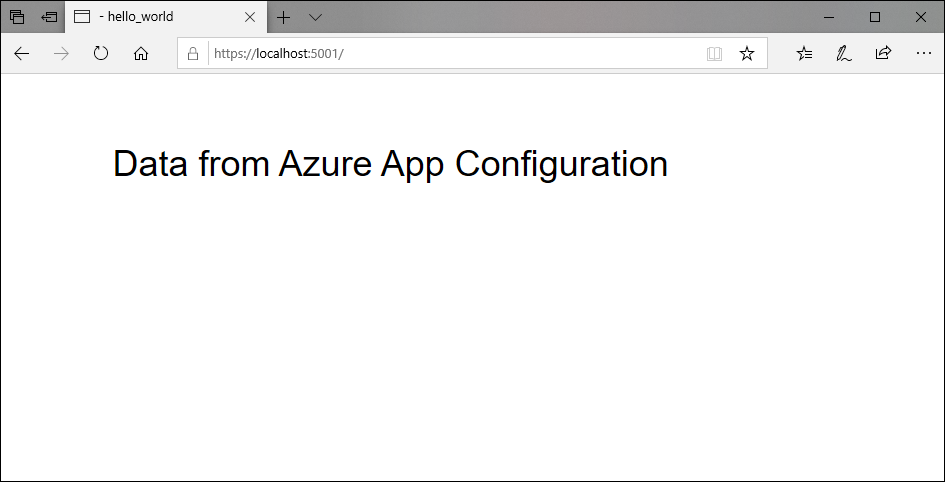
dotnet runOpen a browser window, and go to the URL shown in the
dotnet runoutput.
Sign in to the Azure portal. Select All resources, and select the App Configuration store that you created in the quickstart.
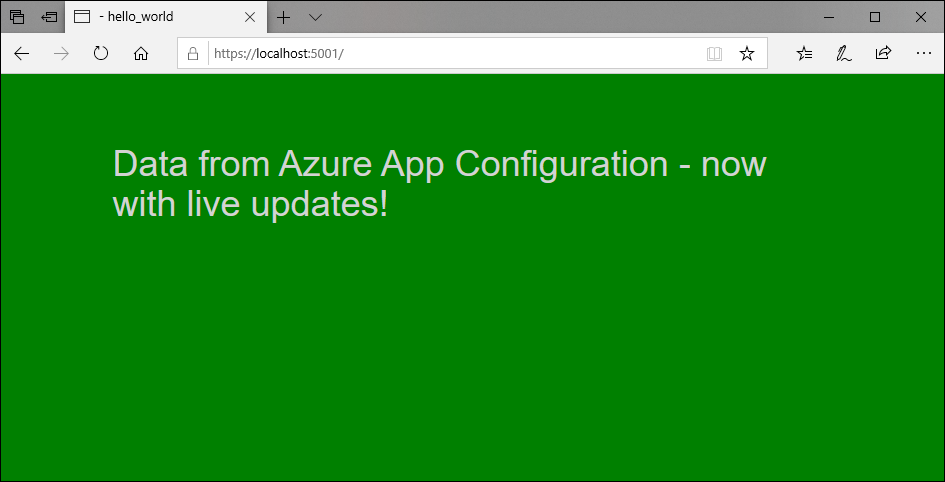
Select Configuration explorer, and update the values of the following keys.
Key Value TestApp:Settings:BackgroundColor green TestApp:Settings:FontColor lightGray TestApp:Settings:Message Data from Azure App Configuration - now with live updates! Refresh the browser a few times. When the refresh interval elapses after 30 seconds, the page shows with updated content.

Logging and monitoring
Logs are output upon configuration refresh and contain detailed information on key-values retrieved from your App Configuration store and configuration changes made to your application.
A default
ILoggerFactoryis added automatically whenservices.AddAzureAppConfiguration()is invoked. The App Configuration provider uses thisILoggerFactoryto create an instance ofILogger, which outputs these logs. ASP.NET Core usesILoggerfor logging by default, so you don't need to make additional code changes to enable logging for the App Configuration provider.Logs are output at different log levels. The default level is
Information.Log Level Description Debug Logs include the key and label of key-values your application monitors for changes from your App Configuration store. The information also includes whether the key-value has changed compared with what your application has already loaded. Enable logs at this level to troubleshoot your application if a configuration change didn't happen as expected. Information Logs include the keys of configuration settings updated during a configuration refresh. Values of configuration settings are omitted from the log to avoid leaking sensitive data. You can monitor logs at this level to ensure your application picks up expected configuration changes. Warning Logs include failures and exceptions that occurred during configuration refresh. Occasional occurrences can be ignored because the configuration provider will continue using the cached data and attempt to refresh the configuration next time. You can monitor logs at this level for repetitive warnings that may indicate potential issues. For example, you rotated the connection string but forgot to update your application. You can enable logging at the
Debuglog level by adding the following example to yourappsettings.jsonfile. This example applies to all other log levels as well."Logging": { "LogLevel": { "Microsoft.Extensions.Configuration.AzureAppConfiguration": "Debug" } }The logging category is
Microsoft.Extensions.Configuration.AzureAppConfiguration.Refresh, which appears before each log. Here are some example logs at each log level:dbug: Microsoft.Extensions.Configuration.AzureAppConfiguration.Refresh[0] Key-value read from App Configuration. Change:'Modified' Key:'ExampleKey' Label:'ExampleLabel' Endpoint:'https://examplestore.azconfig.io' info: Microsoft.Extensions.Configuration.AzureAppConfiguration.Refresh[0] Setting updated. Key:'ExampleKey' warn: Microsoft.Extensions.Configuration.AzureAppConfiguration.Refresh[0] A refresh operation failed while resolving a Key Vault reference. Key vault error. ErrorCode:'SecretNotFound' Key:'ExampleKey' Label:'ExampleLabel' Etag:'6LaqgBQM9C_Do2XyZa2gAIfj_ArpT52-xWwDSLb2hDo' SecretIdentifier:'https://examplevault.vault.azure.net/secrets/ExampleSecret'
Using ILogger is the preferred method in ASP.NET applications and is prioritized as the logging source if an instance of ILoggerFactory is present. However, if ILoggerFactory is not available, logs can alternatively be enabled and configured through the instructions for .NET Core apps. For more information, see logging in .NET Core and ASP.NET Core.
Note
Logging is available if you use version 6.0.0 or later of any of the following packages.
Microsoft.Extensions.Configuration.AzureAppConfigurationMicrosoft.Azure.AppConfiguration.AspNetCoreMicrosoft.Azure.AppConfiguration.Functions.Worker
Clean up resources
If you don't want to continue using the resources created in this article, delete the resource group you created here to avoid charges.
Important
Deleting a resource group is irreversible. The resource group and all the resources in it are permanently deleted. Ensure that you don't accidentally delete the wrong resource group or resources. If you created the resources for this article inside a resource group that contains other resources you want to keep, delete each resource individually from its respective pane instead of deleting the resource group.
- Sign in to the Azure portal, and select Resource groups.
- In the Filter by name box, enter the name of your resource group.
- In the result list, select the resource group name to see an overview.
- Select Delete resource group.
- You're asked to confirm the deletion of the resource group. Enter the name of your resource group to confirm, and select Delete.
After a few moments, the resource group and all its resources are deleted.
Next steps
In this tutorial, you enabled your ASP.NET Core web app to dynamically refresh configuration settings from App Configuration. To learn how to use an Azure-managed identity to streamline the access to App Configuration, continue to the next tutorial.