Use feature filters to enable conditional feature flags
Feature flags allow you to activate or deactivate functionality in your application. A simple feature flag is either on or off. The application always behaves the same way. For example, you could roll out a new feature behind a feature flag. When the feature flag is enabled, all users see the new feature. Disabling the feature flag hides the new feature.
In contrast, a conditional feature flag allows the feature flag to be enabled or disabled dynamically. The application may behave differently, depending on the feature flag criteria. Suppose you want to show your new feature to a small subset of users at first. A conditional feature flag allows you to enable the feature flag for some users while disabling it for others. Feature filters determine the state of the feature flag each time it's evaluated.
The Microsoft.FeatureManagement library includes the following built-in feature filters accessible from the Azure App Configuration portal.
- Time window filter enables the feature flag during a specified window of time.
- Targeting filter enables the feature flag for specified users and groups.
You can also create your own feature filter that implements the Microsoft.FeatureManagement.IFeatureFilter interface. For more information, see Implementing a Feature Filter.
Prerequisites
- Follow the instructions in Quickstart: Add feature flags to an ASP.NET Core app to create a web app with a feature flag.
- Install the
Microsoft.FeatureManagement.AspNetCorepackage of version 3.0.0 or later.
Register a feature filter
If you have a custom feature filter, you can register it by calling the AddFeatureFilter method.
services.AddFeatureManagement()
        .AddFeatureFilter<MyCriteriaFilter>();
Starting with version 3.0.0 of Microsoft.FeatureManagement, the following built-in filters are registered automatically as part of the AddFeatureManagement call, so you don't need to register them.
TimeWindowFilterContextualTargetingFilterPercentageFilter
Tip
For more information on using TargetingFilter, see Enable staged rollout of features for targeted audiences.
Add a feature filter to a feature flag
In this section, you will learn how to add a feature filter to the Beta feature flag you created in the Quickstart. The following steps use the built-in TimeWindowFilter as an example.
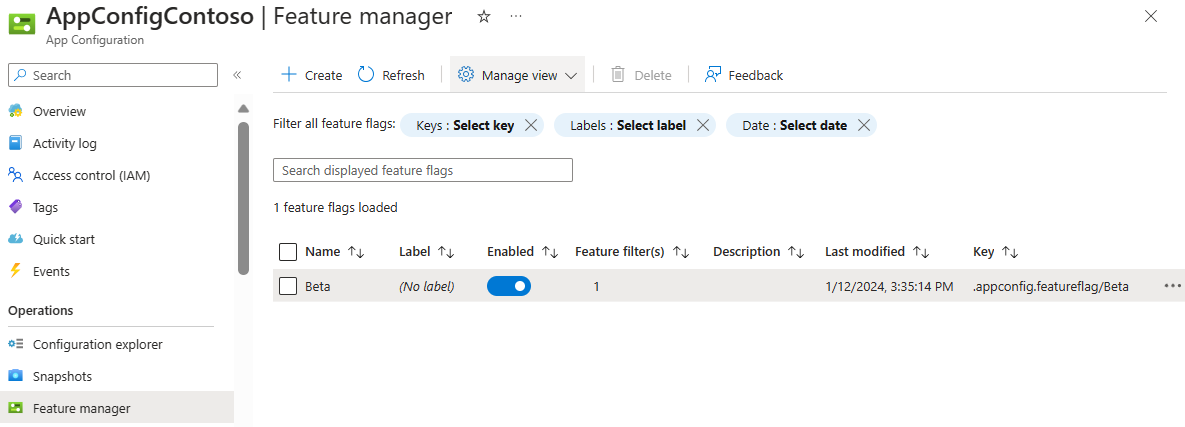
In the Azure portal, go to your configuration store and select Feature manager.
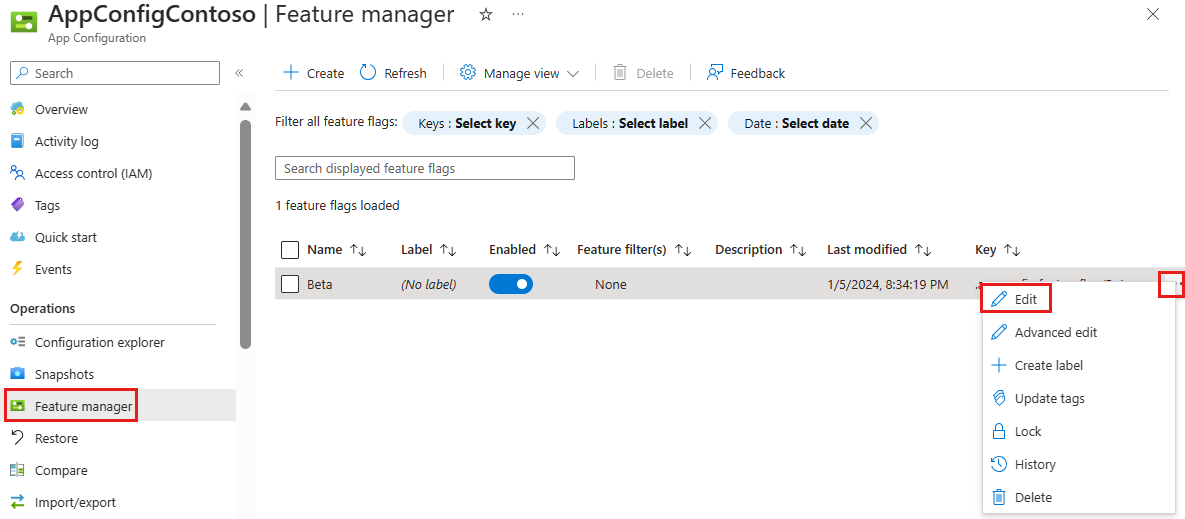
On the line with the Beta feature flag you created in the quickstart, select the context menu and then Edit.
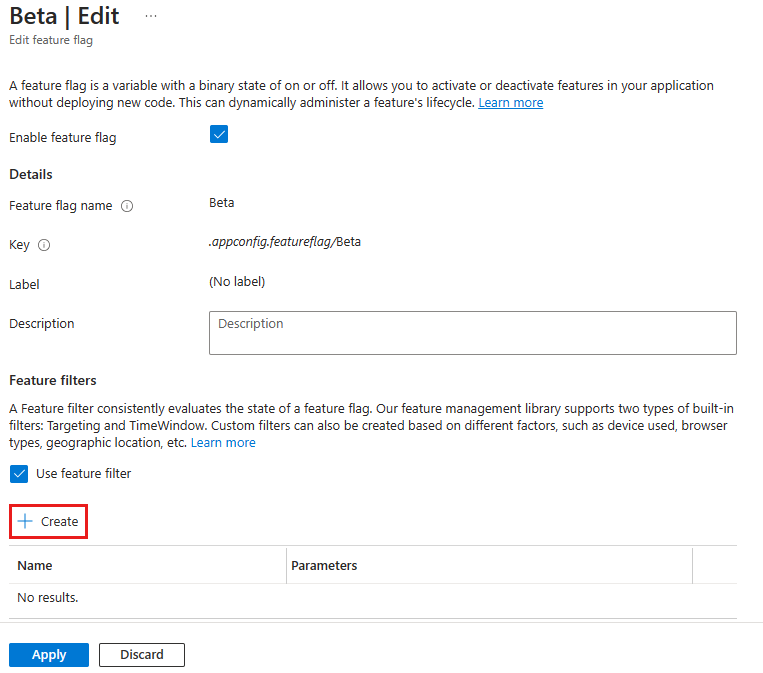
In the Edit feature flag pane that opens, check the Enable feature flag checkbox if it isn't already enabled. Then check the Use feature filter checkbox and select Create.
The pane Create a new filter opens. Under Filter type, select Time window filter.
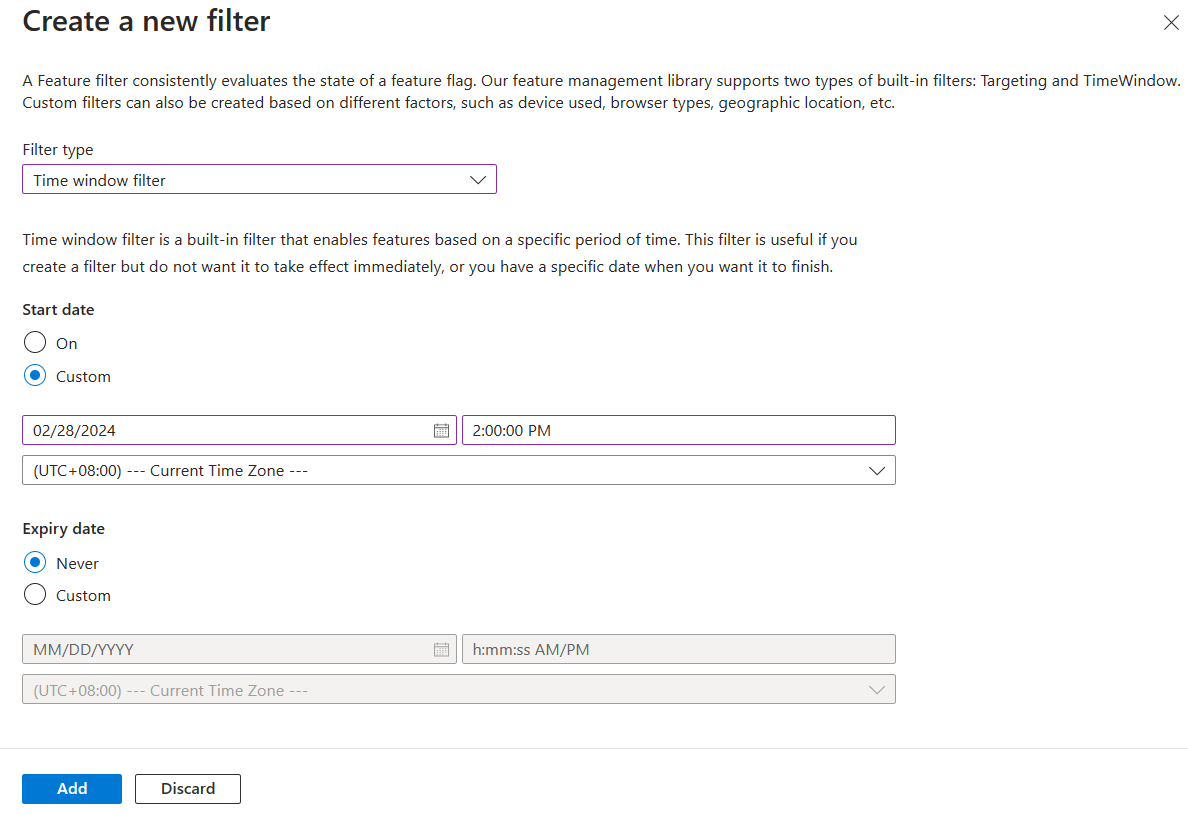
Set the Start date to Custom and select a time a few minutes ahead of your current time. Set the Expiry date to Never
Select Add to save the new feature filter and return to the Edit feature flag screen.
The feature filter you created is now listed in the feature flag details. Select Apply to save the new feature flag settings.
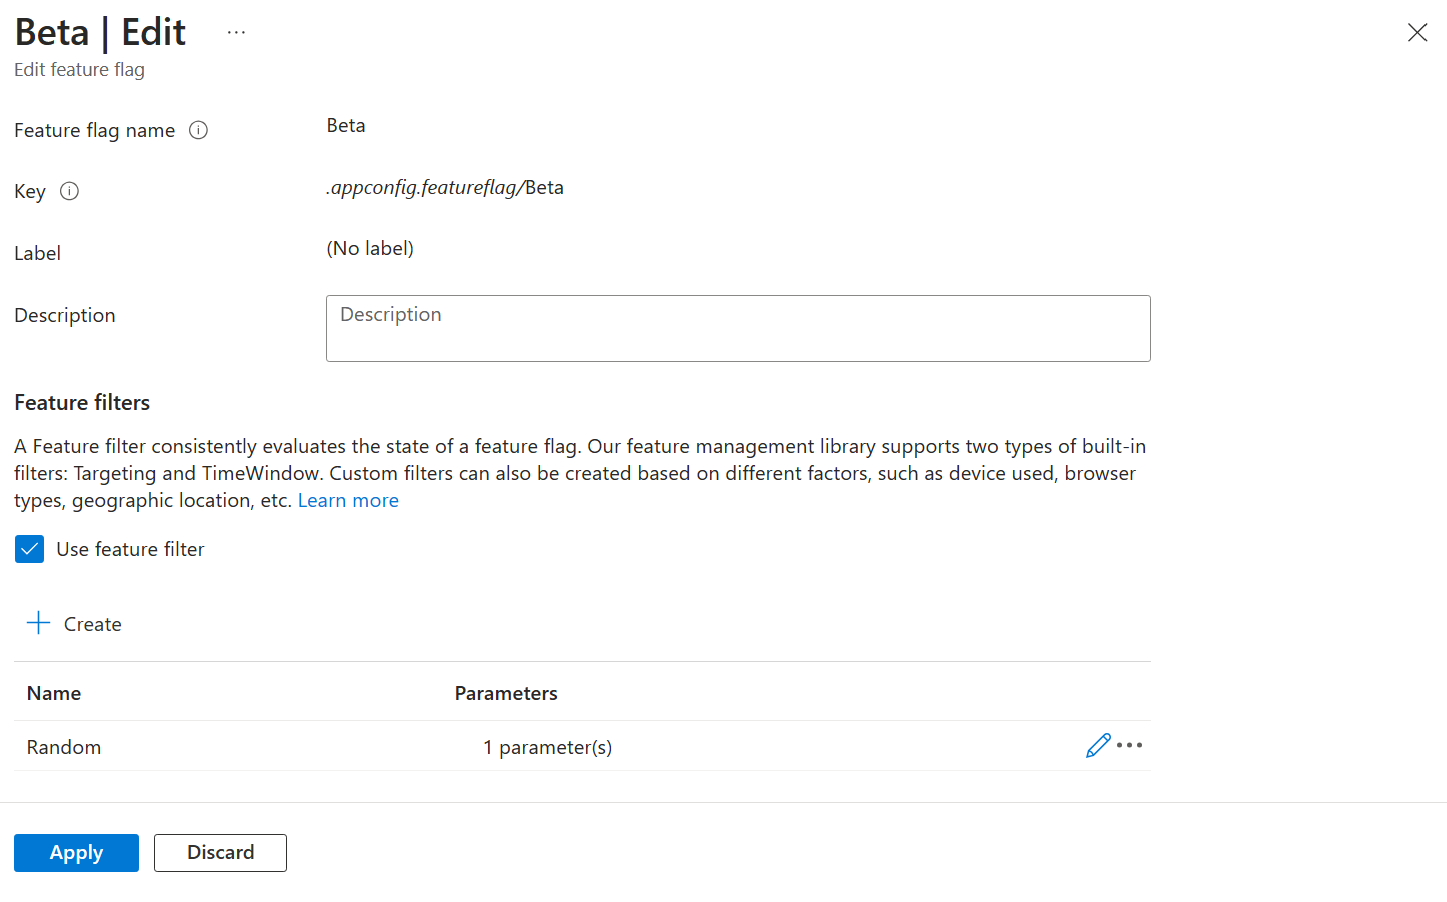
On the Feature manager page, the feature flag now has a Feature filter(s) value of 1.
Feature filters in action
Relaunch the application you created in the Quickstart. If your current time is earlier than the start time set for the time window filter, the Beta menu item will not appear on the toolbar. This is because the Beta feature flag is disabled by the time window filter.
Once the start time has passed, refresh your browser a few times. You will notice that the Beta menu item will now appear. This is because the Beta feature flag is now enabled by the time window filter.
Next steps
Feedback
Coming soon: Throughout 2024 we will be phasing out GitHub Issues as the feedback mechanism for content and replacing it with a new feedback system. For more information see: https://aka.ms/ContentUserFeedback.
Submit and view feedback for