Use the Azure Key Vault Secrets Provider extension to fetch secrets into Azure Arc-enabled Kubernetes clusters
The Azure Key Vault Provider for Secrets Store CSI Driver allows for the integration of Azure Key Vault as a secrets store with a Kubernetes cluster via a CSI volume. For Azure Arc-enabled Kubernetes clusters, you can install the Azure Key Vault Secrets Provider extension to fetch secrets.
Capabilities of the Azure Key Vault Secrets Provider extension include:
- Mounts secrets/keys/certs to pod using a CSI Inline volume
- Supports pod portability with the SecretProviderClass CRD
- Supports Linux and Windows containers
- Supports sync with Kubernetes Secrets
- Supports auto rotation of secrets
- Extension components are deployed to availability zones, making them zone redundant
Tip
If offline access is necessary, or if you need secrets synced into the Kubernetes secrets store, use the Secret Store extension for secret management in your Arc-enabled Kubernetes clusters.
Prerequisites
- A cluster with a supported Kubernetes distribution that's connected to Azure Arc. The following Kubernetes distributions are currently supported for this scenario:
- Cluster API Azure
- Azure Kubernetes Service (AKS) clusters on Azure Local
- AKS enabled by Azure Arc
- Google Kubernetes Engine
- OpenShift Kubernetes Distribution
- Canonical Kubernetes Distribution
- Elastic Kubernetes Service
- Tanzu Kubernetes Grid
- Azure Red Hat OpenShift
- Outbound connectivity to the following endpoints:
linuxgeneva-microsoft.azurecr.ioupstreamarc.azurecr.io*.blob.core.windows.net
- Ensure you meet the general prerequisites for cluster extensions. You must use version 0.4.0 or newer of the
k8s-extensionAzure CLI extension.
Install the Azure Key Vault Secrets Provider extension on an Arc-enabled Kubernetes cluster
You can install the Azure Key Vault Secrets Provider extension on your connected cluster in the Azure portal, by using Azure CLI, or by deploying an ARM template.
Only one instance of the extension can be deployed on each Azure Arc-enabled Kubernetes cluster.
Tip
If the cluster is behind an outbound proxy server, ensure that you connect it to Azure Arc using the proxy configuration option before installing the extension.
Azure portal
In the Azure portal, navigate to Kubernetes - Azure Arc and select your cluster.
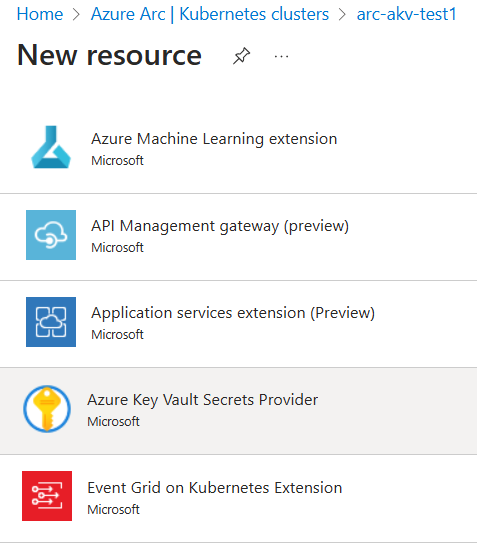
In the service menu, under Settings, select Extensions. Then, select + Add.

From the list of available extensions, select Azure Key Vault Secrets Provider to deploy the latest version of the extension.
Follow the prompts to deploy the extension. If needed, customize the installation by changing the default options on the Configuration tab.

Azure CLI
Set the environment variables:
export CLUSTER_NAME=<arc-cluster-name>
export RESOURCE_GROUP=<resource-group-name>
Install the Secrets Store CSI Driver and the Azure Key Vault Secrets Provider extension by running the following command:
az k8s-extension create --cluster-name $CLUSTER_NAME --resource-group $RESOURCE_GROUP --cluster-type connectedClusters --extension-type Microsoft.AzureKeyVaultSecretsProvider --name akvsecretsprovider
You should see output similar to this example. It may take several minutes before the secrets provider Helm chart is deployed to the cluster.
{
  "aksAssignedIdentity": null,
  "autoUpgradeMinorVersion": true,
  "configurationProtectedSettings": {},
  "configurationSettings": {},
  "customLocationSettings": null,
  "errorInfo": null,
  "extensionType": "microsoft.azurekeyvaultsecretsprovider",
  "id": "/subscriptions/xxxxxxxx-xxxx-xxxx-xxxx-xxxxxxxxxxxx/resourceGroups/$RESOURCE_GROUP/providers/Microsoft.Kubernetes/connectedClusters/$CLUSTER_NAME/providers/Microsoft.KubernetesConfiguration/extensions/akvsecretsprovider",
  "identity": {
    "principalId": "xxxxxxxx-xxxx-xxxx-xxxx-xxxxxxxxxxxx",
    "tenantId": null,
    "type": "SystemAssigned"
  },
  "location": null,
  "name": "akvsecretsprovider",
  "packageUri": null,
  "provisioningState": "Succeeded",
  "releaseTrain": "Stable",
  "resourceGroup": "$RESOURCE_GROUP",
  "scope": {
    "cluster": {
      "releaseNamespace": "kube-system"
    },
    "namespace": null
  },
  "statuses": [],
  "systemData": {
    "createdAt": "2022-05-12T18:35:56.552889+00:00",
    "createdBy": null,
    "createdByType": null,
    "lastModifiedAt": "2022-05-12T18:35:56.552889+00:00",
    "lastModifiedBy": null,
    "lastModifiedByType": null
  },
  "type": "Microsoft.KubernetesConfiguration/extensions",
  "version": "1.1.3"
}
ARM template
Create a .json file using the following format. Be sure to update the
<cluster-name>value to refer to your cluster.{ "$schema": "https://schema.management.azure.com/schemas/2019-04-01/deploymentTemplate.json#", "contentVersion": "1.0.0.0", "parameters": { "ConnectedClusterName": { "defaultValue": "<cluster-name>", "type": "String", "metadata": { "description": "The Connected Cluster name." } }, "ExtensionInstanceName": { "defaultValue": "akvsecretsprovider", "type": "String", "metadata": { "description": "The extension instance name." } }, "ExtensionVersion": { "defaultValue": "", "type": "String", "metadata": { "description": "The version of the extension type." } }, "ExtensionType": { "defaultValue": "Microsoft.AzureKeyVaultSecretsProvider", "type": "String", "metadata": { "description": "The extension type." } }, "ReleaseTrain": { "defaultValue": "stable", "type": "String", "metadata": { "description": "The release train." } } }, "functions": [], "resources": [ { "type": "Microsoft.KubernetesConfiguration/extensions", "apiVersion": "2021-09-01", "name": "[parameters('ExtensionInstanceName')]", "identity": { "type": "SystemAssigned" }, "properties": { "extensionType": "[parameters('ExtensionType')]", "releaseTrain": "[parameters('ReleaseTrain')]", "version": "[parameters('ExtensionVersion')]" }, "scope": "[concat('Microsoft.Kubernetes/connectedClusters/', parameters('ConnectedClusterName'))]" } ] }Now set the environment variables by using the following Azure CLI command:
export TEMPLATE_FILE_NAME=<template-file-path>
export DEPLOYMENT_NAME=<desired-deployment-name>
Finally, run this Azure CLI command to install the Azure Key Vault Secrets Provider extension:
az deployment group create --name $DEPLOYMENT_NAME --resource-group $RESOURCE_GROUP --template-file $TEMPLATE_FILE_NAME
You should now be able to view the secret provider resources and use the extension in your cluster.
Validate the extension installation
To confirm successful installation of the Azure Key Vault Secrets Provider extension, run the following command.
az k8s-extension show --cluster-type connectedClusters --cluster-name $CLUSTER_NAME --resource-group $RESOURCE_GROUP --name akvsecretsprovider
You should see output similar to this example.
{
  "aksAssignedIdentity": null,
  "autoUpgradeMinorVersion": true,
  "configurationProtectedSettings": {},
  "configurationSettings": {},
  "customLocationSettings": null,
  "errorInfo": null,
  "extensionType": "microsoft.azurekeyvaultsecretsprovider",
  "id": "/subscriptions/xxxxxxxx-xxxx-xxxx-xxxx-xxxxxxxxxxxx/resourceGroups/$RESOURCE_GROUP/providers/Microsoft.Kubernetes/connectedClusters/$CLUSTER_NAME/providers/Microsoft.KubernetesConfiguration/extensions/akvsecretsprovider",
  "identity": {
    "principalId": "xxxxxxxx-xxxx-xxxx-xxxx-xxxxxxxxxxxx",
    "tenantId": null,
    "type": "SystemAssigned"
  },
  "location": null,
  "name": "akvsecretsprovider",
  "packageUri": null,
  "provisioningState": "Succeeded",
  "releaseTrain": "Stable",
  "resourceGroup": "$RESOURCE_GROUP",
  "scope": {
    "cluster": {
      "releaseNamespace": "kube-system"
    },
    "namespace": null
  },
  "statuses": [],
  "systemData": {
    "createdAt": "2022-05-12T18:35:56.552889+00:00",
    "createdBy": null,
    "createdByType": null,
    "lastModifiedAt": "2022-05-12T18:35:56.552889+00:00",
    "lastModifiedBy": null,
    "lastModifiedByType": null
  },
  "type": "Microsoft.KubernetesConfiguration/extensions",
  "version": "1.1.3"
}
Create or select an Azure Key Vault
Next, specify the Azure Key Vault to use with your connected cluster. If you don't already have one, create a new Key Vault by using the following commands. Keep in mind that the name of your key vault must be globally unique.
Set the following environment variables:
export AKV_RESOURCE_GROUP=<resource-group-name>
export AZUREKEYVAULT_NAME=<AKV-name>
export AZUREKEYVAULT_LOCATION=<AKV-location>
Next, run the following command:
az keyvault create -n $AZUREKEYVAULT_NAME -g $AKV_RESOURCE_GROUP -l $AZUREKEYVAULT_LOCATION
Azure Key Vault can store keys, secrets, and certificates. For this example, you can set a plain text secret called DemoSecret by using the following command:
az keyvault secret set --vault-name $AZUREKEYVAULT_NAME -n DemoSecret --value MyExampleSecret
Before you move on to the next section, take note of the following properties:
- Name of the secret object in Key Vault
- Object type (secret, key, or certificate)
- Name of your Key Vault resource
- The Azure Tenant ID for the subscription to which the Key Vault belongs
Provide identity to access Azure Key Vault
Currently, the Secrets Store CSI Driver on Arc-enabled clusters can be accessed through a service principal. Follow these steps to provide an identity that can access your Key Vault.
Follow the steps to create a service principal in Azure. Take note of the Client ID and Client Secret generated in this step.
Next, ensure Azure Key Vault has GET permission to the created service principal.
Use the client ID and Client Secret from the first step to create a Kubernetes secret on the connected cluster:
kubectl create secret generic secrets-store-creds --from-literal clientid="<client-id>" --from-literal clientsecret="<client-secret>"Label the created secret:
kubectl label secret secrets-store-creds secrets-store.csi.k8s.io/used=trueCreate a
SecretProviderClasswith the following YAML, filling in your values for key vault name, tenant ID, and objects to retrieve from your AKV instance:# This is a SecretProviderClass example using service principal to access Keyvault apiVersion: secrets-store.csi.x-k8s.io/v1 kind: SecretProviderClass metadata: name: akvprovider-demo spec: provider: azure parameters: usePodIdentity: "false" keyvaultName: <key-vault-name> cloudName: # Defaults to AzurePublicCloud objects: | array: - | objectName: DemoSecret objectType: secret # object types: secret, key or cert objectVersion: "" # [OPTIONAL] object versions, default to latest if empty tenantId: <tenant-Id> # The tenant ID of the Azure Key Vault instanceFor use with national clouds, change
cloudNametoAzureUSGovernmentCloudfor Azure Government, or toAzureChinaCloudfor Microsoft Azure operated by 21Vianet.Apply the SecretProviderClass to your cluster:
kubectl apply -f secretproviderclass.yamlCreate a pod with the following YAML, filling in the name of your identity:
# This is a sample pod definition for using SecretProviderClass and service principal to access Keyvault
kind: Pod
apiVersion: v1
metadata:
  name: busybox-secrets-store-inline
spec:
  containers:
    - name: busybox
      image: k8s.gcr.io/e2e-test-images/busybox:1.29
      command:
        - "/bin/sleep"
        - "10000"
      volumeMounts:
      - name: secrets-store-inline
        mountPath: "/mnt/secrets-store"
        readOnly: true
  volumes:
    - name: secrets-store-inline
      csi:
        driver: secrets-store.csi.k8s.io
        readOnly: true
        volumeAttributes:
          secretProviderClass: "akvprovider-demo"
        nodePublishSecretRef:
          name: secrets-store-creds
Apply the pod to your cluster:
kubectl apply -f pod.yaml
Validate the secrets
After the pod starts, the mounted content at the volume path specified in your deployment YAML is available.
## show secrets held in secrets-store
kubectl exec busybox-secrets-store-inline -- ls /mnt/secrets-store/

## print a test secret 'DemoSecret' held in secrets-store
kubectl exec busybox-secrets-store-inline -- cat /mnt/secrets-store/DemoSecret
Additional configuration options
The Azure Key Vault Secrets Provider extension supports Helm chart configurations.
The following configuration settings are frequently used with the Azure Key Vault Secrets Provider extension:
| Configuration Setting | Default | Description |
|---|---|---|
| enableSecretRotation | false | Boolean type. If true, periodically updates the pod mount and Kubernetes Secret with the latest content from external secrets store |
| rotationPollInterval | 2 m | If enableSecretRotation is true, this setting specifies the secret rotation poll interval duration. This duration can be adjusted based on how frequently the mounted contents for all pods and Kubernetes secrets need to be resynced to the latest. |
| syncSecret.enabled | false | Boolean input. In some cases, you may want to create a Kubernetes Secret to mirror the mounted content. If true, SecretProviderClass allows the secretObjects field to define the desired state of the synced Kubernetes Secret objects. |
These settings can be specified when the extension is installed by using the az k8s-extension create command:
az k8s-extension create --cluster-name $CLUSTER_NAME --resource-group $RESOURCE_GROUP --cluster-type connectedClusters --extension-type Microsoft.AzureKeyVaultSecretsProvider --name akvsecretsprovider --configuration-settings secrets-store-csi-driver.enableSecretRotation=true secrets-store-csi-driver.rotationPollInterval=3m secrets-store-csi-driver.syncSecret.enabled=true
You can also change these settings after installation by using the az k8s-extension update command:
az k8s-extension update --cluster-name $CLUSTER_NAME --resource-group $RESOURCE_GROUP --cluster-type connectedClusters --name akvsecretsprovider --configuration-settings secrets-store-csi-driver.enableSecretRotation=true secrets-store-csi-driver.rotationPollInterval=3m secrets-store-csi-driver.syncSecret.enabled=true
You can use other configuration settings as needed for your deployment. For example, to change the kubelet root directory while creating a cluster, modify the az k8s-extension create command:
az k8s-extension create --cluster-name $CLUSTER_NAME --resource-group $RESOURCE_GROUP --cluster-type connectedClusters --extension-type Microsoft.AzureKeyVaultSecretsProvider --name akvsecretsprovider --configuration-settings linux.kubeletRootDir=/path/to/kubelet secrets-store-csi-driver.linux.kubeletRootDir=/path/to/kubelet
Uninstall the Azure Key Vault Secrets Provider extension
To uninstall the extension, run the following command:
az k8s-extension delete --cluster-type connectedClusters --cluster-name $CLUSTER_NAME --resource-group $RESOURCE_GROUP --name akvsecretsprovider
Note
Uninstalling the extension doesn't delete the Custom Resource Definitions (CRDs) that were created when the extension was installed.
To confirm that the extension instance was deleted, run the following command:
az k8s-extension list --cluster-type connectedClusters --cluster-name $CLUSTER_NAME --resource-group $RESOURCE_GROUP
If the extension was successfully removed, the Azure Key Vault Secrets Provider extension isn't listed in the output. If no other extensions are installed on your cluster, an empty array is returned.
If you no longer need it, be sure to delete the Kubernetes secret associated with the service principal by running the following command:
kubectl delete secret secrets-store-creds
Reconciliation and troubleshooting
The Azure Key Vault Secrets Provider extension is self-healing. If somebody tries to change or delete an extension component that was deployed when the extension was installed, that component is reconciled to its original state. The only exceptions are for Custom Resource Definitions (CRDs). Deleted CRDs aren't reconciled. To restore deleted CRDs, use the az k8s-extension create command again with the existing extension instance name.
For more information about resolving common issues, see the open source troubleshooting guides for Azure Key Vault provider for Secrets Store CSI driver and Secrets Store CSI Driver.
Next steps
- Want to try things out? Get started quickly with an Azure Arc Jumpstart scenario using Cluster API.
- Learn more about Azure Key Vault.