Note
Access to this page requires authorization. You can try signing in or changing directories.
Access to this page requires authorization. You can try changing directories.
Azure Private Link allows you to securely link Azure PaaS services to your virtual network using private endpoints. For many services, you just set up an endpoint per resource. This means you can connect your on-premises or multicloud servers with Azure Arc and send all traffic over an Azure ExpressRoute or site-to-site VPN connection instead of using public networks.
Starting with Azure Arc-enabled servers, you can use a Private Link Scope model to allow multiple servers or machines to communicate with their Azure Arc resources using a single private endpoint.
This article covers when to use and how to set up an Azure Arc Private Link Scope.
Advantages
With Private Link you can:
- Connect privately to Azure Arc without opening up any public network access.
- Ensure data from the Azure Arc-enabled machine or server is only accessed through authorized private networks. This also includes data from VM extensions installed on the machine or server that provide post-deployment management and monitoring support.
- Prevent data exfiltration from your private networks by defining specific Azure Arc-enabled servers and other Azure services resources, such as Azure Monitor, that connects through your private endpoint.
- Securely connect your private on-premises network to Azure Arc using ExpressRoute and Private Link.
- Keep all traffic inside the Microsoft Azure backbone network.
For more information, see Key benefits of Azure Private Link.
How it works
Azure Arc Private Link Scope connects private endpoints (and the virtual networks they're contained in) to an Azure resource, in this case Azure Arc-enabled servers. When you enable any one of the Azure Arc-enabled servers supported VM extensions, such as Azure Monitor, those resources connect other Azure resources. Such as:
- Log Analytics workspace, required for Azure Automation Change Tracking and Inventory, Azure Monitor VM insights, and Azure Monitor log collection with Azure Monitor agent.
- Azure Key Vault
- Azure Blob storage, required for Custom Script Extension.

To download architecture diagrams in high resolution, visit Jumpstart Gems.
Connectivity to any other Azure resource from an Azure Arc-enabled server requires configuring Private Link for each service, which is optional, but recommended. Azure Private Link requires separate configuration per service.
For more information about configuring Private Link for the Azure services listed earlier, see the Azure Automation, Azure Monitor, Azure Key Vault, or Azure Blob storage articles.
Important
Azure Private Link is now generally available. Both Private Endpoint and Private Link service (service behind standard load balancer) are generally available. Different Azure PaaS onboard to Azure Private Link following different schedules. See Private Link availability for an updated status of Azure PaaS on Private Link. For known limitations, see Private Endpoint and Private Link Service.
The Private Endpoint on your VNet allows it to reach Azure Arc-enabled servers endpoints through private IPs from your network's pool, instead of using to the public IPs of these endpoints. That allows you to keep using your Azure Arc-enabled servers resource without opening your VNet to outbound traffic not requested.
Traffic from the Private Endpoint to your resources will go over the Microsoft Azure backbone, and not routed to public networks.
You can configure each of your components to allow or deny ingestion and queries from public networks. That provides a resource-level protection, so that you can control traffic to specific resources.
Restrictions and limitations
The Azure Arc-enabled servers Private Link Scope object has a number of limits you should consider when planning your Private Link setup.
- You can associate at most one Azure Arc Private Link Scope with a virtual network.
- An Azure Arc-enabled machine or server resource can only connect to one Azure Arc-enabled servers Private Link Scope.
- All on-premises machines need to use the same private endpoint by resolving the correct private endpoint information (FQDN record name and private IP address) using the same DNS forwarder. For more information, see Azure Private Endpoint DNS configuration
- The Azure Arc-enabled server and Azure Arc Private Link Scope must be in the same Azure region. The Private Endpoint and the virtual network must also be in the same Azure region, but this region can be different from that of your Azure Arc Private Link Scope and Arc-enabled server.
- Network traffic to Microsoft Entra ID and Azure Resource Manager does not traverse the Azure Arc Private Link Scope and will continue to use your default network route to the internet. You can optionally configure a resource management private link to send Azure Resource Manager traffic to a private endpoint.
- Other Azure services that you will use, for example Azure Monitor, require their own private endpoints in your virtual network.
- Remote access to the server using Windows Admin Center or SSH is not supported over private link at this time.
Planning your Private Link setup
To connect your server to Azure Arc over a private link, you need to configure your network to accomplish the following:
Establish a connection between your on-premises network and an Azure virtual network using a site-to-site VPN or ExpressRoute circuit.
Deploy an Azure Arc Private Link Scope, which controls which machines or servers can communicate with Azure Arc over private endpoints and associate it with your Azure virtual network using a private endpoint.
Update the DNS configuration on your local network to resolve the private endpoint addresses.
Configure your local firewall to allow access to Microsoft Entra ID and Azure Resource Manager.
Associate the machines or servers registered with Azure Arc-enabled servers with the private link scope.
Optionally, deploy private endpoints for other Azure services your machine or server is managed by, such as:
- Azure Monitor
- Azure Automation
- Azure Blob storage
- Azure Key Vault
This article assumes you have already set up your ExpressRoute circuit or site-to-site VPN connection.
Network configuration
Azure Arc-enabled servers integrate with several Azure services to bring cloud management and governance to your hybrid machines or servers. Most of these services already offer private endpoints, but you need to configure your firewall and routing rules to allow access to Microsoft Entra ID and Azure Resource Manager over the internet until these services offer private endpoints.
There are two ways you can achieve this:
If your network is configured to route all internet-bound traffic through the Azure VPN or ExpressRoute circuit, you can configure the network security group (NSG) associated with your subnet in Azure to allow outbound TCP 443 (HTTPS) access to Microsoft Entra ID and Azure using service tags. The NSG rules should look like the following:
Setting Microsoft Entra ID rule Azure rule Source Virtual network Virtual network Source port ranges * * Destination Service Tag Service Tag Destination service tag AzureActiveDirectoryAzureResourceManagerDestination port ranges 443 443 Protocol TCP TCP Action Allow Allow Priority 150 (must be lower than any rules that block internet access) 151 (must be lower than any rules that block internet access) Name AllowAADOutboundAccessAllowAzOutboundAccessConfigure the firewall on your local network to allow outbound TCP 443 (HTTPS) access to Microsoft Entra ID and Azure using the downloadable service tag files. The JSON file contains all the public IP address ranges used by Microsoft Entra ID and Azure and is updated monthly to reflect any changes. Entra ID's service tag is
AzureActiveDirectoryand Azure's service tag isAzureResourceManager. Consult with your network administrator and network firewall vendor to learn how to configure your firewall rules.
To understand more about the network traffic flows, see the diagram in the How it works section of this article.
Create a Private Link Scope
Sign in to the Azure portal.
Go to Create a resource in the Azure portal and search for Azure Arc Private Link Scope, then select Create.
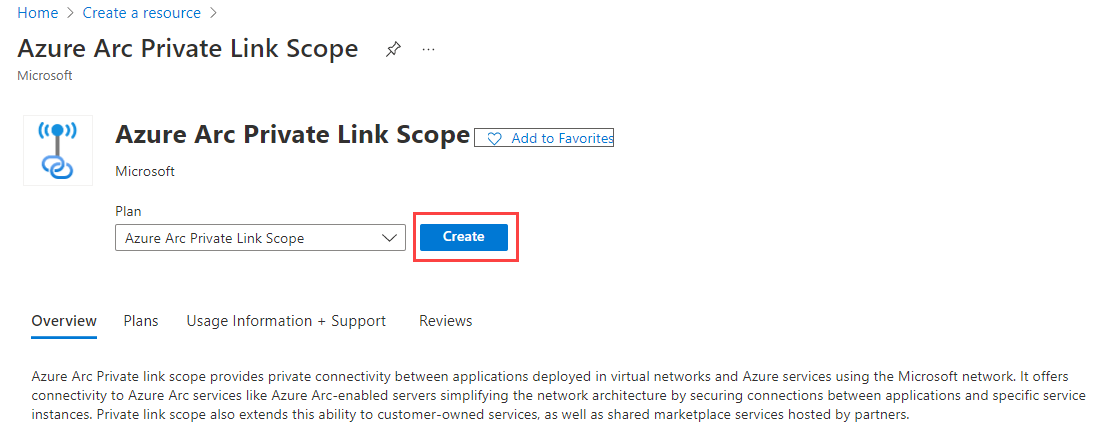
Alternately, go directly to the Azure Arc Private Link Scopes page in the portal, then select Create Azure Arc Private link scope.
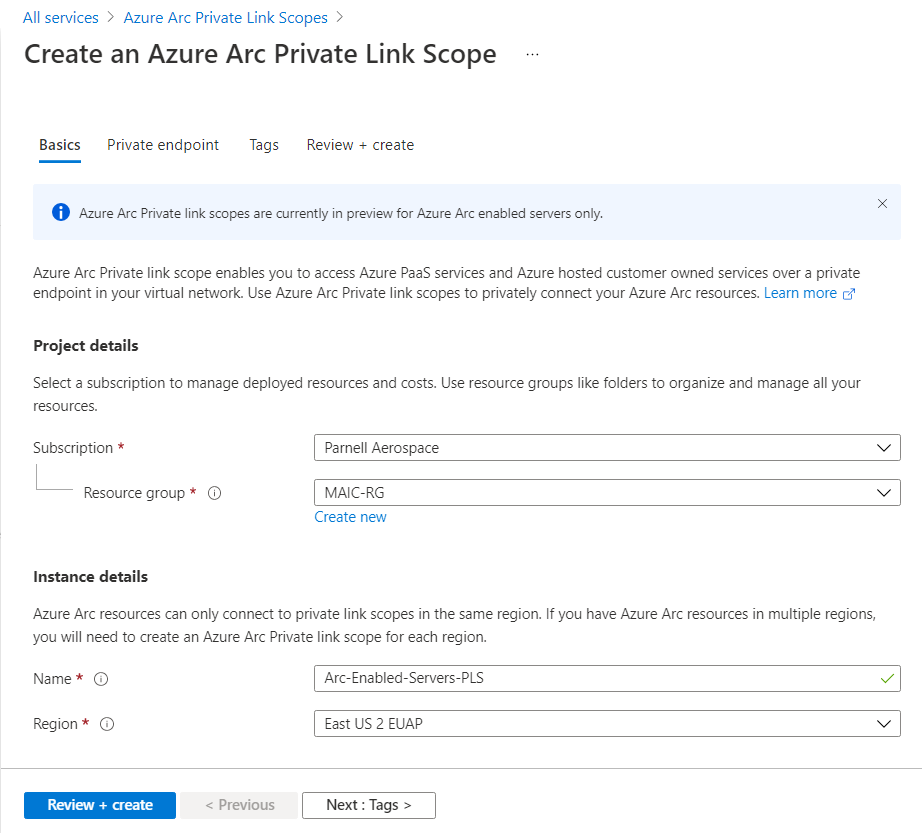
In the Basics tab, select a subscription and resource group.
Enter a name for the Azure Arc Private Link Scope. It's best to use a meaningful and clear name.
Optionally, you can require every Azure Arc-enabled machine or server associated with this Azure Arc Private Link Scope to send data to the service through the private endpoint. To do so, check the box for Allow public network access, so that machines or servers associated with this Azure Arc Private Link Scope can communicate with the service over both private or public networks. You can change this setting after creating the scope as needed.
Select the Private endpoint tab, then select Create.
In the Create private endpoint pane:
Enter a Name for the endpoint.
Choose Yes for Integrate with private DNS zone, and let it automatically create a new Private DNS Zone.
Note
If you choose No and prefer to manage DNS records manually, first complete setting up your Private Link, including this private endpoint and the private scope configuration. Then, configure your DNS according to the instructions in Azure Private Endpoint DNS configuration. Make sure not to create empty records as preparation for your Private Link setup. The DNS records you create can override existing settings and impact your connectivity with Azure Arc-enabled servers.
The same VNET/DNS zone can't be used for both Arc resources using private link and ones which don't use private link. Arc resources which aren't private link connected must resolve to public endpoints.
Select OK.
Select Review + Create.
Let the validation pass, and then select Create.

Configure on-premises DNS forwarding
Your on-premises machines or servers need to be able to resolve the private link DNS records to the private endpoint IP addresses. How you configure this depends on whether you're using Azure private DNS zones to maintain DNS records, or if you're using your own DNS server on-premises and how many servers you're configuring.
DNS configuration using Azure-integrated private DNS zones
If you set up private DNS zones for Azure Arc-enabled servers and Guest Configuration when creating the private endpoint, your on-premises machines or servers need to be able to forward DNS queries to the built-in Azure DNS servers to resolve the private endpoint addresses correctly. You need a DNS forwarder in Azure (either a purpose-built VM or an Azure Firewall instance with DNS proxy enabled), after which you can configure your on-premises DNS server to forward queries to Azure to resolve private endpoint IP addresses.
For more information, see Azure Private Resolver with on-premises DNS forwarder.
Manual DNS server configuration
If you opted out of using Azure private DNS zones during private endpoint creation, you will need to create the required DNS records in your on-premises DNS server.
In the Azure portal, navigate to the private endpoint resource associated with your virtual network and private link scope.
From the service menu, under Settings, select DNS configuration to see a list of the DNS records and corresponding IP addresses that you need to set up on your DNS server. The FQDNs and IP addresses will change based on the region you selected for your private endpoint and the available IP addresses in your subnet.
Follow the guidance from your DNS server vendor to add the necessary DNS zones and A records to match the table in the portal. Ensure that you select a DNS server that is appropriately scoped for your network. Every machine or server that uses this DNS server now resolves the private endpoint IP addresses and must be associated with the Azure Arc Private Link Scope, or the connection will be refused.
Single server scenarios
If you're only planning to use Private Links to support a few machines or servers, you might not want to update your entire network's DNS configuration. In this case, you can add the private endpoint hostnames and IP addresses to your operating systems Hosts file. Depending on the OS configuration, the Hosts file can be the primary or alternative method for resolving hostname to IP address.
Windows
Using an account with administrator privileges, open
C:\Windows\System32\drivers\etc\hosts.Add the private endpoint IPs and hostnames from the DNS configuration listing, as described in Manual DNS server configuration. The hosts file requires the IP address first, followed by a space and then the hostname.
Save the file with your changes. You might need to save to another directory first, then copy the file to the original path.
Linux
Open the
/etc/hostshosts file in a text editor.Add the private endpoint IPs and hostnames from the DNS configuration listing, as described in Manual DNS server configuration. The hosts file asks for the IP address first, followed by a space and then the hostname.
Save the file with your changes.
Connect to an Azure Arc-enabled server
Note
Using private endpoint requires the Azure Connected Machine agent version 1.4 or higher. The Azure Arc-enabled servers deployment script generated in the portal downloads the latest version.
Configure a new Azure Arc-enabled server to use Private link
When connecting a machine or server with Azure Arc-enabled servers for the first time, you can optionally connect it to a Private Link Scope.
From your browser, go to the Azure portal.
Navigate to Machines - Azure Arc.
On the Machines - Azure Arc page, select Add/Create at the upper left, and then select Add a machine from the drop-down menu.
On the Add servers with Azure Arc page, select either the Add a single server or Add multiple servers depending on your deployment scenario, and then select Generate script.
On the Basics page, provide the following:
Select the Subscription and Resource group for the machine.
In the Region drop-down list, select the Azure region to store the machine or server metadata.
In the Operating system drop-down list, select the operating system that the script is configured to run on.
Under Connectivity method, select Private endpoint and select the Azure Arc Private Link Scope created in Part 1 from the drop-down list.
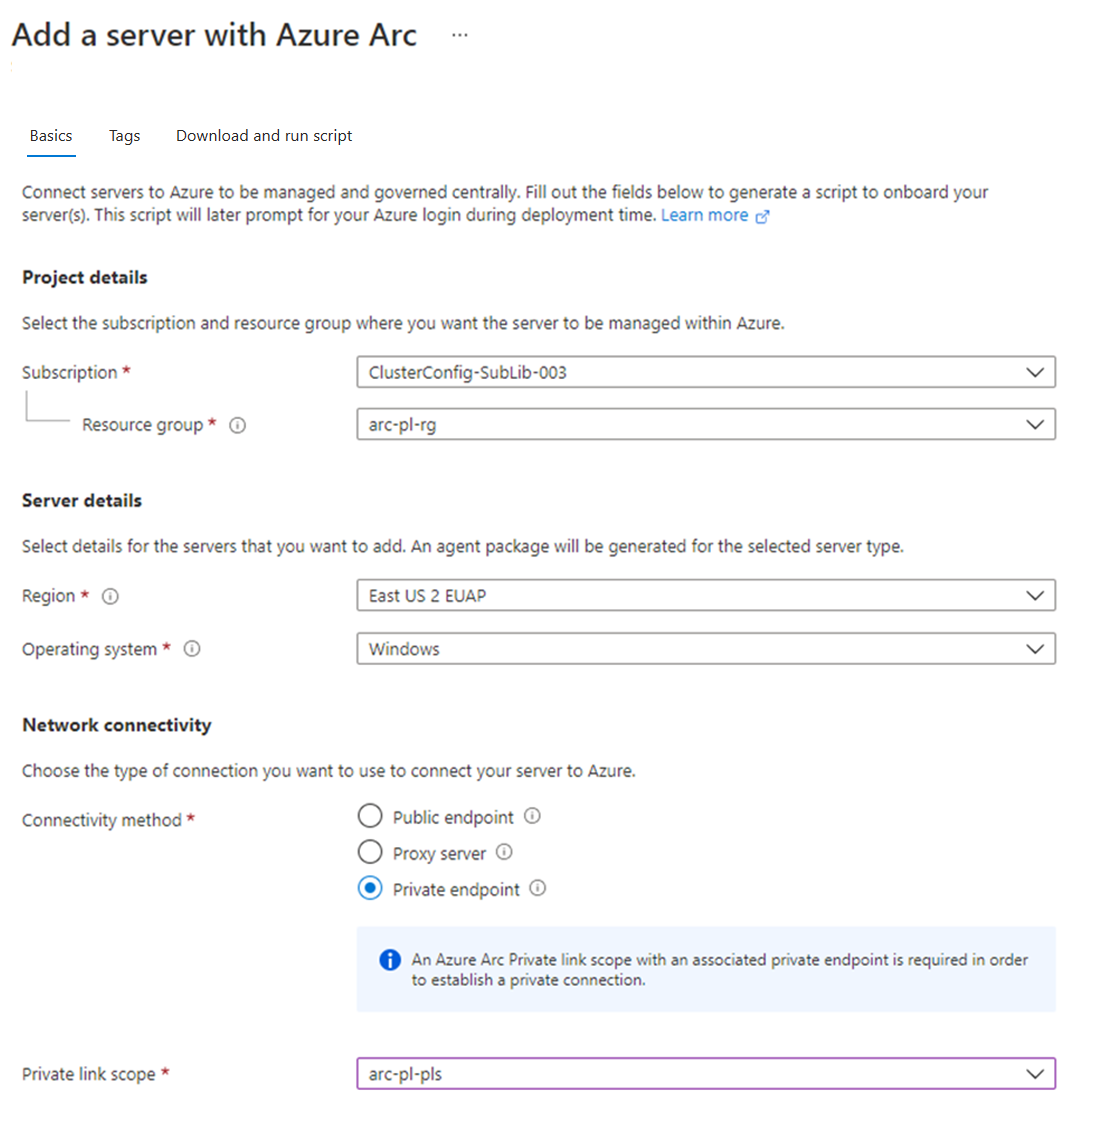
Select Next: Tags.
If you selected Add multiple servers, on the Authentication page, select the service principal created for Azure Arc-enabled servers from the drop-down list. If you haven't created a service principal for Azure Arc-enabled servers, review how to create a service principal to learn about permissions and steps required to create one. Select Next: Tags to continue.
On the Tags page, review the default Physical location tags suggested and enter a value, or specify one or more Custom tags to support your standards.
Select Next: Download and run script.
On the Download and run script page, review the summary information, and then select Download.
After downloading the script, you have to run it on your machine or server using a privileged (administrator or root) account. Depending on your network configuration, you might need to download the agent from a computer with internet access and transfer it to your machine or server, and then modify the script with the path to the agent.
The Windows agent can be downloaded from https://aka.ms/AzureConnectedMachineAgent and the Linux agent can be downloaded from https://packages.microsoft.com. Look for the latest version of the azcmagent under your OS distribution directory and installed with your local package manager.
The script will return status messages letting you know if onboarding was successful after it completes.
Tip
Network traffic from the Azure Connected Machine agent to Microsoft Entra ID (login.windows.net, login.microsoftonline.com, pas.windows.net) and Azure Resource Manager (management.azure.com) will continue to use public endpoints. If your server needs to communicate through a proxy server to reach these endpoints, configure the agent with the proxy server URL before connecting it to Azure. You might also need to configure a proxy bypass for the Azure Arc services if your private endpoint is not accessible from your proxy server.
Configure an existing Azure Arc-enabled server
For Azure Arc-enabled servers that were set up prior to your private link scope, you can allow them to start using the Azure Arc-enabled servers Private Link Scope by completing the following steps.
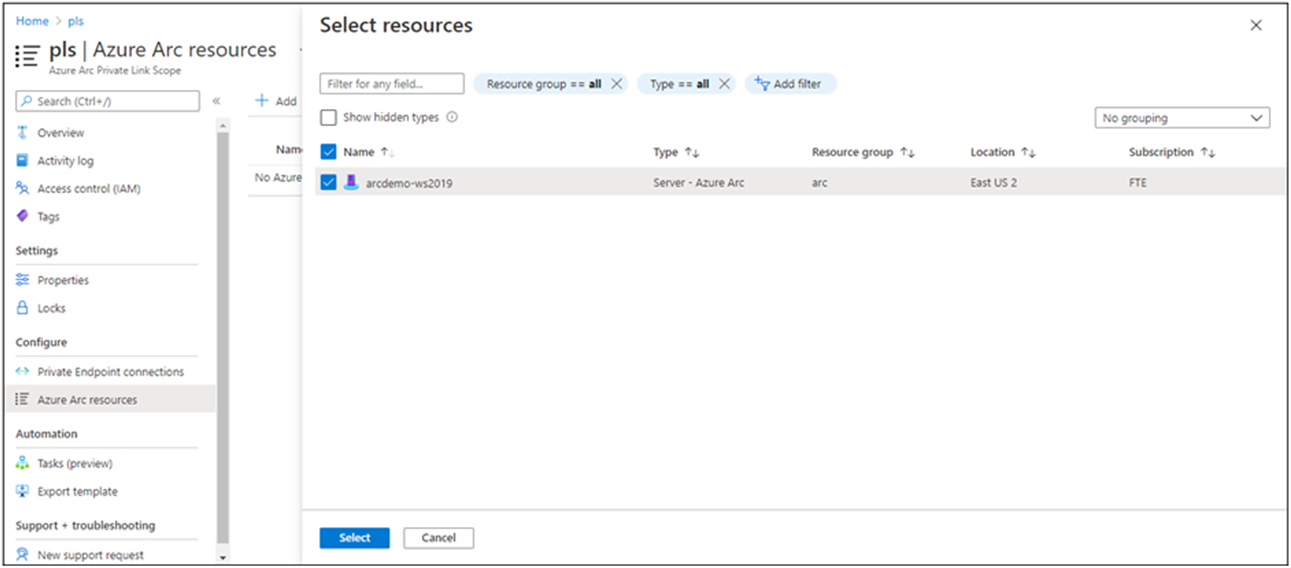
In the Azure portal, navigate to your Azure Arc Private Link Scope resource.
From the service menu, under Configure, select Azure Arc resources and then + Add.
Select the servers in the list that you want to associate with the Private Link Scope, and then select Select to save your changes.

It might take up to 15 minutes for the Private Link Scope to accept connections from the recently associated server(s).
Troubleshooting
If you run into problems, the following suggestions may help:
Check your on-premises DNS server to verify that it's either forwarding to Azure DNS or is configured with appropriate A records in your private link zone. These lookup commands should return private IP addresses in your Azure virtual network. If they resolve public IP addresses, double check your machine or server and network's DNS configuration.
nslookup gbl.his.arc.azure.com
nslookup agentserviceapi.guestconfiguration.azure.com
For issues onboarding a machine or server, confirm that you added the Microsoft Entra ID and Azure Resource Manager service tags to your local network firewall. The agent needs to communicate with these services over the internet until private endpoints are available for these services.
For more troubleshooting help, see Troubleshoot Azure Private Endpoint connectivity problems.
Next steps
- Learn more about Private Endpoint, What is Azure Private Endpoint?.
- Learn how to configure Private Link for Azure Automation, Azure Monitor, Azure Key Vault, or Azure Blob storage.