Note
Access to this page requires authorization. You can try signing in or changing directories.
Access to this page requires authorization. You can try changing directories.
This article demonstrates how to deploy Fluid apps using Azure Static Web Apps. The FluidHelloWorld repository contains a Fluid application called DiceRoller that enables all connected clients to roll a die and view the result. In this how-to, you deploy the DiceRoller application to Azure Static Web Apps using the Visual Studio Code extension.
If you don't have an Azure subscription, create a free trial account.
Prerequisites
- GitHub account
- Azure account
- Visual Studio Code
- Azure Static Web Apps extension for Visual Studio Code
- Install Git
Fork and clone the repository
Navigate to https://github.com/microsoft/FluidHelloWorld and click the Fork button to create your own fork of the FluidHelloWorld repo.
Then clone your fork to your local machine using the following command.
git clone -b main-azure https://github.com/<YOUR_GITHUB_ACCOUNT_NAME>/FluidHelloWorld.git
Make sure to replace <YOUR_GITHUB_ACCOUNT_NAME> with your GitHub username.
Next, open Visual Studio Code and go to File > Open Folder to open the cloned repository in the editor.
Connect to Azure Fluid Relay
You can connect to Azure Fluid Relay by providing the tenant ID and key that is uniquely generated for you when creating the Azure resource. You can build your own token provider implementation or you can use the two token provider implementations that the Fluid Framework provides an AzureFunctionTokenProvider.
To learn more about using InsecureTokenProvider for local development, see Connecting to the service and Authentication and authorization in your app.
Using AzureFunctionTokenProvider
AzureFunctionTokenProvider is a token provider that does not expose the secret key in client-side code and can be used in production scenarios. This token provider implementation can be used to fetch a token from an HTTPS endpoint that is responsible for signing access tokens with the tenant key. This provides a secure way to generate the token and pass it back to the client app.
import { AzureClient, AzureFunctionTokenProvider } from "@fluidframework/azure-client";

const config = {
    tenantId: "myTenantId",
    tokenProvider: new AzureFunctionTokenProvider("https://myAzureAppUrl"+"/api/GetAzureToken", { userId: "test-user",userName: "Test User" }),
    endpoint: "https://myServiceEndpointUrl",
    type: "remote",
};

const clientProps = {
    connection: config,
};

const client = new AzureClient(clientProps);
In order to use this token provider, you need to deploy an HTTPS endpoint that will sign tokens, and pass the URL to your endpoint to the AzureFunctionTokenProvider.
Deploying an Azure Function using Azure Static Web apps
Azure Static Web Apps allows you to develop a full-stack web site without needing to deal with the server-side configuration of an entire web hosting environment. You can deploy Azure Functions alongside your static website. Using this capability, you can deploy an HTTP-triggered Azure Function that will sign tokens.
For more information about deploying Azure Function-powered APIs to your static web app see Add an API to Azure Static Web Apps with Azure Functions.
Note
You can use the example Azure Function code in Implementing an Azure Function to sign tokens to implement your function.
Once your Azure Function is deployed, you must update the URL passed to the AzureFunctionTokenProvider.
import { AzureClient } from "@fluidframework/azure-client";

const config = {
    tenantId: "myTenantId",
    tokenProvider: new AzureFunctionTokenProvider("https://myStaticWebAppUrl/api/GetAzureToken", { userId: "test-user",userName: "Test User" }),
    endpoint: "https://myServiceEndpointUrl",
    type: "remote",
};

const clientProps = {
    connection: config,
};

const client = new AzureClient(config);
Run the npm run build command from the root directory to rebuild the app. This will generate a dist folder with the application code that should be deployed to the Static Web app.
Sign in to Azure
If you already use the Azure service extensions, you should already be logged in and can skip this step.
Once you've installed an extension in Visual Studio Code, you need to sign into your Azure account.
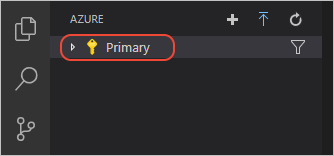
In Visual Studio Code, select the Azure explorer icon, then select Sign in to Azure, and follow the prompts.

After signing in, verify that the email address of your Azure account appears in the Status Bar and your subscription(s) appears in the Azure explorer:
Create a static web app
Inside Visual Studio Code, select the Azure logo in the Activity Bar to open the Azure extensions window.

Note
You must sign in to Azure and GitHub in Visual Studio Code to continue. If you are not already authenticated, the extension will prompt you to sign in to both services during the creation process.
Select F1 to open the Visual Studio Code command palette.
Enter Create static web app in the command box.
Select Azure Static Web Apps: Create static web app... and select Enter.
Setting Value Name Enter my-first-static-web-app Region Select the region closest to you. Build preset Select Custom. Enter the settings values for that match your framework preset choice.
Setting Value Location of application code Enter /src Location of Azure Function code api Once the app is created, a confirmation notification is shown in Visual Studio Code.

As the deployment is in progress, the Visual Studio Code extension reports the build status to you.
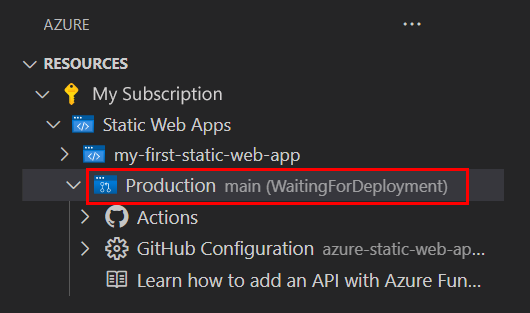
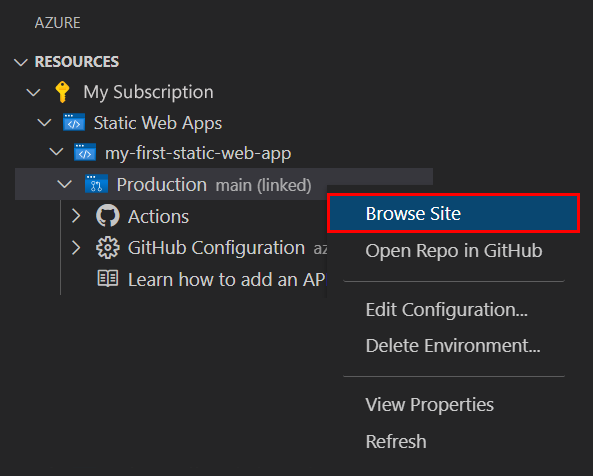
Once the deployment is complete, you can navigate directly to your website.
To view the website in the browser, right-click on the project in the Static Web Apps extension, and select Browse Site.
The location of your application code, Azure Function, and build output is part of the
azure-static-web-apps-xxx-xxx-xxx.ymlworkflow file located in the/.github/workflowsdirectory. This file is automatically created when you create the Static Web app. It defines a GitHub Actions to build and deploy your Static Web app.
Clean up resources
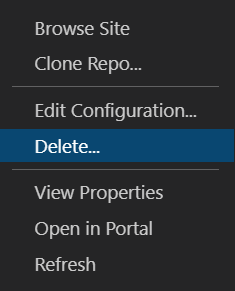
If you're not going to continue to use this application, you can delete the Azure Static Web Apps instance through the extension.
In the Visual Studio Code Explorer window, return to the Static Web Apps section and right-click on my-first-static-web-app and select Delete.