Note
Access to this page requires authorization. You can try signing in or changing directories.
Access to this page requires authorization. You can try changing directories.
Previous versions of the Azure Functions Blob Storage trigger poll your storage container for changes. More recent versions of the Blob Storage extension (5.x+) instead use an Event Grid event subscription on the container. This event subscription reduces latency by triggering your function instantly as changes occur in the subscribed container.
This article shows how to create a function that runs based on events raised when a blob is added to a container. You use Visual Studio Code for local development and to validate your code before deploying your project to Azure.
- Create an event-based Blob Storage triggered function in a new project.
- Validate locally within Visual Studio Code by using the Azurite emulator.
- Create a blob storage container in a new storage account in Azure.
- Create a function app in the Flex Consumption plan.
- Create an event subscription to the new blob container.
- Deploy and validate your function code in Azure.
This article supports version 4 of the Node.js programming model for Azure Functions.
This article supports version 2 of the Python programming model for Azure Functions.
This article creates a C# app that runs in isolated worker mode, which supports .NET 8.0.
Tip
This tutorial shows you how to create an app that runs on the Flex Consumption plan. The Flex Consumption plan only supports the event-based version of the Blob Storage trigger.
Prerequisites
An Azure account with an active subscription. Create an account for free.
Visual Studio Code on one of the supported platforms.
C# extension for Visual Studio Code.
Azure Functions extension for Visual Studio Code.
An Azure account with an active subscription. Create an account for free.
Node.js 14.x or above. Use the
node --versioncommand to check your version.Visual Studio Code on one of the supported platforms.
The Azure Functions extension for Visual Studio Code. This extension installs Azure Functions Core Tools for you the first time you locally run your functions.
An Azure account with an active subscription. Create an account for free.
Visual Studio Code on one of the supported platforms.
The Azure Functions extension for Visual Studio Code.
An Azure account with an active subscription. Create an account for free.
Python versions that are supported by Azure Functions. For more information, see How to install Python.
Visual Studio Code on one of the supported platforms.
The Python extension for Visual Studio Code.
The Azure Functions extension for Visual Studio Code.
An Azure account with an active subscription. Create an account for free.
The Java Development Kit, version 8, 11, 17 or 21(Linux).
Apache Maven, version 3.0 or above.
Visual Studio Code on one of the supported platforms.
The Azure Functions extension for Visual Studio Code.
- Azure Storage extension for Visual Studio Code.
Note
The Azure Storage extension for Visual Studio Code is in preview.
Create a Blob triggered function
When you create a Blob Storage trigger function by using Visual Studio Code, you also create a new project. You need to edit the function to consume an event subscription as the source, rather than use the regular polled container.
In Visual Studio Code, press F1 to open the command palette, enter
Azure Functions: Create Function..., and select Create new project.For your project workspace, select a directory location. Make sure that you either create a new folder or choose an empty folder for the project workspace.
Don't choose a project folder that's already part of a workspace.
At the prompts, provide the following information:
Prompt Action Select a language Select C#.Select a .NET runtime Select .NET 8.0 Isolated LTS.Select a template for your project's first function Select Azure Blob Storage trigger (using Event Grid).Provide a function name Enter EventGridBlobTrigger.Provide a namespace Enter My.Functions.Select setting from "local.settings.json" Select Create new local app setting.Select subscription Select your subscription, if needed. Select a storage account Use Azurite emulator for local storage. The path within your storage account that the trigger will monitor Accept the default value samples-workitems.Select how you would like to open your project Select Open in current window.Prompt Action Select a language Select Python.Select a Python programming model Select Model V2Select a Python interpreter to create a virtual environment Select your preferred Python interpreter. If an option isn't shown, enter the full path to your Python binary. Select a template for your project's first function Select Blob trigger. (The event-based template isn't yet available.)Provide a function name Enter EventGridBlobTrigger.The path within your storage account that the trigger will monitor Accept the default value samples-workitems.Select setting from "local.settings.json" Select Create new local app setting.Select subscription Select your subscription, if needed. Select a storage account Use Azurite emulator for local storage. Select how you would like to open your project Select Open in current window.Prompt Action Select a language Select Java.Select a version of Java Select Java 11orJava 8, the Java version on which your functions run in Azure and that you've locally verified.Provide a group ID Select com.function.Provide an artifact ID Select EventGridBlobTrigger(or the default).Provide a version Select 1.0-SNAPSHOT.Provide a package name Select com.function.Provide an app name Accept the generated name starting with EventGridBlobTrigger.Select the build tool for Java project Select Maven.Select how you would like to open your project Select Open in current window.An HTTP triggered function (
HttpExample) is created for you. You won't use this function and must instead create a new function.Prompt Action Select a language for your function project Select TypeScript.Select a TypeScript programming model Select Model V4.Select a template for your project's first function Select Azure Blob Storage trigger (using Event Grid).Provide a function name Enter EventGridBlobTrigger.Select setting from "local.settings.json" Select Create new local app setting.Select subscription Select your subscription, if needed. Select a storage account Use Azurite emulator for local storage. The path within your storage account that the trigger will monitor Accept the default value samples-workitems.Select how you would like to open your project Select Open in current window.Prompt Action Select a language for your function project Select JavaScript.Select a JavaScript programming model Select Model V4.Select a template for your project's first function Select Azure Blob Storage trigger (using Event Grid).Provide a function name Enter eventGridBlobTrigger.Select setting from "local.settings.json" Select Create new local app setting.Select subscription Select your subscription, if needed. Select a storage account Use Azurite emulator for local storage. The path within your storage account that the trigger will monitor Accept the default value samples-workitems.Select how you would like to open your project Select Open in current window.Prompt Action Select a language for your function project Select PowerShell.Select a template for your project's first function Select Azure Blob Storage trigger (using Event Grid).Provide a function name Enter EventGridBlobTrigger.Select setting from "local.settings.json" Select Create new local app setting.Select subscription Select your subscription, if needed. Select a storage account Use Azurite emulator for local storage. The path within your storage account that the trigger will monitor Accept the default value samples-workitems.Select how you would like to open your project Select Open in current window.
In the command palette, enter
Azure Functions: Create Function...and selectEventGridBlobTrigger. If you don't see this template, first select Change template filter > All.At the prompts, provide the following information:
Prompt Action Provide a package name Select com.function.Provide a function name Enter EventGridBlobTrigger.Select setting from "local.settings.json" Select Create new local app setting.Select subscription Select your subscription. Select a storage account Use Azurite emulator for local storage. The path within your storage account that the trigger will monitor Accept the default value samples-workitems.
You now have a function that can be triggered by events in a Blob Storage container.
Update the trigger source
You need to switch the trigger source from the default Blob trigger source (container polling) to an event subscription source.
Open the function_app.py project file. You see a definition for the
EventGridBlobTriggerfunction with theblob_triggerdecorator applied.Update the decorator by adding
source = "EventGrid". Your function should now look something like this:@app.blob_trigger(arg_name="myblob", source="EventGrid", path="samples-workitems", connection="<STORAGE_ACCOUNT>") def EventGridBlobTrigger(myblob: func.InputStream): logging.info(f"Python blob trigger function processed blob" f"Name: {myblob.name}" f"Blob Size: {myblob.length} bytes")In this definition,
source = "EventGrid"indicates that an event subscription to thesamples-workitemsblob container is used as the source of the event that starts the trigger.
(Optional) Review the code
Open the generated EventGridBlobTrigger.cs file. You see a definition for an EventGridBlobTrigger function that looks something like this:
[Function(nameof(EventGridBlobTriggerCSharp))]
public async Task Run([BlobTrigger("PathValue/{name}", Source = BlobTriggerSource.EventGrid, Connection = "ConnectionValue")] Stream stream, string name)
{
    using var blobStreamReader = new StreamReader(stream);
    var content = await blobStreamReader.ReadToEndAsync();
    _logger.LogInformation("C# Blob Trigger (using Event Grid) processed blob\n Name: {name} \n Data: {content}", name, content);
}
In this definition, Source = BlobTriggerSource.EventGrid indicates that an event subscription to the blob container (in the example PathValue) is the source of the event that starts the trigger.
Open the generated EventGridBlobTrigger.java file. You see a definition for an EventGridBlobTrigger function that looks something like this:
    @FunctionName("EventGridBlobTrigger")
    @StorageAccount("<STORAGE_ACCOUNT>")
    public void run(
        @BlobTrigger(name = "content", source = "EventGrid", path = "samples-workitems/{name}", dataType = "binary") byte[] content,
        @BindingName("name") String name,
        final ExecutionContext context
    ) {
        context.getLogger().info("Java Blob trigger function processed a blob. Name: " + name + "\n  Size: " + content.length + " Bytes");
    }
In this definition, source = EventGrid indicates that an event subscription to the samples-workitems blob container is the source of the event that starts the trigger.
In the EventGridBlobTrigger folder, open the function.json file and find a binding definition like this with a type of blobTrigger and a source of EventGrid:
{
    "bindings": [
        {
            "name": "InputBlob",
            "type": "blobTrigger",
            "direction": "in",
            "path": "samples-workitems/{name}",
            "source": "EventGrid",
            "connection":""
        }
    ]
}
The path indicates that the samples-workitems blob container is the source of the event that starts the trigger.
Open the generated EventGridBlobTrigger.js file. You see a definition for a function that looks something like this:
const { app } = require('@azure/functions');

app.storageBlob('storageBlobTrigger1', {
    path: 'samples-workitems/{name}',
    connection: 'MyStorageAccountAppSetting',
    source: 'EventGrid',
    handler: (blob, context) => {
        context.log(
            `Storage blob function processed blob "${context.triggerMetadata.name}" with size ${blob.length} bytes`
        );
    },
});
In this definition, a source of EventGrid indicates that an event subscription to the samples-workitems blob container is the source of the event that starts the trigger.
Open the generated EventGridBlobTrigger.ts file. You see a definition for a function that looks something like this:
import { app, InvocationContext } from '@azure/functions';

export async function storageBlobTrigger1(blob: Buffer, context: InvocationContext): Promise<void> {
    context.log(
        `Storage blob function processed blob "${context.triggerMetadata.name}" with size ${blob.length} bytes`
    );
}

app.storageBlob('storageBlobTrigger1', {
    path: 'samples-workitems/{name}',
    connection: 'MyStorageAccountAppSetting',
    source: 'EventGrid',
    handler: storageBlobTrigger1,
});
In this definition, a source of EventGrid indicates that an event subscription to the samples-workitems blob container is the source of the event that starts the trigger.
Upgrade the Storage extension
To use the Event Grid-based Blob Storage trigger, you need version 5.x or later of the Azure Functions Storage extension.
To upgrade your project to the required extension version, run this dotnet add package command in the Terminal window:
dotnet add package Microsoft.Azure.Functions.Worker.Extensions.Storage.Blobs
Open the
host.jsonproject file, and review theextensionBundleelement.If
extensionBundle.versionisn't at least3.3.0, replace theextensionBundleelement with this version:"extensionBundle": { "id": "Microsoft.Azure.Functions.ExtensionBundle", "version": "[4.0.0, 5.0.0)" }
Prepare local storage emulation
Visual Studio Code uses Azurite to emulate Azure Storage services when running locally. Use Azurite to emulate the Azure Blob Storage service during local development and testing.
If you haven't already done so, install the Azurite v3 extension for Visual Studio Code.
Verify that the local.settings.json file has
"UseDevelopmentStorage=true"set forAzureWebJobsStorage. This setting tells Core Tools to use Azurite instead of a real storage account connection when running locally.Press F1 to open the command palette, type
Azurite: Start Blob Service, and press enter. This action starts the Azurite Blob Storage service emulator.Select the Azure icon in the Activity bar, expand Workspace > Attached Storage Accounts > Local Emulator, right-click Blob Containers, select Create Blob Container..., enter the name
samples-workitems, and press Enter.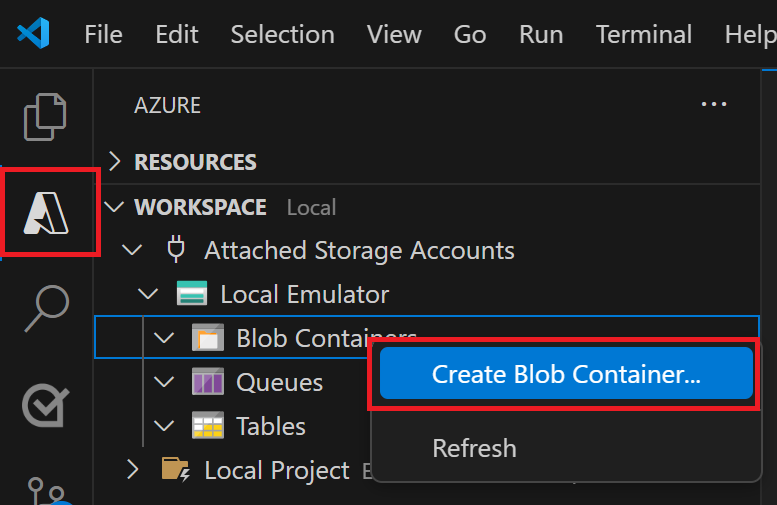
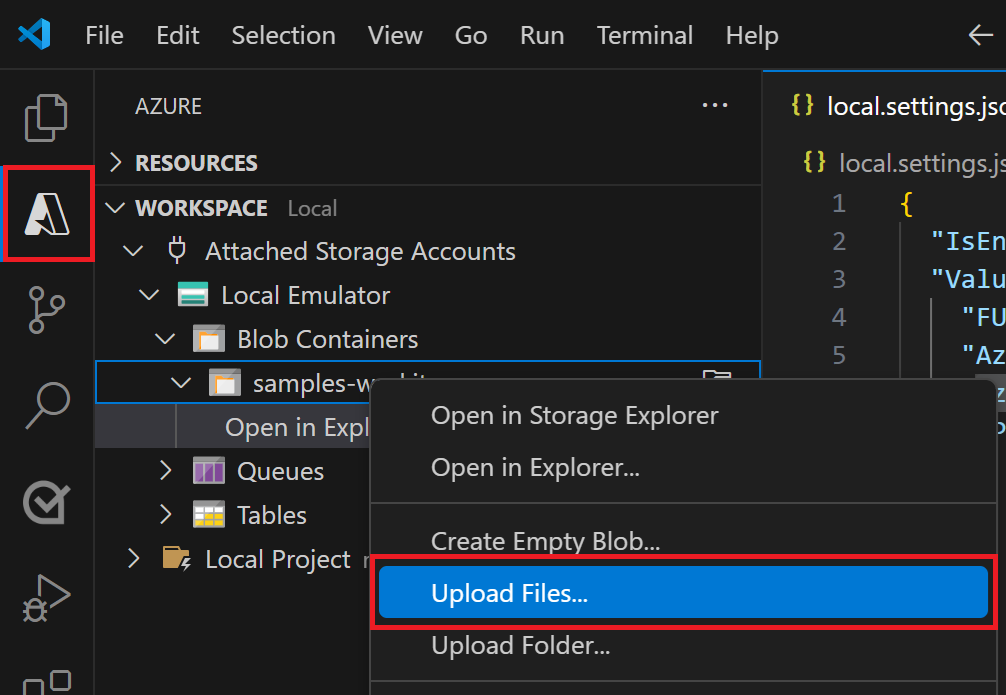
Expand Blob Containers > samples-workitems and select Upload files....
Choose a file to upload to the locally emulated container. Your function processes this file later to verify and debug your function code. A text file might work best with the Blob trigger template code.
Run the function locally
With a file in emulated storage, you can run your function to simulate an event raised by an Event Grid subscription. The event info passed to your trigger depends on the file you added to the local container.
Set any breakpoints and press F5 to start your project for local debugging. Azure Functions Core Tools should be running in your Terminal window.
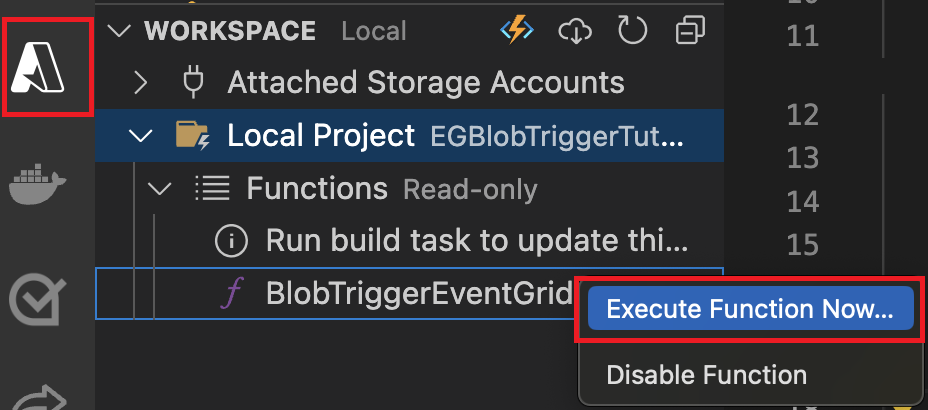
Back in the Azure area, expand Workspace > Local Project > Functions, right-click the function, and select Execute Function Now....
In the request body dialog, type
samples-workitems/<TEST_FILE_NAME>, replacing<TEST_FILE_NAME>with the name of the file you uploaded in the local storage emulator.Press Enter to run the function. The value you provided is the path to your blob in the local emulator. This string gets passed to your trigger in the request payload, which simulates the payload when an event subscription calls your function to report a blob being added to the container.
Review the output of this function execution. You should see in the output the name of the file and its contents logged. If you set any breakpoints, you might need to continue the execution.
Now that you've successfully validated your function code locally, it's time to publish the project to a new function app in Azure.
Prepare the Azure Storage account
Event subscriptions to Azure Storage require a general-purpose v2 storage account. You can use the Azure Storage extension for Visual Studio Code to create this storage account.
In Visual Studio Code, press F1 to open the command palette and enter
Azure Storage: Create Storage Account.... Provide this information when prompted:Prompt Action Enter the name of the new storage account Provide a globally unique name. Storage account names must have 3 to 24 characters in length with only lowercase letters and numbers. For easier identification, use the same name for the resource group and the function app name. Select a location for new resources For better performance, choose a region near you. The extension creates a general-purpose v2 storage account with the name you provide. The same name is also used for the resource group that contains the storage account. The Event Grid-based Blob Storage trigger requires a general-purpose v2 storage account.
Press F1 again and in the command palette enter
Azure Storage: Create Blob Container.... Provide this information when prompted:Prompt Action Select a resource Select the general-purpose v2 storage account that you created. Enter a name for the new blob container Enter samples-workitems, which is the container name referenced in your code project.
Your function app also needs a storage account to run. For simplicity, this tutorial uses the same storage account for your blob trigger and your function app. However, in production, you might want to use a separate storage account with your function app. For more information, see Storage considerations for Azure Functions.
Create the function app
Use these steps to create a function app in the Flex Consumption plan. When you host your app in a Flex Consumption plan, Blob Storage triggers must use event subscriptions.
In the command palette, enter Azure Functions: Create function app in Azure...(Advanced).
Follow the prompts and provide this information:
Prompt Selection Enter a globally unique name for the new function app Type a globally unique name that identifies your new function app and then select Enter. Valid characters for a function app name are a-z,0-9, and-.Select a hosting plan Choose Flex Consumption, which is the recommended hosting plan for serverless hosting. Select a location for new resources Select a location in a region near you or near other services that your functions access. Select a runtime stack Select the language version you currently run locally. Select an instance size Select 512. You can always change the instance size setting to a larger size later. Enter the maximum instance count Select the default value of 100, which limits the total scale-out of your app. You can also choose a different value between 40 and 1,000. Select a resource group Select Create new resource group and accept the default or enter another name for the new group that's unique in your subscription. Select resource authentication type Select Managed identity so that your app connects to remote resources by using Microsoft Entra ID authentication instead of using shared secrets (connection strings and keys), which are less secure. Select a user assigned identity Select Create new user-assigned identity. Select a location for new resources Select the same region as the storage account you created. If for some reason this region isn't supported by the Flex Consumption play, it isn't displayed. In that case, choose a nearby region instead. For more information, see View currently supported regions. Select a storage account Choose the name of the storage account you created. Select an Application Insights resource for your app Choose Create new Application Insights resource and at the prompt provide the name for the instance used to store runtime data from your functions. A notification appears after your function app is created. Select View Output in this notification to view the creation results, including the Azure resources that you created.
Deploy your function code
Important
Deploying to an existing function app always overwrites the contents of that app in Azure.
In the command palette, enter and then select Azure Functions: Deploy to Function App.
Select the function app you just created. When prompted about overwriting previous deployments, select Deploy to deploy your function code to the new function app resource.
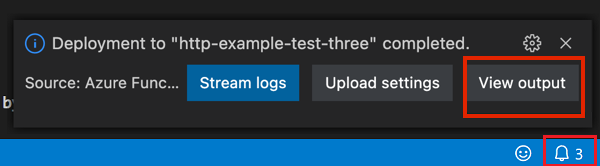
When deployment is completed, select View Output to view the creation and deployment results, including the Azure resources that you created. If you miss the notification, select the bell icon in the lower-right corner to see it again.
Update application settings
Because the publishing process doesn't automatically upload required application settings from the local.settings.json file, you must upload them to your function app so that your function runs correctly in Azure.
In the command palette, enter
Azure Functions: Download Remote Settings..., and in the Select a resource prompt choose the name of your function app.When prompted that the
AzureWebJobsStoragesetting already exists, select Yes to overwrite the local emulator setting with the actual storage account connection string from Azure.In the
local.settings.jsonfile, replace the local emulator setting with same connection string used forAzureWebJobsStorage.Remove the
FUNCTIONS_WORKER_RUNTIMEentry, which isn't supported in a Flex Consumption plan.In the command palette, enter
Azure Functions: Upload Local Settings..., and in the Select a resource prompt choose the name of your function app.
Now both the Functions host and the trigger share the same storage account.
Build the endpoint URL
To create an event subscription, you need to provide Event Grid with the URL of the specific endpoint to report Blob Storage events. This blob extension URL is composed of these parts:
| Part | Example |
|---|---|
| Base function app URL | https://<FUNCTION_APP_NAME>.azurewebsites.net |
| Blob-specific path | /runtime/webhooks/blobs |
| Function query string | ?functionName=Host.Functions.<FUNCTION_NAME> |
| Blob extension access key | &code=<BLOB_EXTENSION_KEY> |
While your app connects to the storage account by using Microsoft Entra ID authentication, the blob extension access key helps protect your blob extension webhook from unauthorized access. To find your blob extension access key:
In Visual Studio Code, select the Azure icon in the Activity bar. In Resources, expand your subscription, expand Function App, right-click the function app you created, and select Open in portal.
Under Functions in the left menu, select App keys.
Under System keys, select the key named blobs_extension, and copy the key Value.
Include this value in the query string of the new endpoint URL.
Create a new endpoint URL for the Blob Storage trigger based on the following example:
https://<FUNCTION_APP_NAME>.azurewebsites.net/runtime/webhooks/blobs?functionName=Host.Functions.EventGridBlobTrigger&code=<BLOB_EXTENSION_KEY>In this example, replace
<FUNCTION_APP_NAME>with the name of your function app, and<BLOB_EXTENSION_KEY>with the value you got from the portal. If you used a different name for your function, replaceEventGridBlobTriggerwith that function name.
You can now use this endpoint URL to create an event subscription.
Create the event subscription
An event subscription, powered by Azure Event Grid, raises events based on changes in the subscribed blob container. This event is then sent to the blob extension endpoint for your function. After you create an event subscription, you can't update the endpoint URL.
In Visual Studio Code, choose the Azure icon in the Activity bar. In Resources, expand your subscription, expand Storage accounts, right-click the storage account you created earlier, and select Open in portal.
Sign in to the Azure portal and make a note of the Resource group for your storage account. Create your other resources in the same group to make it easier to clean up resources when you're done.
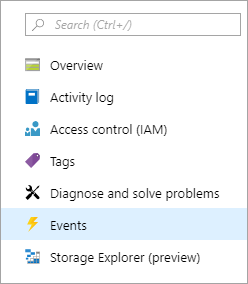
Select the Events option from the left menu.
In the Events window, select the + Event Subscription button, and provide values from the following table into the Basic tab:
Setting Suggested value Description Name myBlobEventSub Name that identifies the event subscription. Use the name to quickly find the event subscription. Event Schema Event Grid Schema Use the default schema for events. System Topic Name samples-workitems-blobs Name for the topic, which represents the container. The topic is created with the first subscription, and you use it for future event subscriptions. Filter to Event Types Blob Created Endpoint Type Web Hook The blob storage trigger uses a web hook endpoint. Endpoint Your Azure-based URL endpoint Use the URL endpoint that you built, which includes the key value. Select Confirm selection to validate the endpoint URL.
Select the Filters tab and provide the following information to the prompts:
Setting Suggested value Description Enable subject filtering Enabled Enables filtering on which blobs can trigger the function. Subject Begins With /blobServices/default/containers/<CONTAINER_NAME>/blobs/<BLOB_PREFIX>Replace <CONTAINER_NAMEand<BLOB_PREFIX>with values you choose. This setting triggers the subscription only for blobs that start withBLOB_PREFIXand are in theCONTAINER_NAMEcontainer.Subject Ends With .txt Ensures that the function is only triggered by blobs ending with .txt.For more information on filtering to specific blobs, see Event Filtering for Azure Event Hubs.
Select Create to create the event subscription.
Upload a file to the container
You can upload a file from your computer to your blob storage container by using Visual Studio Code.
In Visual Studio Code, press F1 to open the command palette and type
Azure Storage: Upload Files....In the Open dialog box, choose a file, preferably a text file, and select Upload .
Provide the following information at the prompts:
Setting Suggested value Description Enter the destination directory of this upload default Accept the default value of /, which is the container root.Select a resource Storage account name Choose the name of the storage account you created in a previous step. Select a resource type Blob Containers You're uploading to a blob container. Select Blob Container samples-workitems This value is the name of the container you created in a previous step.
Browse your local file system to find a file to upload, then select the Upload button to upload the file.
Verify the function in Azure
When you upload a file to the samples-workitems container, the function triggers. You can verify the function by checking the following items on the Azure portal:
In your storage account, go to the Events page, select Event Subscriptions, and you should see that an event was delivered. There might be up to a five-minute delay for the event to show up on the chart.
Back in your function app page in the portal, under Functions find your function and select Invocations and more. You should see traces written from your successful function execution.
Clean up resources
When you continue to the next step and add an Azure Storage queue binding to your function, you'll need to keep all your resources in place to build on what you've already done.
Otherwise, you can use the following steps to delete the function app and its related resources to avoid incurring any further costs.
In Visual Studio Code, press F1 to open the command palette. In the command palette, search for and select
Azure: Open in portal.Choose your function app and press Enter. The function app page opens in the Azure portal.
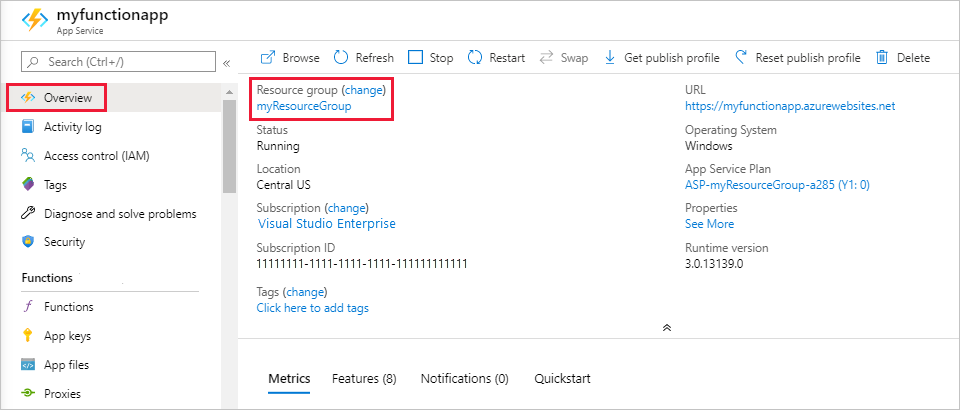
In the Overview tab, select the named link next to Resource group.
On the Resource group page, review the list of included resources, and verify that they're the ones you want to delete.
Select Delete resource group, and follow the instructions.
Deletion may take a couple of minutes. When it's done, a notification appears for a few seconds. You can also select the bell icon at the top of the page to view the notification.
For more information about Functions costs, see Estimating Consumption plan costs.