Note
Access to this page requires authorization. You can try signing in or changing directories.
Access to this page requires authorization. You can try changing directories.
Applies to: Azure Local 2503 and later
This article describes the discovery and replication phase for Hyper-V virtual machine (VM) migration to Azure Local using Azure Migrate.
Important
This feature is currently in PREVIEW. See the Supplemental Terms of Use for Microsoft Azure Previews for legal terms that apply to Azure features that are in beta, preview, or otherwise not yet released into general availability.
For more information on appliances for Azure Migrate and how to manage them, see Azure Migrate appliance.
Before you begin
For both the source and target appliance, make sure that your hardware has sufficient resource to support the creation of a Windows Server 2022 VM with 16 GB RAM, 80 GB of disk storage, 8 vCPUs, and an external virtual switch.
Ensure all VMs that you wish to migrate are powered on and have Hyper-V integration services installed. Migration will fail if the VMs are not powered on and do not have Hyper-V integration services installed.
Step 1: Create and configure the source appliance
Generate the project key
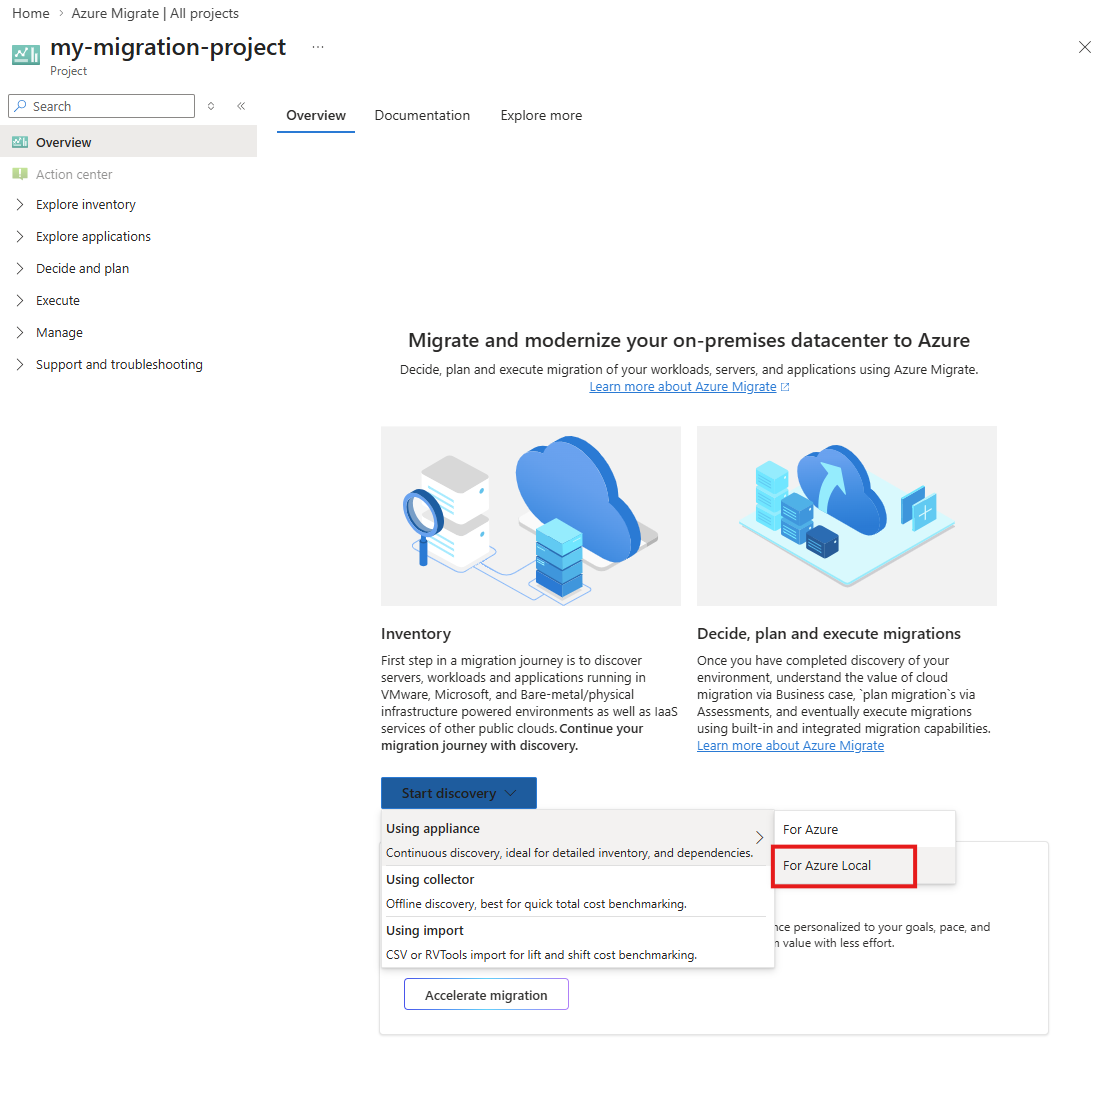
In the Azure portal, go to the All projects page and select your project from the list.
On the Overview tab, under Inventory, select Start discovery > Using appliance > For Azure Local.
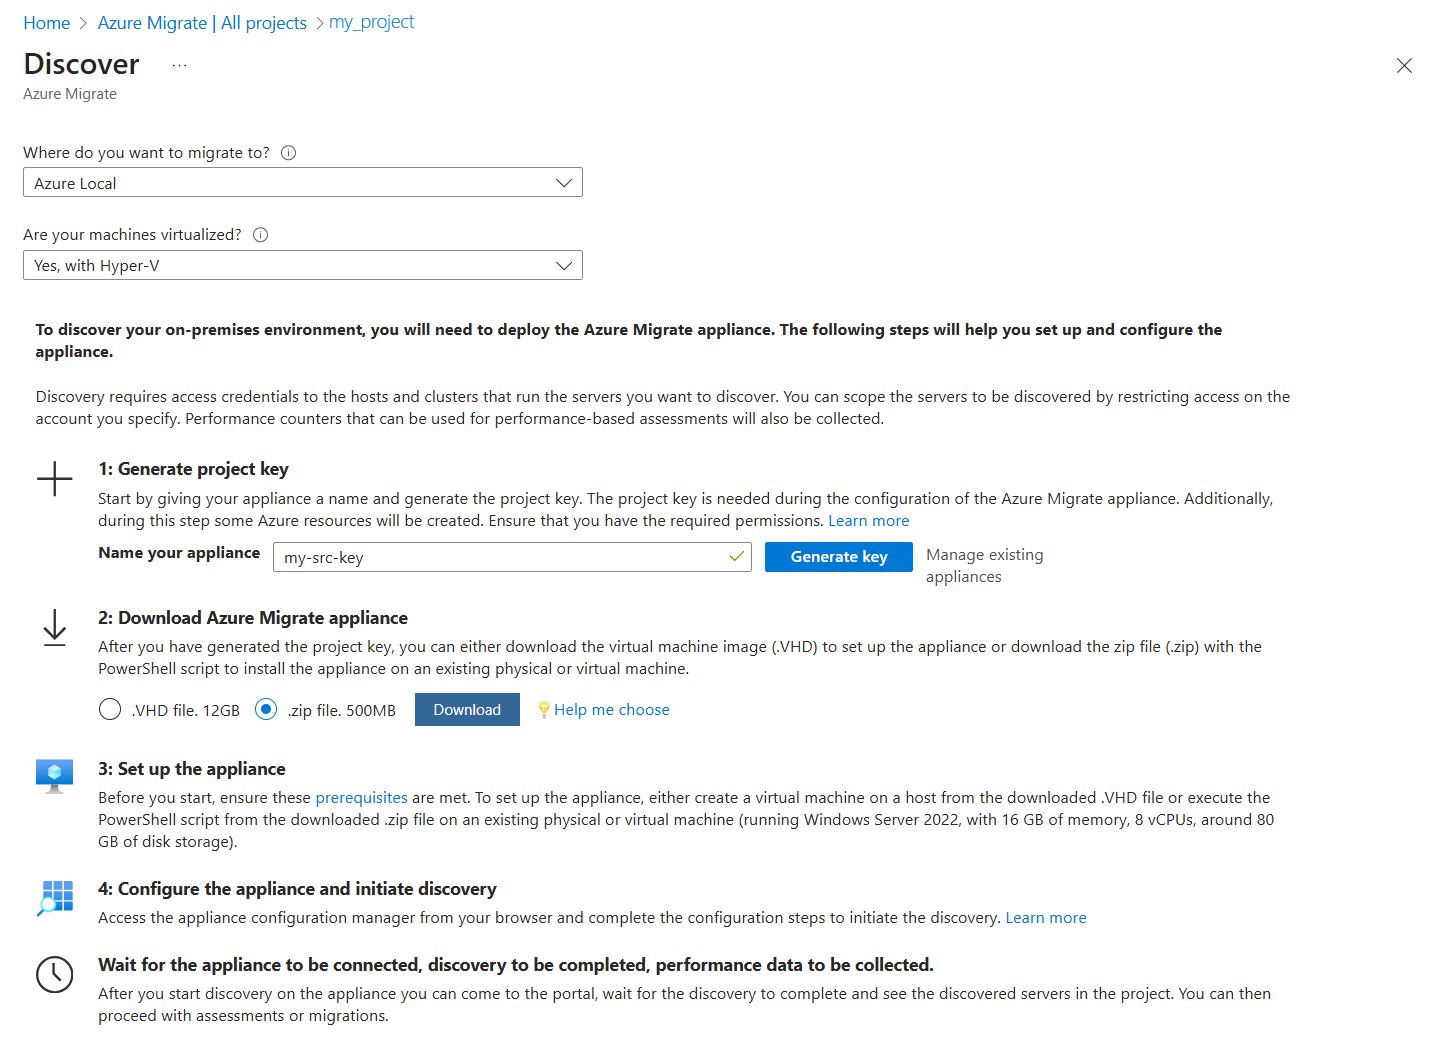
On the Discover page, select Azure Local under Where do you want to migrate to and then select Yes, with Hyper-V under Are your machines virtualized in Azure Migrate.
Enter a name for your source appliance and generate the key for the source Hyper-V appliance. For detailed steps, see Generate the project key.
Copy the Project key (to a text editor such as Notepad) and save it for later use.
You can now Download the Azure Migrate source appliance using either a .VHD or a .zip file. The detailed steps are provided in the subsequent sections.


Create the source appliance
You can install the appliance using either a template (.VHD file) or a script (.zip file) that you download to your Hyper-V server. For more information on appliances for Azure Migrate and how to manage them, see Azure Migrate appliance.
Install using a template (.VHD file)
This step applies only if you are deploying the source appliance using a .VHD file template. The source appliance is installed for you using the .VHD file. For step-by-step information, see Download the VHD.
Install using a script (.zip file)
This step applies only if you downloaded the .zip file. You use the AzureMigrateInstaller.ps1 PowerShell script to install the source appliance. For specific information, see Set up an appliance with a script.
Configure the appliance and discover VMs
Once the source appliance is installed, you are ready to Configure the appliance.
If needed, you can use a preconfigured Microsoft Entra ID application to register the source appliance. For more information, see Register an Azure Migrate appliance with a preconfigured Microsoft Entra ID application.
Note
Each preconfigured application can only be used with a single appliance. You must create a separate preconfigured application for the target appliance and for any additional appliances in other projects.
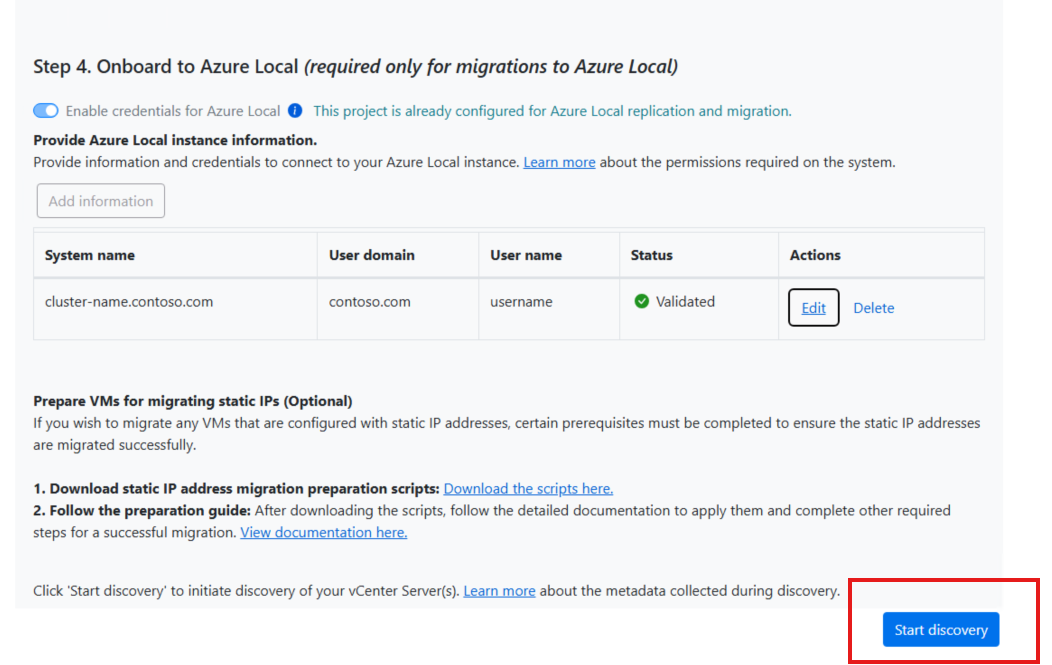
Onboard to Azure Local
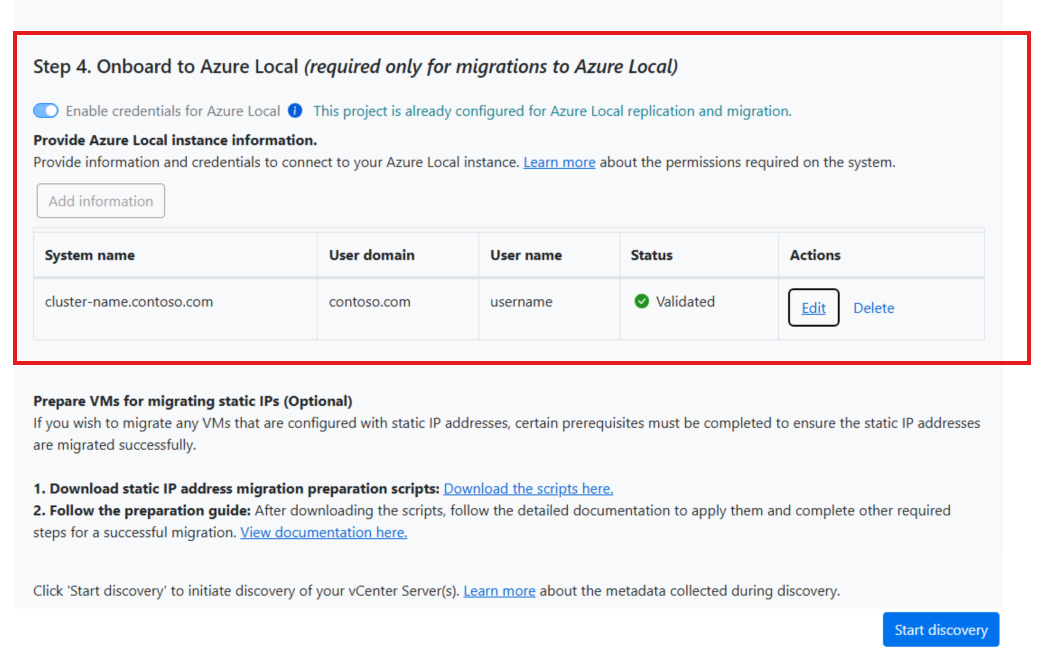
After you add the discovery sources, onboard to the target Azure Local instance. This step validates connectivity between the source appliance and the target Azure Local instance, and provides the information needed about the target system for migration.
Toggle the slider to "Enable credentials for Azure Local".

Select Add information to provide the necessary information and credentials for the target Azure Local instance.
Select Save".
The information table is updated and the status changes to Validated.


Start discovery
Once the source appliance is configured and onboarded to Azure Local, you can start the discovery of Hyper-V VMs.
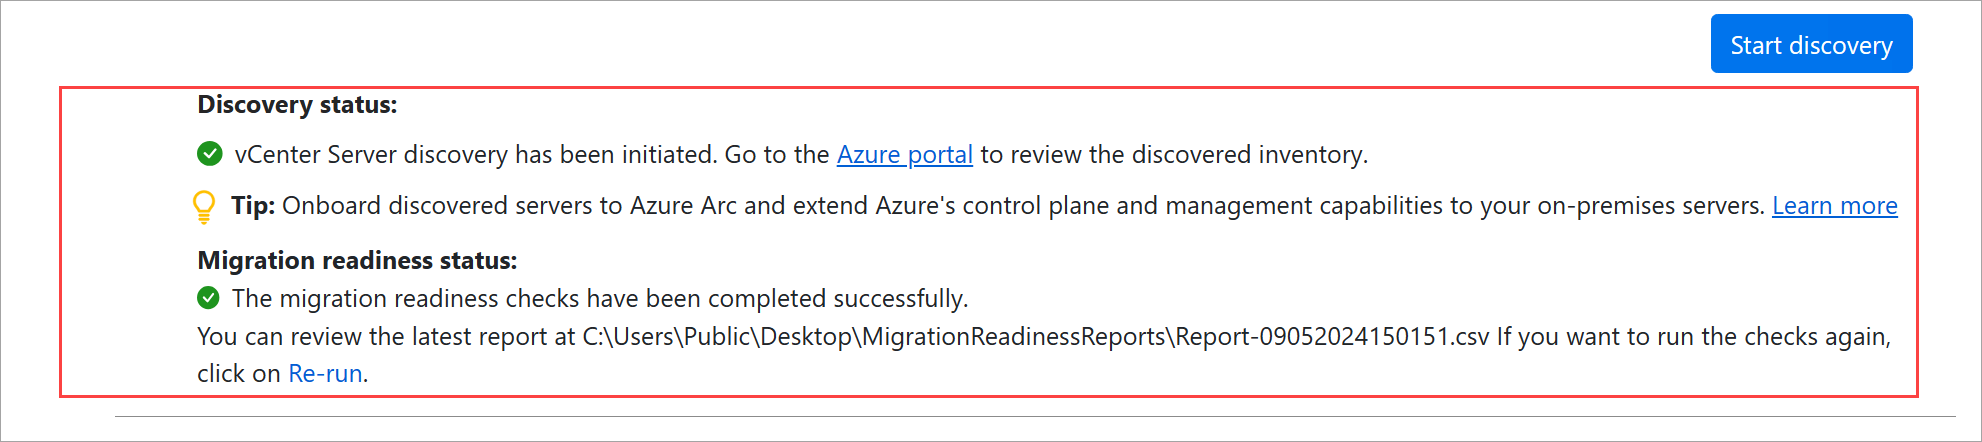
Select Start Discovery. The discovery may take several minutes to finish.
Wait until you see green checkmarks to indicate that the discovery and migration readiness are complete.
Go to the Azure portal to review the VM inventory.
Ensure all the VMs you want to migrate are powered on and Hyper-V integration services is installed before or during the discovery process.

Step 2: Create and configure the target appliance
Generate target appliance key
Complete the following tasks to generate the target appliance key:
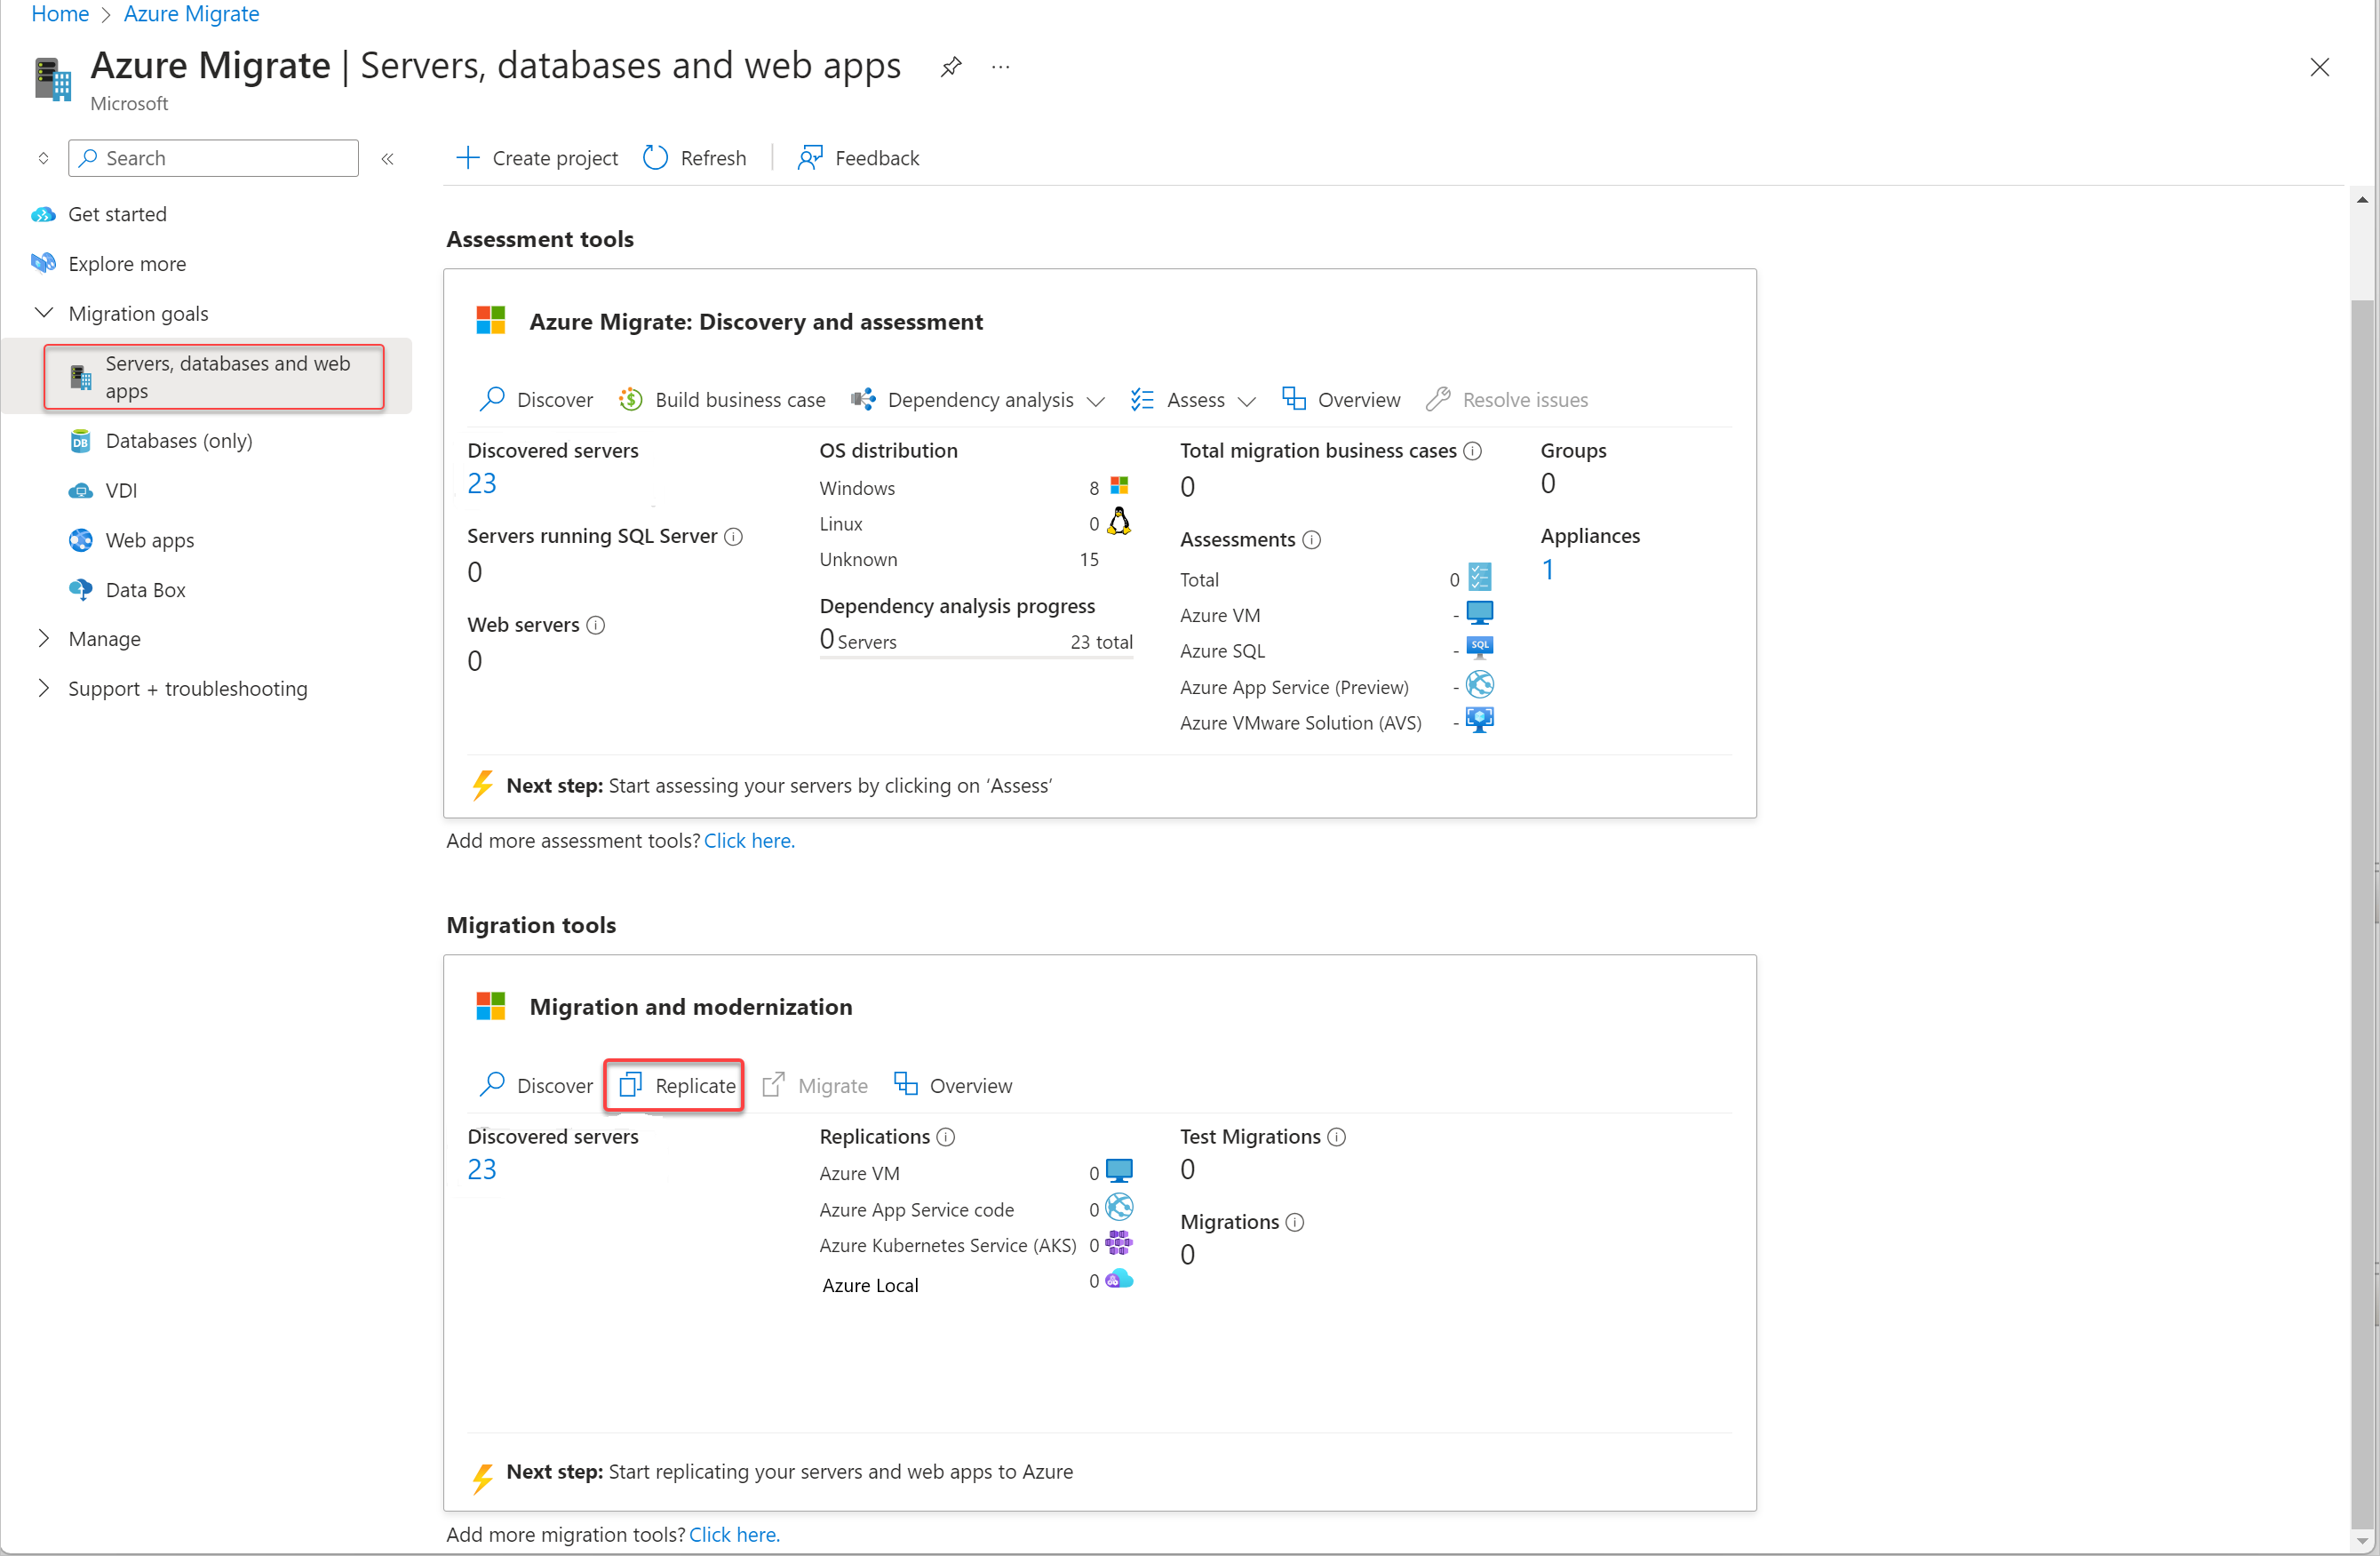
In the Azure portal, go to your Azure Migrate project and select Servers, databases and web apps.
Verify that you see a value greater than zero for Discovered servers under Migration tools.
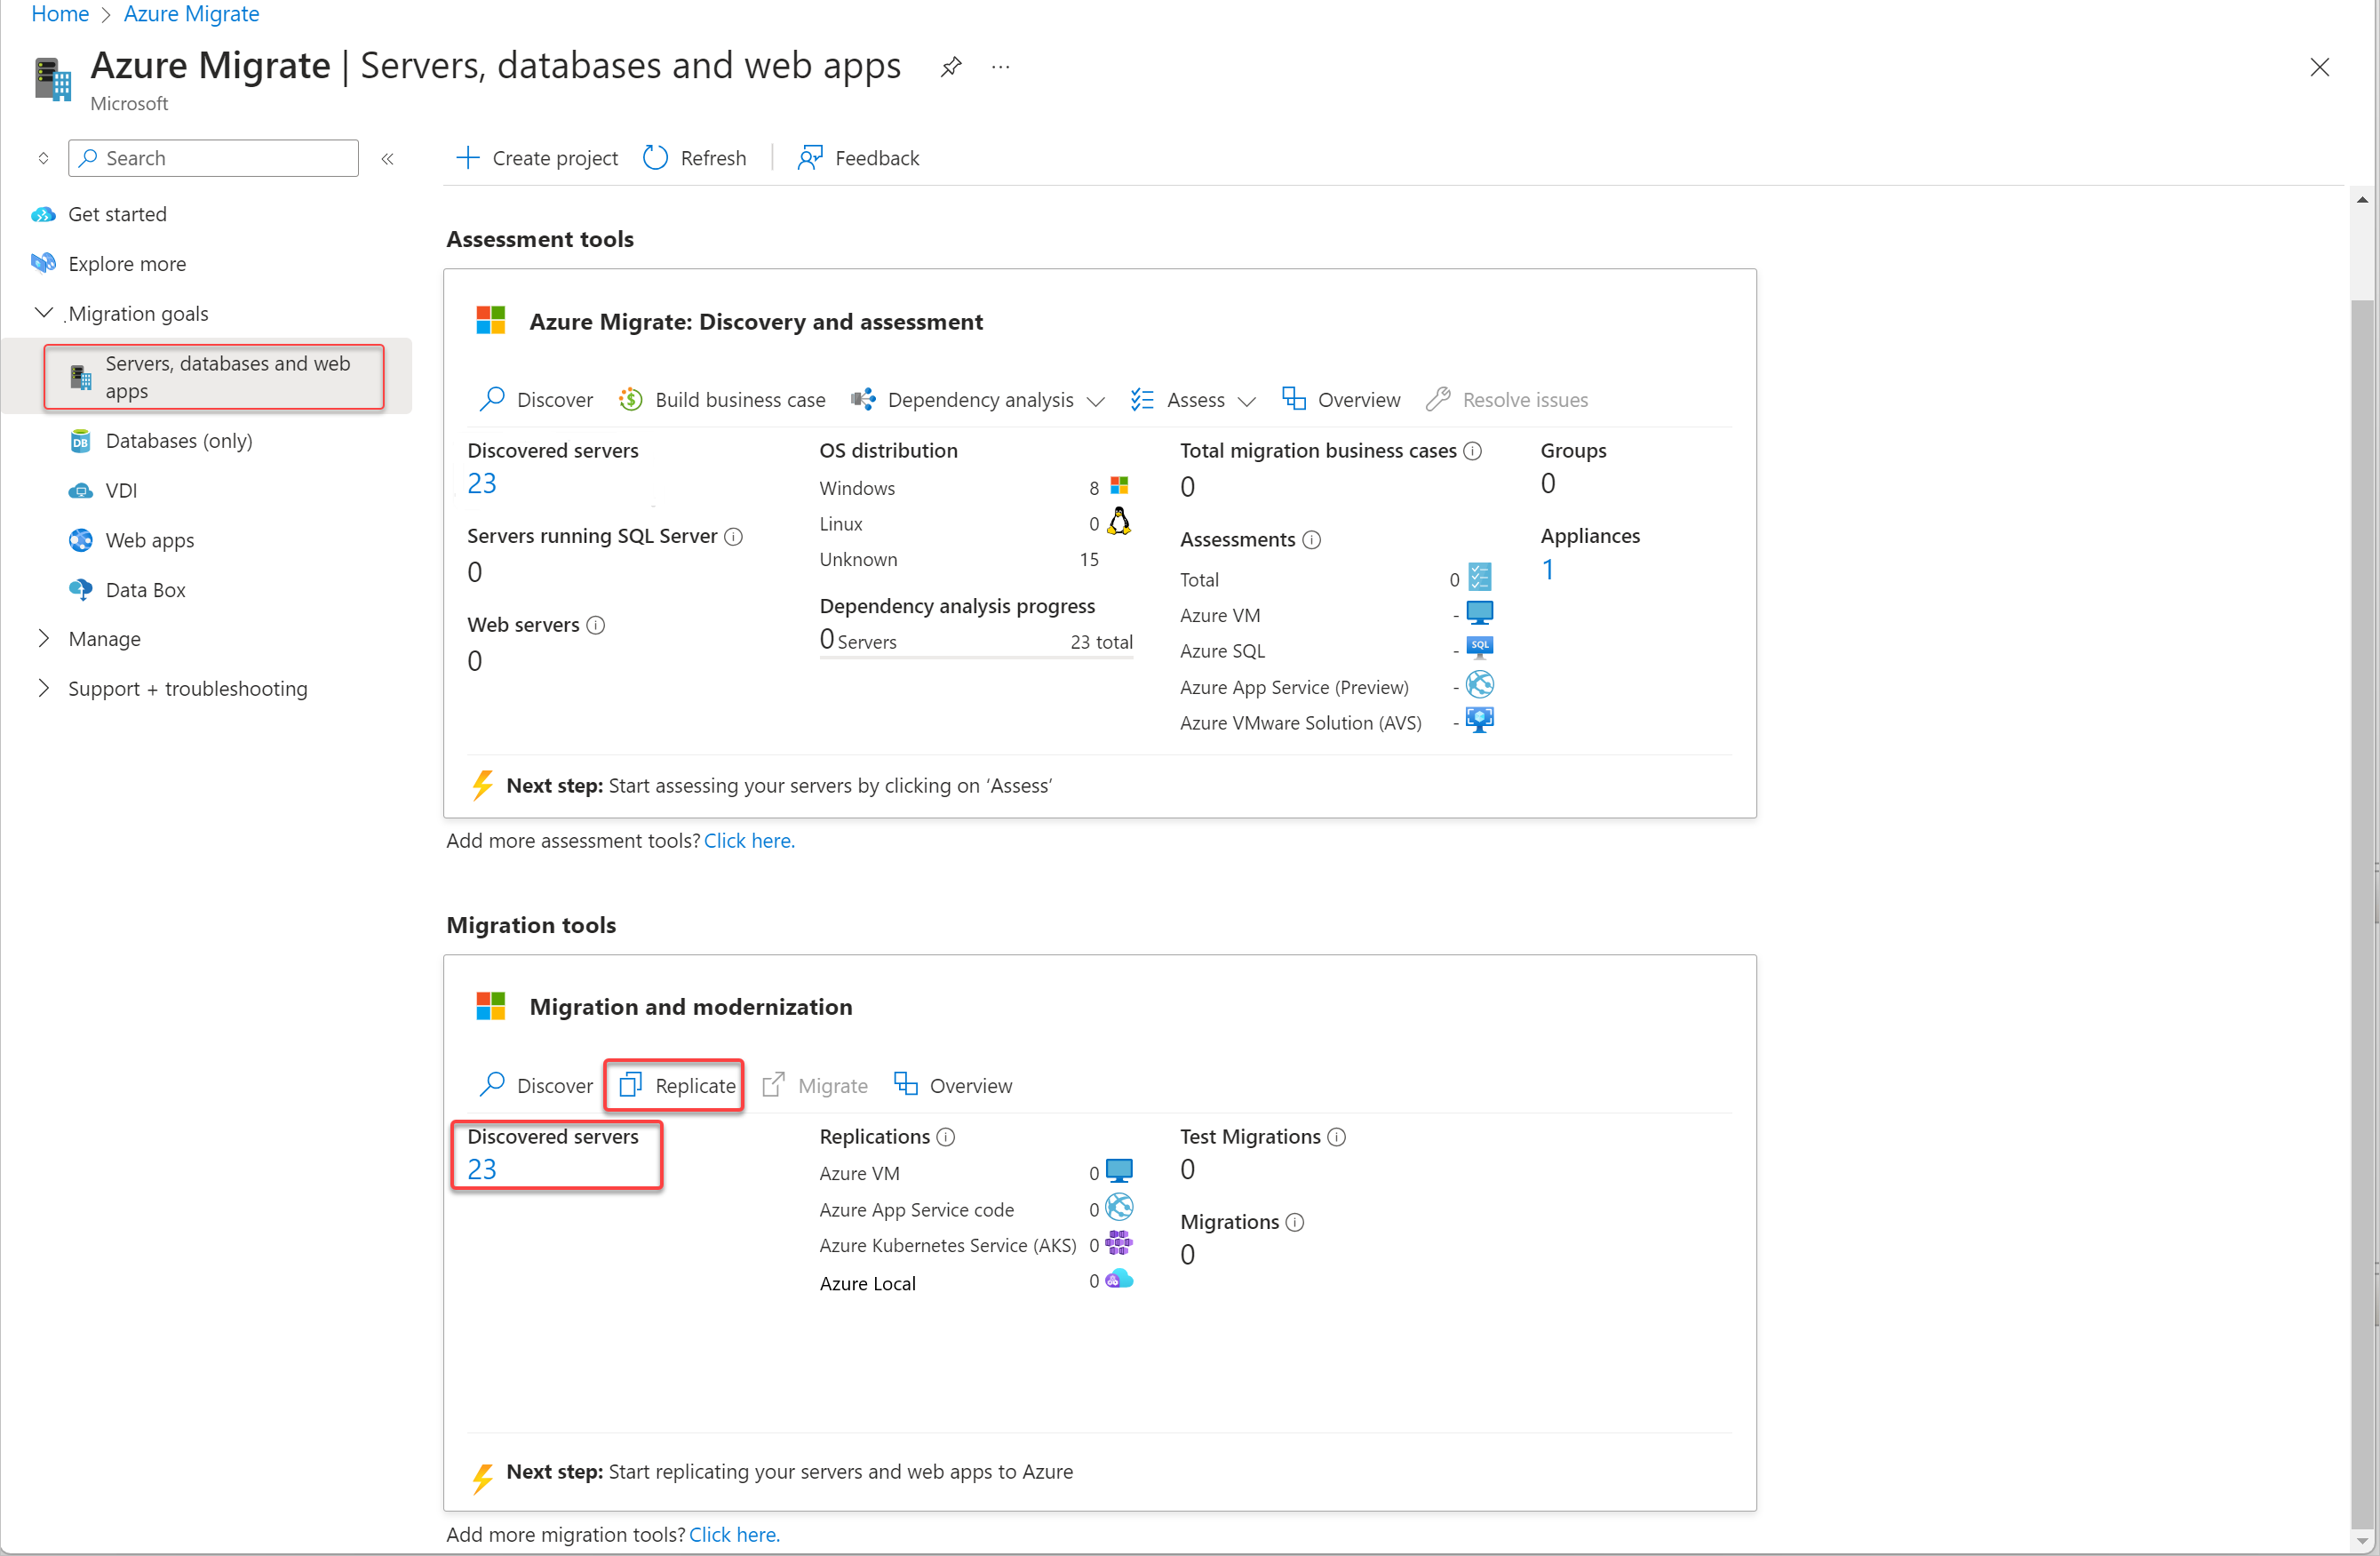
Under Migration and modernization, select Replicate.
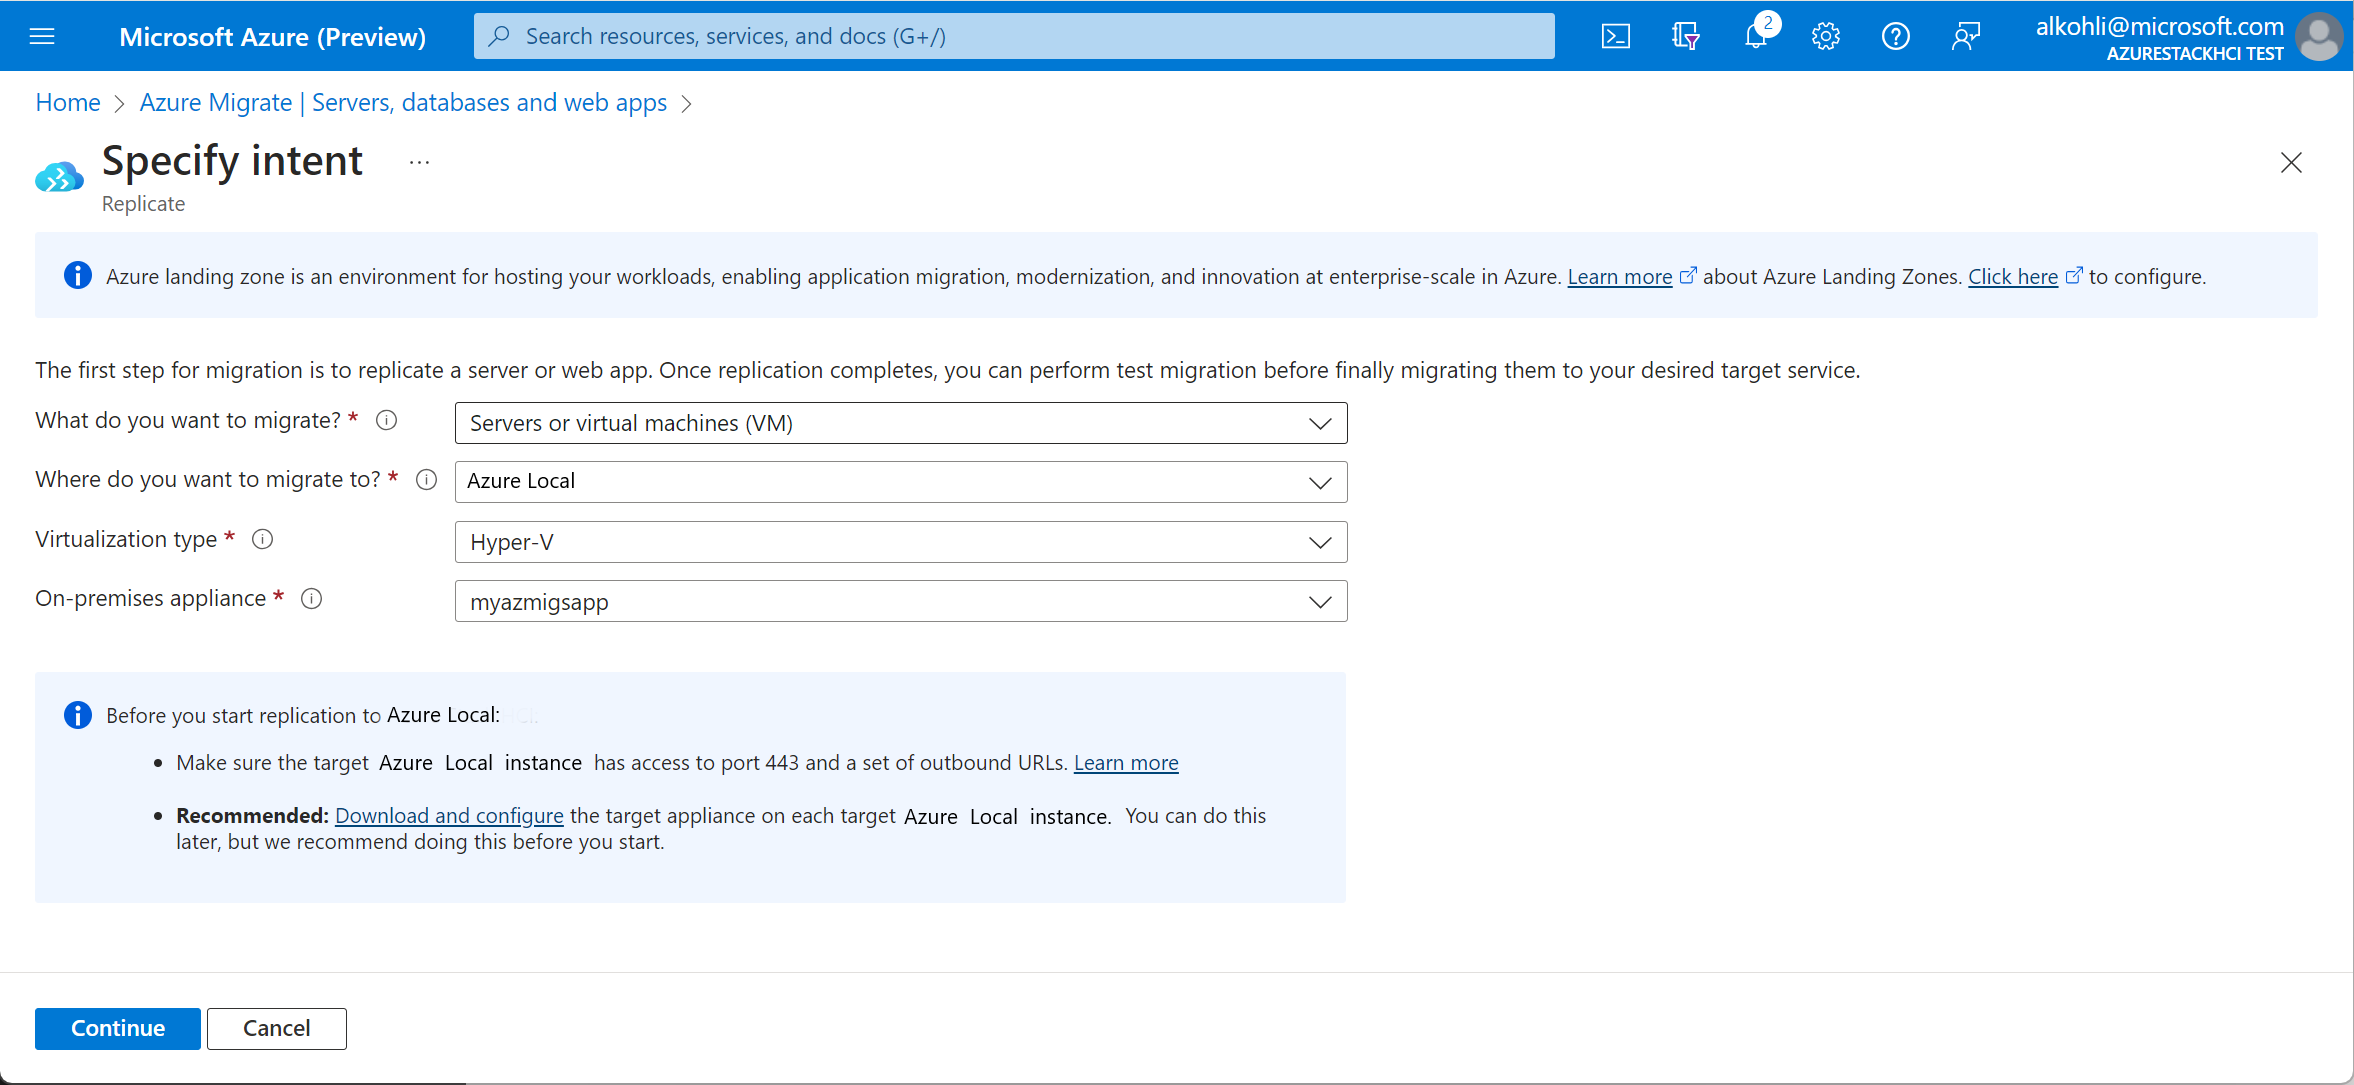
On the Specify intent page, enter the following inputs:
- For What do you want to migrate?, select Servers or virtual machines (VM).
- For Where do you want to migrate?, select Azure Local.
- For Virtualization Type, select Hyper-V.
- For the On-premises appliance, the source appliance is pre-populated. If you have more than one source appliance, select the applicable one from the dropdown list.
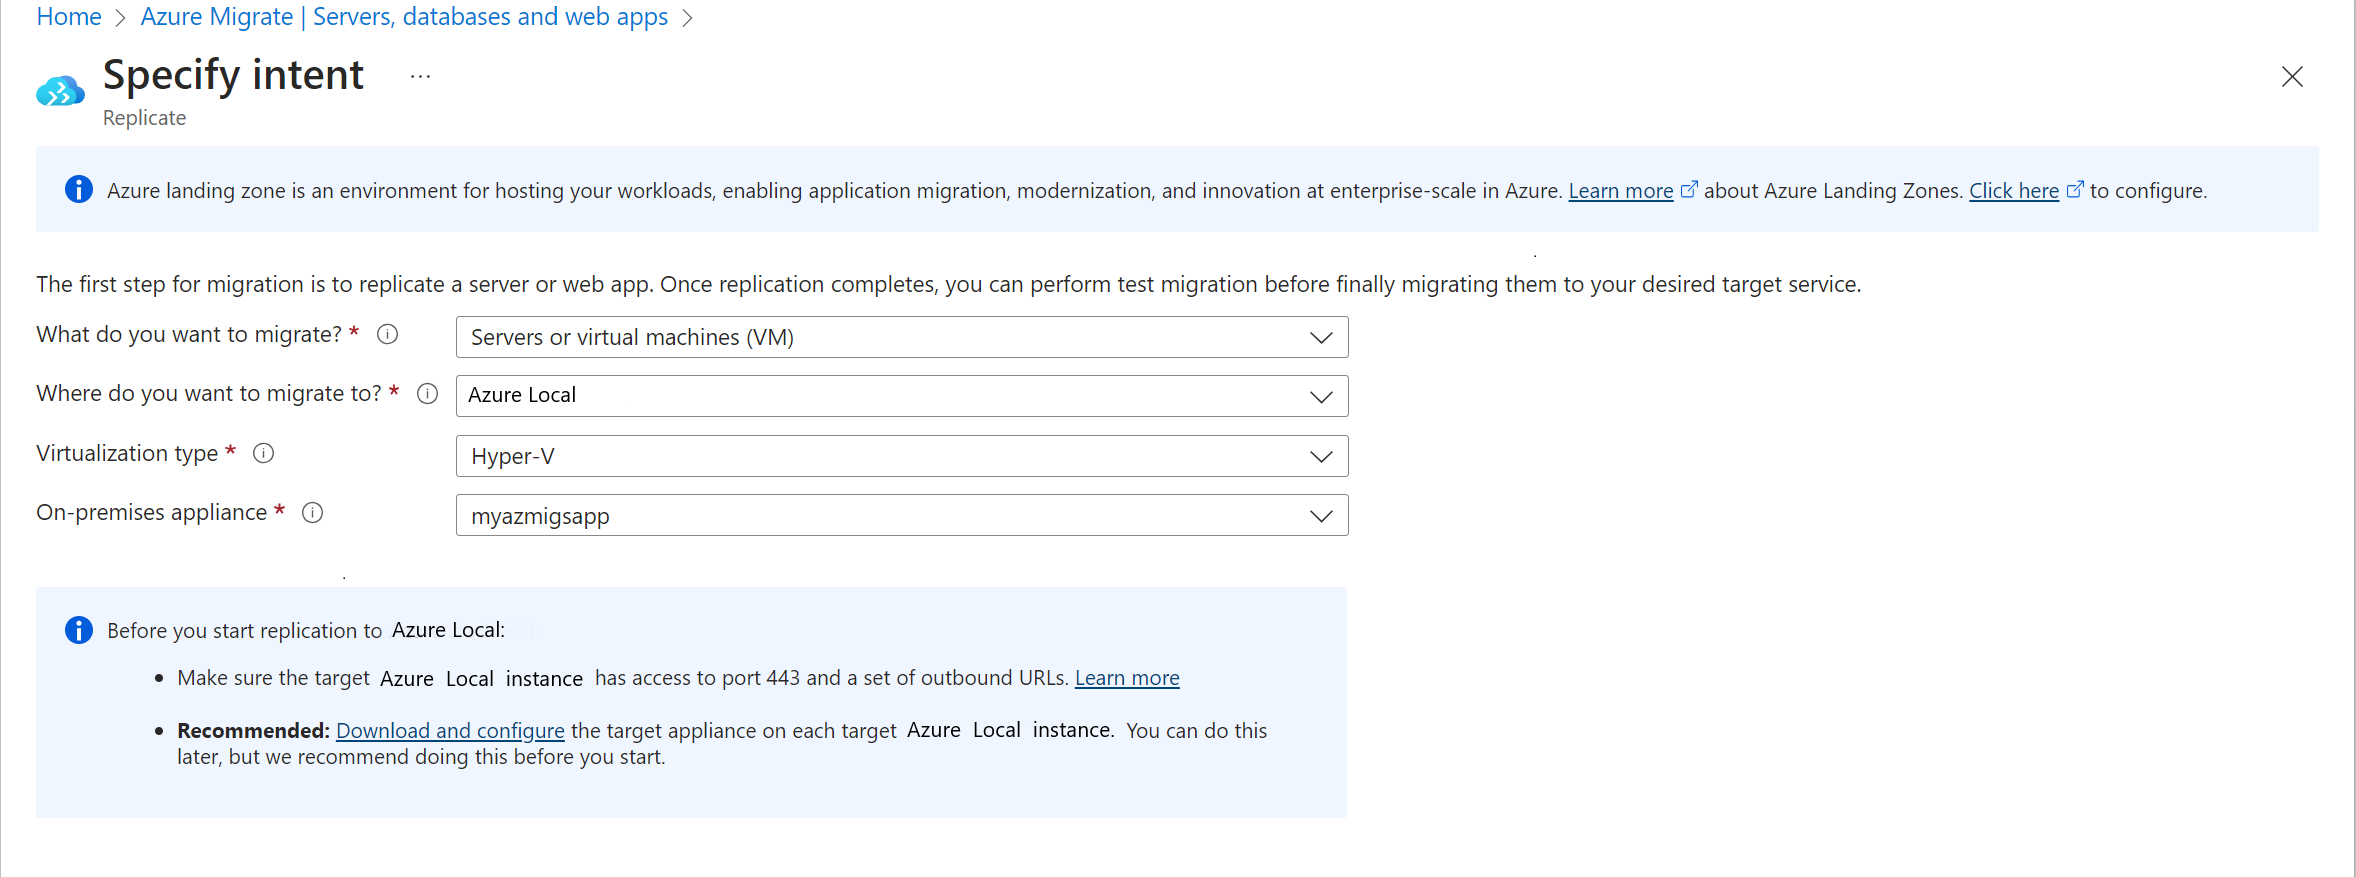
Select Download and configure in Before you start replication to Azure Local from the information block.
On the Deploy and configure the target appliance pane, provide a name for the target appliance and then select Generate key.
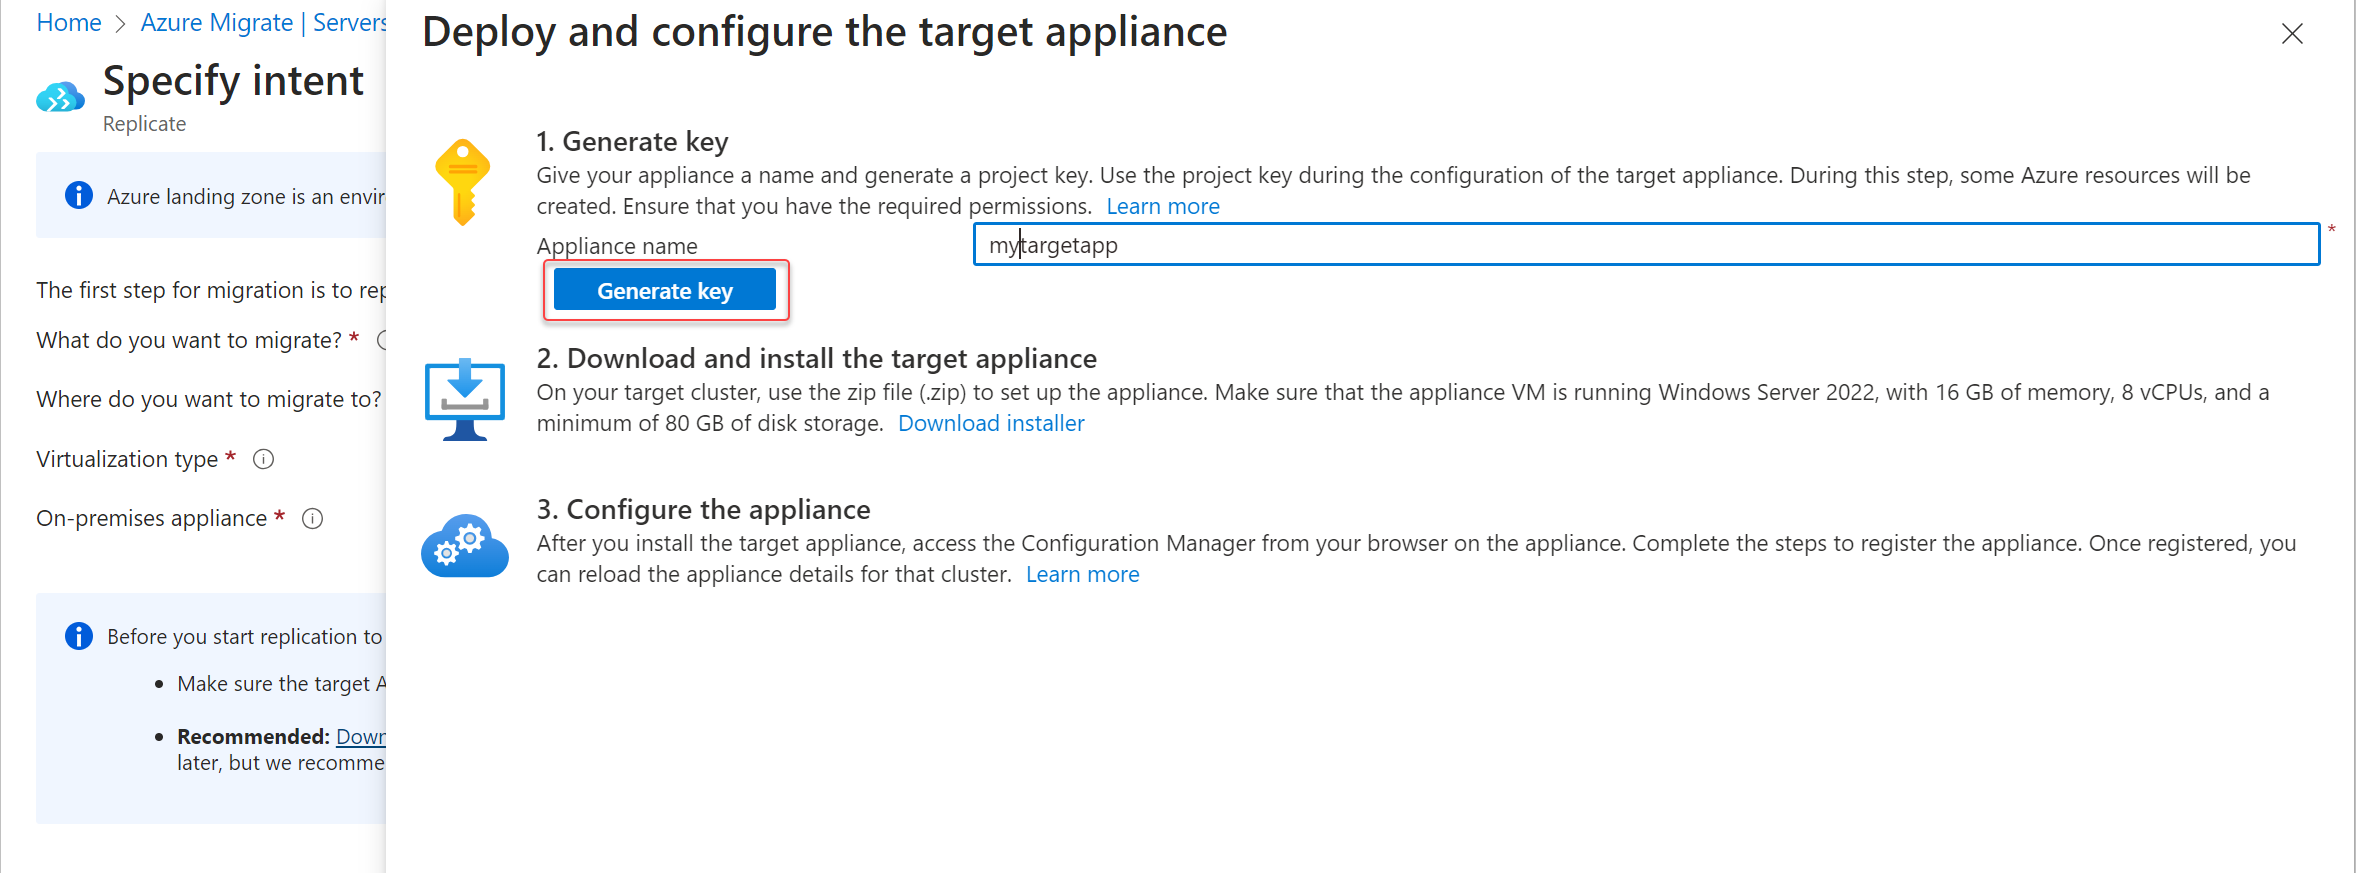
Copy and paste the project key to a text editor (for example, Notepad) after it is generated for future use.


Create the target appliance
You can download the appliance using either a .VHD file or a .zip file.
Under Step 2: Download Azure Migrate appliance, select either .VHD or .zip, and then select Download installer.

Install the appliance using a template (.vhd file)
This step applies only if you downloaded the .vhd zipped file.
Check that the zipped file is secure, before you deploy it.
On the machine where you downloaded the file, run PowerShel as an administrator.
To generate the hash for the VHD, run the following command.
C:\>Get-FileHash -Path <Path to downloaded VHD zip> -Algorithm SHA256Verify the latest appliance versions and hash values:
Scenario Download SHA256 Azure Local appliance Latest version: https://go.microsoft.com/fwlink/?linkid=22464166ae1144b026efb2650f5e11c007a457c351a752f942c2db827dd2903f468dccb Extract the zipped file to a folder.
Now you can install the appliance using the .vhd file.
Use a local tool, such as Hyper-V Manager or Failover Cluster, and install the target appliance from the downloaded .vhd file on your Azure Local instance.
After the VM has finished provisioning and has booted, open the Azure Migrate Target Appliance Configuration Manager shortcut from the desktop.
Install using a script (.zip file)
This step applies to using a .zip file.
Create a VM in Azure Local with the following configuration:
- Operating system: Windows Server 2022 or Windows Server 2025
- vCPU: 8
- Disk: >80 GB
- Memory: 16 GB
Once the VM is created, sign into the VM as an administrator.
Download the appliance from a .zip file. Refer to Step 2: Download and install the target appliance, select .zip, and then select Download.
Copy the downloaded zip file to the new VM that you created on the Azure Local instance. Extract the zip to a folder and go to the
AzureMigrateInstaller.ps1PowerShell script in the extracted folder.Open PowerShell as an administrator and run the following:
Set-ExecutionPolicy -ExecutionPolicy Unrestricted
.\AzureMigrateInstaller.ps1 -Scenario AzureLocalTarget -Cloud Public -PrivateEndpoint:$false
Restart the VM after the installation is complete. Sign in to the VM.
Register the target appliance
Sign in to the target appliance VM.
Open Azure Migrate Target Appliance Configuration Manager from the desktop shortcut.
Locate the target key that you previously generated, paste it in the field under Verification of Azure Migrate project key, and then select Verify.
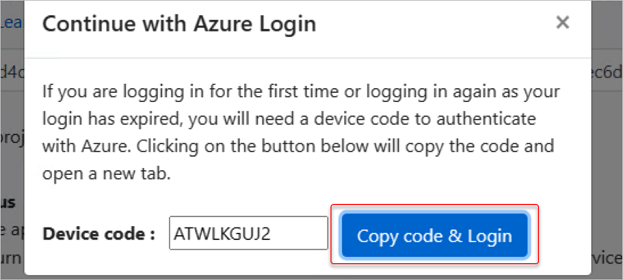
After the verification is complete, select Log in and sign in to your Azure account.
- If needed, you can use a preconfigured Microsoft Entra ID application to register the target appliance. For more information, see Register an Azure Migrate appliance with a preconfigured Microsoft Entra ID application.
Note
Each preconfigured application can only be used with a single appliance. You must create a separate preconfigured application for each appliance.
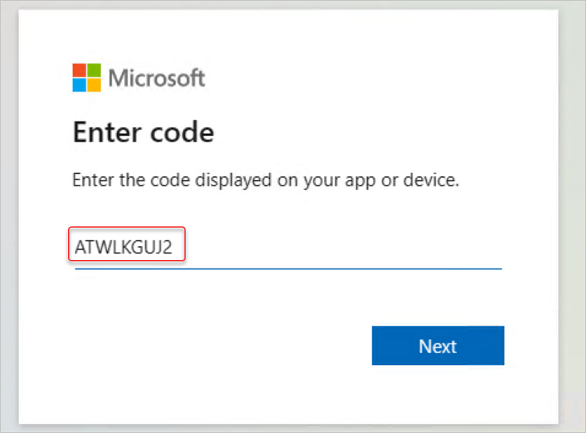
Enter the code that is displayed in your Authenticator (or similar) app for MFA authentication.
Wait until you see The appliance has been successfully registered message.
Sign in to Microsoft Azure PowerShell using the code displayed in your Authenticator app. It can take up to 10 minutes for the appliance to be registered.
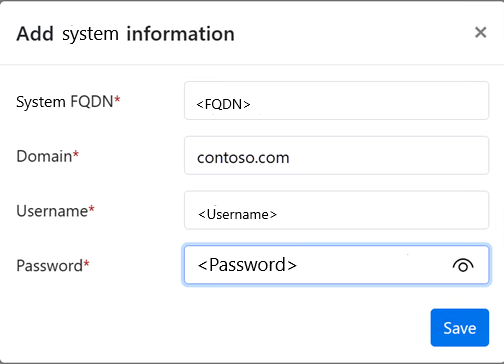
After the appliance is registered, under Provide Azure Local instance information, select Add system information.
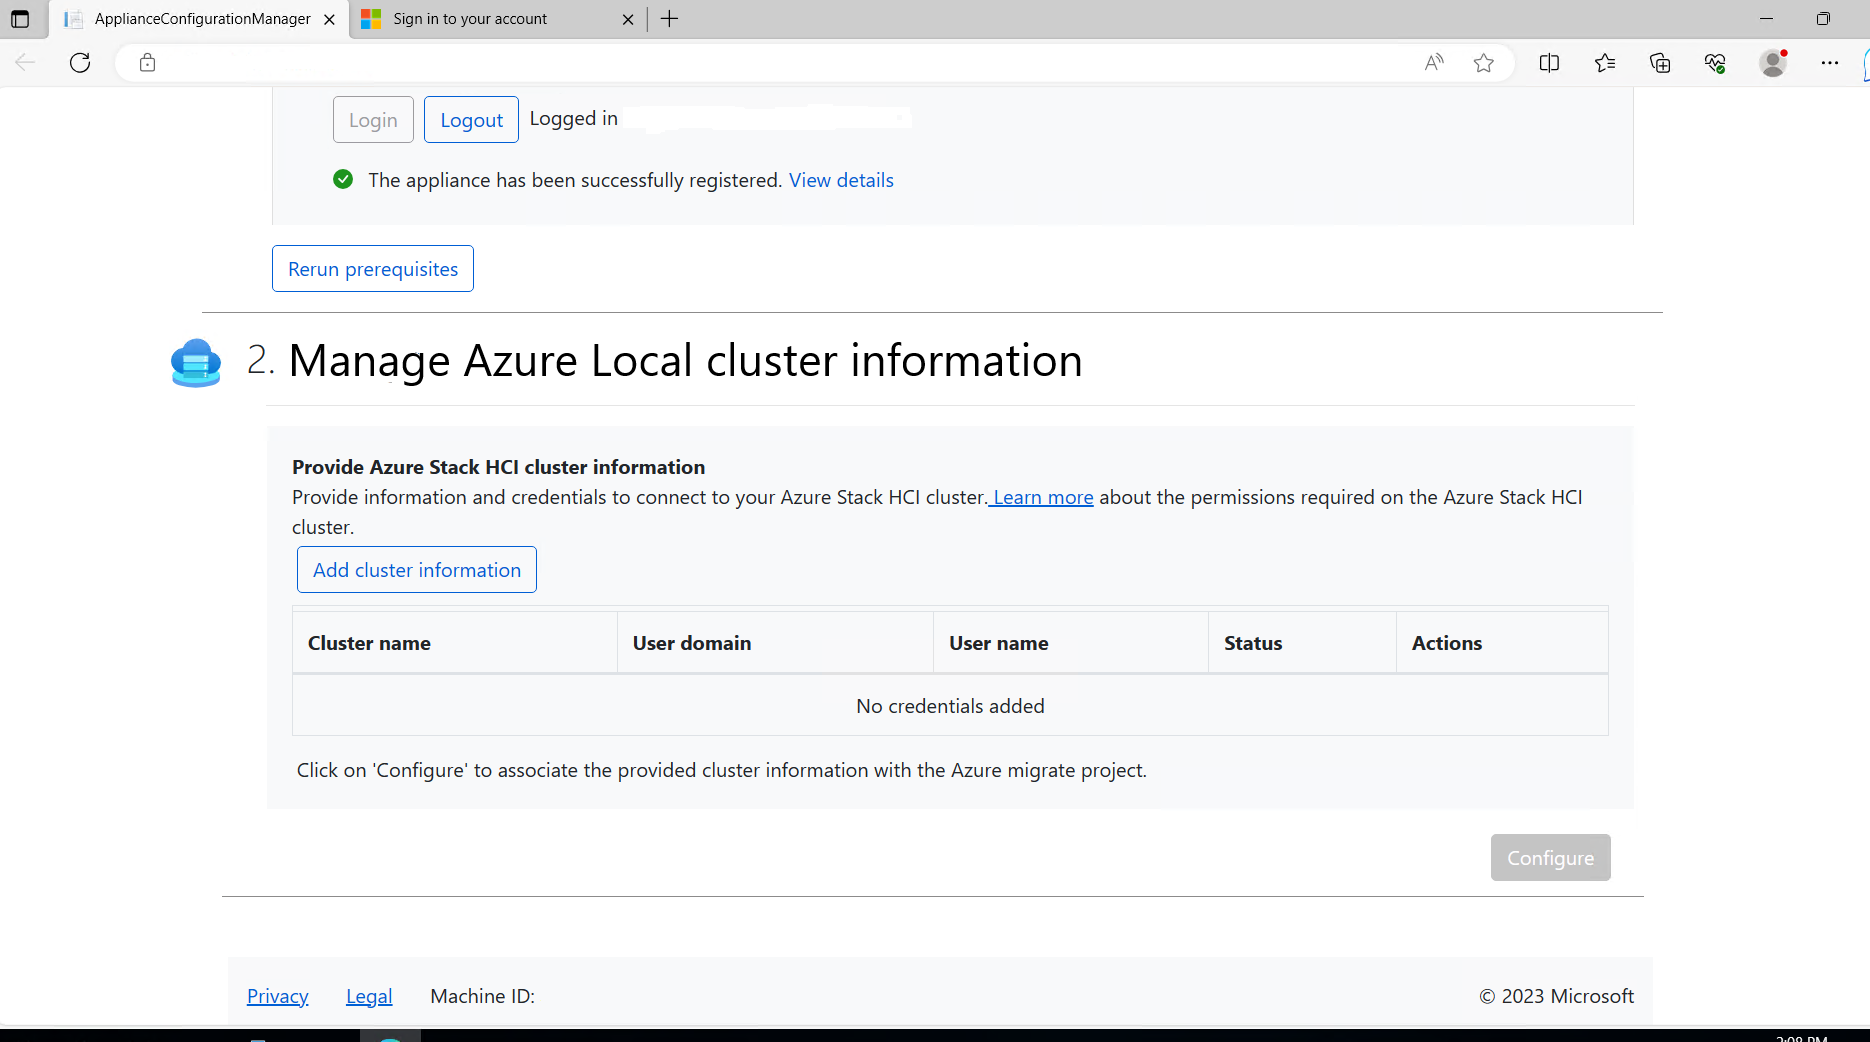
For your target Azure Local instance, enter the fully qualified domain name (FQDN), domain name, username and password, and then select Save.
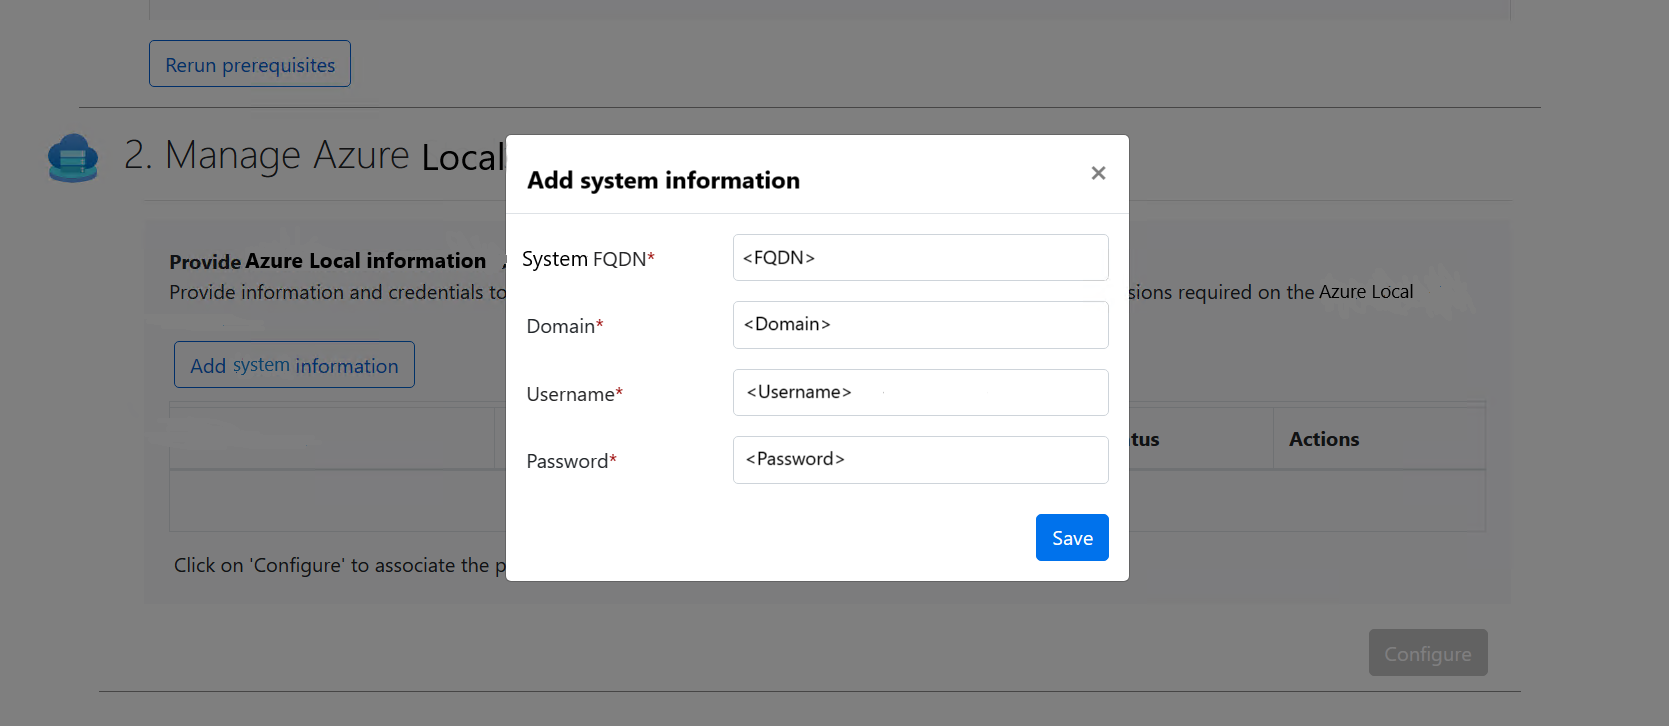
After the credentials are accepted, the status changes to Validated. Select Configure.
Wait until the configuration is complete and you see this message: Successfully configured Azure Migrate project.


Step 3: Start replication
In the Azure portal, go to your Azure Migrate project and select Servers, databases and web apps.
Under Migration and modernization, select Replicate.
On the Specify intent page:
- What do you want to migrate is automatically populated as Servers or virtual machines (VM).
- Select Azure Local for Where do you want to migrate to?
- Select Hyper-V for the Virtualization type.
- Select the source appliance as the On-premises appliance (source) used for discovery.
- When finished, select Continue.
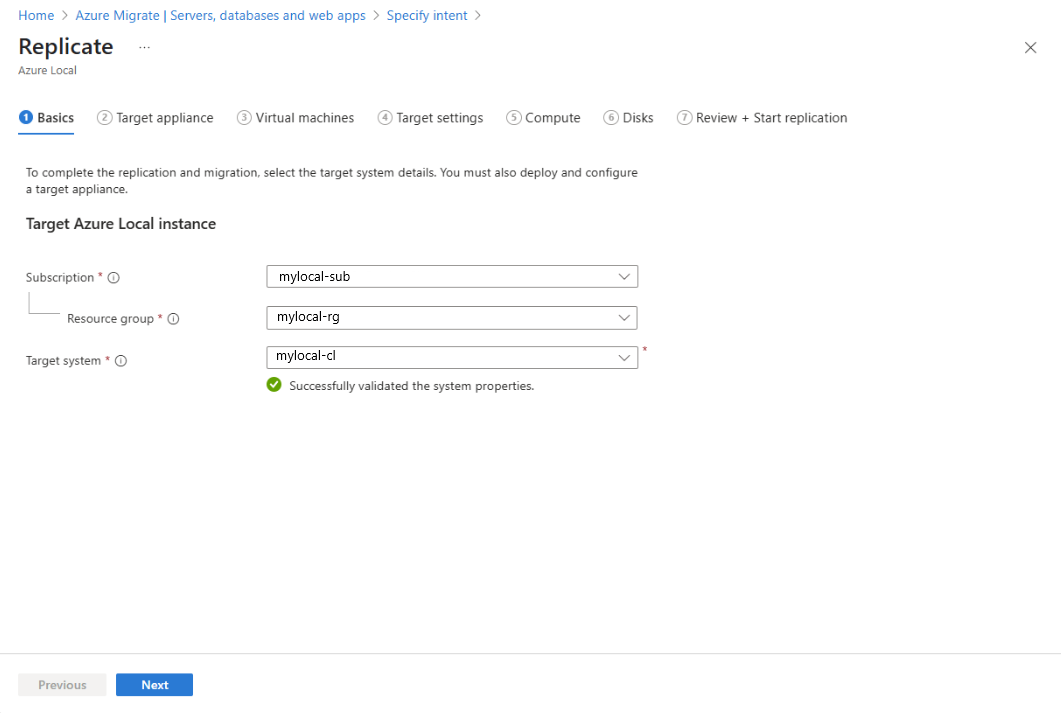
On the Replicate page, on the Basics tab:
- The Subscription field is automatically populated. If it's not the subscription that has your target Azure Local instance, choose the Azure subscription that has the system.
- Select the Resource group associated with your target system.
- For Target system, select the Azure Local resource.
- Verify there's a green check for the system. A green check indicates that all prerequisites such as Azure Arc resource bridge are configured on this system.
- When finished, select Next.
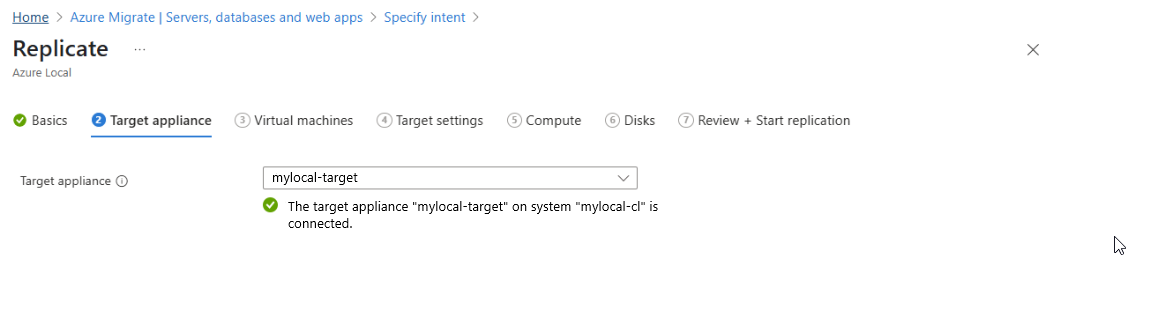
On the Target appliance tab, verify that the target appliance is connected. You should see a green checkmark.
Note
A green checkmark indicates that the target appliance is successfully registered and configured. If your target appliance isn't configured, you see the configuration page instead.
Select Next.
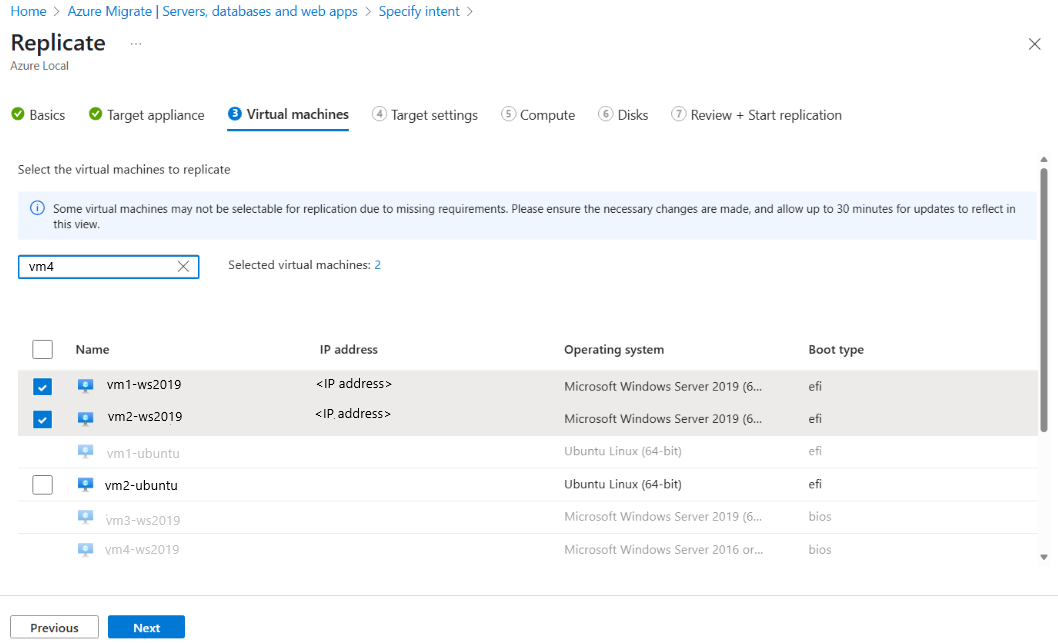
On the Virtual machines tab, verify the VMs are discovered and listed. You can select up to 10 VMs from the list to migrate at one time. Select Next.
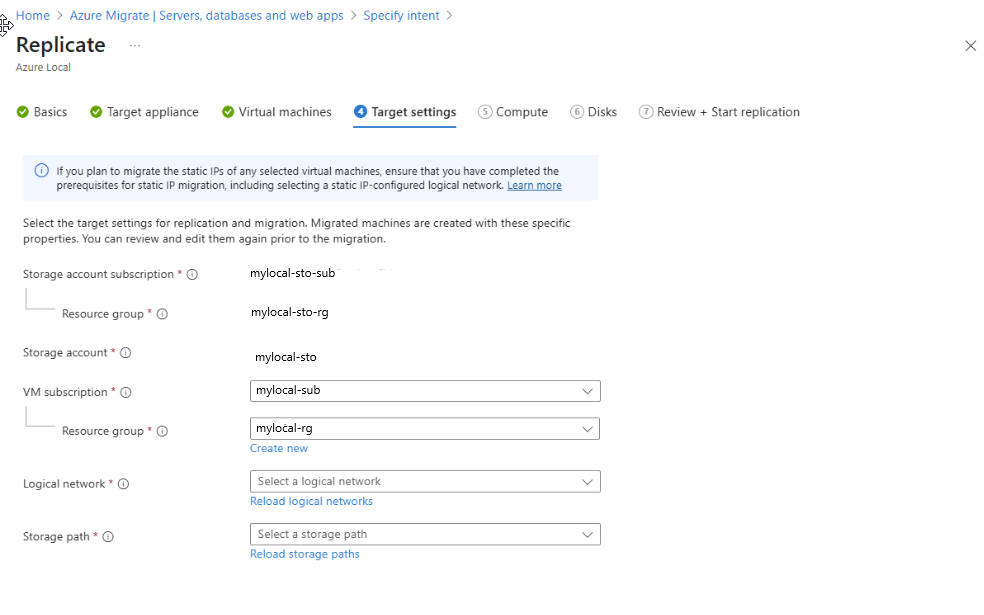
On the Target settings tab, complete these tasks:
The Storage account subscription populates automatically. If this isn't the subscription where you want to create the storage account, select a different subscription.
Select the Resource group to associate with your storage account.
For your Storage account, you can select an existing storage account from the dropdown list or create a new one by selecting Create new. The storage account is only used to store metadata during replication and migration. All migrated VM data and disks remain completely on-premises.
Note
If you use an existing storage account, ensure the following:
- The storage account is Standard Performance tier and uses Azure Blob storage. Premium storage accounts aren't supported.
- The storage account has Public network access enabled. If public network access is disabled, replication fails.
Select a resource group to associate with your migrated VMs.
Select the logical network that you created as a prerequisite. The VMs are connected to this network. If you don't see a logical network in the dropdown list, create a logical network and select Reload logical network.
Select the storage path that you created as a prerequisite. The VMs are created at this storage path. Ensure that the storage path has sufficient space to accommodate the VMs being migrated.
If you don't see a storage path in the dropdown list, Create a storage path and select Reload storage path.
When finished, select Next.
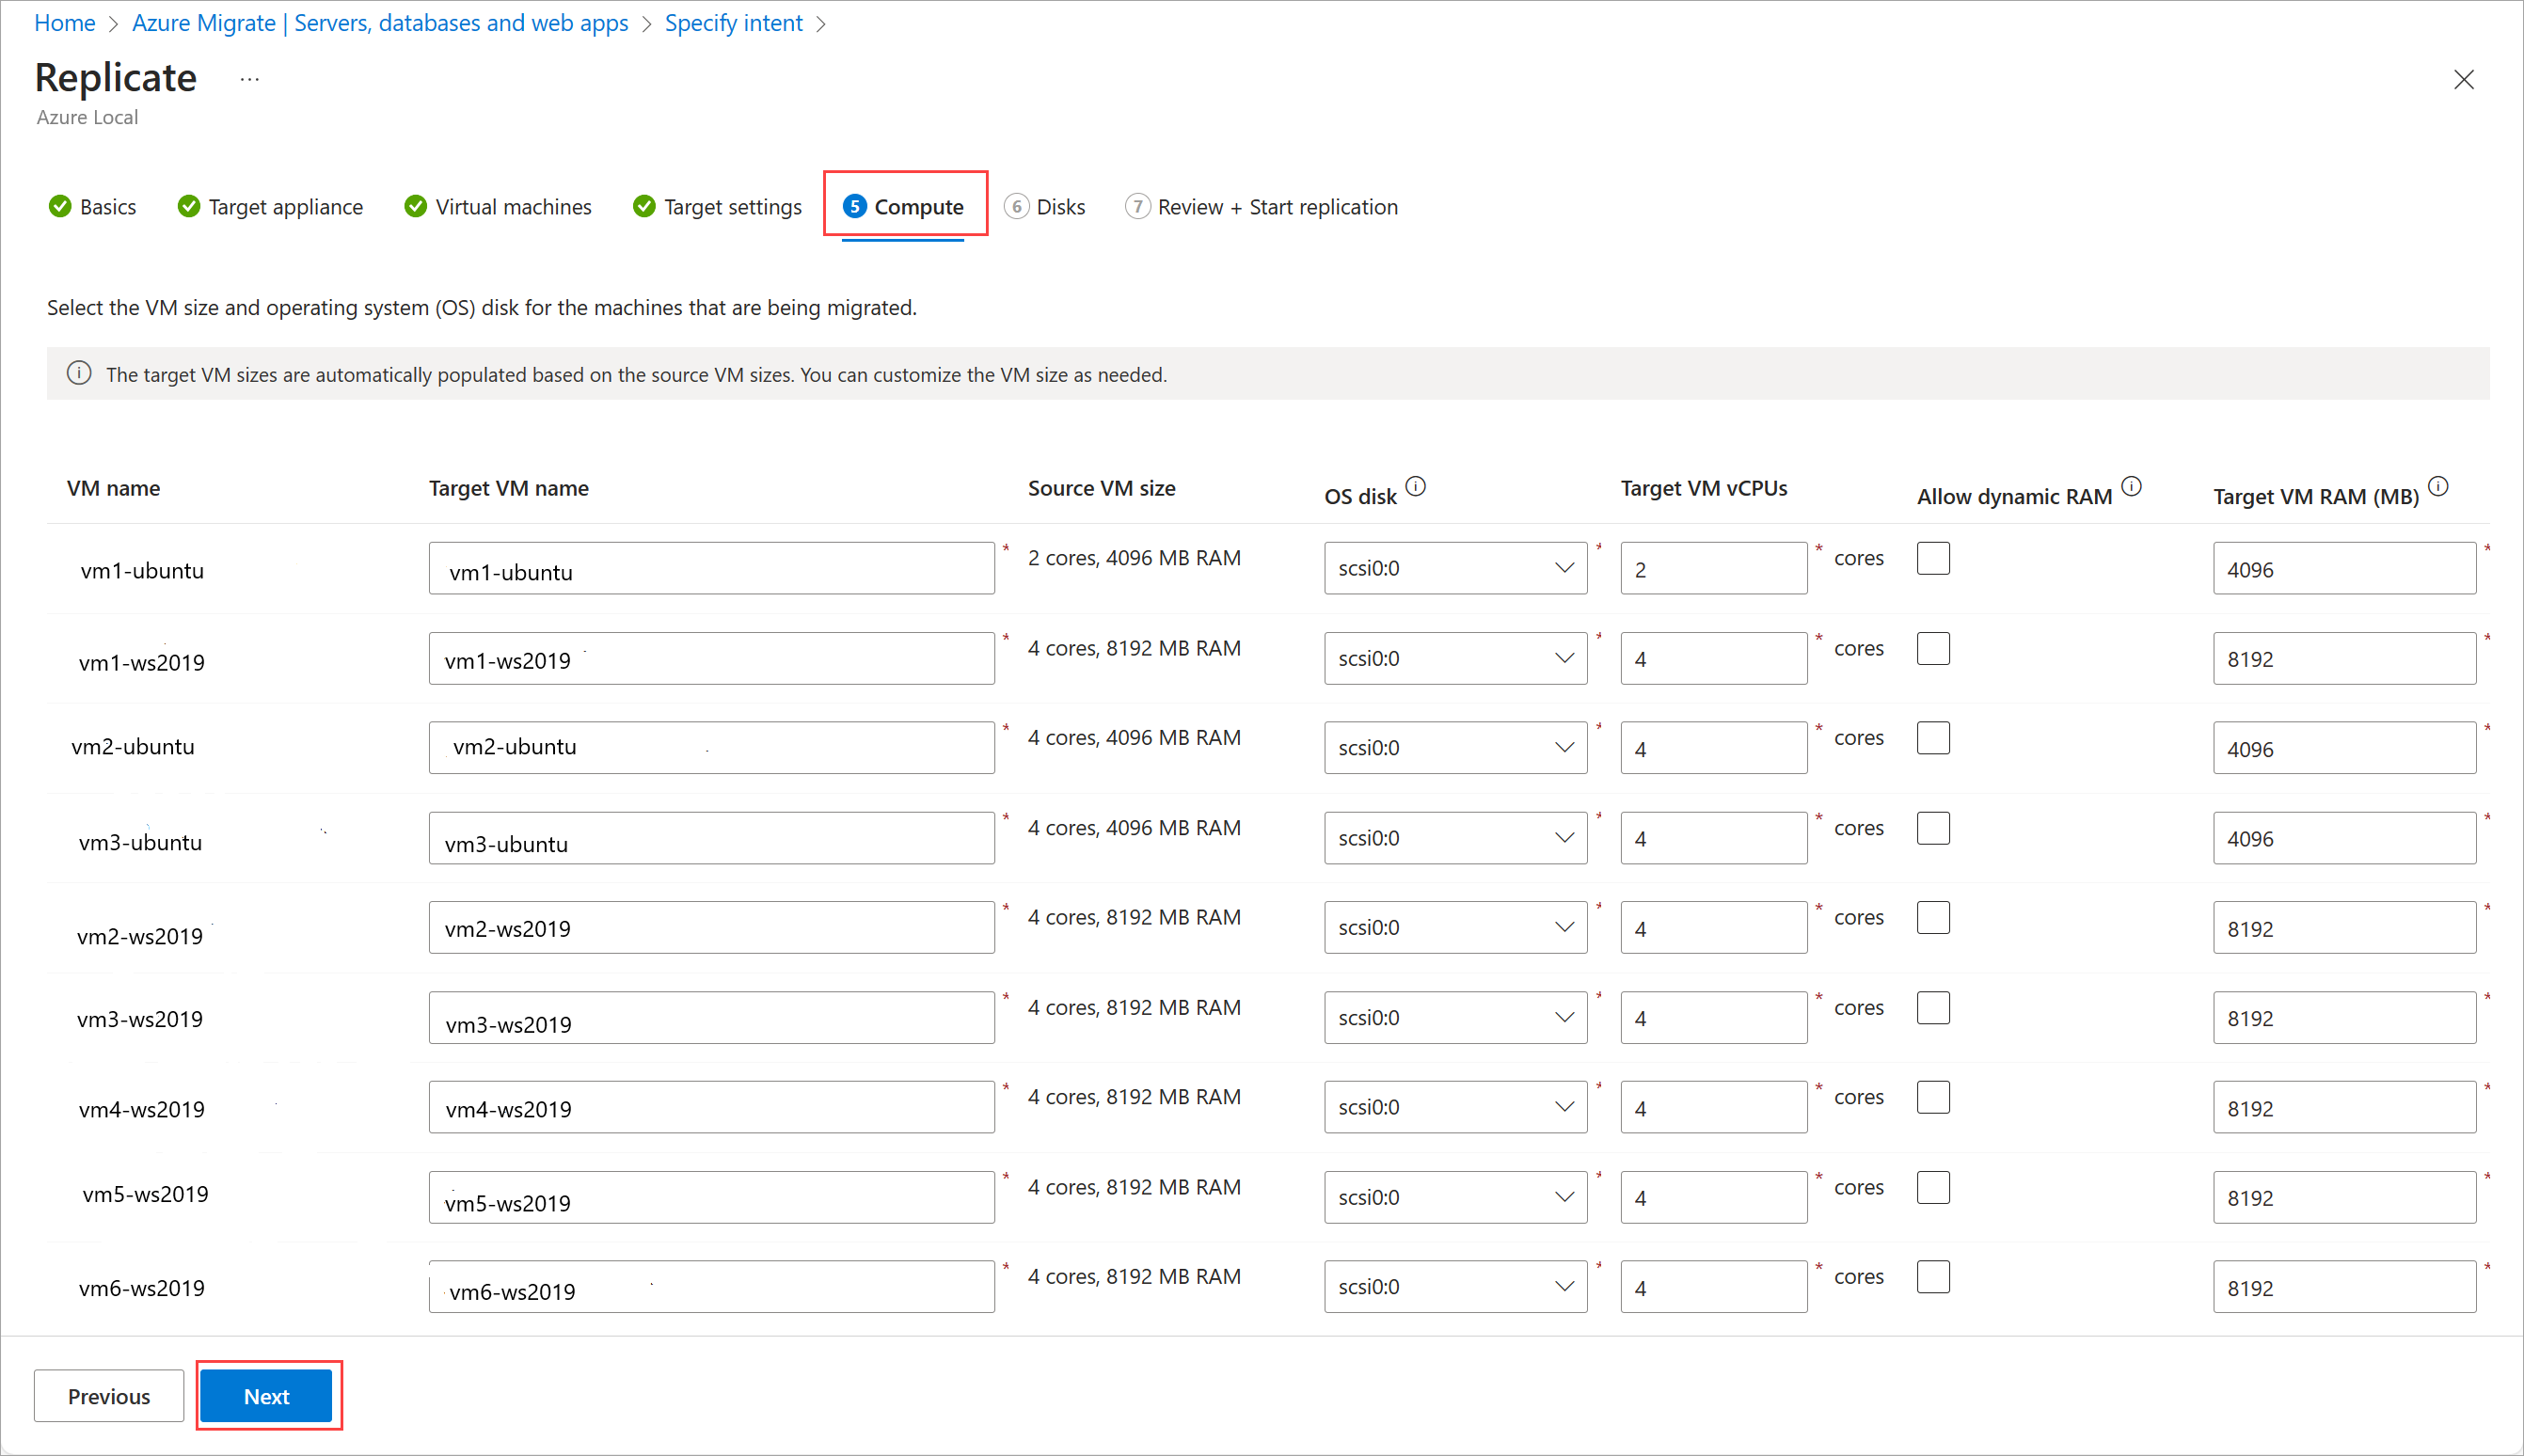
On the Compute tab:
Rename target VMs as needed.
Select the OS disk for each VM from the dropdown lists.
Configure the number of vCPUs and RAM including selecting dynamic RAM for each VM, as needed.
When finished, select Next.
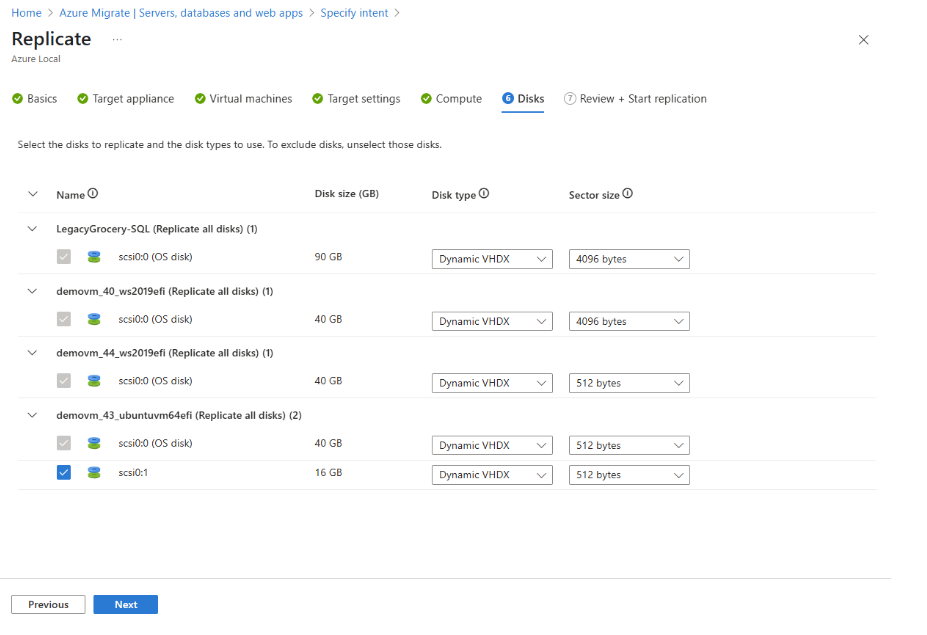
On the Disks tab, select which disks you want to replicate.
Note
Once selected, the OS disks can't be unselected.
Change the disk type, if needed, and select Next.
- It is recommended to use VHDX format for the disks to ensure future expand and disk operations compatibility.
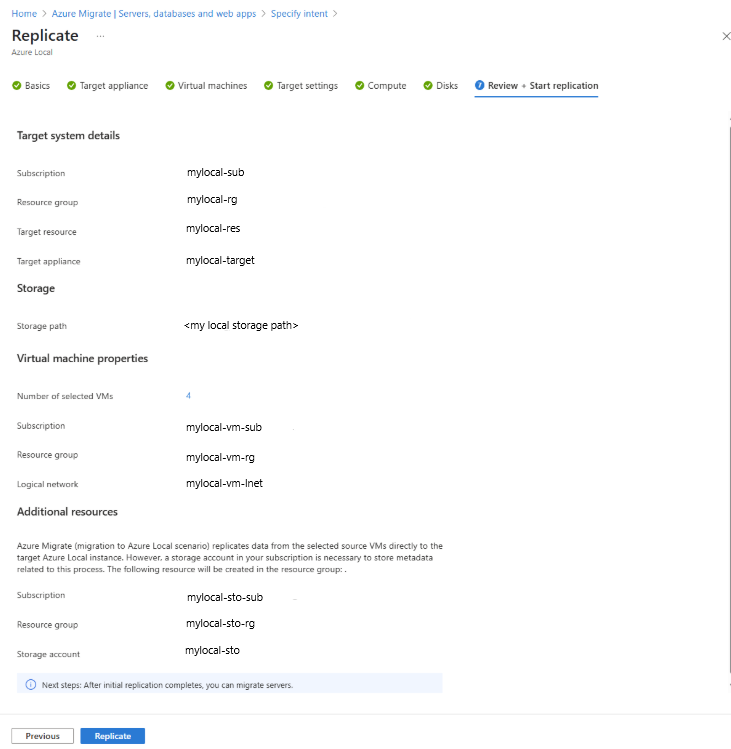
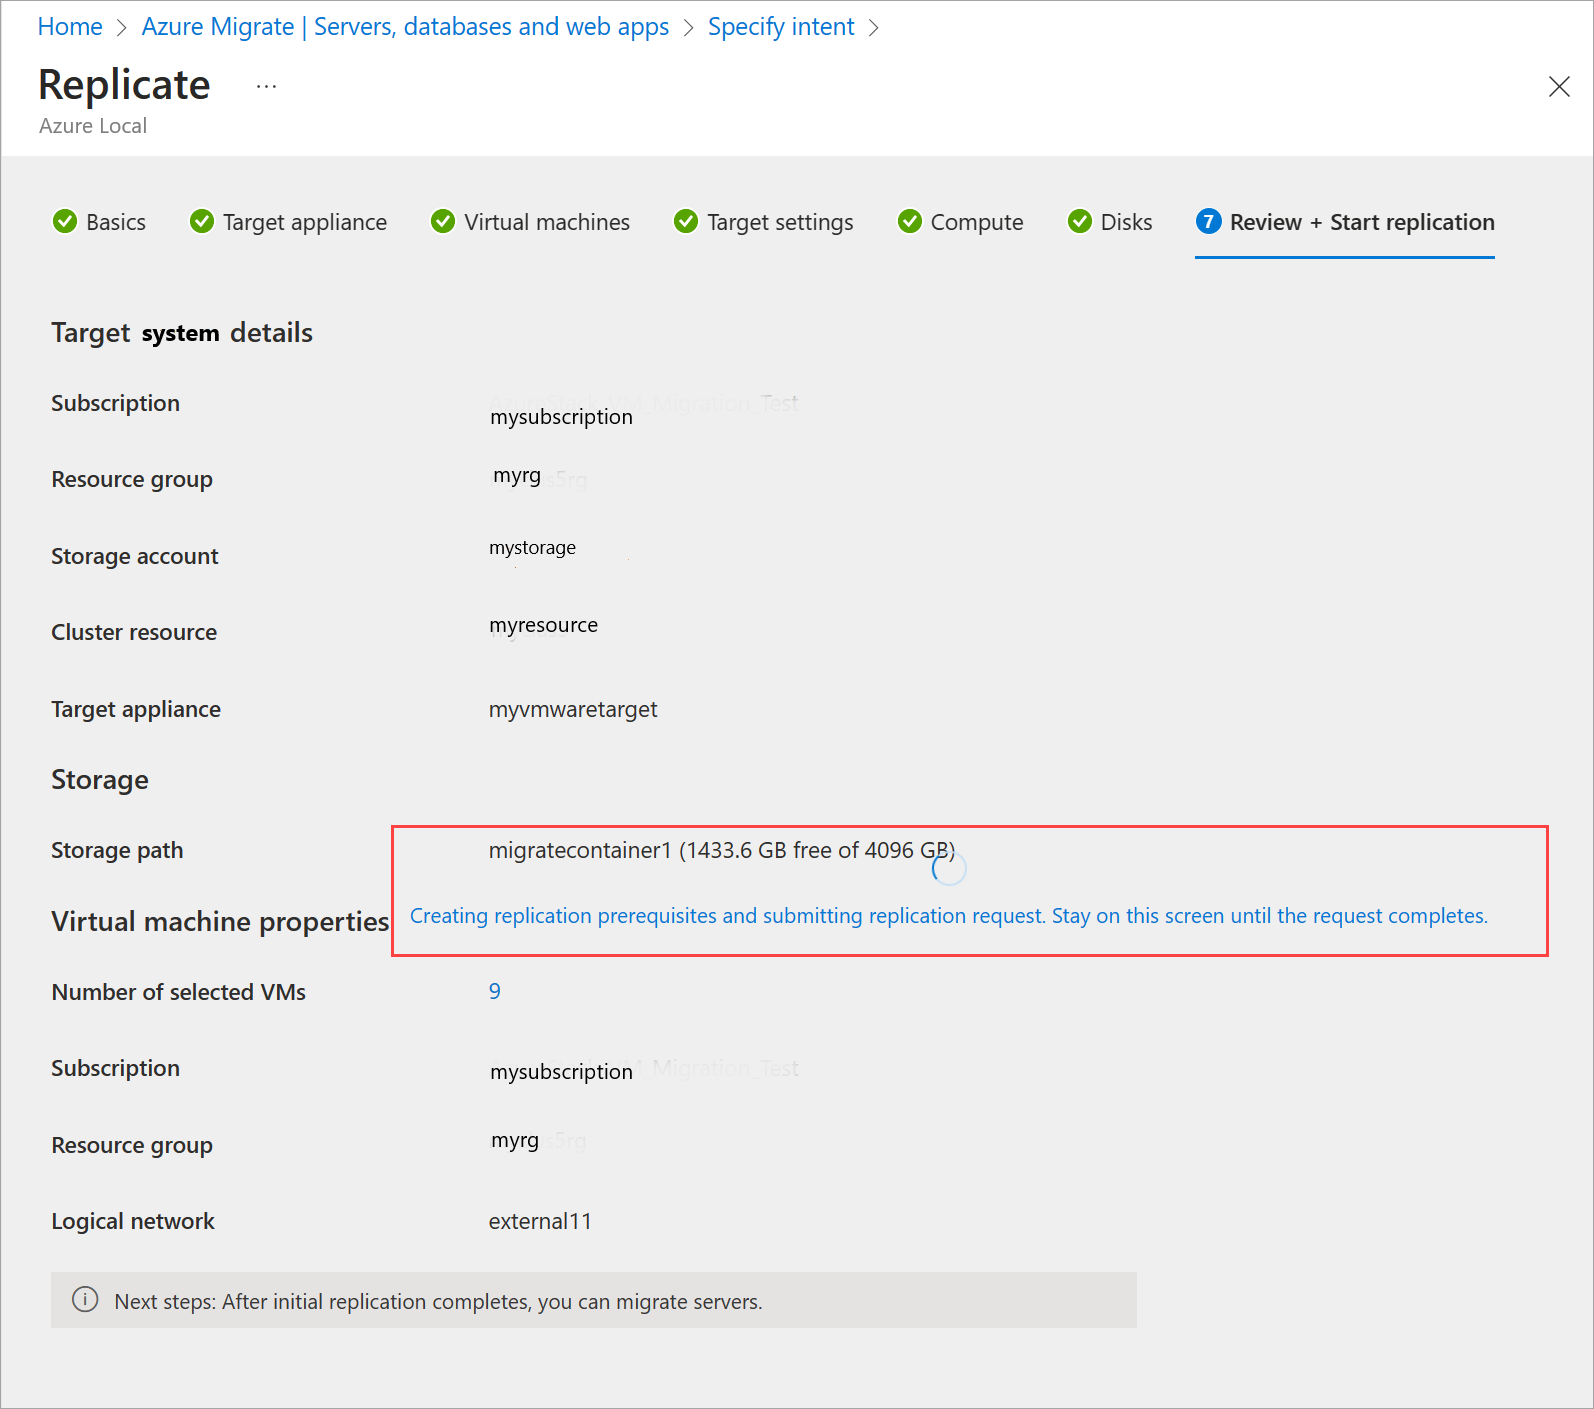
On the Review + Start replication tab, ensure all the values are correct and then select Replicate.
Stay on this page until the process is complete (this might take 5-10 minutes). If you move away from this page, the replication artifacts won't be created fully leading to a failure in replication and then migration.
You are automatically taken to the Servers, databases and web apps page. On the Migration tools tile, select Overview.
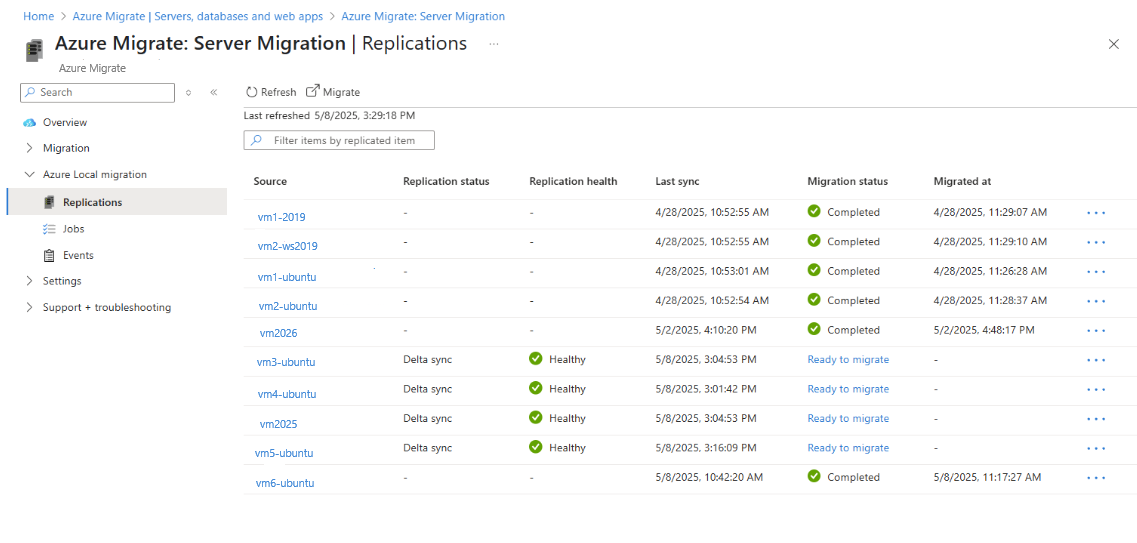
Go to Azure Local migration > Replications. Review the replication status. Select Refresh to see the replicated VMs appear.
As the replication continues, replication status shows progress. Refresh periodically.
After the initial replication is complete, hourly delta replications begin. The Migration status changes to Ready to migrate. The VMs can be migrated.


Next steps
- Complete Hyper-V VM Migration.