Note
Access to this page requires authorization. You can try signing in or changing directories.
Access to this page requires authorization. You can try changing directories.
Azure Maps supports Azure Private Link, enabling secure access to Azure Maps services through a private endpoint in your virtual network. A private endpoint assigns a private IP address from your virtual network to the Azure Maps service, so traffic between your applications and Azure Maps stays on the Microsoft backbone network instead of the public internet. This provides improved security and network isolation. You can create a private endpoint when you create an Azure Maps account or add one to an existing account.
Benefits of private endpoints for Azure Maps
Private endpoints provide the following benefits for Azure Maps accounts:
- No Public Internet Exposure: You can isolate your Azure Maps account from the public internet to reduce exposure to external threats. Only clients within your private network can access the account. This can be done by blocking external access through the publicNetworkAccess feature.
- Secure VNet Communication: Resources in your virtual network (such as VMs and containers) communicate with Azure Maps using private IP addresses. Traffic stays within the VNet, simplifying network security and avoiding public networks, which helps meet internal security and compliance requirements.
Note
All Azure Maps REST APIs (including Render, Search, Routing, and Weather) are fully supported with Private Link, with no loss of functionality. Using Azure Maps with Private Link works the same as public access, with added security.
Prerequisites
If you don't have an Azure subscription, create a free account before you begin.
- An Azure Maps account. Use a Maps account and a virtual network in the same Azure region for optimal performance.
- A Virtual Network and Subnet: A virtual network and subnet in your Azure subscription for the private endpoint. The subnet must have available IP addresses.
- Required permissions
- To create a private endpoint that's automatically approved, you need:
- Azure Maps Contributor on the Azure Maps account
- Network Contributor on the virtual network
- To create a private endpoint that requires manual approval, only the Network Contributor role is required.
- To create a private endpoint that's automatically approved, you need:
- Choose whether Azure automatically manages DNS for the private endpoint using Azure Private DNS, or manage DNS manually. In most cases, Azure Private DNS provides the simplest setup.
Configure a private endpoint for Azure Maps
To enable private connectivity for an Azure Maps account, create a private endpoint and configure DNS to route traffic through your virtual network.
1. Create the private endpoint (Portal or CLI)
In the Azure portal, go to Create a resource and search for Private Endpoint. You can also create a private endpoint from the Networking section of your Azure Maps resource. Select Create to open the wizard.
- Basics: Select the proper Subscription and Resource Group for the endpoint resource and choose a Name and Region (use the same region as your VNet).
- Resource: For Connection method, choose Connect to an Azure resource in my directory. Then set:
- Resource type =
Microsoft.Maps/accounts. This tells Azure you want a private link to an Azure Maps account. - Resource = Your Azure Maps account name. Pick the specific Azure Maps account
- Target sub-resource =
mapsAccount. Azure Maps has a single private link subresource representing the account's data plane.
- Resource type =
- Configuration: Select the Virtual Network and Subnet where the private endpoint is placed. Ensure the subnet has space for one IP. Leave Private DNS integration enabled unless you plan to configure DNS manually. With DNS integration on, Azure creates a Private DNS zone for
privatelink.account.maps.azure.comand add the necessary DNS record automatically.
Once creation is complete, go to your Azure Maps account in the portal and navigate to Networking > Private endpoint connections. You should see a new connection listed. If the private endpoint creator owns or has the proper permissions on the Azure Maps account, the connection is typically auto-approved (status shows "Approved"). If it shows "Pending", manual approval may be required. After approval, the private link is established.
Example – Using Azure CLI
The following Azure CLI command creates a private endpoint for an Azure Maps account, equivalent to the portal steps above:
az network private-endpoint create \
  --name <MyPrivateEndpointName> \
  --resource-group <MyResourceGroup> \
  --vnet-name <MyVNetName> \
  --subnet <MySubnetName> \
  --private-connection-resource-id "/subscriptions/<SubscriptionID>/resourceGroups/<MyResourceGroup>/providers/Microsoft.Maps/accounts/<MyMapsAccountName>" \
  --group-id mapsAccount \
  --connection-name <MyConnectionName>
This command specifies the Maps account resource ID and the mapsAccount subresource, along with the virtual network and subnet used for the private endpoint.
2. Configure DNS for the private endpoint
If you enabled Private DNS integration when creating the private endpoint (the default), Azure automatically creates a Private DNS zone for privatelink.account.maps.azure.com in your subscription and links it to your virtual network.
Within this zone, a DNS record maps your Azure Maps account's unique ID and region to the private IP address of the endpoint. For example, if your Maps account client ID is abc123 and the region is East US, the DNS record resolves that hostname to the private endpoint IP address:
- Record name:
abc123.eastus.account.maps.azure.com - Record value:
10.x.y.z- The private IP address assigned to the endpoint.
Clients inside the virtual network resolve the hostname to a private IP address for private connectivity, while clients outside the network resolve the same hostname to the Azure Maps public endpoint. This split‑horizon DNS approach lets you use a single endpoint URL both inside and outside the virtual network.
If you don't use automatic DNS integration, configure DNS manually so the Azure Maps account hostname
(<maps-account-client-id>.<location>.account.maps.azure.com) resolves to the private endpoint IP address within your network. For more information, see Azure Private Endpoint DNS documentation.
3. Use the private endpoint in your applications
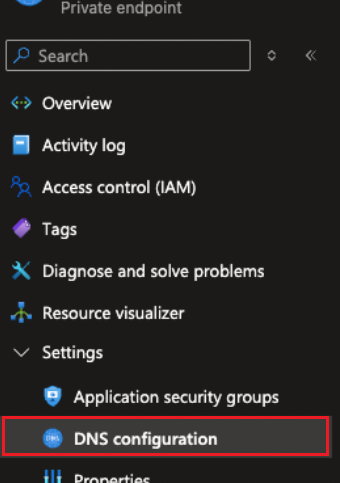
To use the private endpoint, configure your applications to call the Azure Maps account-specific endpoint. You can find this endpoint in the Azure Maps account Overview or Authentication pages, or in the private endpoint resource under DNS configuration (customer-visible FQDNs).
The access pattern is:
https://{maps-account-client-id}.{location}.account.maps.azure.com
Important
If your application continues to use the default Azure Maps endpoint (such as atlas.microsoft.com), requests won't be routed through the private endpoint. Azure Maps SDKs support overriding the default endpoint, so configure your SDK or connection code to use your Azure Maps account–specific hostname. When configured, requests from within your network are automatically routed through Private Link.
4. [Optional] Disable public network access
Even after creating a private endpoint, your Azure Maps account's public endpoints remain active by default. This allows existing applications outside the virtual network to continue working until you intentionally restrict them. If you require exclusive private access, disable public network access for the Maps account.
In the Azure portal, open your Maps account and go to Networking. Set Public access to Disable and save. Once completed, Azure Maps rejects any connection attempts over the public endpoint. This adds an extra layer of protection: even if someone has your Maps authentication key or SAS token, they can't use it from the internet once public access is off.
You can also disable public access via ARM templates or the Azure CLI by setting the property
publicNetworkAccesstoDisabled.
After disabling Public network access, validate connectivity from each application. Public endpoints (for example, atlas.microsoft.com) are blocked by design, so update all application and SDK configurations to use the private DNS endpoint.
Other considerations
- DNS Resolution: If you can't connect to Azure Maps through the private endpoint, verify your DNS configuration, as DNS issues are a common cause of connectivity problems.
- Multiple Networks: You can create multiple private endpoints for a single Azure Maps account to connect from different virtual networks. Each private endpoint uses one IP address from the selected subnet.
Using Azure Private Link with Azure Maps keeps all application traffic on private networks. This improves security and supports enterprise network policies while maintaining full Azure Maps functionality. Azure Maps is accessed through private IP addresses and DNS, ensuring traffic remains within your controlled network boundary.
Ask Copilot