Tools for migrating from Log Analytics Agent to Azure Monitor Agent
Azure Monitor Agent (AMA) replaces the Log Analytics agent (also known as MMA and OMS) for Windows and Linux machines, in Azure and non-Azure environments, including on-premises and third-party clouds. The benefits of migrating to Azure Monitor Agent include enhanced security, cost-effectiveness, performance, manageability and reliability. This article explains how to use the AMA Migration Helper and DCR Config Generator tools to help automate and track the migration from Log Analytics Agent to Azure Monitor Agent.

Important
Do not remove legacy agents being used by other Azure solutions or services. Use the migration helper to discover which solutions and services you use today.
Important
The legacy Log Analytics agent will be deprecated by August 2024. After this date, Microsoft will no longer provide any support for the Log Analytics agent. Migrate to Azure Monitor agent before August 2024 to continue ingesting data.
Using AMA Migration Helper
AMA Migration Helper is a workbook-based Azure Monitor solution that helps you discover what to migrate and track progress as you move from Log Analytics Agent to Azure Monitor Agent. Use this single pane of glass view to expedite and track the status of your agent migration journey. The helper now supports multiple subscriptions, and includes automatic migration recommendations based on your usage.
You can access the workbook here, or find it on the Azure portal under Monitor > Workbooks > Public Templates > Azure Monitor essentials > AMA Migration Helper.

Automatic Migration Recommendations

Installing and using DCR Config Generator
Azure Monitor Agent relies only on data collection rules (DCRs) for configuration, whereas Log Analytics Agent inherits its configuration from Log Analytics workspaces.
Use the DCR Config Generator tool to parse Log Analytics Agent configuration from your workspaces and generate/deploy corresponding data collection rules automatically. You can then associate the rules to machines running the new agent using built-in association policies.
Note
DCR Config Generator does not currently support additional configuration for Azure solutions or services dependent on Log Analytics Agent.
Prerequisites\Setup
Powershell version 7.1.3or higher is recommended (minimum version 5.1)- Uses
Az Powershell moduleto pull workspace agent configuration information Az PowerShell module - User will need Read/Write access to the specified workspace resource
- Connect-AzAccount and Select-AzSubscription will be used to set the context for the script to run so proper Azure credentials will be needed
To install DCR Config Generator:
Run the script using the sample parameters below:
.\WorkspaceConfigToDCRMigrationTool.ps1 -SubscriptionId $subId -ResourceGroupName $rgName -WorkspaceName $workspaceName -DCRName $dcrName -OutputFolder $outputFolderPath
Name Required Description SubscriptionIdYES This is the subscription ID of the workspace ResourceGroupNameYES This is the resource Group of the workspace WorkspaceNameYES This is the name of the workspace (Azure resource IDs are case insensitive) DCRNameYES The base name that will be used for each one the outputs DCRs OutputFolderNO The output folder path. If not provided, the working directory path is used Outputs:
For each supported
DCR type, the script produces a DCR ARM template (ready to be deployed) and a DCR payload (for users that don't need the ARM template). This is the list of currently supported DCR types:- Windows contains
WindowsPerfCountersandWindowsEventLogsdata sources only - Linux contains
LinuxPerfCountersandSyslogdata sources only - Custom Logs contains
logFilesdata sources only:- Each custom log gets its own DCR ARM template
- IIS Logs contains
iisLogsdata sources only - Extensions contains
extensionsdata sources only along with any associated perfCounters data sourcesVMInsights- If you would like to add support for a new extension type, please reach out to us.
- Windows contains
Deploy the generated ARM templates:
Portal
In the portal's search box, type in template and then select Deploy a custom template.

Select Build your own template in the editor.
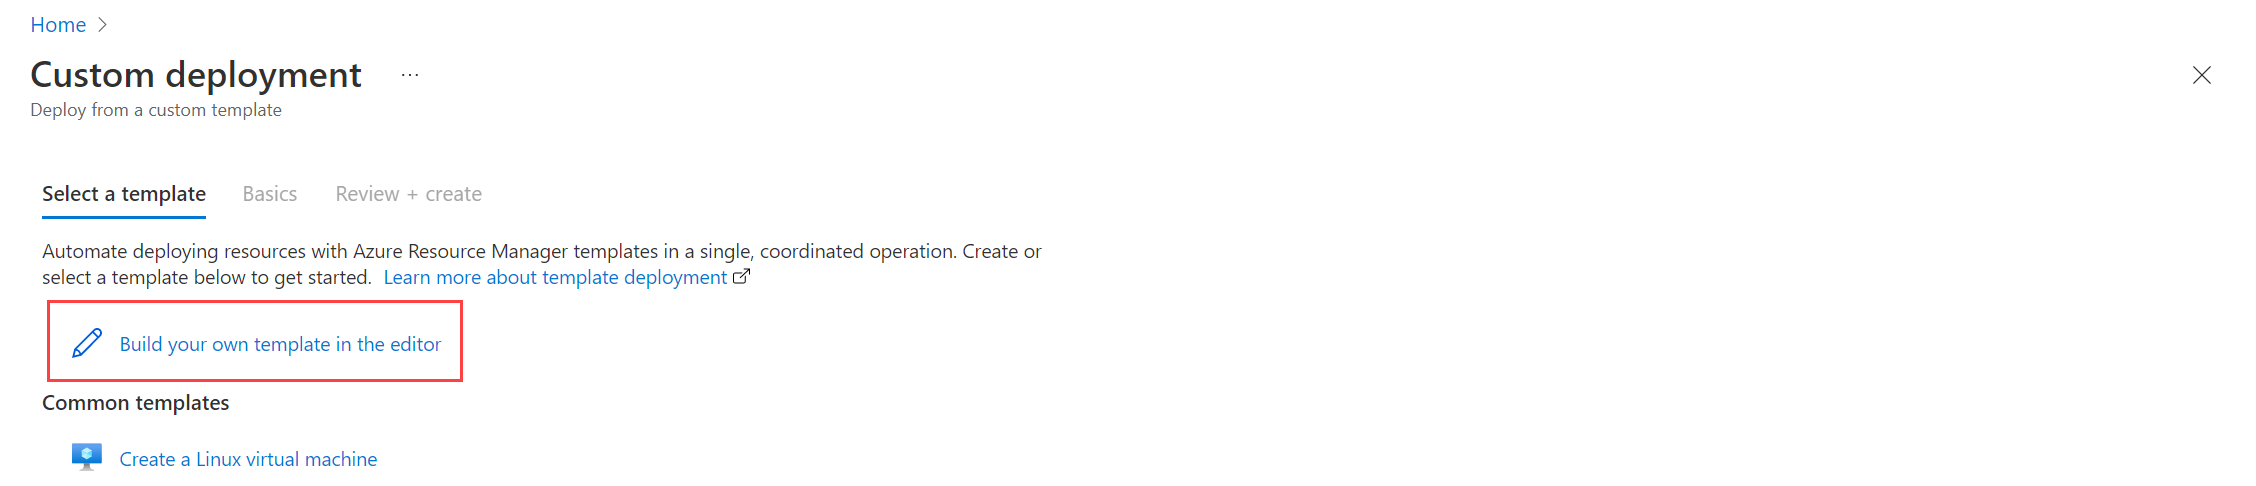
Paste the generated template into the editor and select Save.
On the Custom deployment screen, specify a Subscription, Resource group, and Region.
Select Review + create > Create.
PowerShell
New-AzResourceGroupDeployment -ResourceGroupName <resource-group-name> -TemplateFile <path-to-template>Note
You can include up to 100 'counterSpecifiers' in a data collection rule. 'samplingFrequencyInSeconds' must be between 1 and 300, inclusive.
Associate machines to your data collection rules:
- From the Monitor menu, select Data Collection Rules.
- From the Data Collection Rules screen, select your data collection rule.
- Select View resources > Add.
- Select your machines > Apply.


Feedback
Coming soon: Throughout 2024 we will be phasing out GitHub Issues as the feedback mechanism for content and replacing it with a new feedback system. For more information see: https://aka.ms/ContentUserFeedback.
Submit and view feedback for