Note
Access to this page requires authorization. You can try signing in or changing directories.
Access to this page requires authorization. You can try changing directories.
When you use Application Insights Profiler for .NET or Snapshot Debugger, artifacts generated by your application are uploaded by default into Azure Storage accounts over the public internet. For these artifacts and storage accounts, Microsoft controls and covers the cost for:
- Processing and analysis.
- Encryption-at-rest and lifetime management policies.
Meanwhile, when you "bring your own storage" (BYOS), artifacts are uploaded into a storage account that only you control and cover the cost for:
- The encryption-at-rest policy and the Lifetime management policy.
- Network access.
Note
BYOS is required if you're enabling Azure Private Link or customer-managed keys.
In this guide, you learn how to:
- Grant Diagnostic Services access to your storage account.
- Link your storage account with your Application Insights resource.
- Learn how your storage account is accessed.
Prerequisites
- Verify you created your storage account in the same location as your Application Insights resource.
- If you enabled Private Link, allow connection to our Trusted Microsoft Service from your virtual network.
Grant Diagnostic Services access to your storage account
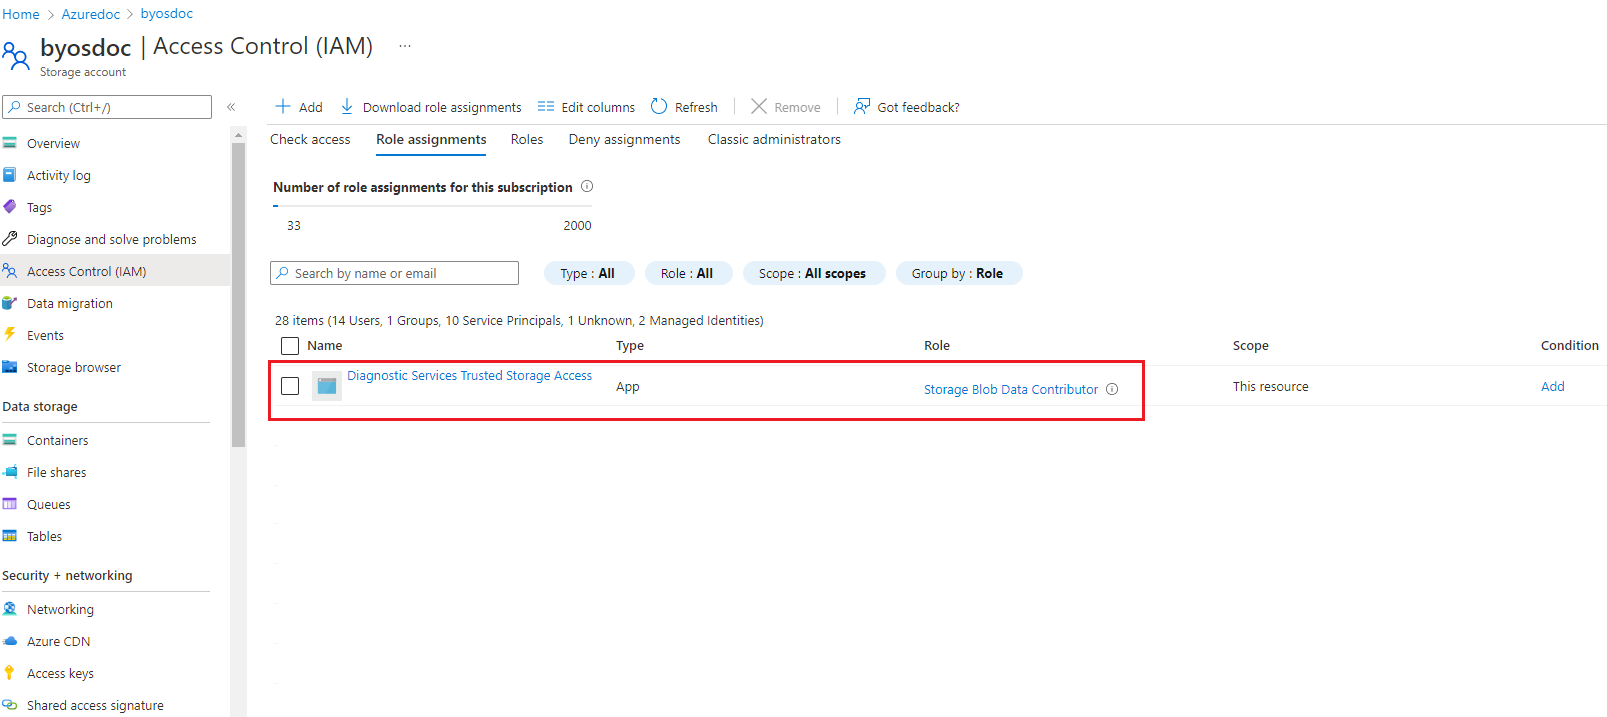
A BYOS storage account is linked to an Application Insights resource. Start by granting the Storage Blob Data Contributor role to the Microsoft Entra application named Diagnostic Services Trusted Storage Access via the Access Control (IAM) page in your storage account.
Select Access control (IAM).
Select Add > Add role assignment to open the Add role assignment page.
Assign the following role.
Setting Value Role Storage Blob Data Contributor Assign access to User, group, or service principal Members Diagnostic Services Trusted Storage Access 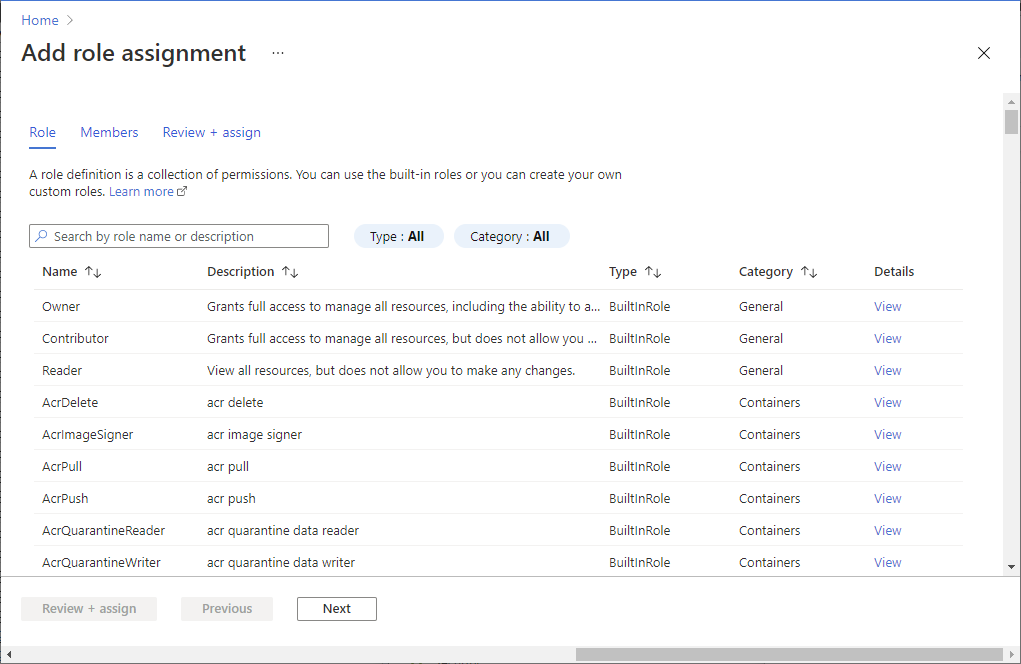
Once assigned, you can see the role under the Role assignments section.
Note
If you're also using Private Link, one more configuration is required to allow connection to our Trusted Microsoft Service from your virtual network. For more information, see Storage network security documentation.
Link your storage account with your Application Insights resource
You have three options for configuring BYOS for code-level diagnostics like the .NET Profiler and Snapshot Debugger:
- Azure PowerShell cmdlets
- The Azure CLI
- Azure Resource Manager templates
Before you begin, install Azure PowerShell 4.2.0 or greater.
In the PowerShell terminal, install the Application Insights PowerShell extension.
Install-Module -Name Az.ApplicationInsights -ForceSign in with your Azure account subscription.
Connect-AzAccount -Subscription "{subscription_id}"For more information on how to sign in, see the Connect-AzAccount documentation.
Remove any previous storage account linked to your Application Insights resource.
Pattern:
Get-AzApplicationInsights -ResourceGroupName "{resource_group_name}" -Name "{application_insights_name}" | Remove-AzApplicationInsightsLinkedStorageAccountExample:
Get-AzApplicationInsights -ResourceGroupName "byos-test" -Name "byos-test-westus2-ai" | Remove-AzApplicationInsightsLinkedStorageAccountConnect your storage account with your Application Insights resource.
Pattern:
$storageAccount = Get-AzStorageAccount -ResourceGroupName "{resource_group_name}" -Name "{storage_account_name}"
New-AzApplicationInsightsLinkedStorageAccount -Name "{application_insights_name}" -LinkedStorageAccountResourceId $storageAccount.Id
Example:
$storageAccount = Get-AzStorageAccount -ResourceGroupName "byos-test" -Name "byosteststoragewestus2"
New-AzApplicationInsightsLinkedStorageAccount -Name "byos-test-westus2-ai" -LinkedStorageAccountResourceId $storageAccount.Id
Troubleshooting
For assistance with troubleshooting BYOS for, see the dedicated troubleshooting documentation for:
Frequently asked questions
This section provides answers to common questions about configuring BYOS for .NET Profiler and Snapshot Debugger.
If I enabled the .NET Profiler/Snapshot Debugger and BYOS, is my data migrated into my storage account?
No, it won't.
Does BYOS work with encryption-at-rest and customer-managed keys?
Yes. To be precise, BYOS is a requirement to have the .NET Profiler/Snapshot Debugger enabled with customer-manager keys.
Does BYOS work in an environment isolated from the internet?
Yes. BYOS is a requirement for isolated network scenarios.
Does BYOS work with both customer-managed keys and Private Link enabled?
Yes, it's possible.
If I enabled BYOS, can I go back to using Diagnostic Services storage accounts to store my collected data?
Yes, you can, but we don't currently support data migration from your BYOS.
After I enable BYOS, do I take over all the related costs of storage and networking?
Yes.
How is my storage account accessed?
Agents running in your virtual machines or Azure App Service upload artifacts (profiles, snapshots, and symbols) to blob containers in your account.
This process involves contacting the .NET Profiler or Snapshot Debugger to obtain a shared access signature token to a new blob in your storage account.
The .NET Profiler or Snapshot Debugger:
- Analyzes the incoming blob.
- Write back the analysis results and log files into blob storage.
Depending on available compute capacity, this process might occur anytime after upload.
When you view Profiler traces or Snapshot Debugger analysis, the service fetches the analysis results from blob storage.