Note
Access to this page requires authorization. You can try signing in or changing directories.
Access to this page requires authorization. You can try changing directories.
You must delegate a subnet to Azure NetApp Files. When you create a volume, you need to specify the delegated subnet.
Considerations
When creating the delegated subnet for Azure NetApp Files, consider the size of the subnet. A subnet with a /28 network mask provides only 11 usable IP addresses, which might be insufficient for certain use cases. Consider creating a larger subnet mask. For example:
- A /26 network mask provides 59 usable IP addresses
- A /24 network mask provides 251 usable IP addresses
In scenarios involving high application volume counts such as SAP HANA, consider larger subnets, like a /23 network mask. Larger subnets are especially beneficial if you expect many volumes and storage endpoints.
Once the delegated network is created, its network mask cannot be altered. Thus it's essential to thoughtfully plan your virtual network (VNet) and delegated subnet sizes with an eye toward the future.
When creating the delegated subnet, an specific route will be programmed for the subnet range, apart from the route for the entire Virtual Network space.
In each VNet, only one subnet can be delegated to Azure NetApp Files.
Azure enables you to create multiple delegated subnets in a VNet. However, any attempts to create a new volume would fail if you use more than one delegated subnet.
You can have only a single delegated subnet in a VNet. A NetApp account can deploy volumes into multiple VNets, each having its own delegated subnet.If you're using Basic network features, you can't designate a network security group (NSG) or service endpoint in the delegated subnet. Doing so causes the subnet delegation to fail. To designate an NSG or service endpoint, upgrade to Standard network features.
Access to a volume from a globally peered virtual network isn't currently supported using Basic networks features. Global VNet peering is supported with Standard network features. For more information, see Supported network topologies.
For Azure NetApp Files support of User-defined routes (UDRs) and Network security groups (NSGs), see Constraints in Guidelines for Azure NetApp Files network planning.
To establish routing or access control to the Azure NetApp Files delegated subnet, you can apply UDRs and NSGs to other subnets, even within the same VNet as the subnet delegated to Azure NetApp Files.
Steps
Navigate to Virtual networks in the Azure portal. Select the virtual network that you want to use for Azure NetApp Files.
From Virtual network, select Subnets then the +Subnet button.
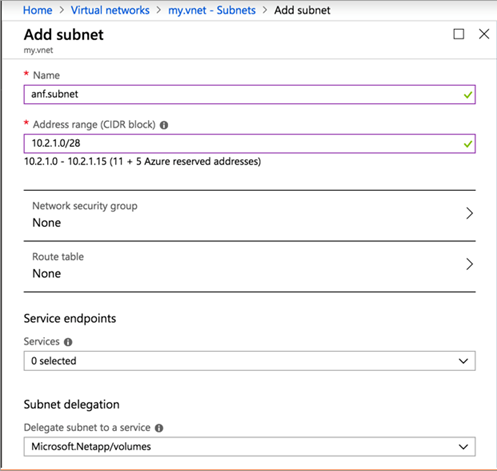
Create a new subnet to use for Azure NetApp Files by completing the following required fields in the Add Subnet page:
Name: Specify the subnet name.
Address range: Specify the IP address range.
Subnet delegation: Select Microsoft.NetApp/volumes.
You can also create and delegate a subnet when you create a volume for Azure NetApp Files.