Note
Access to this page requires authorization. You can try signing in or changing directories.
Access to this page requires authorization. You can try changing directories.
In the previous tutorial, you deploy a linked template. In this tutorial, you learn how to use Azure Pipelines to continuously build and deploy Azure Resource Manager template (ARM template) projects.
Azure DevOps provides developer services to support teams to plan work, collaborate on code development, and build and deploy applications. Developers can work in the cloud using Azure DevOps Services. Azure DevOps provides an integrated set of features that you can access through your web browser or IDE client. Azure Pipelines is one of these features. Azure Pipelines is a fully featured continuous integration (CI) and continuous delivery (CD) service. It works with your preferred Git provider and can deploy to most major cloud services. Then you can automate the build, testing, and deployment of your code to Microsoft Azure, Google Cloud Platform, or Amazon Web Services.
Note
Pick a project name. When you go through the tutorial, replace any of the ARMPipelineProj with your project name. This project name is used to generate resource names. One of the resources is a storage account. Storage account names must be between 3 and 24 characters in length and use numbers and lower-case letters only. The name must be unique. In the template, the storage account name is the project name with store appended, and the project name must be between 3 and 11 characters. So the project name must meet the storage account name requirements and has less than 11 characters.
This tutorial covers the following tasks:
- Prepare a GitHub repository
- Create an Azure DevOps project
- Create an Azure pipeline
- Verify the pipeline deployment
- Update the template and redeploy
- Clean up resources
If you don't have an Azure subscription, create a free account before you begin.
Prerequisites
To complete this article, you need:
- A GitHub account, where you use it to create a repository for your templates. If you don't have one, you can create one for free. For more information about using GitHub repositories, see Build GitHub repositories.
- Install Git. This tutorial instruction uses Git Bash or Git Shell. For instructions, see Install Git.
- An Azure DevOps organization. If you don't have one, you can create one for free. See Create an organization or project collection.
- (optional) Visual Studio Code with Resource Manager Tools extension. See Quickstart: Create ARM templates with Visual Studio Code.
Prepare a GitHub repository
GitHub is used to store your project source code including Resource Manager templates. For other supported repositories, see repositories supported by Azure DevOps.
Create a GitHub repository
If you don't have a GitHub account, see Prerequisites.
Sign in to GitHub.
Select your account image on the upper right corner, and then select Your repositories.
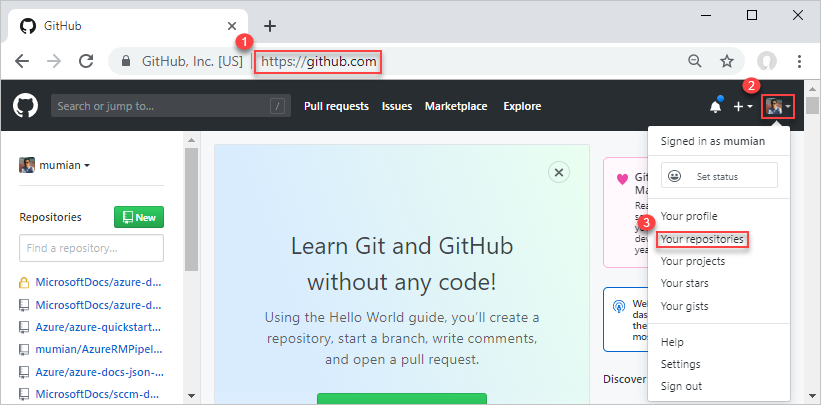
Select New, a green button.
In Repository name, enter a repository name. For example, ARMPipeline-repo. Remember to replace any of ARMPipeline with your project name. You can select either Public or private for going through this tutorial. And then select Create repository.
Write down the URL. The repository URL is the following format -
https://github.com/[YourAccountName]/[YourRepositoryName].
This repository is referred to as a remote repository. Each of the developers of the same project can clone their own local repository, and merge the changes to the remote repository.
Clone the remote repository
Open Git Shell or Git Bash. See Prerequisites.
Verify your current folder is GitHub.
Run the following command:
git clone https://github.com/[YourAccountName]/[YourGitHubRepositoryName]
cd [YourGitHubRepositoryName]
mkdir create_web_app
cd create_web_app
pwd
Replace
[YourAccountName]with your GitHub account name, and replace[YourGitHubRepositoryName]with your repository name you created in the previous procedure.
The create_web_app folder is the folder where the template is stored. The pwd command shows the folder path. The path is where you save the template to in the following procedure.
Download a Quickstart template
Instead of creating the templates, you can download the templates and save them to the create_web_app folder.
- The main template: https://raw.githubusercontent.com/Azure/azure-docs-json-samples/master/get-started-deployment/linked-template/azuredeploy.json
- The linked template: https://raw.githubusercontent.com/Azure/azure-docs-json-samples/master/get-started-deployment/linked-template/linkedStorageAccount.json
Both the folder name and the file names are used as they are in the pipeline. If you change these names, you must update the names used in the pipeline.
Push the template to the remote repository
The azuredeploy.json has been added to the local repository. Next, you upload the template to the remote repository.
Open Git Shell or Git Bash, if it is not opened.
Change directory to the create_web_app folder in your local repository.
Verify the azuredeploy.json file is in the folder.
Run the following command:
git add .
git commit -m "Add web app templates."
git push origin main
You might get a warning about LF. You can ignore the warning. main is the main branch. You typically create a branch for each update. To simplify the tutorial, you use the main branch directly.
Browse to your GitHub repository from a browser. The URL is
https://github.com/[YourAccountName]/[YourGitHubRepository]. You shall see the create_web_app folder and the two files inside the folder.Select azuredeploy.json to open the template.
Select the Raw button. The URL begins with
https://raw.githubusercontent.com.Make a copy of the URL. You need to provide this value when you configure the pipeline later in the tutorial.
So far, you have created a GitHub repository, and uploaded the templates to the repository.
Create a DevOps project
A DevOps organization is needed before you can proceed to the next procedure. If you don't have one, see Prerequisites.
Sign in to Azure DevOps.
Select a DevOps organization from the left, and then select New project. If you don't have any projects, the create project page is opened automatically.
Enter the following values:
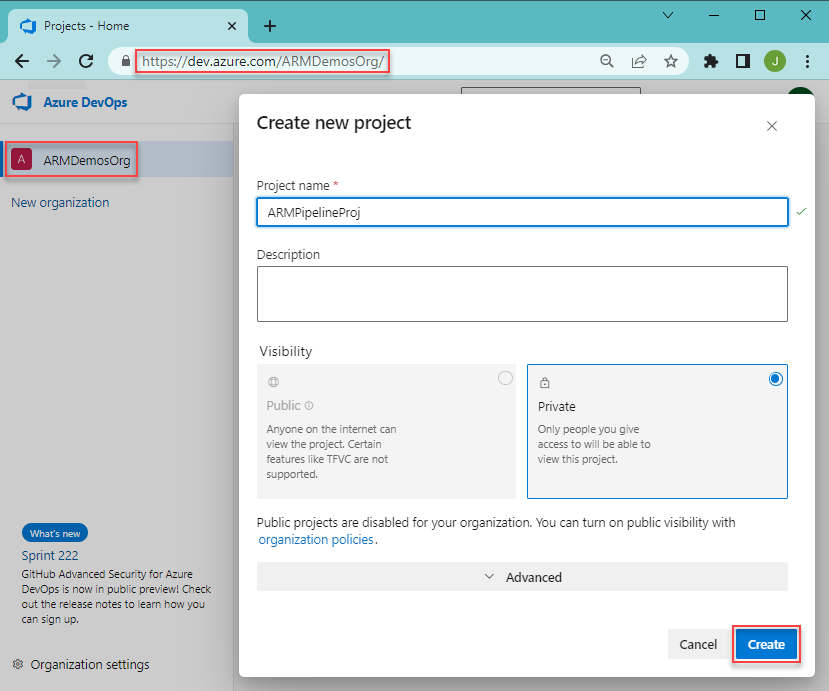
- Project name: Enter a project name. You can use the project name you picked at the very beginning of the tutorial.
- Visibility: Select Private.
Use the default value for the other properties.
Select Create.
Create a service connection that is used to deploy projects to Azure.
Select Project settings from the bottom of the left menu.
Select Service connections under Pipelines.
Select Create Service connection, select Azure Resource Manager, and then select Next.
Select Service principal (automatic), and then select Next.
Enter the following values:
- Scope level: select Subscription.
- Subscription: select your subscription.
- Resource Group: Leave it blank.
- Connection name: enter a connection name. For example, ARMPipeline-conn. Write down this name, you need the name when you create your pipeline.
- Grant access permission to all pipelines. (selected)
Select Save.
Create a pipeline
Until now, you have completed the following tasks. If you skip the previous sections because you are familiar with GitHub and DevOps, you must complete the tasks before you continue.
- Create a GitHub repository, and save the templates to the create_web_app folder in the repository.
- Create a DevOps project, and create an Azure Resource Manager service connection.
To create a pipeline with a step to deploy a template:
Select Pipelines from the left menu.
Select Create pipeline.
From the Connect tab, select GitHub. If asked, enter your GitHub credentials, and then follow the instructions. If you see the following screen, select Only select repositories, and verify your repository is in the list before you select Approve & Install.

From the Select tab, select your repository. The default name is
[YourAccountName]/[YourGitHubRepositoryName].From the Configure tab, select Starter pipeline. It shows the azure-pipelines.yml pipeline file with two script steps.
Delete the two script steps from the .yml file.
Move the cursor to the line after steps:.
Select Show assistant on the right of the screen to open Tasks pane.
Select ARM template deployment.
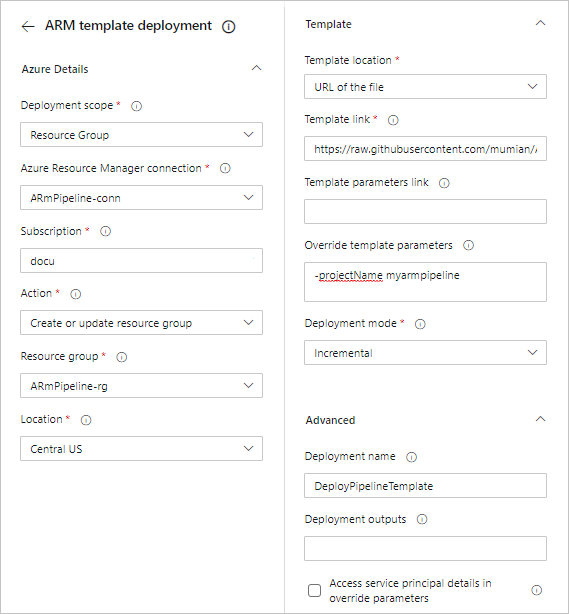
Enter the following values:
- deploymentScope: Select Resource Group. To learn more about the scopes, see Deployment scopes.
- Azure Resource Manager connection: Select the service connection name that you created earlier.
- Subscription: Specify the target subscription ID.
- Action: Select the Create Or Update Resource Group action does 2 actions - 1. create a resource group if a new resource group name is provided; 2. deploy the template specified.
- Resource group: Enter a new resource group name. For example, ARMPipeline-rg.
- Location: Select a location for the resource group, for example, Central US.
- Template location: Select URL of the file, which means the task looks for the template file by using the URL. Because relativePath is used in the main template and relativePath is only supported on URI-based deployments, you must use URL here.
- Template link: Enter the URL that you got at the end of the Prepare a GitHub repository section. It starts with
https://raw.githubusercontent.com. - Template parameters link: Leave this field blank. You will specify the parameter values in the Override template parameters.
- Override template parameters: Enter
-projectName [EnterAProjectName]. - Deployment mode: Select Incremental.
- Deployment name: Enter DeployPipelineTemplate. Select Advanced before you can see Deployment name.
Select Add.
For more information about the task, see Azure Resource Group Deployment task, and Azure Resource Manager template deployment task
The .yml file shall be similar to:
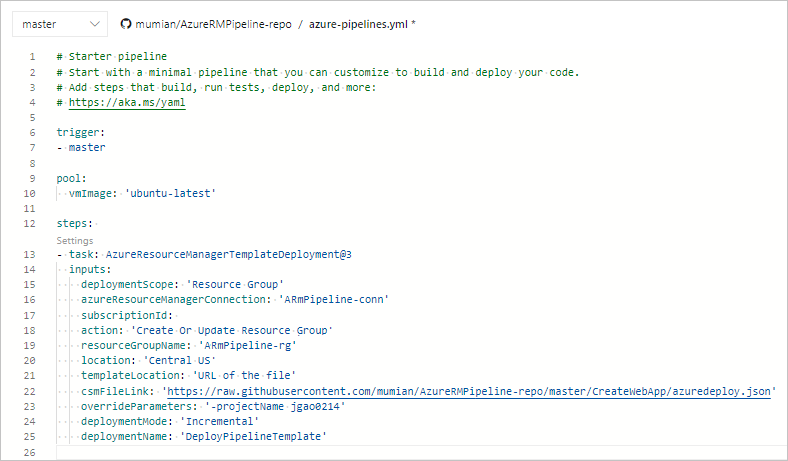
Select Save and run.
From the Save and run pane, select Save and run again. A copy of the YAML file is saved into the connected repository. You can see the YAML file by browse to your repository.
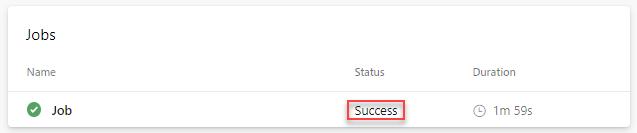
Verify that the pipeline is executed successfully.
Verify the deployment
- Sign in to the Azure portal.
- Open the resource group. The name is what you specified in the pipeline YAML file. You shall see one storage account created. The storage account name starts with store.
- Select the storage account name to open it.
- Select Properties. Notice the Replication is Locally-redundant storage (LRS).
Update and redeploy
When you update the template and push the changes to the remote repository, the pipeline automatically updates the resources, the storage account in this case.
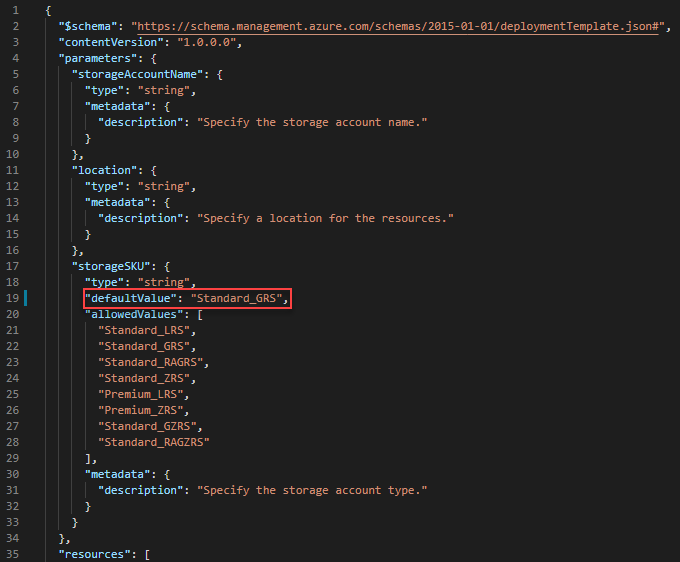
Open linkedStorageAccount.json from your local repository in Visual Studio Code or any text editor.
Update the defaultValue of storageAccountType to Standard_GRS. See the following screenshot:
Save the changes.
Push the changes to the remote repository by running the following commands from Git Bash/Shell.
git pull origin main
git add .
git commit -m "Update the storage account type."
git push origin main
The first command (
pull) syncs the local repository with the remote repository. The pipeline YAML file was only added to the remote repository. Running thepullcommand downloads a copy of the YAML file to the local branch.The fourth command (
push) uploads the revised linkedStorageAccount.json file to the remote repository. With the main branch of the remote repository updated, the pipeline is fired again.
To verify the changes, you can check the Replication property of the storage account. See Verify the deployment.
Clean up resources
When the Azure resources are no longer needed, clean up the resources you deployed by deleting the resource group.
- From the Azure portal, select Resource group from the left menu.
- Enter the resource group name in the Filter by name field.
- Select the resource group name.
- Select Delete resource group from the top menu.
You might also want to delete the GitHub repository and the Azure DevOps project.
Next steps
Congratulations, you've finished this Resource Manager template deployment tutorial. Let us know if you have any comments and suggestions in the feedback section. Thanks! You're ready to jump into more advanced concepts about templates. The next tutorial goes into more detail about using template reference documentation to help with defining resources to deploy.