Note
Access to this page requires authorization. You can try signing in or changing directories.
Access to this page requires authorization. You can try changing directories.
Learn how to deploy Azure resources based on conditions in an Azure Resource Manager template (ARM template).
In the Set resource deployment order tutorial, you create a virtual machine, a virtual network, and some other dependent resources including a storage account. Instead of creating a new storage account every time, you let people choose between creating a new storage account and using an existing storage account. To accomplish this goal, you define an additional parameter. If the value of the parameter is new, a new storage account is created. Otherwise, an existing storage account with the name provided is used.

This tutorial covers the following tasks:
- Open a Quickstart template
- Modify the template
- Deploy the template
- Clean up resources
This tutorial only covers a basic scenario of using conditions. For more information, see:
- Template file structure: Condition.
- Conditionally deploy a resource in an ARM template.
- Template function: If.
- Comparison functions for ARM templates
For a Learn module that covers conditions, see Manage complex cloud deployments by using advanced ARM template features.
If you don't have an Azure subscription, create a free account before you begin.
Prerequisites
To complete this article, you need:
Visual Studio Code with Resource Manager Tools extension. See Quickstart: Create ARM templates with Visual Studio Code.
To increase security, use a generated password for the virtual machine administrator account. You can use Azure Cloud Shell to run the following command in PowerShell or Bash:
openssl rand -base64 32To learn more, run
man openssl randto open the manual page.Azure Key Vault is designed to safeguard cryptographic keys and other secrets. For more information, see Tutorial: Integrate Azure Key Vault in ARM template deployment. We also recommend you to update your password every three months.
Open a Quickstart template
Azure Quickstart Templates is a repository for ARM templates. Instead of creating a template from scratch, you can find a sample template and customize it. The template used in this tutorial is called Deploy a simple Windows VM.
From Visual Studio Code, select File > Open File.
In File name, paste the following URL:
https://raw.githubusercontent.com/Azure/azure-quickstart-templates/master/quickstarts/microsoft.compute/vm-simple-windows/azuredeploy.jsonSelect Open to open the file.
There are six resources defined by the template:
- Microsoft.Storage/storageAccounts.
- Microsoft.Network/publicIPAddresses.
- Microsoft.Network/networkSecurityGroups.
- Microsoft.Network/virtualNetworks.
- Microsoft.Network/networkInterfaces.
- Microsoft.Compute/virtualMachines.
It is helpful to review the template reference before customizing a template.
Select File > Save As to save a copy of the file to your local computer with the name azuredeploy.json.
Modify the template
Make two changes to the existing template:
- Add a storage account name parameter. Users can specify either a new storage account name or an existing storage account name.
- Add a new parameter called
newOrExisting. The deployment uses this parameter to determine whether to create a new storage account or use an existing storage account.
Here is the procedure to make the changes:
Open azuredeploy.json in Visual Studio Code.
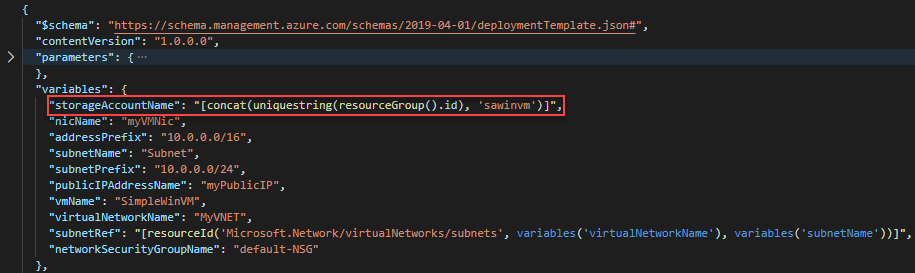
Replace the three
variables('storageAccountName')withparameters('storageAccountName')in the whole template.Remove the following variable definition:
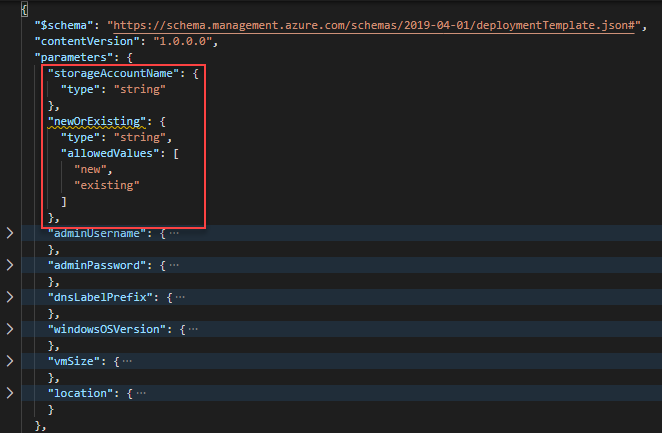
Add the following two parameters to the beginning of the parameters section:
"storageAccountName": {
  "type": "string"
},
"newOrExisting": {
  "type": "string",
  "allowedValues": [
    "new",
    "existing"
  ]
},
Press Alt+Shift+F to format the template in Visual Studio Code.
The updated parameters definition looks like:
Add the following line to the beginning of the storage account definition.
"condition": "[equals(parameters('newOrExisting'),'new')]",The condition checks the value of the parameter
newOrExisting. If the parameter value is new, the deployment creates the storage account.The updated storage account definition looks like:

Update the
storageUriproperty of the virtual machine resource definition with the following value:"storageUri": "[format('https://{0}.blob.core.windows.net', parameters('storageAccountName'))]"This change is necessary when you use an existing storage account under a different resource group.
Save the changes.
Deploy the template
Sign in to Cloud Shell.
Choose your preferred environment by selecting either PowerShell or Bash (for CLI) on the upper left corner. Restarting the shell is required when you switch.
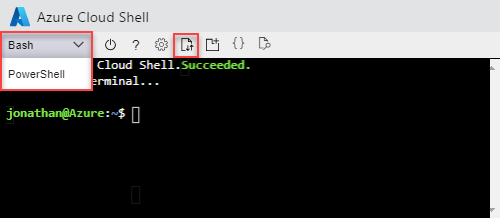
Select Upload/download files, and then select Upload. See the previous screenshot. Select the file you saved in the previous section. After uploading the file, you can use the
lscommand and thecatcommand to verify the file was uploaded successfully.Run the following PowerShell script to deploy the template.
Important
The storage account name must be unique across Azure. The name must have only lowercase letters or numbers. It can be no longer than 24 characters. The storage account name is the project name with store appended. Make sure the project name and the generated storage account name meet the storage account name requirements.
$projectName = Read-Host -Prompt "Enter a project name that is used to generate resource group name and resource names"
$newOrExisting = Read-Host -Prompt "Create new or use existing (Enter new or existing)"
$location = Read-Host -Prompt "Enter the Azure location (i.e. centralus)"
$vmAdmin = Read-Host -Prompt "Enter the admin username"
$vmPassword = Read-Host -Prompt "Enter the admin password" -AsSecureString
$dnsLabelPrefix = Read-Host -Prompt "Enter the DNS Label prefix"

$resourceGroupName = "${projectName}rg"
$storageAccountName = "${projectName}store"

New-AzResourceGroup -Name $resourceGroupName -Location $location
New-AzResourceGroupDeployment `
    -ResourceGroupName $resourceGroupName `
    -adminUsername $vmAdmin `
    -adminPassword $vmPassword `
    -dnsLabelPrefix $dnsLabelPrefix `
    -storageAccountName $storageAccountName `
    -newOrExisting $newOrExisting `
    -TemplateFile "$HOME/azuredeploy.json"

Write-Host "Press [ENTER] to continue ..."
Note
The deployment fails if
newOrExistingis new, but the storage account with the storage account name specified already exists.
Try making another deployment with newOrExisting set to existing and specify an existing storage account. To create a storage account beforehand, see Create a storage account.
Clean up resources
When the Azure resources are no longer needed, clean up the resources you deployed by deleting the resource group. To delete the resource group, select Try it to open the Cloud Shell. To paste the PowerShell script, right-click the shell pane, and then select Paste.
$projectName = Read-Host -Prompt "Enter the same project name you used in the last procedure"
$resourceGroupName = "${projectName}rg"

Remove-AzResourceGroup -Name $resourceGroupName

Write-Host "Press [ENTER] to continue ..."
Next steps
In this tutorial, you developed a template that allows users to choose between creating a new storage account and using an existing storage account. To learn how to retrieve secrets from Azure Key Vault, and use the secrets as passwords in the template deployment, see: