Note
Access to this page requires authorization. You can try signing in or changing directories.
Access to this page requires authorization. You can try changing directories.
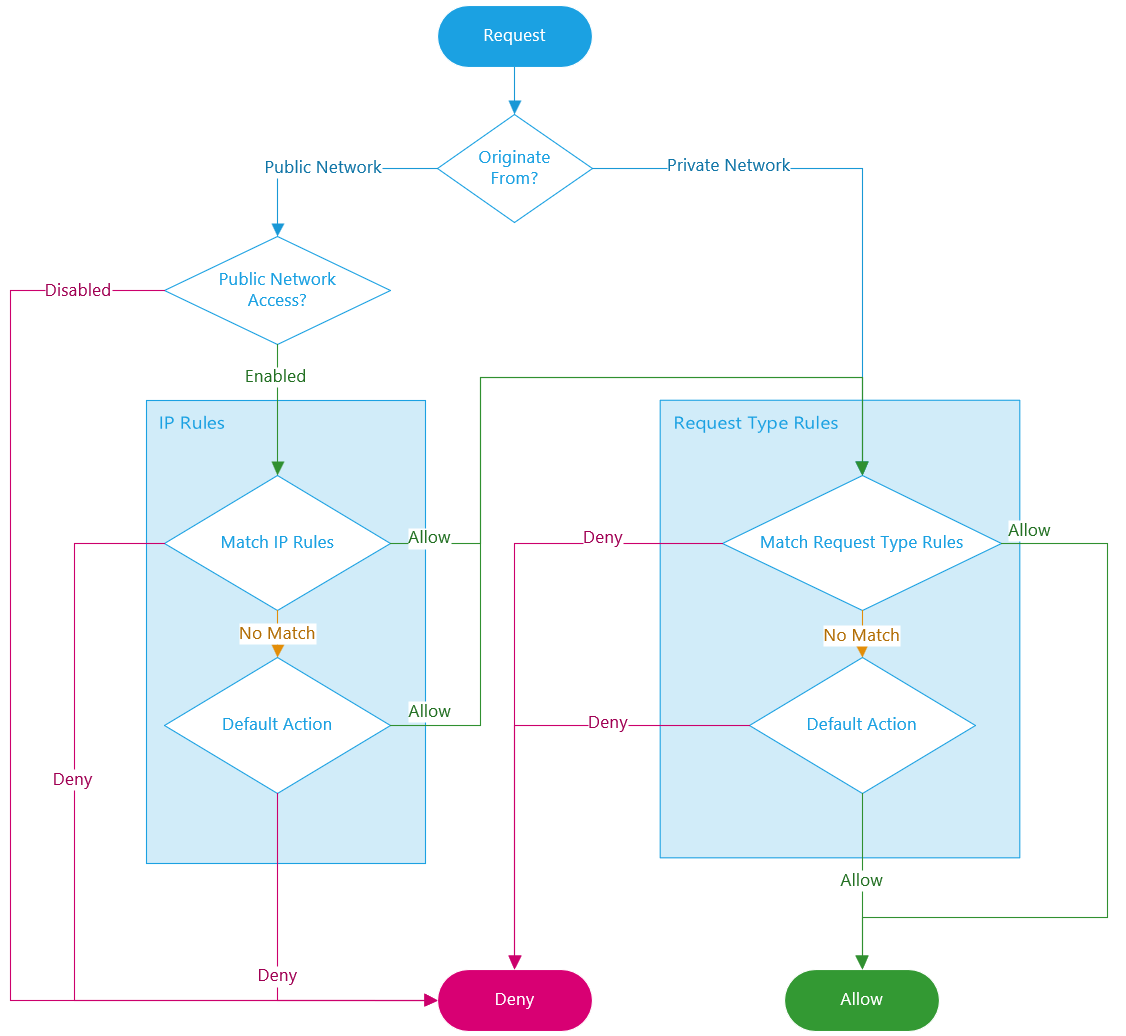
Azure SignalR Service allows you to secure and manage access to your service endpoint based on request types and network subsets. When you configure network access control rules, only applications making requests from the specified networks can access your SignalR Service.
Important
An application that accesses a SignalR Service when network access control rules are in effect still requires proper authorization for the request.
Public Network Access
We offer a single, unified switch to simplify the configuration of public network access. The switch has following options:
- Disabled: Completely blocks public network access. All other network access control rules are ignored for public networks.
- Enabled: Allows public network access, which is further regulated by additional network access control rules.
Go to the SignalR Service instance you want to secure.
Select Networking from the left side menu. Select Public access tab:
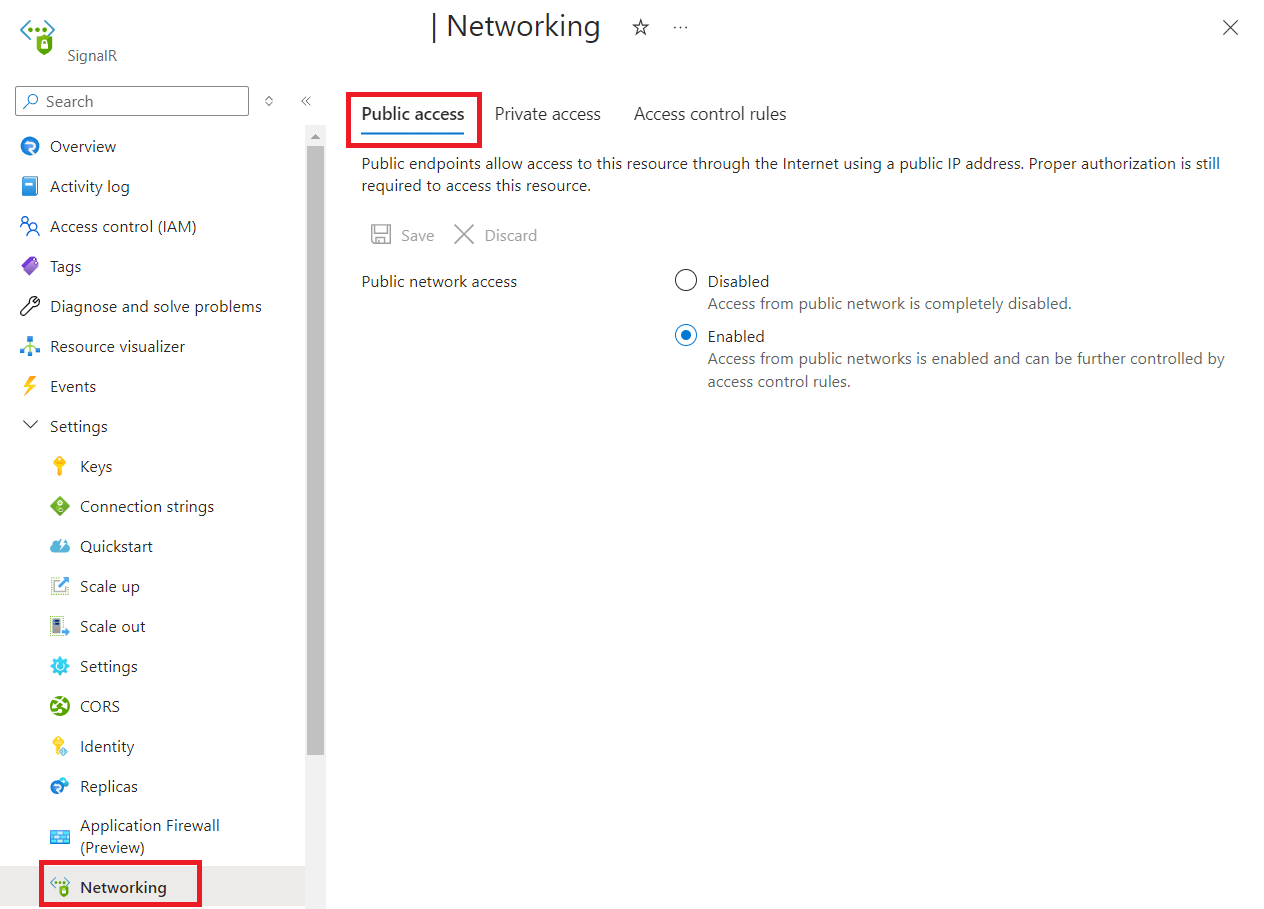
Select Disabled or Enabled.
Select Save to apply your changes.
Default Action
The default action is applied when no other rule matches.
Go to the SignalR Service instance you want to secure.
Select Network access control from the left side menu.
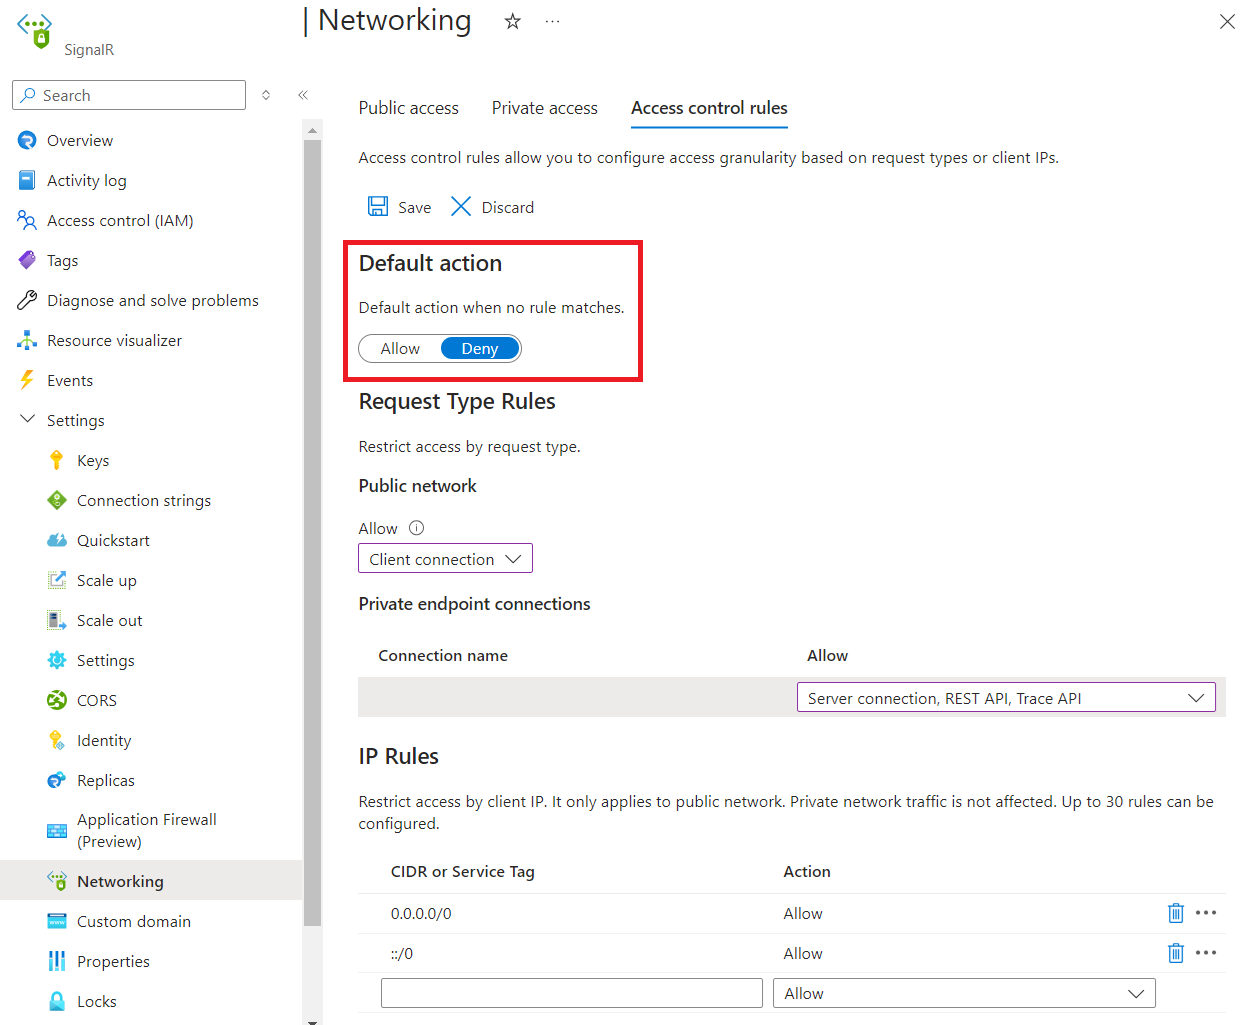
To edit the default action, toggle the Allow/Deny button.
Select Save to apply your changes.
Request Type Rules
You can configure rules to allow or deny specified request types for both the public network and each private endpoint.
For example, Server Connections are typically high-privileged. To enhance security, you may want to restrict their origin. You can configure rules to block all Server Connections from public network, and only allow they originate from a specific virtual network.
If no rule matches, the default action is applied.
Go to the SignalR Service instance you want to secure.
Select Network access control from the left side menu.

To edit public network rule, select allowed types of requests under Public network.
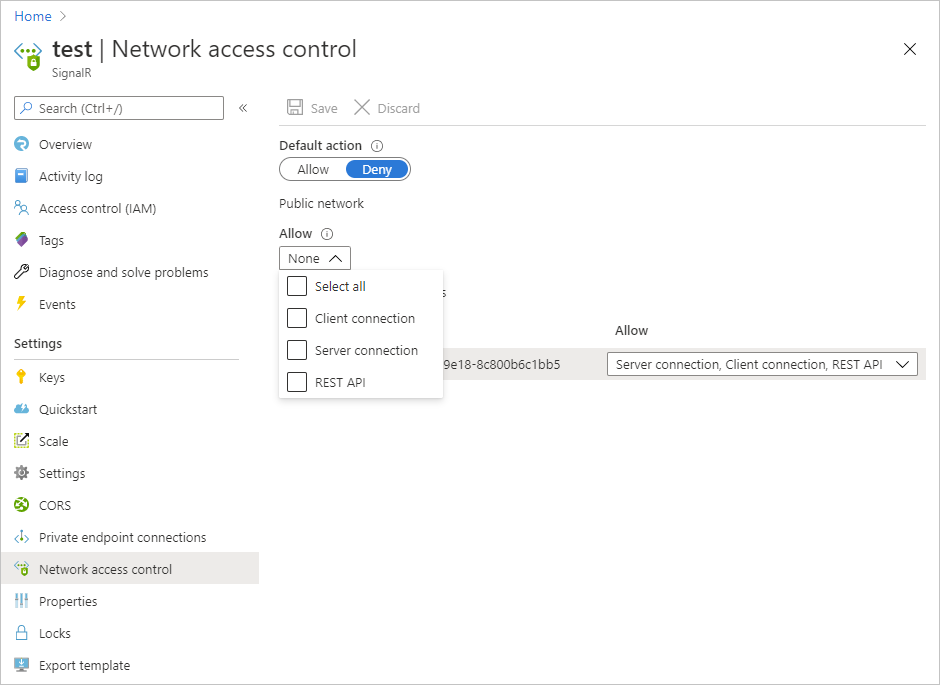
To edit private endpoint network rules, select allowed types of requests in each row under Private endpoint connections.
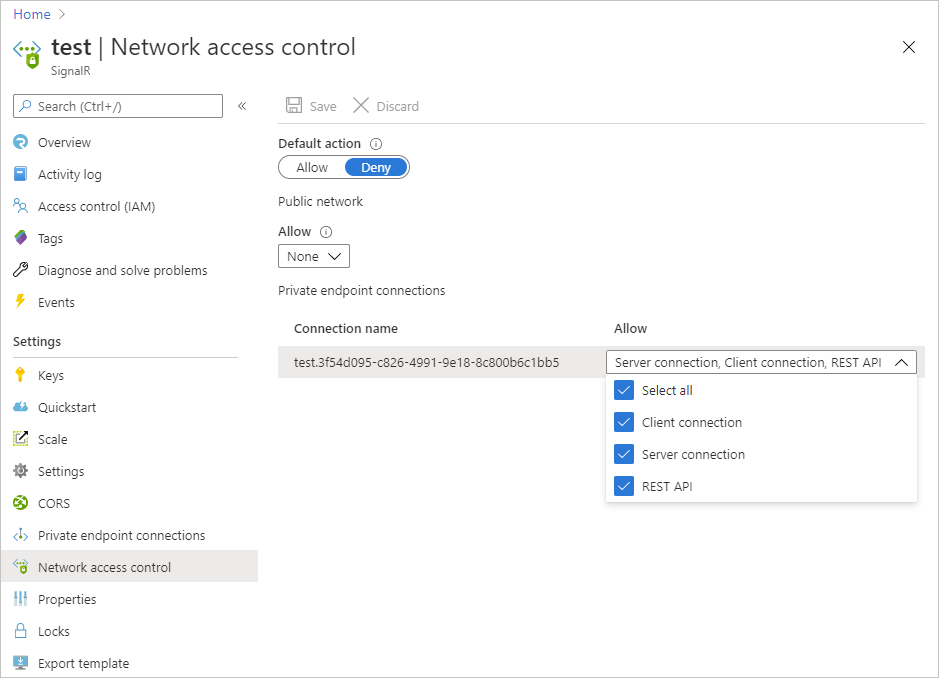
Select Save to apply your changes.
IP Rules
IP rules allow you to grant or deny access to specific public internet IP address ranges. These rules can be used to permit access for certain internet-based services and on-premises networks or to block general internet traffic.
The following restrictions apply:
- You can configure up to 30 rules.
- Address ranges must be specified using CIDR notation, such as
16.17.18.0/24. Both IPv4 and IPv6 addresses are supported. - IP rules are evaluated in the order they are defined. If no rule matches, the default action is applied.
- IP rules apply only to public traffic and cannot block traffic from private endpoints.
Go to the SignalR Service instance you want to secure.
Select Networking from the left side menu. Select Access control rules tab:
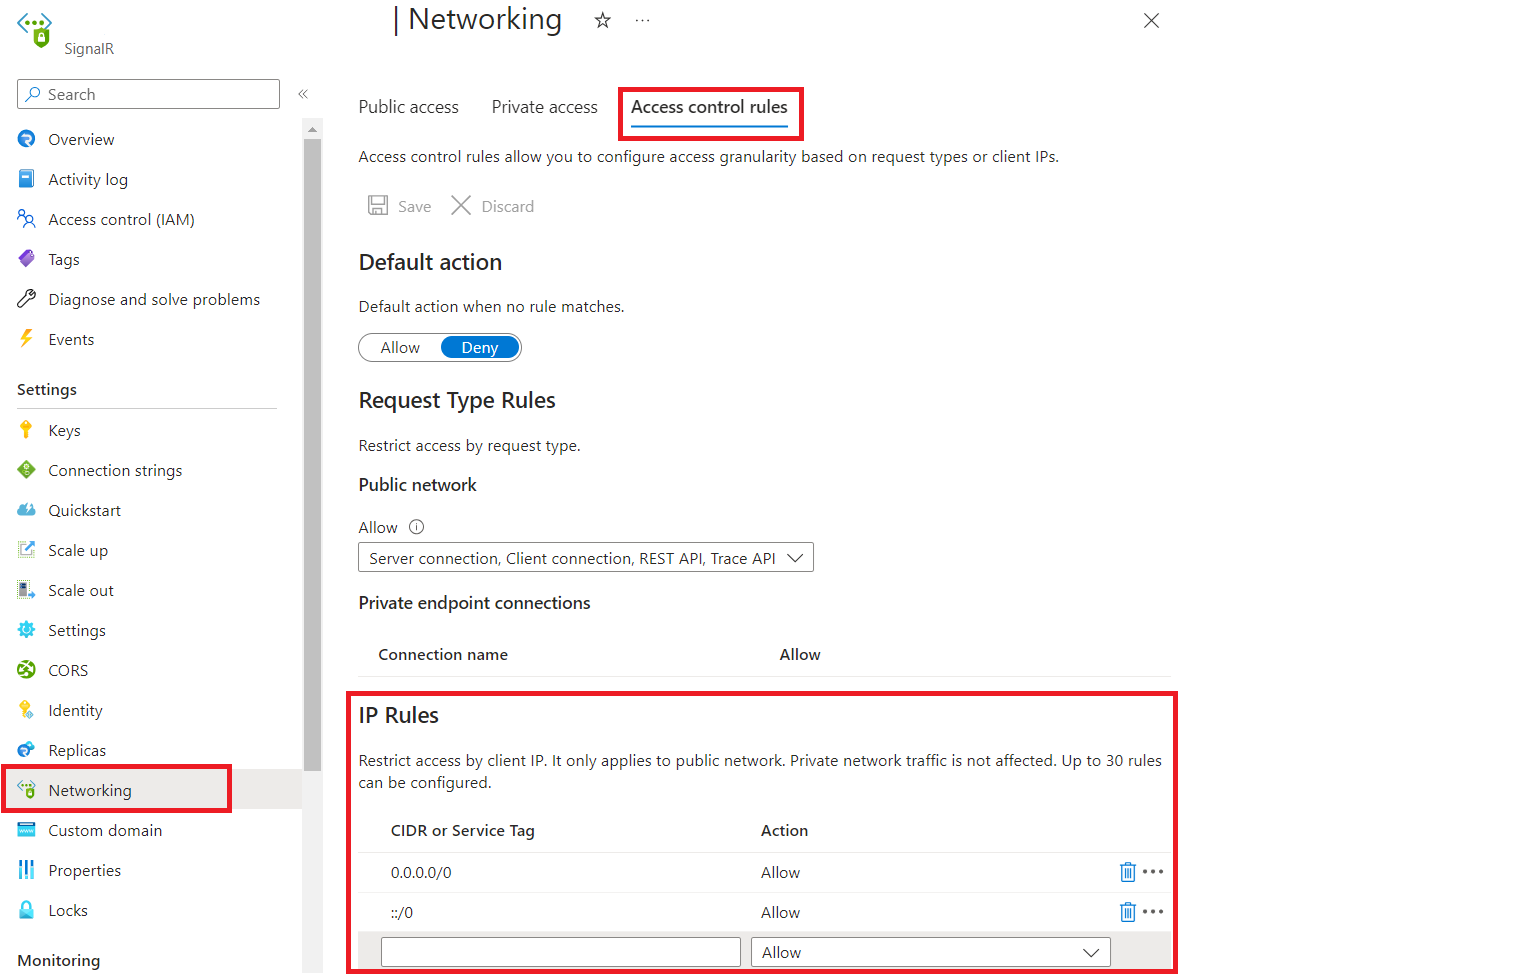
Edit the list under IP rules section.
Select Save to apply your changes.
Next steps
Learn more about Azure Private Link.