Note
Access to this page requires authorization. You can try signing in or changing directories.
Access to this page requires authorization. You can try changing directories.
Azure Front Door is a modern cloud-native application delivery network (ADN) that provides dynamic site acceleration, global load balancing, TLS termination, and application layer security. It operates at the HTTP/HTTPS layer (Layer 7) and acts as the entry point for web applications—routing and optimizing traffic based on attributes such as URL paths, latency, and health status of backends.
A key benefit of Azure Front Door is its native support for WebSocket and WebSocket Secure (WSS) connections. This support enables real-time, bi-directional communication between clients and backend services without requiring any special configuration.
In this guide, we demonstrate how to use Azure Front Door with Azure SignalR Service to front-end your real-time applications. By routing traffic through Front Door, you can:
- Apply WebSocket support with global reach and edge acceleration,
- Apply centralized security policies, such as WAF rules and rate limiting,
- Reduce public exposure of your backend services.
As shown in the diagram, you configure Azure Front Door to route WebSocket traffic to your SignalR-powered application backend. This setup ensures that your real-time functionality benefits from low-latency, scalable, and secure traffic handling through Azure’s global edge network.
Set up and configure Azure Front Door
Create an Azure SignalR Service resource
Follow the article and create a SignalR Service resource
Create an Azure Front Door resource
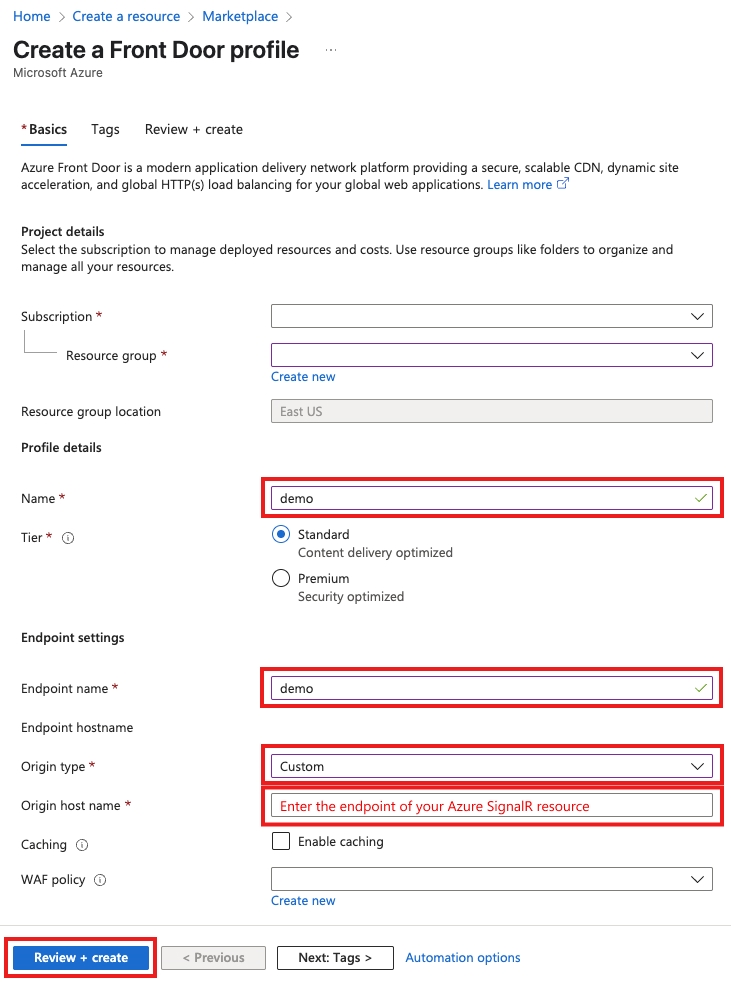
On the Azure portal, search for Front Door and Create.
Quick test
Conduct quick tests to verify that SignalR endpoint is healthy and Azure Front Door resource is correctly configured.
Send a request to <your-SignalR-resource-endpoint>/client and it should return 400 with error message 'hub' query parameter is required. This message means that the request arrived at SignalR Service and the service performed validation as expected.
curl -v <your-SignalR-resource-endpoint>/client
Returns
< HTTP/1.1 400 Bad Request
< ...
<
'hub' query parameter is required.
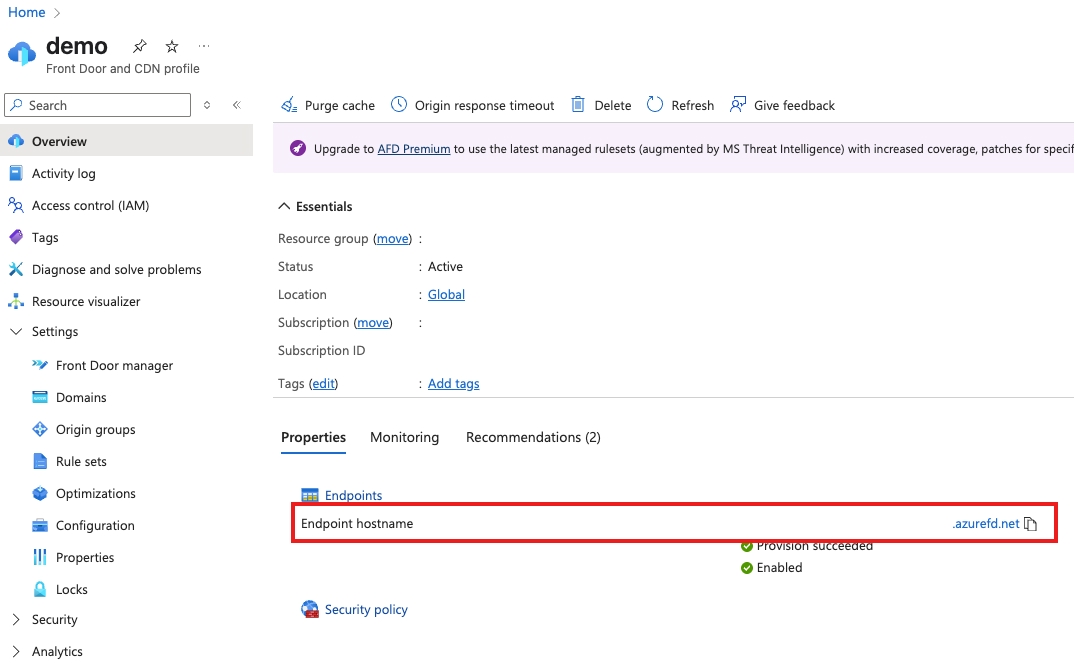
Send a request to the same health endpoint of Azure SignalR through Azure Front Door http://<the-hostname-of-your-Azure-Front-Door-resource>/client. Go to the Overview tab of the created Azure Front Door resource, and locate the endpoint hostname.
curl -I http://<the-hostname-of-your-Azure-Front-Door-resource>/client
It should also return 400 with error message 'hub' query parameter is required. This message confirms that the request successfully went through Azure Front Door to SignalR Service.
< HTTP/1.1 400 Bad Request
< ...
<
'hub' query parameter is required.
Run a SignalR sample app through Azure Front Door
Now that we can verify that the traffic can reach SignalR Service through Azure Front Door. Next, we use a barebone sample app to demonstrate Azure Front Door's ability to route WebSocket traffic without configuration. We take a step-by-step approach so that you can follow along, if needed.
Create the project
mkdir afd-demo
cd afd-demo

touch afd-demo.csproj
Paste in the content to the afd-demo.csproj file. This project uses only the "Microsoft.Azure.SignalR" package.
<Project Sdk="Microsoft.NET.Sdk.Web">
  <PropertyGroup>
    <TargetFramework>net7.0</TargetFramework>
    <Nullable>enable</Nullable>
    <ImplicitUsings>enable</ImplicitUsings>
    <RootNamespace>afd_demo</RootNamespace>
  </PropertyGroup>
  <ItemGroup>
    <PackageReference Include="Microsoft.Azure.SignalR" Version="1.30.2" />
  </ItemGroup>
</Project>
Configure app settings
Create an appsettings.json file and paste in the content. The values will be referenced in the Program.cs file, which we create in the next step. Add a ClientEndpoint section in the ConnectionString.
touch appsettings.json
Raw connection strings appear in this article for demonstration purposes only. In production environments, always protect your access keys. Use Azure Key Vault to manage and rotate your keys securely and secure your connection string using Microsoft Entra ID and authorize access with Microsoft Entra ID.
{
  "Azure": {
    "SignalR": {
      "ConnectionString": "<the-connection-string-of-your-Azure-SignalR-resource>;ClientEndpoint=<the-endpoint-of-your-Azure-Front-Door-resource>"
    }
  }
}
Create Program.cs file
touch Program.cs
Paste in the code to the Program.cs file. The web app defines a SignalR hub and serves index.html at the web root.
using Microsoft.Azure.SignalR;
var builder = WebApplication.CreateBuilder(args);

// Automatically read in the configuration from `appsettings.json`
builder.Services.AddSignalR().AddAzureSignalR();

var app = builder.Build();
app.UseStaticFiles();

app.UseRouting();

app.MapHub<DemoHub>("/demohub");

app.MapGet("/", async context =>
{
    var path = Path.Combine(Directory.GetCurrentDirectory(), "wwwroot", "index.html");
    context.Response.ContentType = "text/html";
    await context.Response.SendFileAsync(path);
});

app.Run();
Define a SignalR hub
mkdir hubs && cd hubs
touch demohubs.cs
Paste in the code to the demohubs.cs file. For simplicity, the hub exposes only BroadcastMessage method to SignalR client, which broadcasts the received message to all connected SignalR clients.
using Microsoft.AspNetCore.SignalR;

public class DemoHub : Hub
{
    public Task BroadcastMessage(string message) =>
        Clients.All.SendAsync("broadcastMessage", message);
}
Define Web UI
Make sure you're at the root of the project folder.
mkdir wwwroot && cd wwwroot
touch index.html
Paste in the code to index.html. The user interface consists of a <textarea> to receive text input from user and a <button> to send the user input through a SignalR connection. Since we defined the SignalR server's behavior to broadcast received messages, you see the same message logged to the browser console.
<!DOCTYPE html>
<html>

<head>
  <meta http-equiv="Cache-Control" content="no-cache, no-store, must-revalidate" />
  <meta name="viewport" content="width=device-width">
  <meta http-equiv="Pragma" content="no-cache" />
  <meta http-equiv="Expires" content="0" />
  <title>Azure SignalR with Azure Front Door as the reverse proxy</title>
</head>

<body>
  <div>
    <textarea id="message" style="display: block; width: 100%; padding: 5px 10px; max-width: 400px; margin-bottom: 8px;"
      placeholder="Your message..."></textarea>
    <button id="btn-send" disabled>Send</button>
  </div>

  <!--Reference the SignalR library. -->
  <script src="https://cdnjs.cloudflare.com/ajax/libs/microsoft-signalr/6.0.1/signalr.js"></script>

  <script type="module">
    document.addEventListener("DOMContentLoaded", async function () {
      const connection = new signalR.HubConnectionBuilder()
        .withUrl("/demohub")
        .build();

      connection.on("broadcastMessage", (msg) => {
        console.log(msg)
      })
      await connection.start();
      document.getElementById("btn-send").removeAttribute("disabled")

      document.getElementById("btn-send").addEventListener("click", () => {
        const message = document.getElementById("message").value
        if (message !== "") {
          connection.send("broadcastMessage", message)
          document.getElementById("message").value = ""
        } else {
          alert("Message body is empty. Please enter message.")
        }
      })
    })
  </script>
</body>

</html>
Run the app and verify the flow of message through Azure Front Door
That is all the code to the sample. Let's run the app.
  dotnet restore
  dotnet run
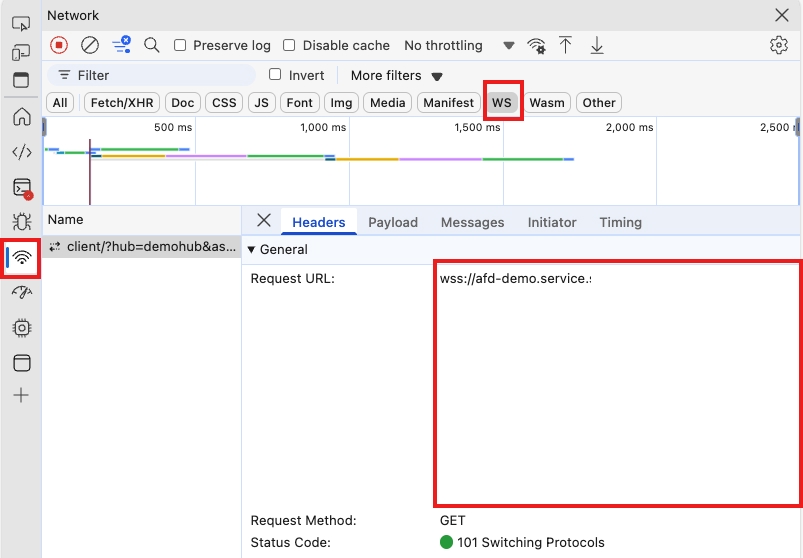
Open http://localhost:5129 from the browser and use F12 keyboard shortcut to open developer tools. Head to the network panel, you can see that the WebSocket connection is indeed established with Azure Front Door.
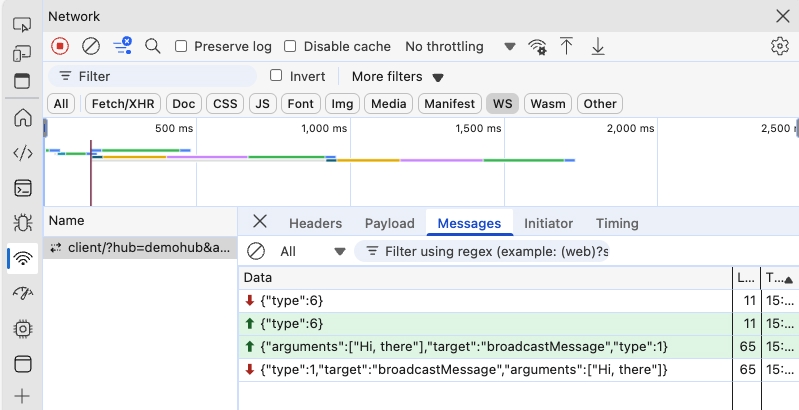
Try to type something in the text box and hit the send button. You see the message is logged to browser console as expected.
You can also inspect the flow of messages in the network panel.