Try Azure SQL Database free with Azure free account (old offer)
Azure SQL Database is an intelligent, scalable, relational database service built for the cloud. SQL Database is a fully managed platform as a service (PaaS) database engine that handles most database management functions such as upgrading, patching, backups, and monitoring without user involvement.
This offer is still active for existing resources for 12 months after provisioning, providing a S0 database with 10 database transaction units and 250-GB storage for an Azure free account.
Important
This free offer has been replaced by the Azure SQL Database free offer, see Try Azure SQL Database for free. Starting in September 2023, you can try Azure SQL Database free of charge and get 100,000 vCore seconds of compute every month, for the life of your subscription. This free offer provides a General Purpose database for the lifetime of your subscription.
Monitor and track service usage of previous free offer
You aren't charged for the Azure SQL Database included with your Azure free account unless you exceed the free service limit. To remain within the limit, use the Azure portal to track and monitor your free services usage.
To track usage, follow these steps:
In the Azure portal, search for Subscriptions and select the free trial subscription.
On the Overview page, scroll down to see the tile Top free services by usage, and then select View all free services.
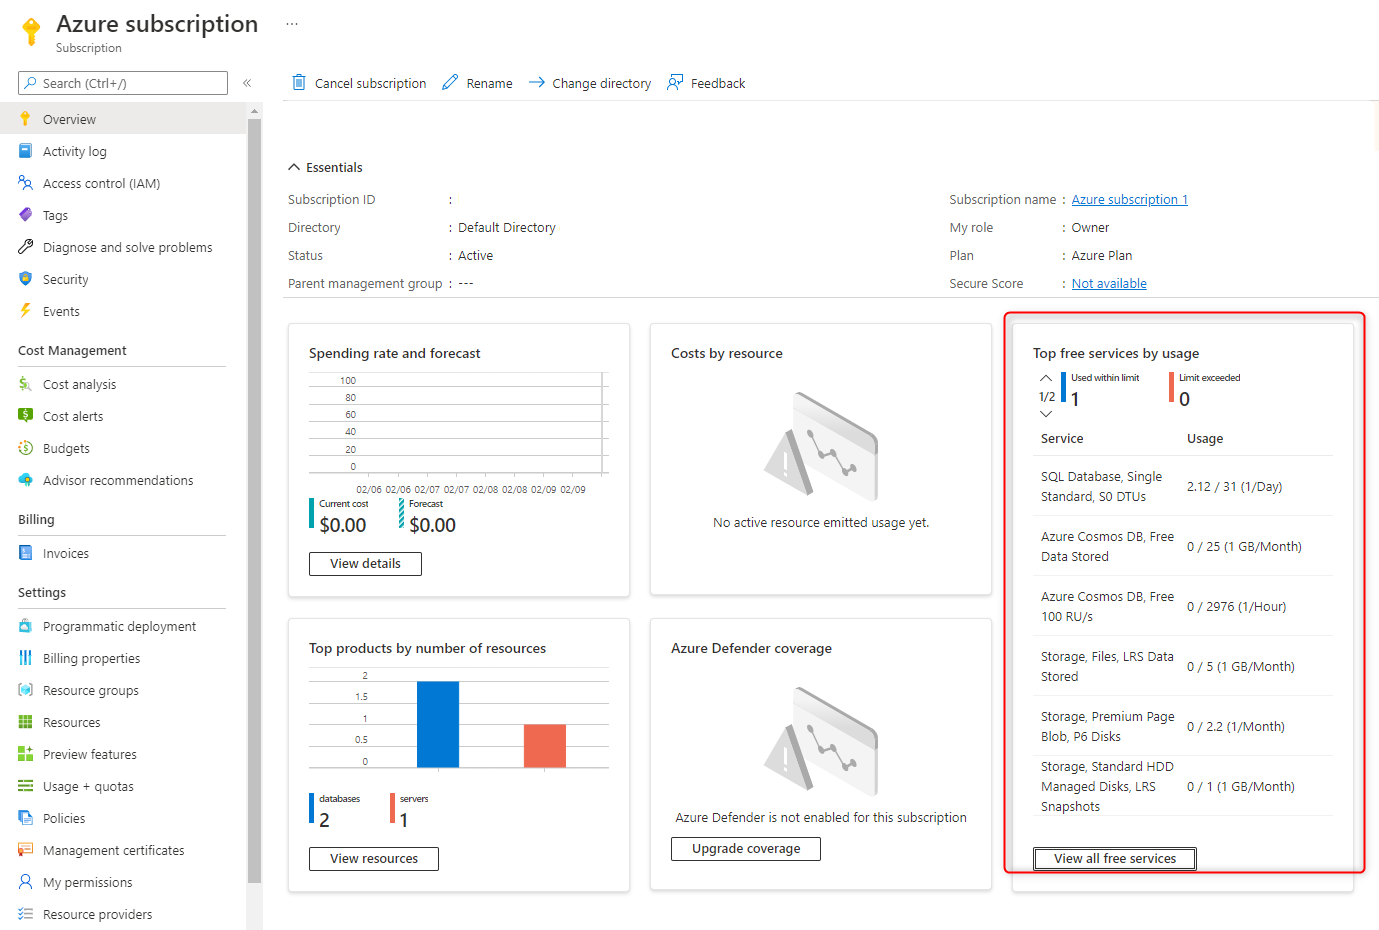
Locate the meters related to Azure SQL Database to track usage.
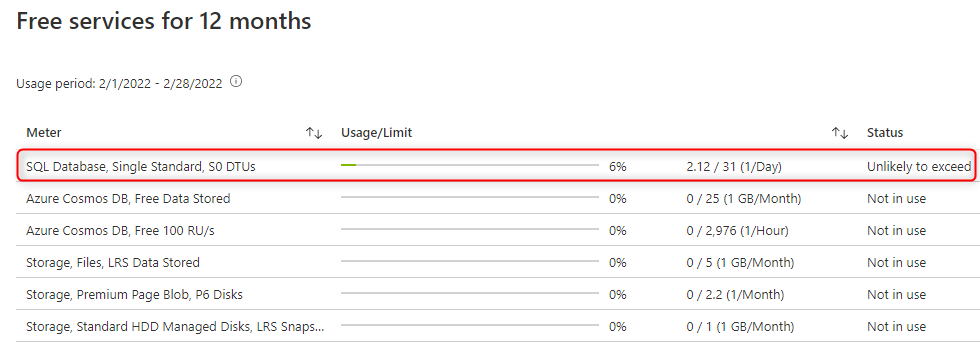
The following table describes the values on the track usage page:
| Value | Description |
|---|---|
| Meter | Identifies the unit of measure for the service being consumed. For example, the meter for Azure SQL Database is SQL Database, Single Standard, S0 DTUs, which tracks the number of S0 databases used per day, and has a monthly limit of 1. |
| Usage/limit | The usage of the meter for the current month, and the limit for the meter. |
| Status | The current status of your usage of the service defined by the meter. The possible values for status are: Not in use: You haven't used the meter or the usage for the meter hasn't reached the billing system. Exceeded on <Date>: You've exceeded the limit for the meter on <Date>. Unlikely to Exceed: You're unlikely to exceed the limit for the meter. Exceeds on <Date>: You're likely to exceed the limit for the meter on <Date>. |
- With an Azure free account, you also get $200 in credit to use in 30 days. During this time, any usage of the service beyond the free monthly amount is deducted from this credit.
- At the end of your first 30 days or after you spend your $200 credit (whichever comes first), you'll only pay for what you use beyond the free monthly amount of services. To keep getting free services after 30 days, move to pay-as-you-go pricing. If you don't move to pay as you go, you can't purchase Azure services beyond your $200 credit and eventually your account and services are disabled.
- For more information, see Azure free account FAQ.
Clean up resources
When you're finished using these resources, you can delete the resource group you created, which also delete the server and single database within it.
To delete myResourceGroup and all its resources using the Azure portal:
- In the portal, search for and select Resource groups, and then select
myResourceGroupfrom the list. - On the resource group page, select Delete resource group.
- Under Type the resource group name, enter
myResourceGroup, and then select Delete.
Next step
Feedback
Coming soon: Throughout 2024 we will be phasing out GitHub Issues as the feedback mechanism for content and replacing it with a new feedback system. For more information see: https://aka.ms/ContentUserFeedback.
Submit and view feedback for