Note
Access to this page requires authorization. You can try signing in or changing directories.
Access to this page requires authorization. You can try changing directories.
Applies to: ![]() Azure SQL Database
Azure SQL Database
This article provides samples to configure and manage an Azure SQL Database Hyperscale named replica.
Create a Hyperscale named replica
The following sample scenarios guide you to create a named replica WideWorldImporters_NamedReplica for database WideWorldImporters, using the Azure portal, T-SQL, PowerShell, or Azure CLI.
The following example creates a named replica WideWorldImporters_NamedReplica for database WideWorldImporters using T-SQL. The primary replica uses service level objective HS_Gen5_4, while the named replica uses HS_Gen5_2. Both use the same logical server named contosoeast.
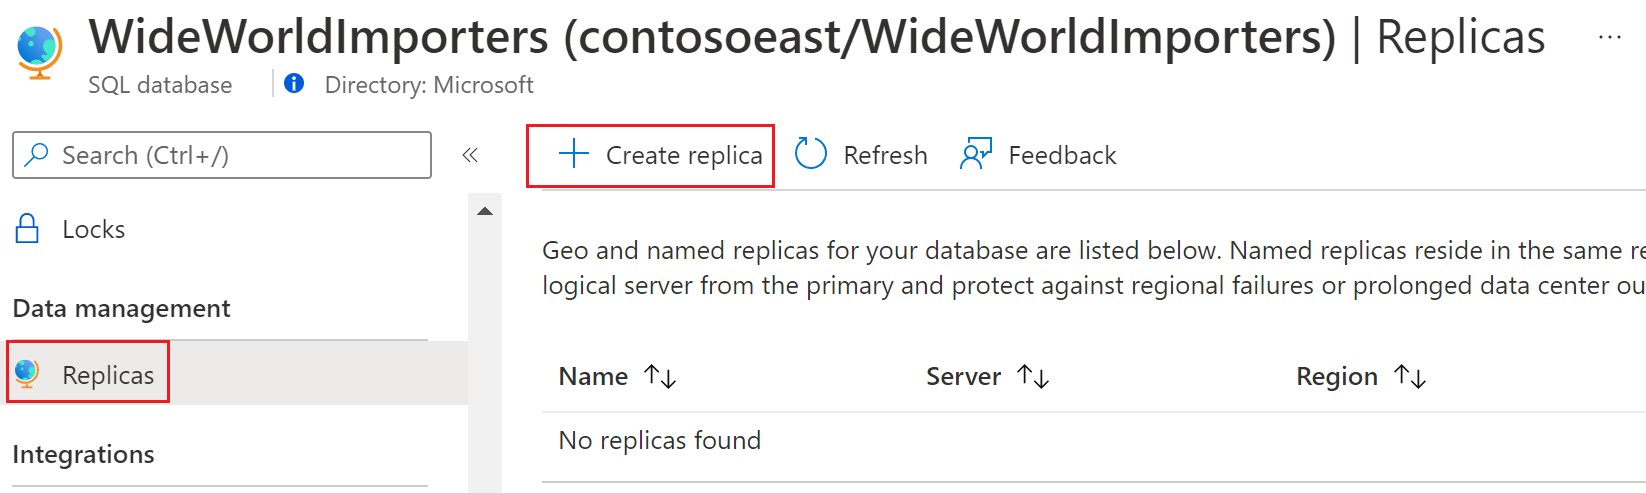
In the Azure portal, browse to the database for which you want to create the named replica.
On the SQL Database page, select your database, scroll to Data management, select Replicas, and then select Create replica.
Choose Named replica under Replica configuration. Select an existing server or create a new server for the named replica. Enter named replica database name and configure the Compute + storage options if necessary.
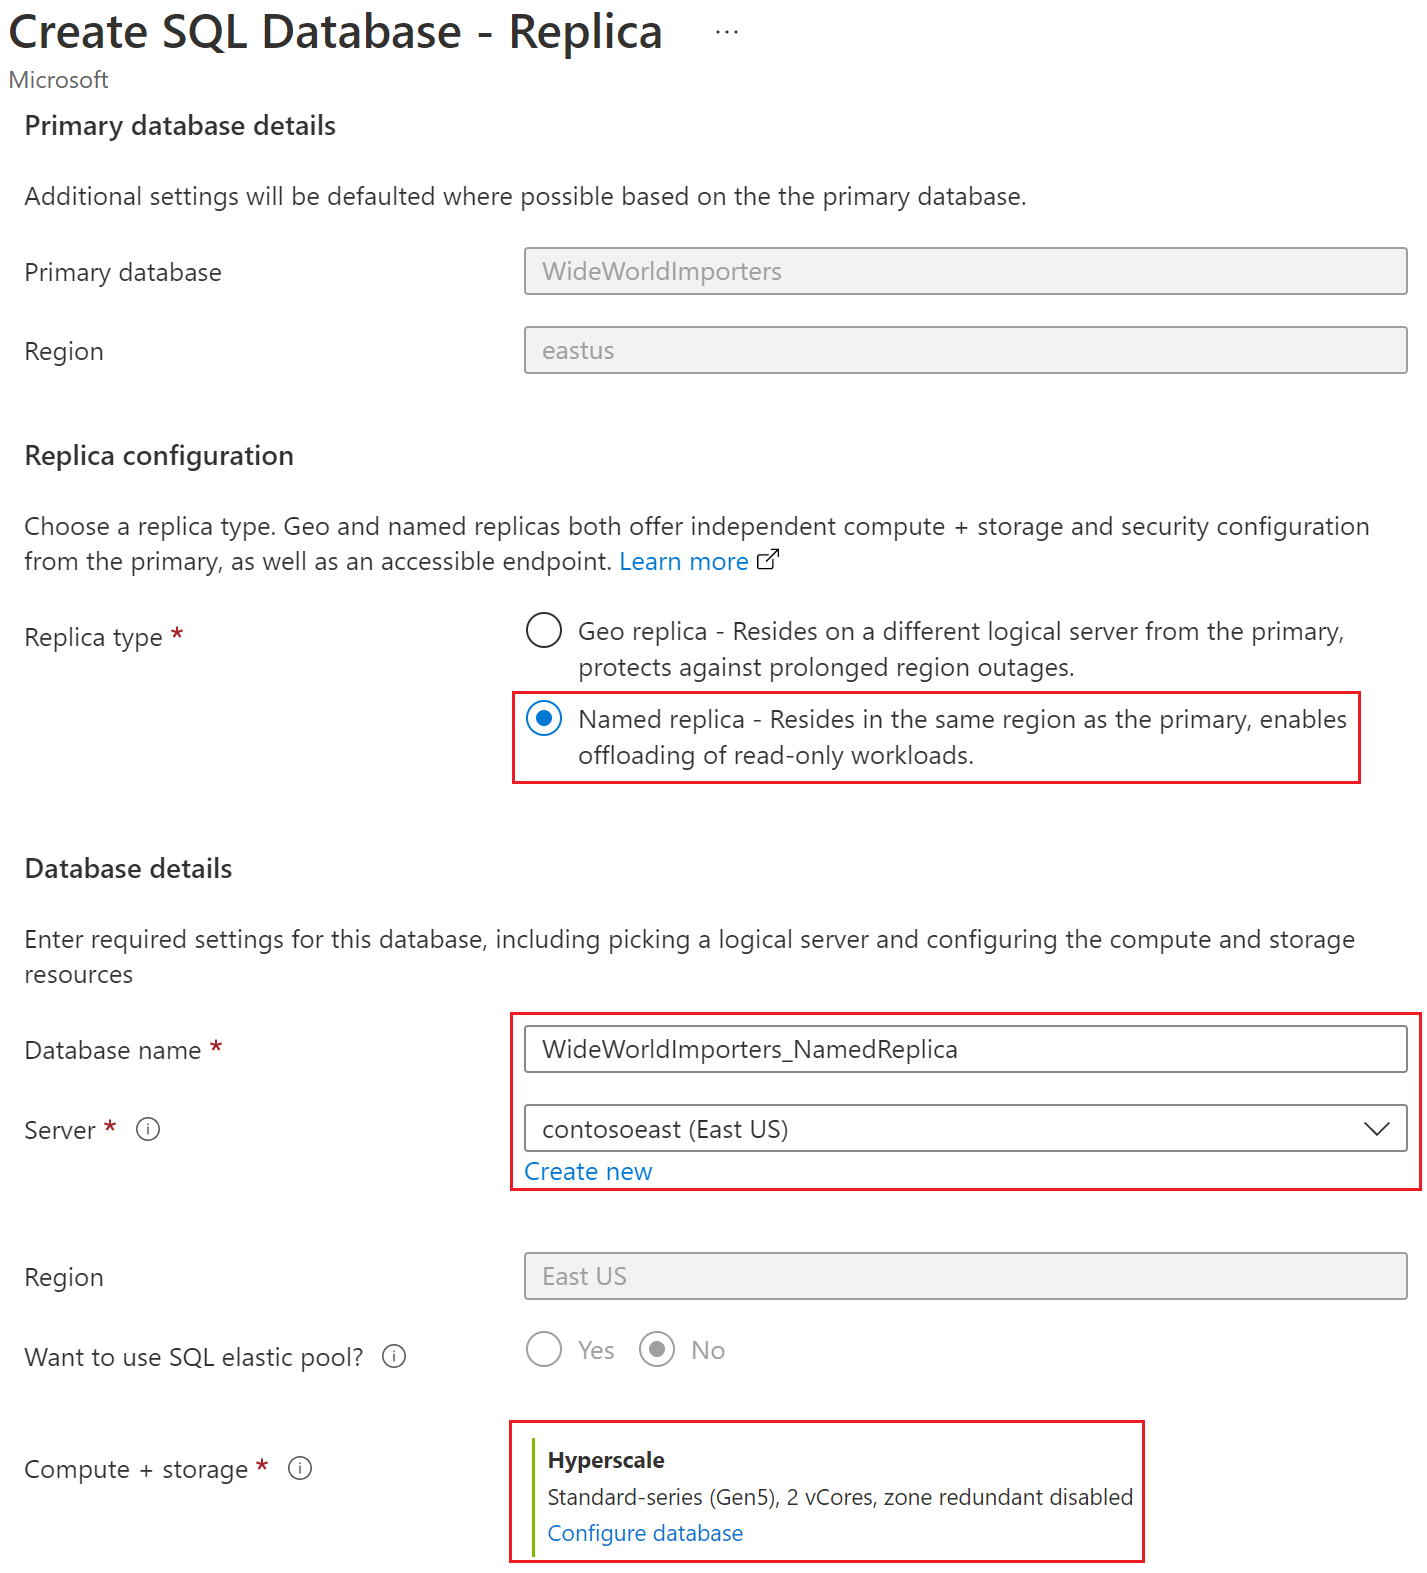
Optionally, configure a zone redundant Hyperscale named replica. For more information, see Zone redundancy in Azure SQL Database Hyperscale named replicas.
- In the Configure database page, select Yes for Would you like to make this database zone redundant?
- Add at least one High-Availability Secondary Replica to your configuration.
- Select Apply.
Select Review + create, review the information, and then select Create.
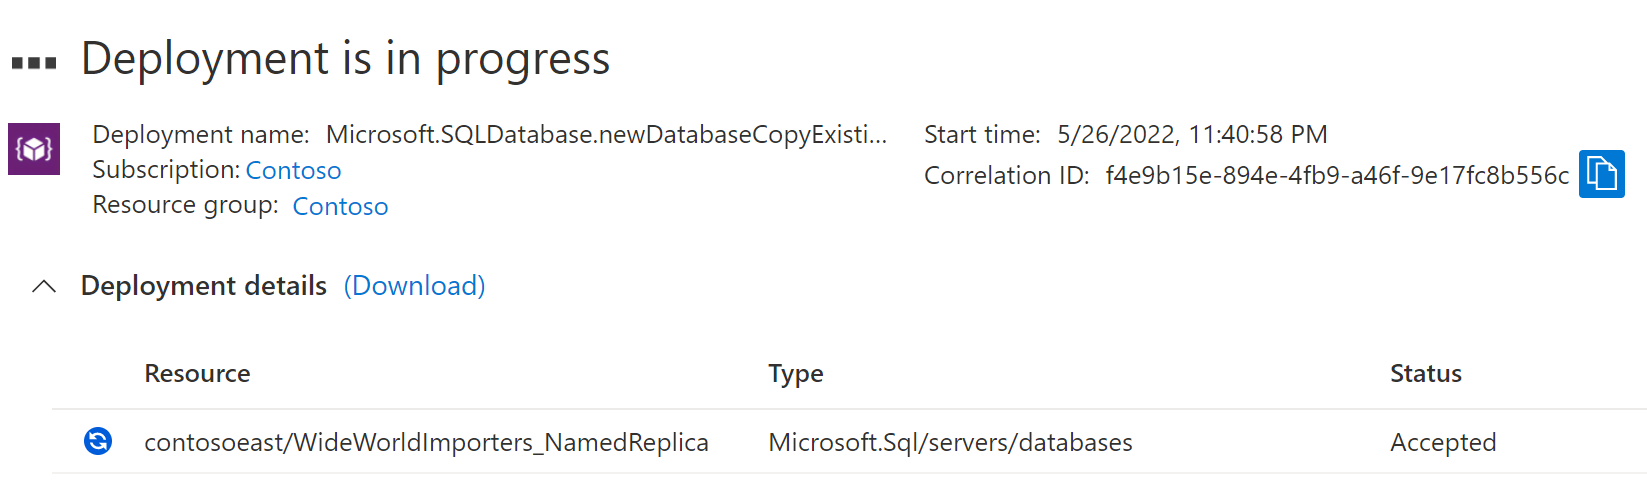
The named replica deployment process begins.
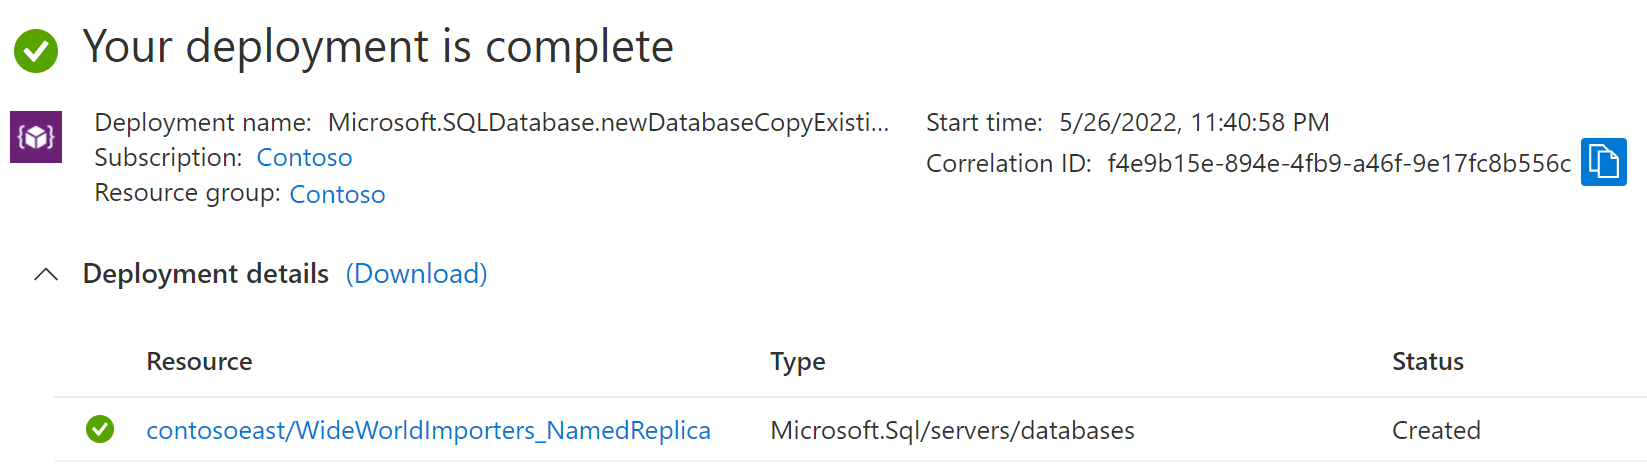
When the deployment is complete, the named replica displays its status.
Return to the primary database page, and then select Replicas. Your named replica is listed under Named replicas.
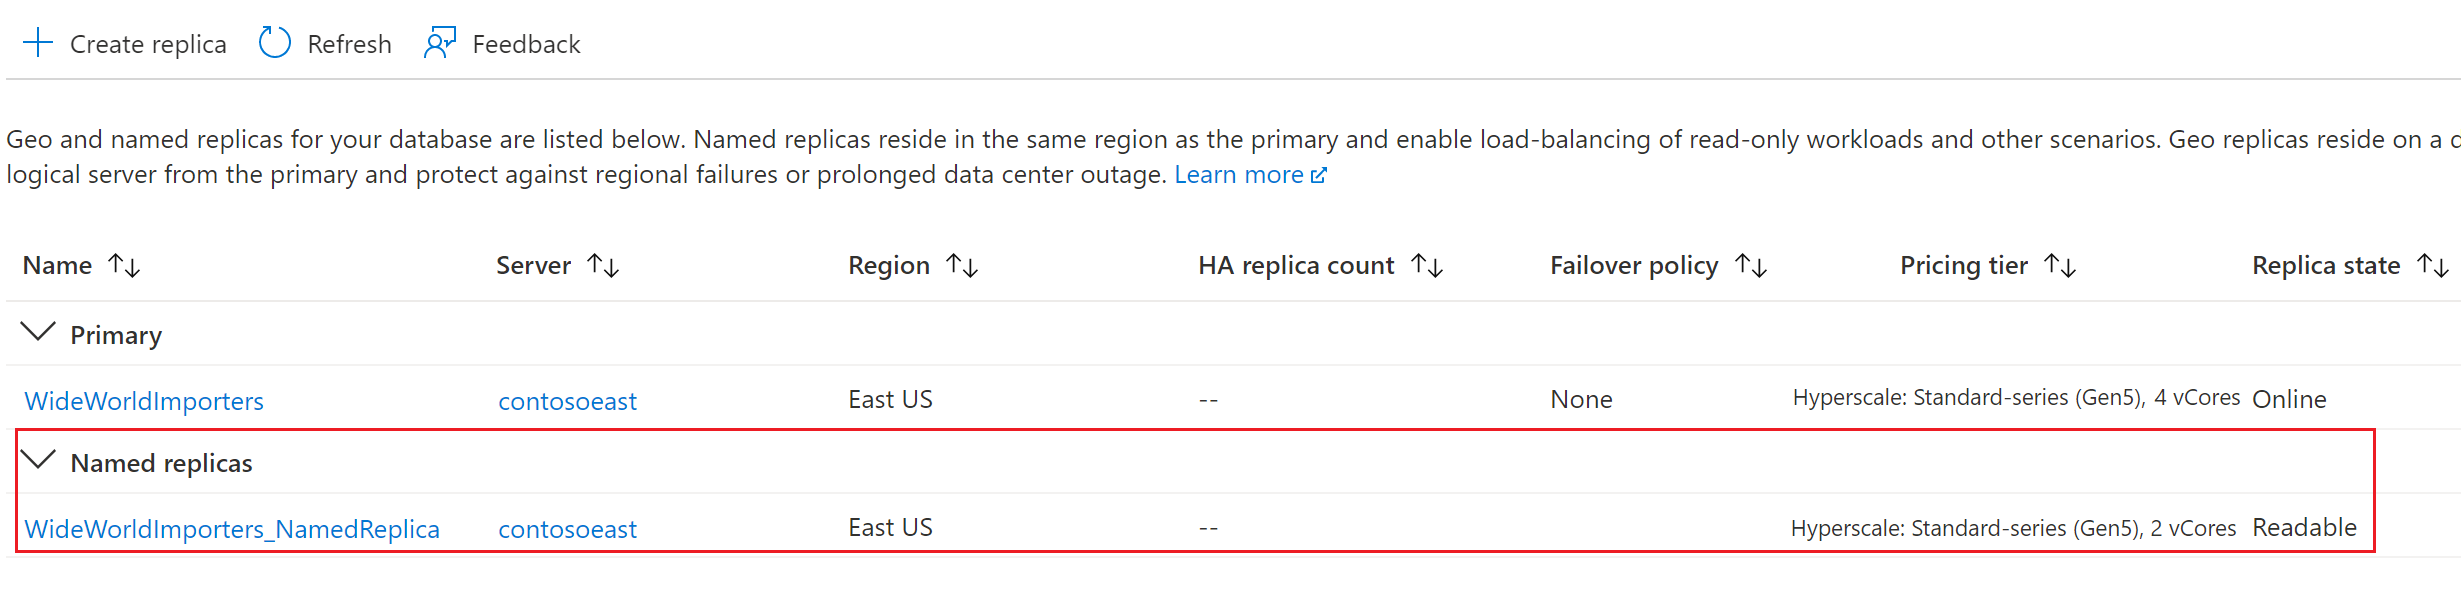


As there is no data movement involved, in most cases a named replica will be created in about a minute. Once the named replica is available, it will be visible from the Azure portal or any command-line tool like AZ CLI or PowerShell. A named replica is usable as a regular read-only database.
Connect to a Hyperscale named replica
To connect to a Hyperscale named replica, you must use the connection string for that named replica, referencing its server and database names. There is no need to specify the option ApplicationIntent=ReadOnly as named replicas are always read-only.
Just like for HA replicas, even though the primary, HA, and named replicas share the same data on the same set of page servers, data caches on each named replica are kept in sync with the primary. The sync is maintained by the transaction log service, which forwards log records from the primary to named replicas. As the result, depending on the workload being processed by a named replica, application of the log records might happen at different speeds, and thus different replicas could have different data latency relative to the primary replica.
Modify a Hyperscale named replica
You can define the service level objective of a named replica when you create it, via the ALTER DATABASE command or in any other supported way (Portal, AZ CLI, PowerShell). If you need to change the service level objective after the named replica has been created, you can do it using the ALTER DATABASE ... MODIFY command on the named replica itself.
In the following example, WideWorldImporters_NamedReplica is the named replica of WideWorldImporters database.
Open named replica database page, and then select Compute + storage. Update the vCores.

Remove a Hyperscale named replica
To remove a Hyperscale named replica, you drop it just like you would a regular database.
Open named replica database page, and choose Delete option.

Important
Named replicas will be automatically removed when the primary replica from which they have been created is deleted.
Optimizing named replica configuration
It is recommended to configure the named replica with the same compute size (vCores) as the primary replica. If the primary replica experiences a heavy write workload, a named replica with a lower compute size might not be able to keep up, causing replication lag. To maintain the recoverability SLAs, primary's transaction log rate can be temporarily reduced to allow its secondaries to catch up.
If you choose to create the named replica with a different compute size (vCores) than the primary, monitor the log IO rate on the primary over time. This helps estimate the minimal compute size required for the named replica to sustain the replication load. For more information, consider the following objects:
- The sys.dm_hs_database_log_rate() dynamic management function (DMF) provides additional details to help understand log rate reduction, if any. It can indicate which specific secondary replica is behind in applying log records and the total size of the unapplied transaction log.
- To retrieve historical log IO data, use sys.resource_stats view.
- For recent log IO data with higher granularity that better reflects short-term spikes, use sys.dm_db_resource_stats.
For more information, see to the Azure SQL Database Hyperscale Performance Diagnostics.