Note
Access to this page requires authorization. You can try signing in or changing directories.
Access to this page requires authorization. You can try changing directories.
Applies to: ![]() Azure SQL Database
Azure SQL Database
In this guide, you learn how to migrate your MySQL database to an Azure SQL database by using SQL Server Migration Assistant for MySQL (SSMA for MySQL).
For other migration guides, see Azure Database Migration Guide.
Prerequisites
Before you begin migrating your MySQL database to a SQL database, do the following:
- Verify that your source environment is supported. Currently, MySQL 4.1 and above is supported.
- Download and install SQL Server Migration Assistant for MySQL.
- Ensure that you have connectivity and sufficient permissions to access both the source and the target.
Pre-migration
After you've met the prerequisites, you're ready to discover the topology of your environment and assess the feasibility of your Azure cloud migration.
Assess
Use SQL Server Migration Assistant (SSMA) for MySQL to review database objects and data, and assess databases for migration.
To create an assessment, do the following:
Open SSMA for MySQL.
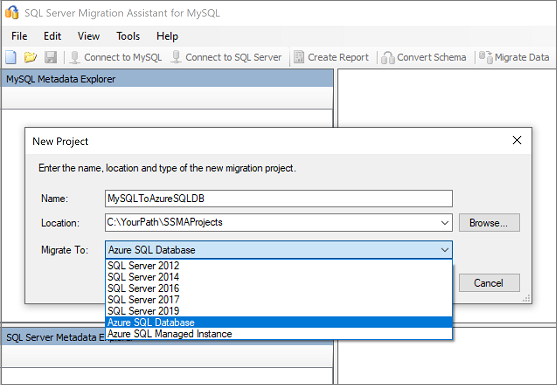
Select File, and then select New Project.
In the New Project pane, enter a name and location for your project and then, in the Migrate To dropdown list, select Azure SQL Database.
Select OK.
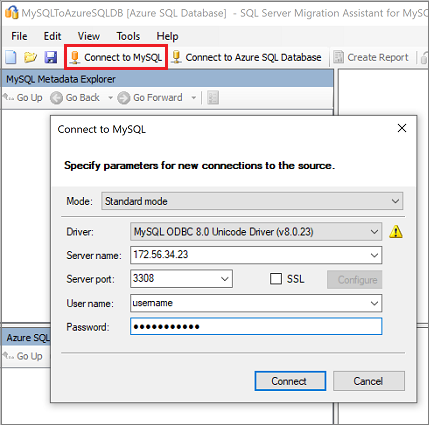
Select the Connect to MySQL tab, and then provide details for connecting your MySQL server.
On the MySQL Metadata Explorer pane, right-click the MySQL schema, and then select Create Report. Alternatively, you can select the Create Report tab at the upper right.
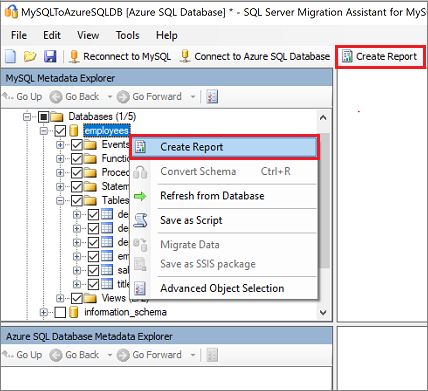
Review the HTML report to understand the conversion statistics, errors, and warnings. Analyze it to understand the conversion issues and resolutions. You can also open the report in Excel to get an inventory of MySQL objects and understand the effort that's required to perform schema conversions. The default location for the report is in the report folder within SSMAProjects. For example:
drive:\Users\<username>\Documents\SSMAProjects\MySQLMigration\report\report_2016_11_12T02_47_55\

Validate the data types
Validate the default data type mappings and change them based on requirements, if necessary. To do so:
Select Tools, and then select Project Settings.
Select the Type Mappings tab.
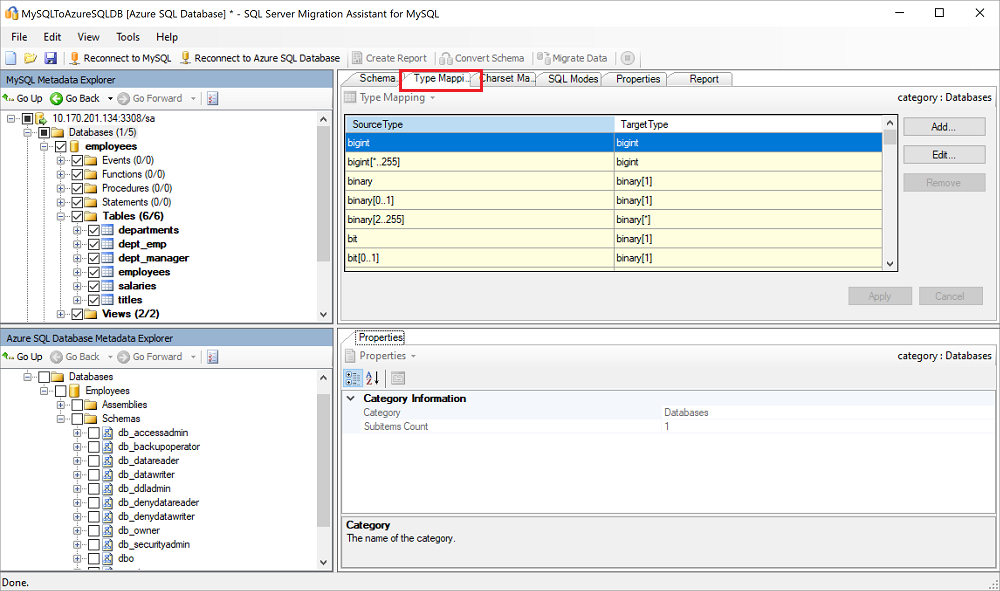
You can change the type mapping for each table by selecting the table name on the MySQL Metadata Explorer pane.

Convert the schema
To convert the schema, do the following:
(Optional) To convert dynamic or specialized queries, right-click the node, and then select Add statement.
Select the Connect to Azure SQL Database tab, and then do the following:
a. Enter the details for connecting to your SQL database.
b. In the dropdown list, select your target SQL database. Or you can provide a new name, in which case a database will be created on the target server.
c. Provide authentication details.
d. Select Connect.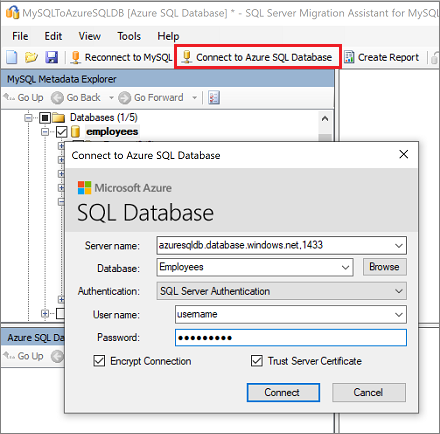
Right-click the schema you're working with, and then select Convert Schema. Alternatively, you can select the Convert schema tab at the upper right.
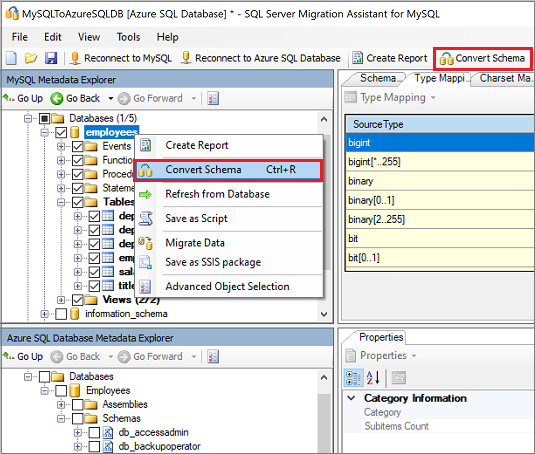
After the conversion is completed, review and compare the converted objects to the original objects to identify potential problems and address them based on the recommendations.
Compare the converted Transact-SQL text to the original code, and review the recommendations.
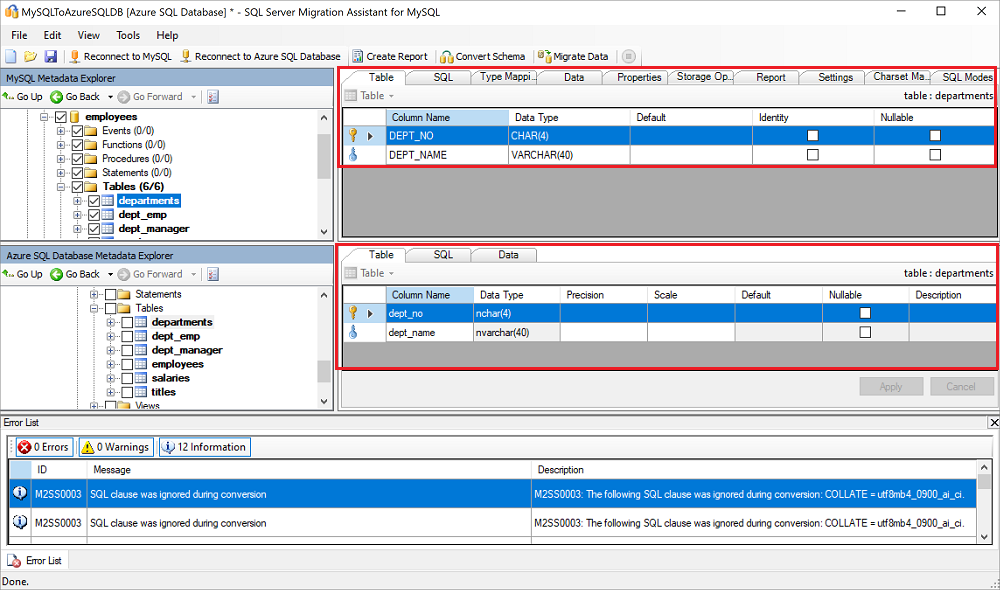
On the Output pane, select Review results, and then review any errors on the Error list pane.
Save the project locally for an offline schema remediation exercise. To do so, select File > Save Project. This gives you an opportunity to evaluate the source and target schemas offline and perform remediation before you publish the schema to your SQL database.
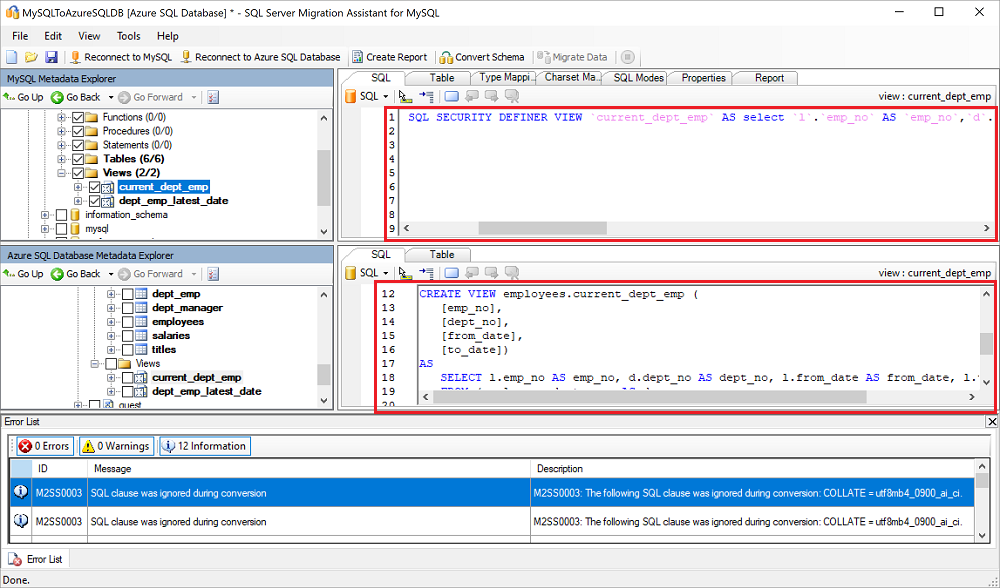
Compare the converted procedures to the original procedures, as shown in the following screenshot:


Migrate the databases
After you've assessed your databases and addressed any discrepancies, you can run the migration process. Migration involves two steps: publishing the schema and migrating the data.
To publish the schema and migrate the data, do the following:
Publish the schema. On the Azure SQL Database Metadata Explorer pane, right-click the database, and then select Synchronize with Database. This action publishes the MySQL schema to your SQL database.

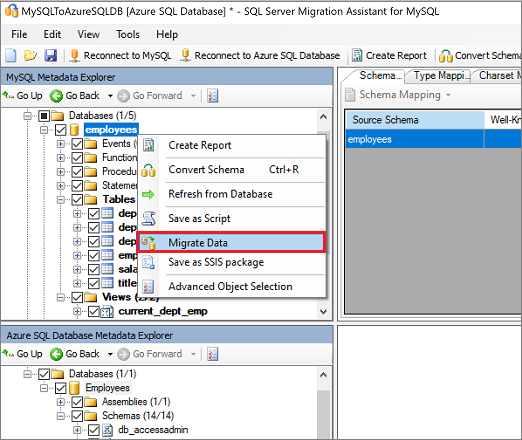
Migrate the data. On the MySQL Metadata Explorer pane, right-click the MySQL schema you want to migrate, and then select Migrate Data. Alternatively, you can select the Migrate Data tab at the upper right.
To migrate data for an entire database, select the check box next to the database name. To migrate data from individual tables, expand the database, expand Tables, and then select the check box next to the table. To omit data from individual tables, clear the check box.
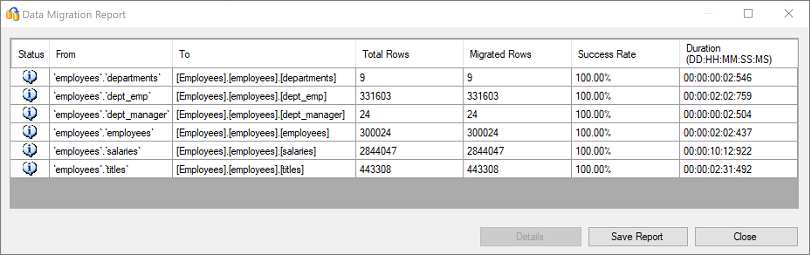
After the migration is completed, view the Data Migration Report.
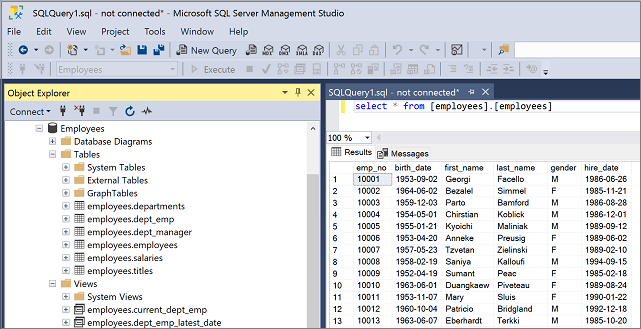
Connect to your SQL database by using SQL Server Management Studio and validate the migration by reviewing the data and schema.

Post-migration
After you've successfully completed the migration stage, you need to complete a series of post-migration tasks to ensure that everything is functioning as smoothly and efficiently as possible.
Remediate applications
After the data is migrated to the target environment, all the applications that formerly consumed the source need to start consuming the target. Accomplishing this will in some cases require changes to the applications.
Perform tests
The test approach to database migration consists of the following activities:
Develop validation tests: To test the database migration, you need to use SQL queries. You must create the validation queries to run against both the source and target databases. Your validation queries should cover the scope you've defined.
Set up a test environment: The test environment should contain a copy of the source database and the target database. Be sure to isolate the test environment.
Run validation tests: Run validation tests against the source and the target, and then analyze the results.
Run performance tests: Run performance tests against the source and the target, and then analyze and compare the results.
Optimize
The post-migration phase is crucial for reconciling any data accuracy issues, verifying completeness, and addressing performance issues with the workload.
For more information about these issues and the steps to mitigate them, see the Post-migration validation and optimization guide.
Migration assets
For more assistance with completing this migration scenario, see the following resource. It was developed in support of a real-world migration project engagement.
| Title | Description |
|---|---|
| Data workload assessment model and tool | Provides suggested "best fit" target platforms, cloud readiness, and application/database remediation levels for specified workloads. It offers simple, one-click calculation and report generation that helps to accelerate large estate assessments by providing an automated, uniform target-platform decision process. |
| MySQL to SQL DB - Database Compare utility | The Database Compare utility is a Windows console application that you can use to verify that the data is identical both on source and target platforms. You can use the tool to efficiently compare data down to the row or column level in all or selected tables, rows, and columns. |
The Data SQL Engineering team developed these resources. This team's core charter is to unblock and accelerate complex modernization for data platform migration projects to Microsoft's Azure data platform.