Note
Access to this page requires authorization. You can try signing in or changing directories.
Access to this page requires authorization. You can try changing directories.
After you plan your deployment, deploy and configure your Azure VMware Solution private cloud.
In this tutorial, you'll:
- Register the resource provider and create a private cloud
- Connect to a new or existing ExpressRoute virtual network gateway
- Validate the network connection
Once you completed this section, follow the next steps provided at the end of this tutorial.
Register the Microsoft.AVS resource provider
To use Azure VMware Solution, you must first register the resource provider with your subscription. For more information about resource providers, see Azure resource providers and types.
Sign in to the Azure portal.
Note
If you need access to the Azure US Gov portal, go to https://portal.azure.us/
On the Azure portal menu, select All services.
In the All services box, enter subscription, and then select Subscriptions.
Select the subscription from the subscription list to view.
Select Resource providers and enter Microsoft.AVS into the search.
If the resource provider isn't registered, select Register.

Create an Azure VMware Solution private cloud
You can create an Azure VMware Solution private cloud using the Azure portal or the Azure CLI.
Sign in to the Azure portal.
Note
If you need access to the Azure US Gov portal, go to https://portal.azure.us/
Select Create a resource.
In the Search services and marketplace text box, type
Azure VMware Solutionand select it from the search results.On the Azure VMware Solution window, select Create.
If you need more hosts, request a host quota increase.
On the Basics tab, enter values for the fields and then select Review + Create.
Tip
You gathered this information during the planning phase of this quick start.
Field Value Subscription Select the subscription you plan to use for the deployment. All resources in an Azure subscription are billed together. Resource group Select the resource group for your private cloud. An Azure resource group is a logical container into which Azure resources are deployed and managed. Alternatively, you can create a new resource group for your private cloud. Resource name Provide the name of your Azure VMware Solution private cloud. Location Select a location, such as (US) East US 2. It's the region you defined during the planning phase. Size of host Select the AV36, AV36P or AV52 SKU. Host Location Select All hosts in one availability zone for a standard private cloud or Hosts in two availability zones for stretched clusters. Number of hosts Number of hosts allocated for the private cloud cluster. The default value is 3, which you can increase or decrease after deployment. If these nodes aren't listed as available, contact support to request a quota increase. You can also select the link labeled If you need more hosts, request a quota increase in the Azure portal. Address block for private cloud Provide an IP address block for the private cloud. The CIDR represents the private cloud management network and is used for the cluster management services, such as vCenter Server and NSX-T Manager. Use /22 address space, for example, 10.175.0.0/22. The address should be unique and not overlap with other Azure Virtual Networks and with on-premises networks. 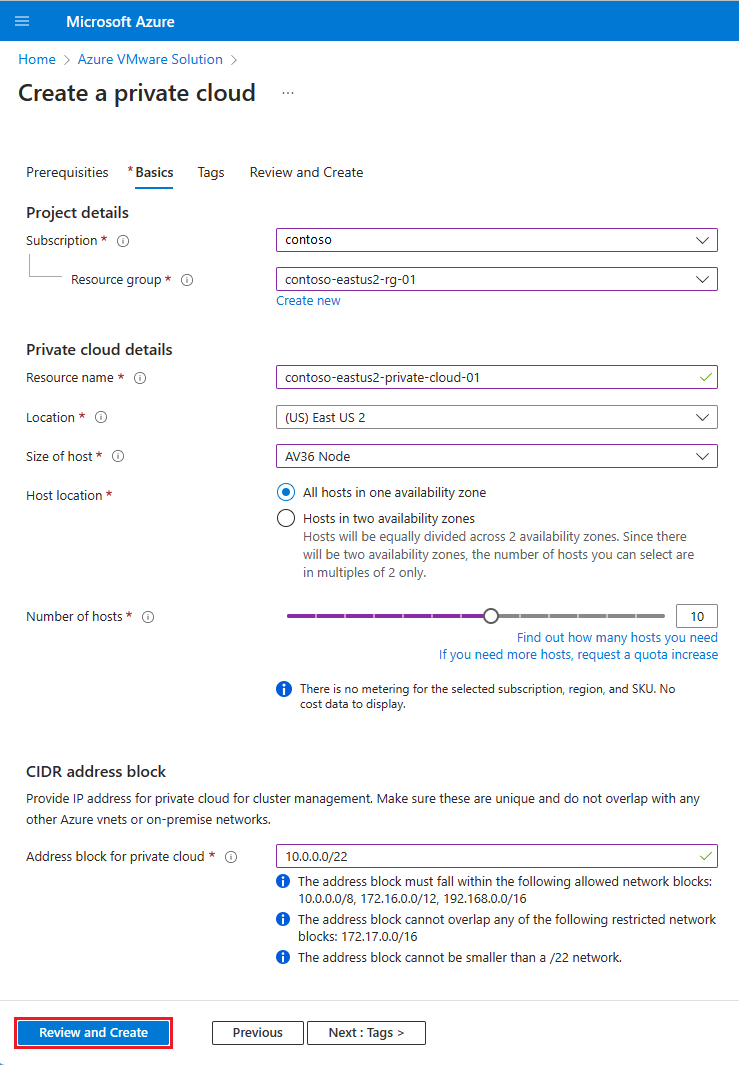
Verify the information entered, and if correct, select Create.
Note
This step takes an estimated 4+ hours. Adding a single host in an existing cluster takes an estimated 1 hour. If you are adding a new cluster with maximum nodes (16), it can take an estimated 4+ hours.
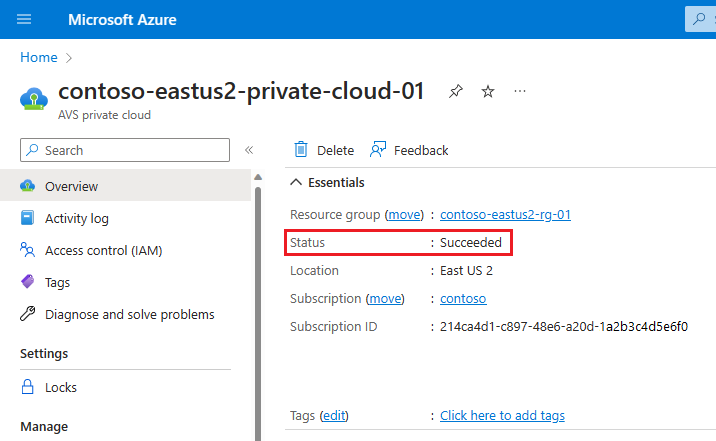
Verify that the deployment was successful. Navigate to the resource group you created and select your private cloud. You see the status of Succeeded when the deployment is finished.
Connect to Azure Virtual Network with ExpressRoute
In the planning phase, you defined whether to use an existing or new ExpressRoute virtual network gateway.
Important
If you plan to scale your Azure VMware Solution hosts by using Azure NetApp Files datastores, deploying the virtual network close to your hosts with an ExpressRoute virtual network gateway is crucial. The closer the storage is to your hosts, the better the performance.
Use a new ExpressRoute virtual network gateway
Important
You must have a virtual network with a GatewaySubnet that does not already have a virtual network gateway.
| If | Then |
|---|---|
| You don't already have a virtual network... | Create: |
| You already have a virtual network without a GatewaySubnet... | Create: |
| You already have a virtual network with a GatewaySubnet... | Create: |
Use an existing virtual network gateway
Request an ExpressRoute authorization key:
In the Azure portal, go to the Azure VMware Solution private cloud.
Under Manage, select Connectivity.
Select the ExpressRoute tab, and then select + Request an authorization key.
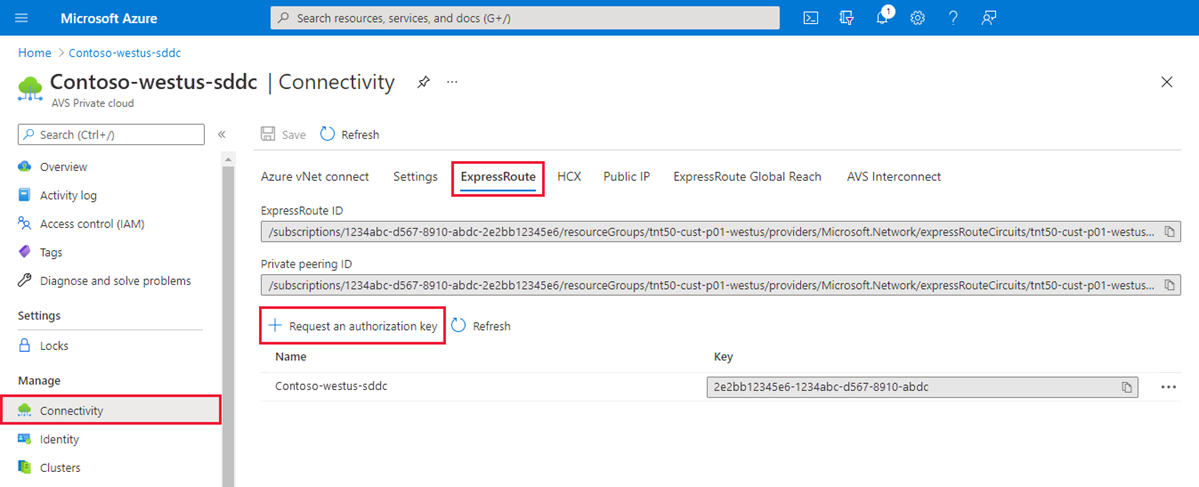
Provide a name for the authorization key, and then select Create.
It can take about 30 seconds to create the key. After the key is created, it appears in the list of authorization keys for the private cloud.
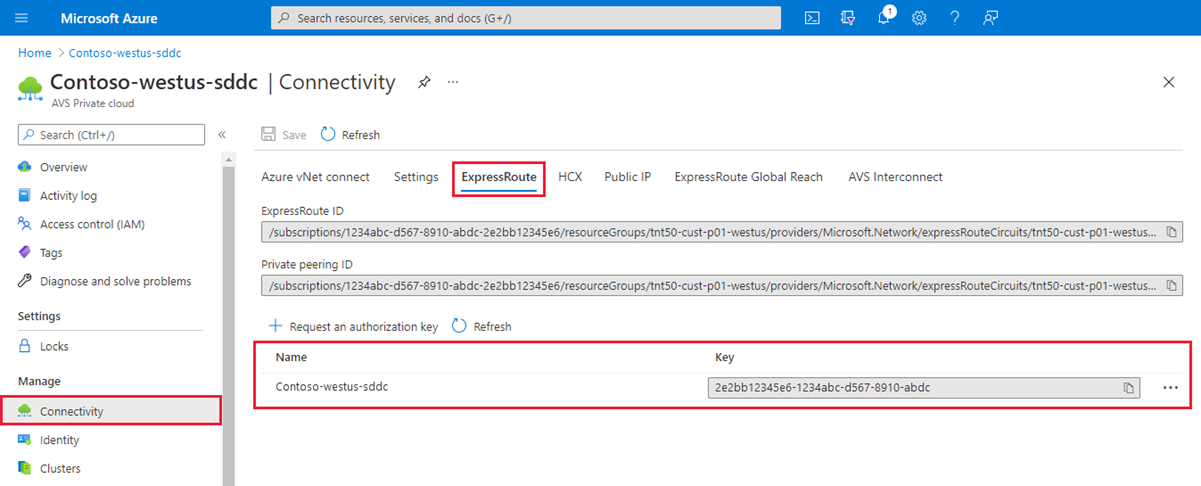
Copy the authorization key and the ExpressRoute ID. You need them to complete the peering. The authorization key disappears after some time, so copy it as soon as it appears.
Go to the virtual network gateway that you plan to use, and then select Connections > + Add.
On the Add connection pane, provide the following values, and then select OK.
Field Value Name Enter a name for the connection. Connection type Select ExpressRoute. Redeem authorization Ensure that this checkbox is selected. Virtual network gateway The value is prepopulated with the virtual network gateway that you intend to use. Authorization key Paste the authorization key that you copied earlier. Peer circuit URI Paste the ExpressRoute ID that you copied earlier. 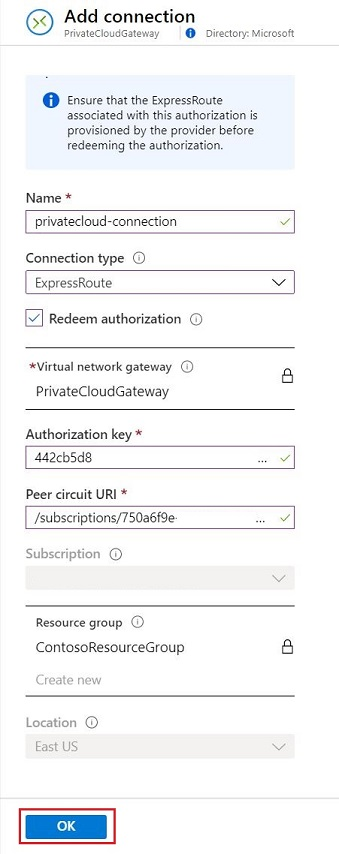


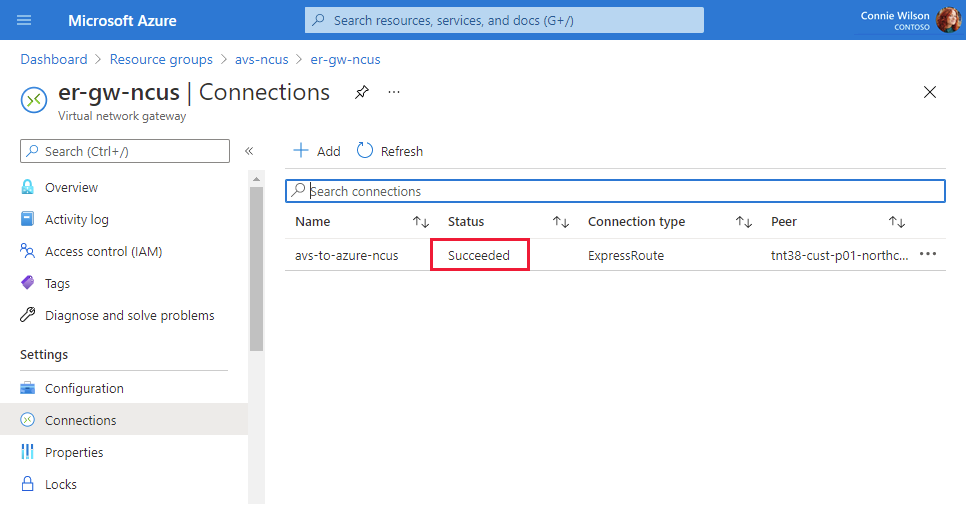
A status of Succeeded indicates that you finished creating the connection between your ExpressRoute circuit and your virtual network.
Validate the connection
Ensure connectivity between the Azure Virtual Network where the ExpressRoute terminates and the Azure VMware Solution private cloud.
Use a virtual machine within the Azure Virtual Network where the Azure VMware Solution ExpressRoute terminates. For more information, see Connect to Azure Virtual Network with ExpressRoute.
Sign in to the Azure portal.
Navigate to a running virtual machine (VM), and under Settings, select Networking and the network interface resource.
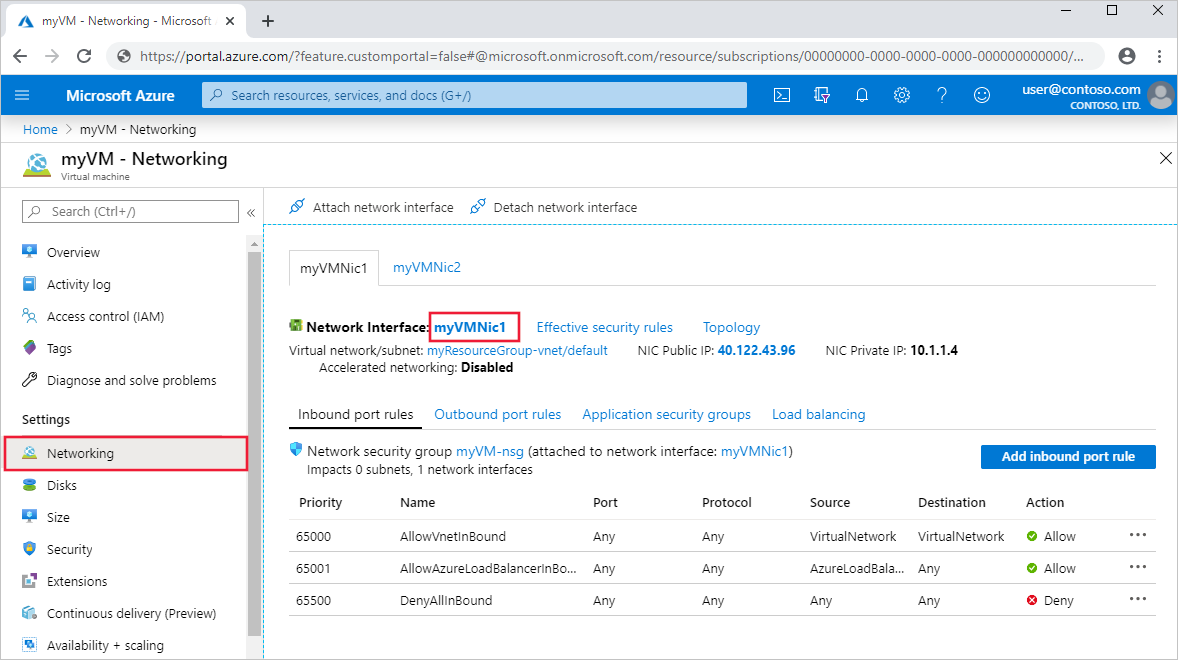
On the left, select Effective routes. A list of address prefixes that are contained within the
/22CIDR block you entered during the deployment phase displays.
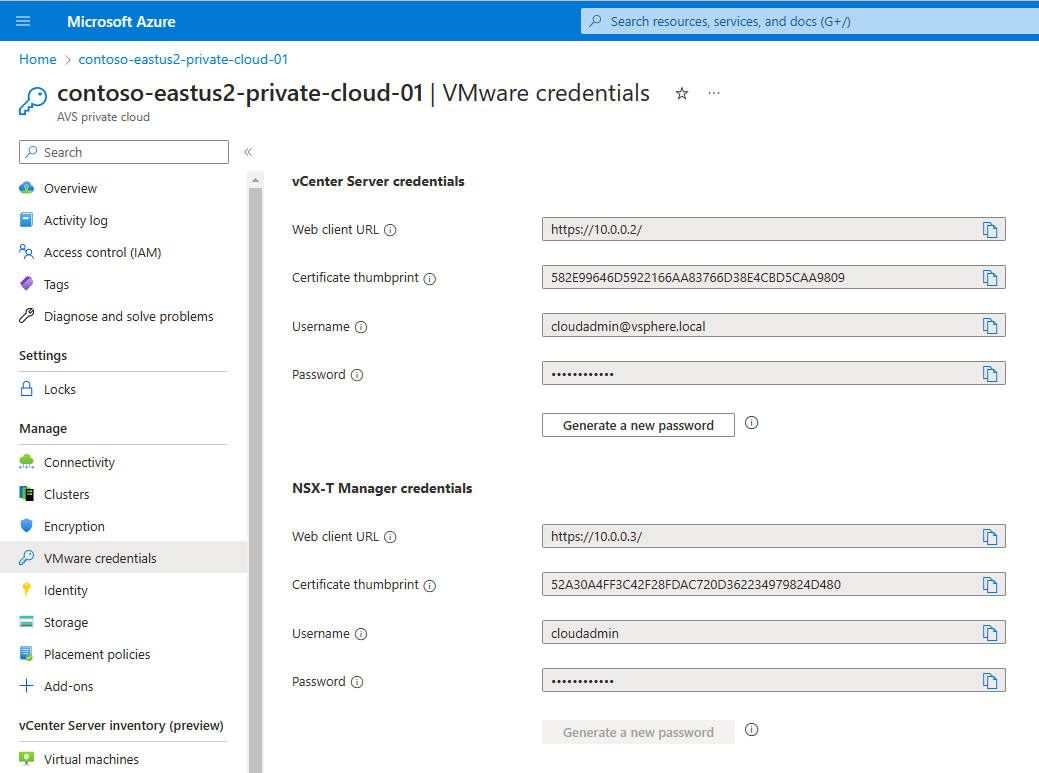
To sign in to both vCenter Server and NSX Manager, open a web browser and sign in to the same virtual machine used for network route validation.
Find the vCenter Server and NSX Manager console's IP addresses and credentials in the Azure portal. Select your private cloud and then Manage > VMware credentials.
Next steps
In the next tutorial, you'll connect Azure VMware Solution to your on-premises network through ExpressRoute.