Note
Access to this page requires authorization. You can try signing in or changing directories.
Access to this page requires authorization. You can try changing directories.
In this article, you learn how to migrate a SQL Server Failover Cluster Instance to Azure VMware Solution. Currently Azure VMware Solution service doesn't support VMware Hybrid Linked Mode to connect an on-premises vCenter Server with one running in Azure VMware Solution. Due to this constraint, this process requires the use of VMware HCX for the migration. For more information about configuring HCX, see Install and activate VMware HCX in Azure VMware Solution.
VMware HCX doesn't support migrating virtual machines with SCSI controllers in physical sharing mode attached to a virtual machine. However, you can overcome this limitation by performing the steps shown in this procedure and using VMware HCX Cold Migration to move the different virtual machines that make up the cluster.

Note
This procedure requires a full shutdown of the cluster. Since the SQL Server service will be unavailable during the migration, plan accordingly for the downtime period.
Microsoft SQL Servers 2019 and 2022 were tested with Windows Servers 2019 and 2022 Data Center edition with the virtual machines deployed in the on-premises environment. Windows Server and SQL Server were configured following best practices and recommendations from Microsoft and VMware. The on-premises source infrastructure was VMware vSphere 7.0 Update 3 and VMware vSAN running on Dell PowerEdge servers and Intel Optane P4800X SSD NVMe devices.
Prerequisites
- Review and record the storage and network configuration of every node in the cluster.
- Review and record the WSFC configuration.
- Maintain backups of all the SQL Server databases.
- Back up the cluster virtual machines.
- Remove all cluster node VMs from any Distributed Resource Scheduler (DRS) groups and rules they're part of.
- VMware HCX must be configured between your on-premises datacenter and the Azure VMware Solution private cloud that runs the migrated workloads. For more information about installing VMware HCX, see Azure VMware Solution documentation.
- Ensure that all the network segments in use by SQL Server and workloads using it are extended into your Azure VMware Solution private cloud. To verify this step, see Configure VMware HCX network extension.
Either VMware HCX over VPN or ExpressRoute connectivity can be used as the networking configuration for the migration.
With VMware HCX over VPN, due to its limited bandwidth, is typically suited for workloads that can sustain longer periods of downtime (such as nonproduction environments).
For any of the following instances, ExpressRoute connectivity is recommended for a migration:
- Production environments
- Workloads with large database sizes
- Scenarios in which there's a need to minimize downtime the ExpressRoute connectivity is recommended for the migration.
Downtime considerations
Downtime during a migration depends on the size of the database to be migrated and the speed of the private network connection to Azure cloud. Migration of SQL Server Failover Cluster Instances Always On to Azure VMware Solution requires a full downtime of the database and all cluster nodes, however you should plan for the migration to be executed during off-peak hours with an approved change window.
The following table indicates the estimated downtime for migration of each SQL Server topology.
| Scenario | Downtime expected | Notes |
|---|---|---|
| SQL Server standalone instance | Low | Migration is done using VMware vMotion, the database is available during migration time, but it isn't recommended to commit any critical data during it. |
| SQL Server Always On Availability Group | Low | The primary replica will always be available during the migration of the first secondary replica and the secondary replica will become the primary after the initial failover to Azure. |
| SQL Server Always On Failover Cluster Instance | High | All nodes of the cluster are shut down and migrated using VMware HCX Cold Migration. Downtime duration depends upon database size and private network speed to Azure cloud. |
Windows Server Failover Cluster quorum considerations
Windows Server Failover Cluster requires a quorum mechanism to maintain the cluster.
Use an odd number of voting elements to achieve by an odd number of nodes in the cluster or by using a witness. Witnesses can be configured in three different forms:
- Disk witness
- File share witness
- Cloud witness
If the cluster uses Disk witness, then the disk must be migrated with the cluster shared storage using the Migrate fail over cluster.
If the cluster uses a File share witness running on-premises, then the type of witness for your migrated cluster depends on the Azure VMware Solution scenario:
- Datacenter Extension: Maintain the file share witness on-premises. Your workloads are distributed across your datacenter and Azure VMware Solution, therefore connectivity between both should always be available. In any case take into consideration bandwidth constraints and plan accordingly.
- Datacenter Exit: For this scenario, there are two options. In both cases, you can maintain the file share witness on-premises during the migration in case you need to do roll back.
- Deploy a new File share witness in your Azure VMware Solution private cloud.
- Deploy a Cloud witness running in Azure Blob Storage in the same region as the Azure VMware Solution private cloud.
- Disaster Recovery and Business Continuity: For a disaster recovery scenario, the best and most reliable option is to create a Cloud Witness running in Azure Storage.
- Application Modernization: For this use case, the best option is to deploy a Cloud Witness.
For more information about quorum configuration and management, see Failover Clustering documentation. For more information about deploying a Cloud witness in Azure Blob Storage, see Deploy a Cloud Witness for a Failover Cluster documentation for the details.
Migrate failover cluster
For illustration purposes, in this document we're using a two-node cluster with Windows Server 2019 Datacenter and SQL Server 2019 Enterprise. Windows Server 2022 and SQL Server 2022 are also supported with this procedure.
From vSphere Client shutdown, the second node of the cluster.
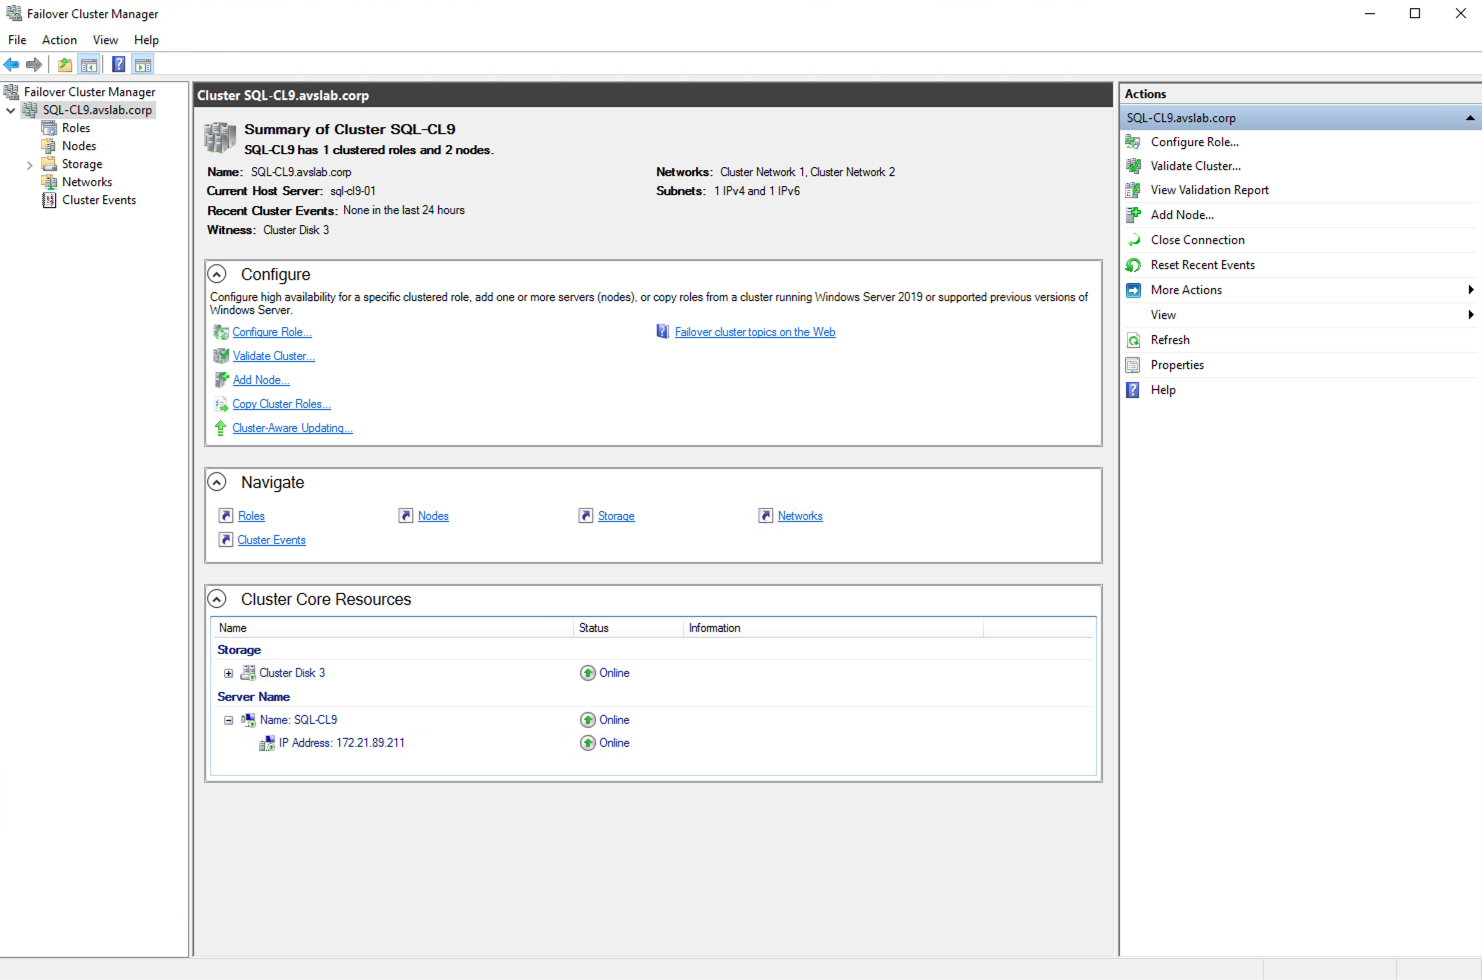
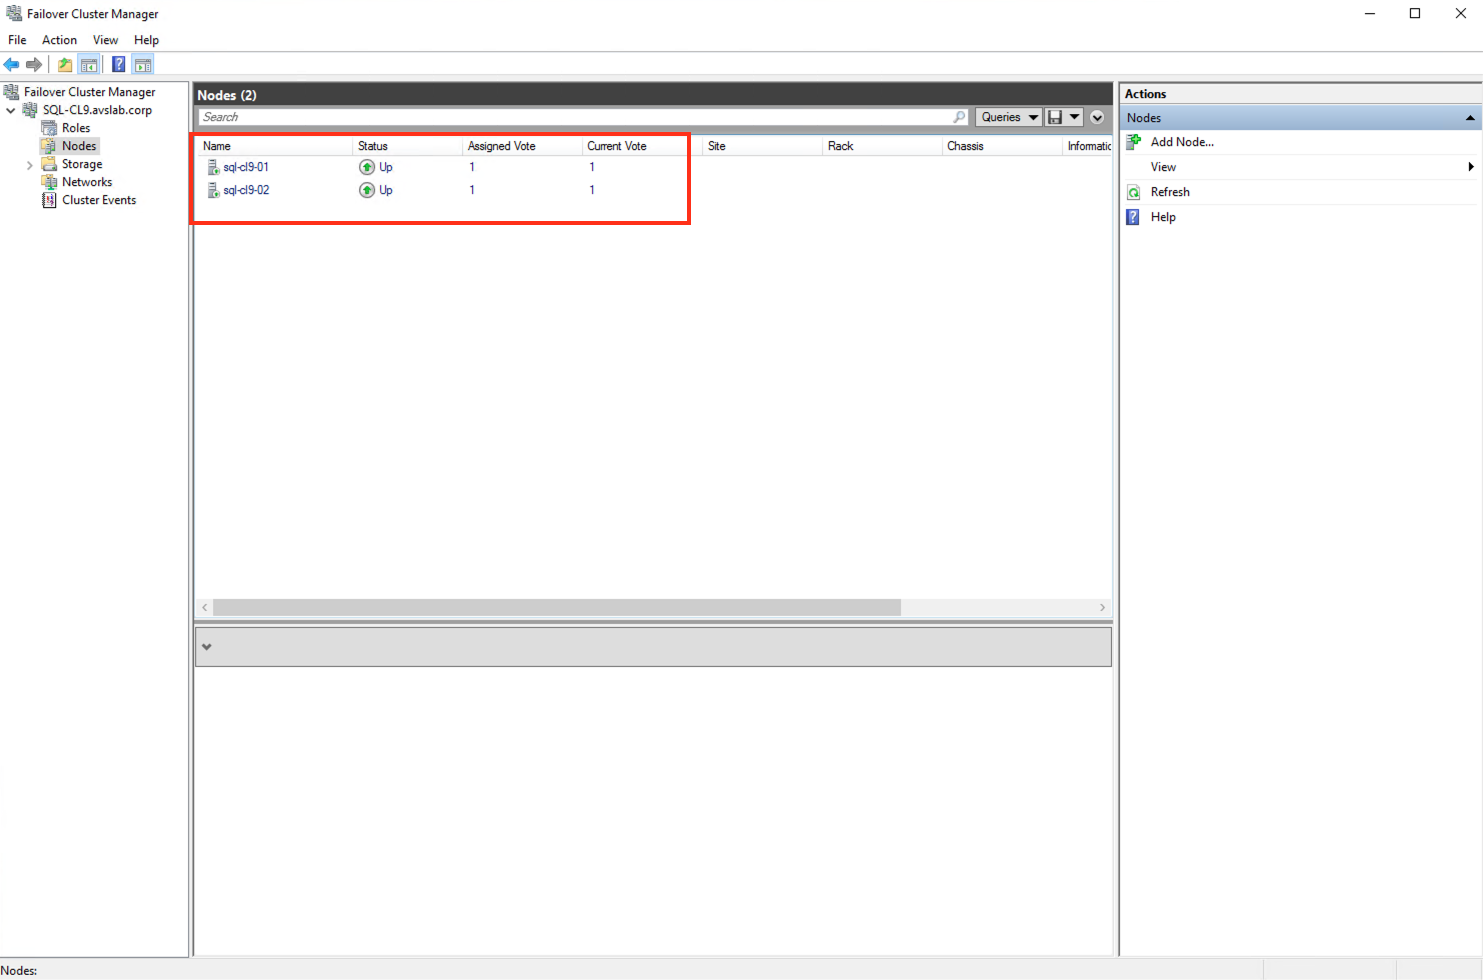
Access the first node of the cluster and open Failover Cluster Manager.
Verify that the second node is in Offline state and that all clustered services and storage are under the control of the first node.

Shut down the cluster.

Check that all cluster services are successfully stopped without errors.
Shut down first node of the cluster.
From the vSphere Client, edit the settings of the second node of the cluster.
- Remove all shared disks from the virtual machine configuration.
- Ensure that the Delete files from datastore checkbox isn't selected as it permanently deletes the disk from the datastore. If that happens, you need to recover the cluster from a previous backup.
- Set SCSI Bus Sharing from Physical to None in the virtual SCSI controllers used for the shared storage. Usually, these controllers are of VMware Paravirtual type.
Edit the first node virtual machine settings. Set SCSI Bus Sharing from Physical to None in the SCSI controllers.
From the vSphere Client, go to the HCX plugin area. Under Services, select Migration > Migrate.
- Select the second node virtual machine.
- Set the vSphere cluster in the remote private cloud, it hosts the migrated SQL Server VM or VMs, as the Compute Container.
- Select the vSAN Datastore as remote storage.
- Select a folder if you want to place the virtual machines in specific folder. It's not mandatory but is recommended to separate the different workloads in your Azure VMware Solution private cloud.
- Keep Same format as source.
- Select Cold migration as Migration profile.
- In Extended Options select Migrate Custom Attributes.
- Verify that on-premises network segments have the correct remote stretched segment in Azure.
- Select Validate and ensure that all checks are completed with pass status. The most common error is one related to the storage configuration. Verify again that there are no SCSI controllers with physical sharing setting.
- Select Go and the migration initiates.
Repeat the same process for the first node.
Access Azure VMware Solution vSphere Client and edit the first node settings and set back to physical SCSI Bus sharing the SCSI controller or controllers managing the shared disks.
Edit node 2 settings in vSphere Client.
- Set SCSI Bus sharing back to physical in the SCSI controller managing shared storage.
- Add the cluster shared disks to the node as extra storage. Assign them to the second SCSI controller.
- Ensure that all the storage configuration is the same as the one recorded before the migration.
Power on the first node virtual machine.
Access the first node VM with VMware Remote Console.
Verify virtual machine network configuration and ensure it can reach on-premises and Azure resources.
Open Failover Cluster Manager and verify cluster services.
Power on the second node virtual machine.
Access the second node VM from the VMware Remote Console.
- Verify that Windows Server can reach the storage.
- In the Failover Cluster Manager review that the second node appears as Online status.
Using the SQL Server Management Studio connect to the SQL Server cluster resource network name. Confirm all databases are online and accessible.


Check the connectivity to SQL Server from other systems and applications in your infrastructure. Verify that all applications using the database or databases can still access them.
More information
- Enable Azure Hybrid Benefit for SQL Server in Azure VMware Solution.
- Create a placement policy in Azure VMware Solution
- Windows Server Failover Clustering Documentation
- Microsoft SQL Server 2019 Documentation
- Microsoft SQL Server 2022 Documentation
- Windows Server Technical Documentation
- Planning Highly Available, Mission Critical SQL Server Deployments with VMware vSphere
- VMware KB 100 2951 – Tips for configuring Microsoft SQL Server in a virtual machine
- Microsoft SQL Server 2019 in VMware vSphere 7.0 Performance Study
- Architecting Microsoft SQL Server on VMware vSphere – Best Practices Guide
- Setup for Windows Server Failover Cluster in VMware vSphere 7.0