Note
Access to this page requires authorization. You can try signing in or changing directories.
Access to this page requires authorization. You can try changing directories.
Azure Application Gateway is a layer 7 web traffic load balancer that lets you manage traffic to your web applications, offered in both Azure VMware Solution v1.0 and v2.0. Both versions tested with web apps running on Azure VMware Solution.
The capabilities include:
- Cookie-based session affinity
- URL-based routing
- Web Application Firewall (WAF)
For a complete list of features, see Azure Application Gateway features.
This article shows you how to use Application Gateway in front of a web server farm to protect a web app running on Azure VMware Solution.
Topology
The diagram shows how Application Gateway is used to protect Azure IaaS virtual machines (VMs), Azure Virtual Machine Scale Sets, or on-premises servers. Application Gateway treats Azure VMware Solution VMs as on-premises servers.

Important
Azure Application Gateway is the preferred method to expose web apps running on Azure VMware Solution VMs.
The diagram shows the testing scenario used to validate the Application Gateway with Azure VMware Solution web applications.

The Application Gateway instance gets deployed on the hub in a dedicated subnet with an Azure public IP address. Activating the Azure DDoS Protection for the virtual network is recommended. The web server is hosted on an Azure VMware Solution private cloud behind NSX T0 and T1 Gateways. Additionally, Azure VMware Solution uses ExpressRoute Global Reach to enable communication with the hub and on-premises systems.
Prerequisites
- An Azure account with an active subscription.
- An Azure VMware Solution private cloud deployed and running.
Deployment and configuration
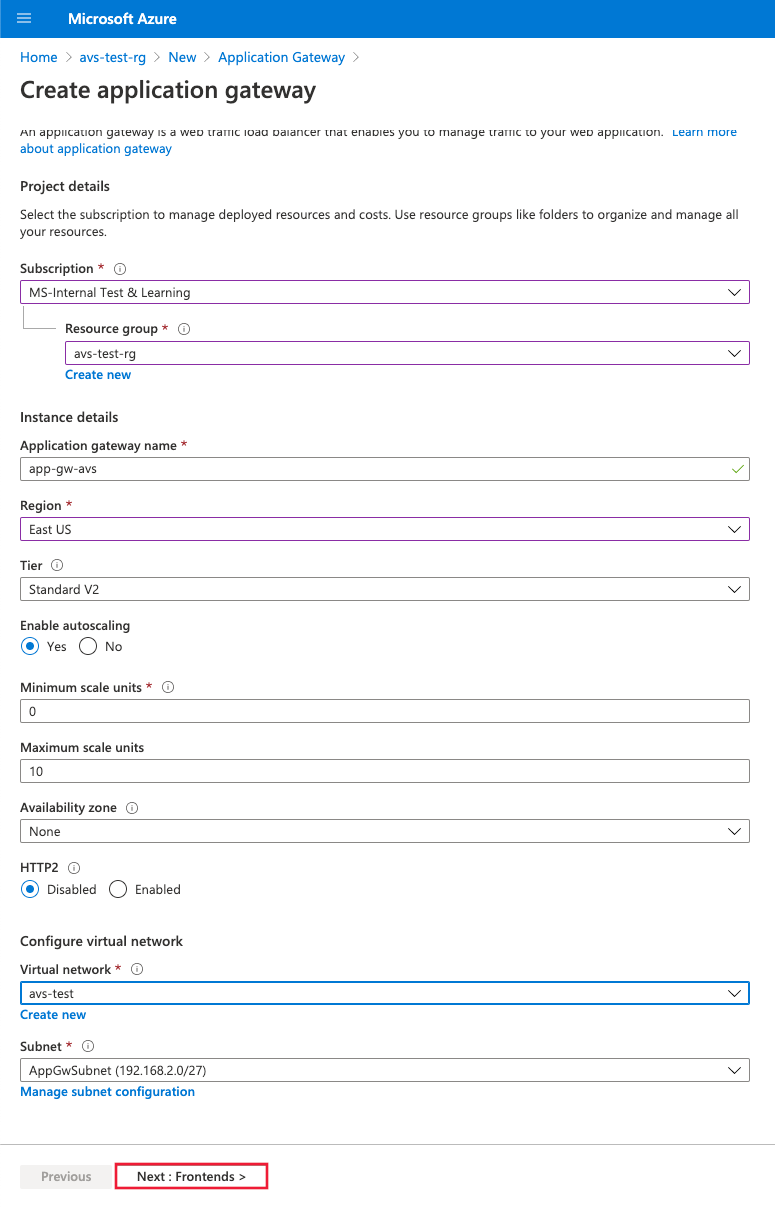
In the Azure portal, search for Application Gateway and select Create application gateway.
Provide the basic details as in the following figure; then select Next: Frontends>.
Choose the frontend IP address type. For public, choose an existing public IP address or create a new one. Select Next: Backends>.
Note
Only standard and Web Application Firewall (WAF) SKUs are supported for private frontends.
Add a backend pool of the VMs that run on Azure VMware Solution infrastructure. Provide the details of web servers that run on the Azure VMware Solution private cloud and select Add. Then select Next: Configuration>.
On the Configuration tab, select Add a routing rule.
On the Listener tab, provide the details for the listener. If HTTPS is selected, you must provide a certificate, either from a PFX file or an existing Azure Key Vault certificate.
Select the Backend targets tab and select the backend pool previously created. For the HTTP settings field, select Add new.
Configure the parameters for the HTTP settings. Select Add.
If you want to configure path-based rules, select Add multiple targets to create a path-based rule.
Add a path-based rule and select Add. Repeat to add more path-based rules.
When you finish adding path-based rules, select Add again, then select Next: Tags>.
Add tags and then select Next: Review + Create>.
A validation runs on your Application Gateway. If it's successful, select Create to deploy.

Configuration examples
Now configure Application Gateway with Azure VMware Solution VMs as backend pools for the following use cases:
Hosting multiple sites
This procedure shows you how to define backend address pools using VMs running on an Azure VMware Solution private cloud on an existing application gateway.
Note
This procedure assumes you have multiple domains, so we'll use examples of www.contoso.com and www.contoso2.com.
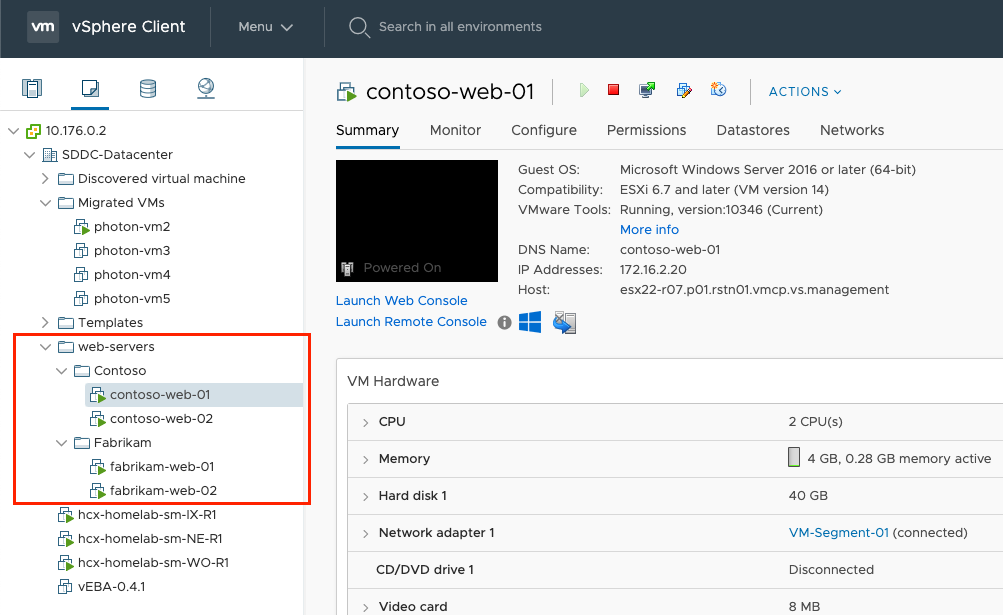
In your private cloud, create two different pools of VMs. One represents Contoso and the second contoso2.
We used Windows Server 2016 with the Internet Information Services (IIS) role installed. Once the VMs are installed, run the following PowerShell commands to configure IIS on each of the VMs.
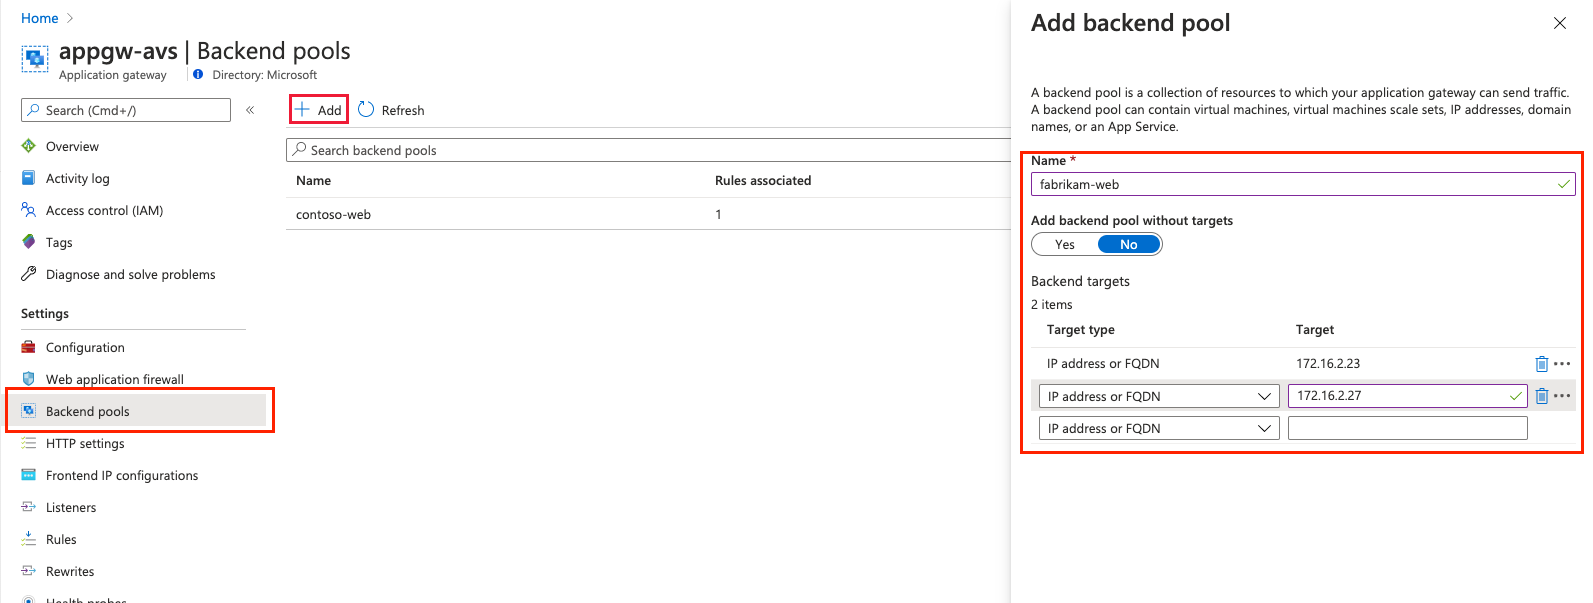
Install-WindowsFeature -Name Web-Server
Add-Content -Path C:\inetpub\wwwroot\Default.htm -Value $($env:computername)
In an existing application gateway instance, select Backend pools from the left menu, select Add, and enter the new pools' details. Select Add in the right pane.
In the Listeners section, create a new listener for each website. Enter the details for each listener and select Add.
On the left, select HTTP settings and select Add in the left pane. Fill in the details to create a new HTTP setting and select Save.

Create the rules in the Rules section of the left menu. Associate each rule with the corresponding listener. Select Add.
Configure the corresponding backend pool and HTTP settings. Select Add.
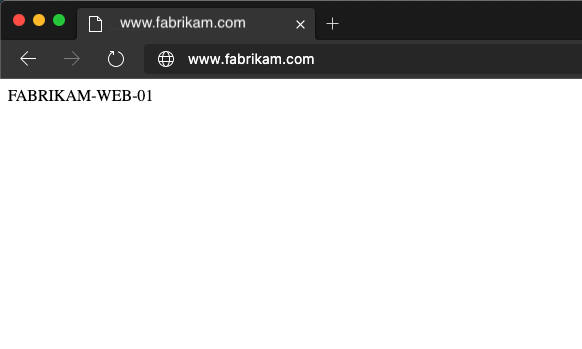
Test the connection. Open your preferred browser and navigate to the different websites hosted on your Azure VMware Solution environment.


Routing by URL
The following steps define backend address pools using VMs running on an Azure VMware Solution private cloud. The private cloud is on an existing application gateway. You then create routing rules that make sure web traffic arrives at the appropriate servers in the pools.
In your private cloud, create a virtual machine pool to represent the web farm.
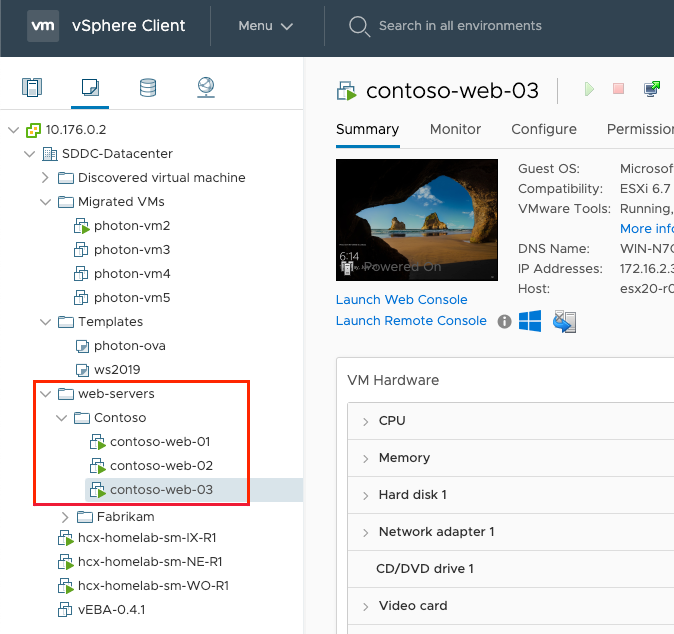
Windows Server 2016 with IIS role installed was used to illustrate this tutorial. Once the VMs are installed, run the following PowerShell commands to configure IIS for each VM tutorial.
The first virtual machine, contoso-web-01, hosts the main website.
Install-WindowsFeature -Name Web-Server
Add-Content -Path C:\inetpub\wwwroot\Default.htm -Value $($env:computername)
The second virtual machine, contoso-web-02, hosts the images site.
Install-WindowsFeature -Name Web-Server
New-Item -Path "C:\inetpub\wwwroot\" -Name "images" -ItemType "directory"
Add-Content -Path C:\inetpub\wwwroot\images\test.htm -Value $($env:computername)
The third virtual machine, contoso-web-03, hosts the video site.
Install-WindowsFeature -Name Web-Server
New-Item -Path "C:\inetpub\wwwroot\" -Name "video" -ItemType "directory"
Add-Content -Path C:\inetpub\wwwroot\video\test.htm -Value $($env:computername)
Add three new backend pools in an existing application gateway instance.
- Select Backend pools from the left menu.
- Select Add and enter the details of the first pool, contoso-web.
- Add one VM as the target.
- Select Add.
- Repeat this process for contoso-images and contoso-video, adding one unique VM as the target.

In the Listeners section, create a new listener of type Basic using port 8080.
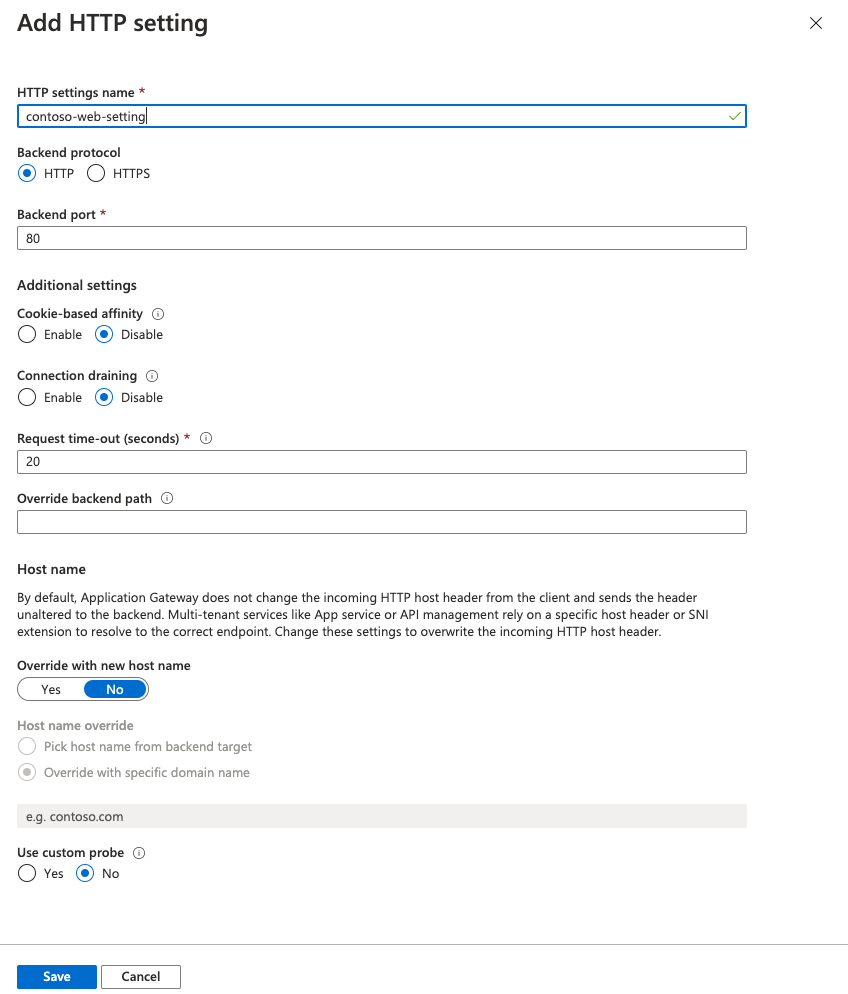
On the left navigation, select HTTP settings and select Add in the left pane. Fill in the details to create a new HTTP setting and select Save.
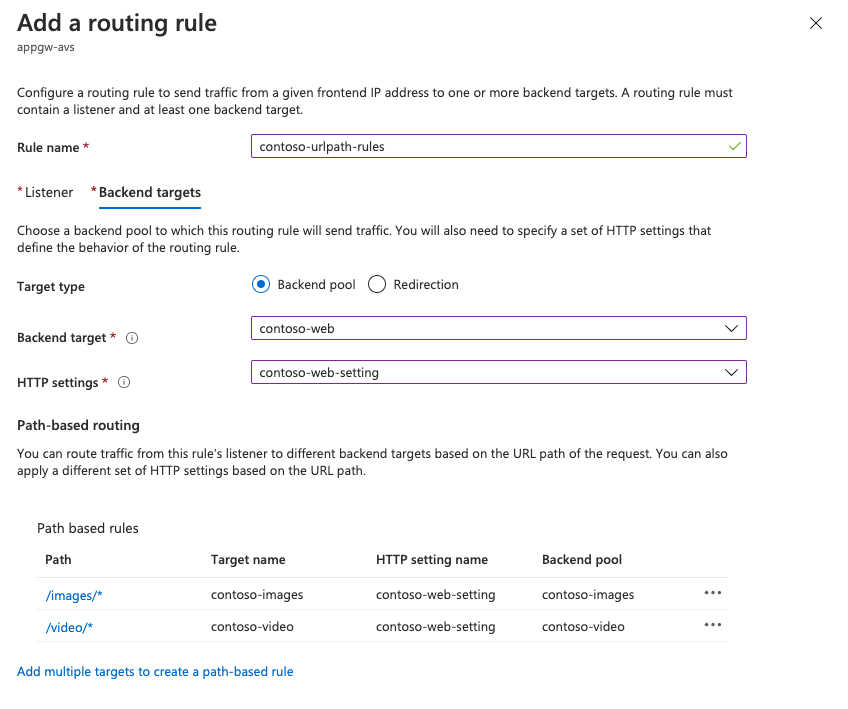
Create the rules in the Rules section of the left menu and associate each rule with the previously created listener. Then configure the main backend pool and HTTP settings, and then select Add.
Test the configuration. Access the application gateway on the Azure portal and copy the public IP address in the Overview section.
Open a new browser window and enter the URL
http://<app-gw-ip-address>:8080.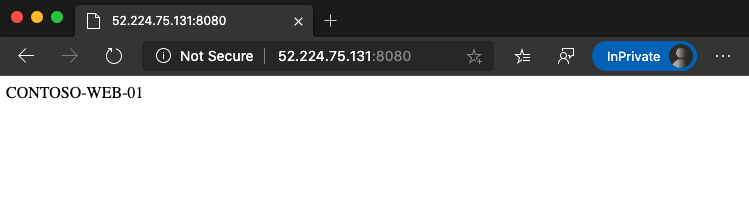
Change the URL to
http://<app-gw-ip-address>:8080/images/test.htm.
Change the URL again to
http://<app-gw-ip-address>:8080/video/test.htm.


Next Steps
Now that you covered using Application Gateway to protect a web app running on Azure VMware Solution, learn more about: