Note
Access to this page requires authorization. You can try signing in or changing directories.
Access to this page requires authorization. You can try changing directories.
Prerequisites
- An Azure account with an active subscription. Create a free Azure account, if don't have one already.
Tip
Web PubSub includes a generous free tier that can be used for testing and production purposes.
Create a resource from Azure portal
Select the New button found on the upper left-hand corner of the Azure portal. In the New screen, type Web PubSub in the search box and then press Enter.
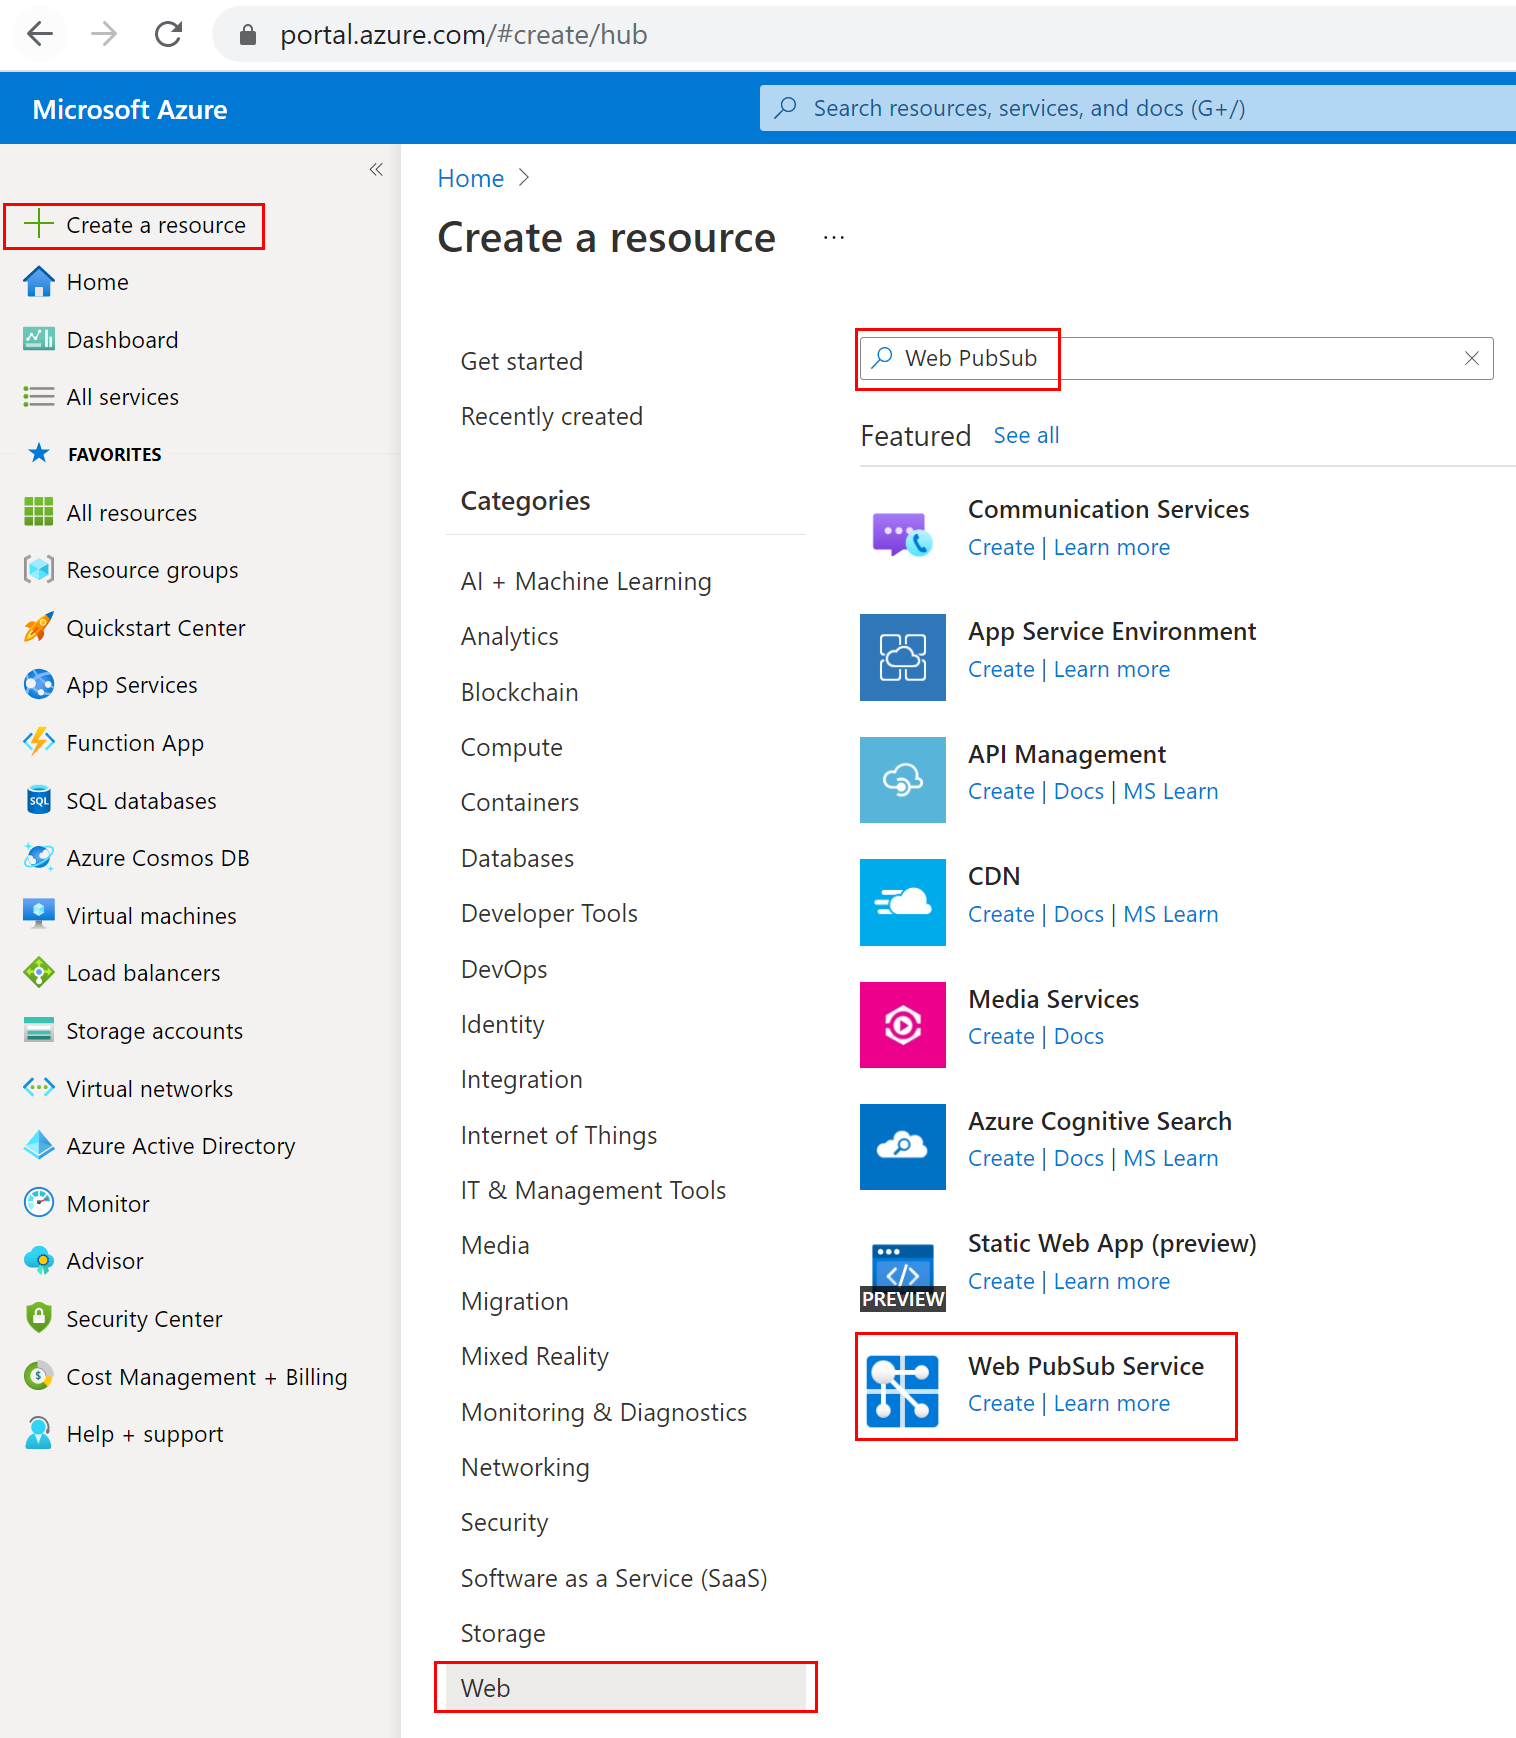
Select Web PubSub from the search results, then select Create.
Enter the following settings.
Setting Suggested value Description Resource name Globally unique name The globally unique Name that identifies your new Web PubSub service instance. Valid characters are a-z,A-Z,0-9, and-.Subscription Your subscription The Azure subscription under which this new Web PubSub service instance is created. [Resource Group] myResourceGroup Name for the new resource group in which to create your Web PubSub service instance. Location West US Choose a region near you. Pricing tier Free You can first try Azure Web PubSub service for free. Learn more details about Azure Web PubSub service pricing tiers Unit count - Unit count specifies how many connections your Web PubSub service instance can accept. Each unit supports 1,000 concurrent connections at most. It is only configurable in the Standard tier. 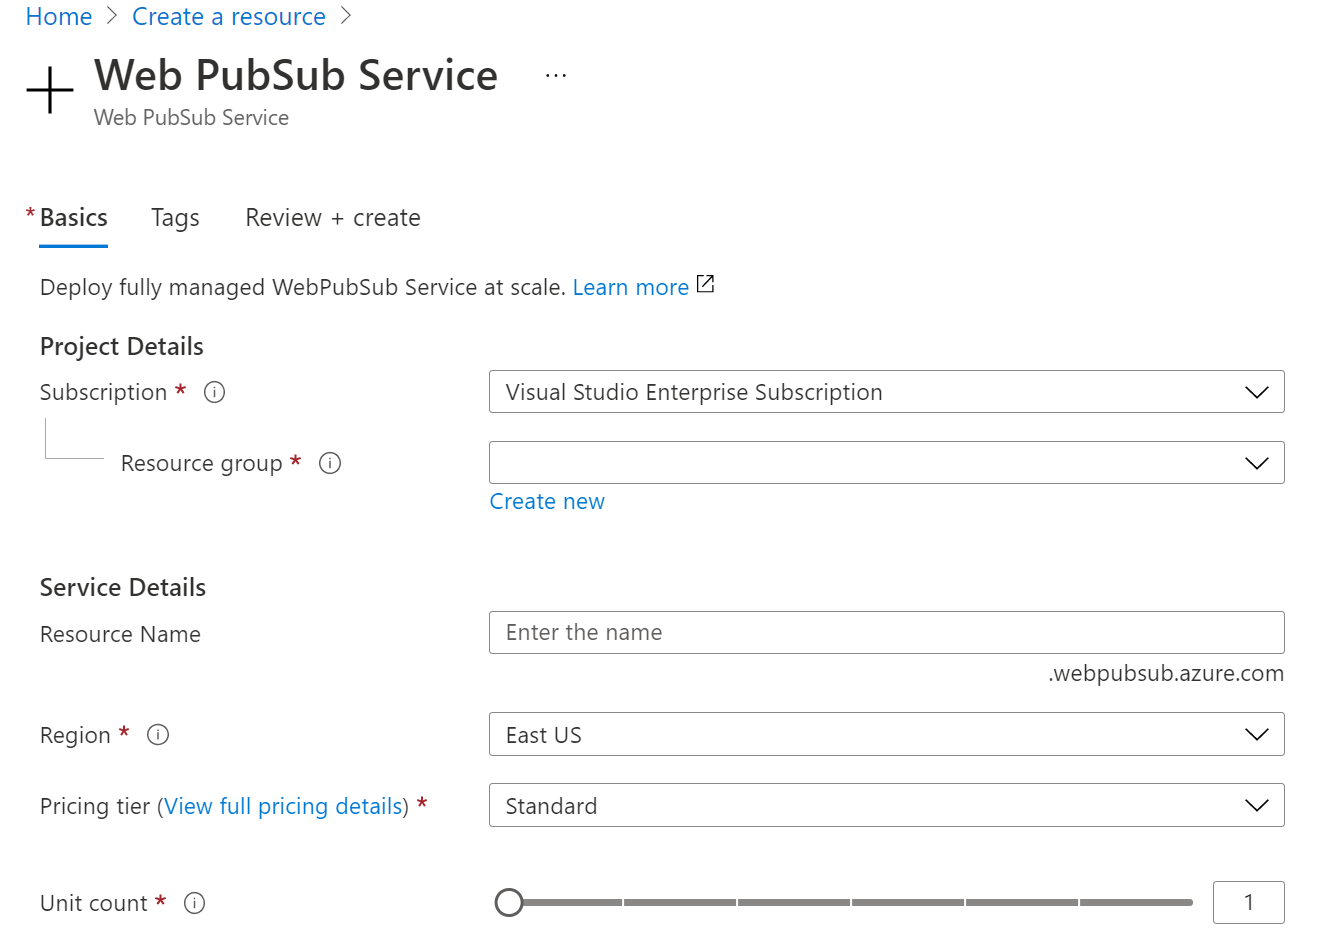
Select Create to provision your Web PubSub resource.
Create a resource using Azure CLI
The Azure CLI is a set of commands used to create and manage Azure resources. The Azure CLI is available across Azure services and is designed to get you working quickly with Azure, with an emphasis on automation.
Important
This quickstart requires Azure CLI of version 2.22.0 or higher.
Create a resource group
A resource group is a logical container into which Azure resources are deployed and managed. Use the az group create command to create a resource group named myResourceGroup in the eastus location.
az group create --name myResourceGroup --location EastUS
Create a resource
Run az extension add to install or upgrade the webpubsub extension to the current version.
az extension add --upgrade --name webpubsub
Use the Azure CLI az webpubsub create command to create a Web PubSub in the resource group you've created. The following command creates a Free Web PubSub resource under resource group myResourceGroup in EastUS:
Important
Each Web PubSub resource must have a unique name. Replace <your-unique-resource-name> with the name of your Web PubSub in the following examples.
az webpubsub create --name "<your-unique-resource-name>" --resource-group "myResourceGroup" --location "EastUS" --sku Free_F1
The output of this command shows properties of the newly created resource. Take note of the two properties listed below:
- Resource Name: The name you provided to the
--nameparameter above. - hostName: In the example, the host name is
<your-unique-resource-name>.webpubsub.azure.com/.
At this point, your Azure account is the only one authorized to perform any operations on this new resource.
Create a resource using Bicep file
Bicep is a domain-specific language (DSL) that uses declarative syntax to deploy Azure resources. It provides concise syntax, reliable type safety, and support for code reuse. Bicep offers the best authoring experience for your infrastructure-as-code solutions in Azure.
Review the Bicep file
The template used in this quickstart is from Azure Quickstart Templates.
/* This Bicep file deploys a new instance of Azure Web PubSub service. */

// Parameters

@description('The name for your new Web PubSub instance.')
@maxLength(63)
@minLength(3)
param wpsName string = uniqueString(resourceGroup().id)

@description('The region in which to create the new instance, defaults to the same location as the resource group.')
param location string = resourceGroup().location

@description('Unit count')
@allowed([
  1
  2
  5
  10
  20
  50
  100
])
param unitCount int = 1

@description('SKU name')
@allowed([
  'Standard_S1'
  'Free_F1'
])
param sku string = 'Free_F1'

@description('Pricing tier')
@allowed([
  'Free'
  'Standard'
])
param pricingTier string = 'Free'

// Resource definition
resource webpubsub 'Microsoft.SignalRService/webPubSub@2021-10-01' = {
  name: wpsName
  location: location
  sku: {
    capacity: unitCount
    name: sku
    tier: pricingTier
  }
  identity: {
    type: 'None'
  }
  properties: {
    disableAadAuth: false
    disableLocalAuth: false
    liveTraceConfiguration: {
      categories: [
        {
          enabled: 'false'
          name: 'ConnectivityLogs'
        }
        {
          enabled: 'false'
          name: 'MessagingLogs'
        }
      ]
      enabled: 'false'
    }
    networkACLs: {
      defaultAction: 'Deny'
      publicNetwork: {
        allow: [
          'ServerConnection'
          'ClientConnection'
          'RESTAPI'
          'Trace'
        ]
      }
    }
    publicNetworkAccess: 'Enabled'
    resourceLogConfiguration: {
      categories: [
        {
          enabled: 'true'
          name: 'ConnectivityLogs'
        }
        {
          enabled: 'true'
          name: 'MessagingLogs'
        }
      ]
    }
    tls: {
      clientCertEnabled: false
    }
  }
}
Deploy the Bicep file
Save the Bicep file as main.bicep to your local computer.
Deploy the Bicep file using either Azure CLI or Azure PowerShell.
az group create --name exampleRG --location eastus
az deployment group create --resource-group exampleRG --template-file main.bicep
When the deployment finishes, you should see a message indicating the deployment succeeded.
Review deployed resources
Use the Azure portal, Azure CLI, or Azure PowerShell to list the deployed resources in the resource group.
az resource list --resource-group exampleRG
Clean up resources
When no longer needed, use the Azure portal, Azure CLI, or Azure PowerShell to delete the resource group and its resources.
az group delete --name exampleRG
Next step
Now that you have created a resource, you are ready to put it to use. Next, you will learn how to subscribe and publish messages among your clients.