Note
Access to this page requires authorization. You can try signing in or changing directories.
Access to this page requires authorization. You can try changing directories.
This article describes how to configure backup for Azure Cosmos DB (preview) using Azure portal.
Prerequisites
Before you configure backup for Azure Cosmos DB, review the following prerequisites:
- Check the supported scenarios and known limitations of Azure Cosmos DB backup.
- Identify or create a Backup Vault in the same region where you want to back up the Azure Cosmos DB account.
Create vaulted backup policy for Azure Cosmos DB
A backup policy defines backup frequency and retention rules that determine lifecycle management of recovery points. You can also create the backup policy on the go while configuring backup.
To create a backup policy, follow these steps:
Go to Resiliency and select Manage > Protection policies.
On the Protection policies pane, select + Create policy > Create backup policy.
On the Start: Create Policy pane and, select Datasource type as Azure Cosmos DB (Preview), and select Continue.
On the Create Backup Policy pane, on the Basics tab, enter a Policy name for the new backup policy.
On the Schedule + retention tab, under Backup schedule, define the Backup frequency.
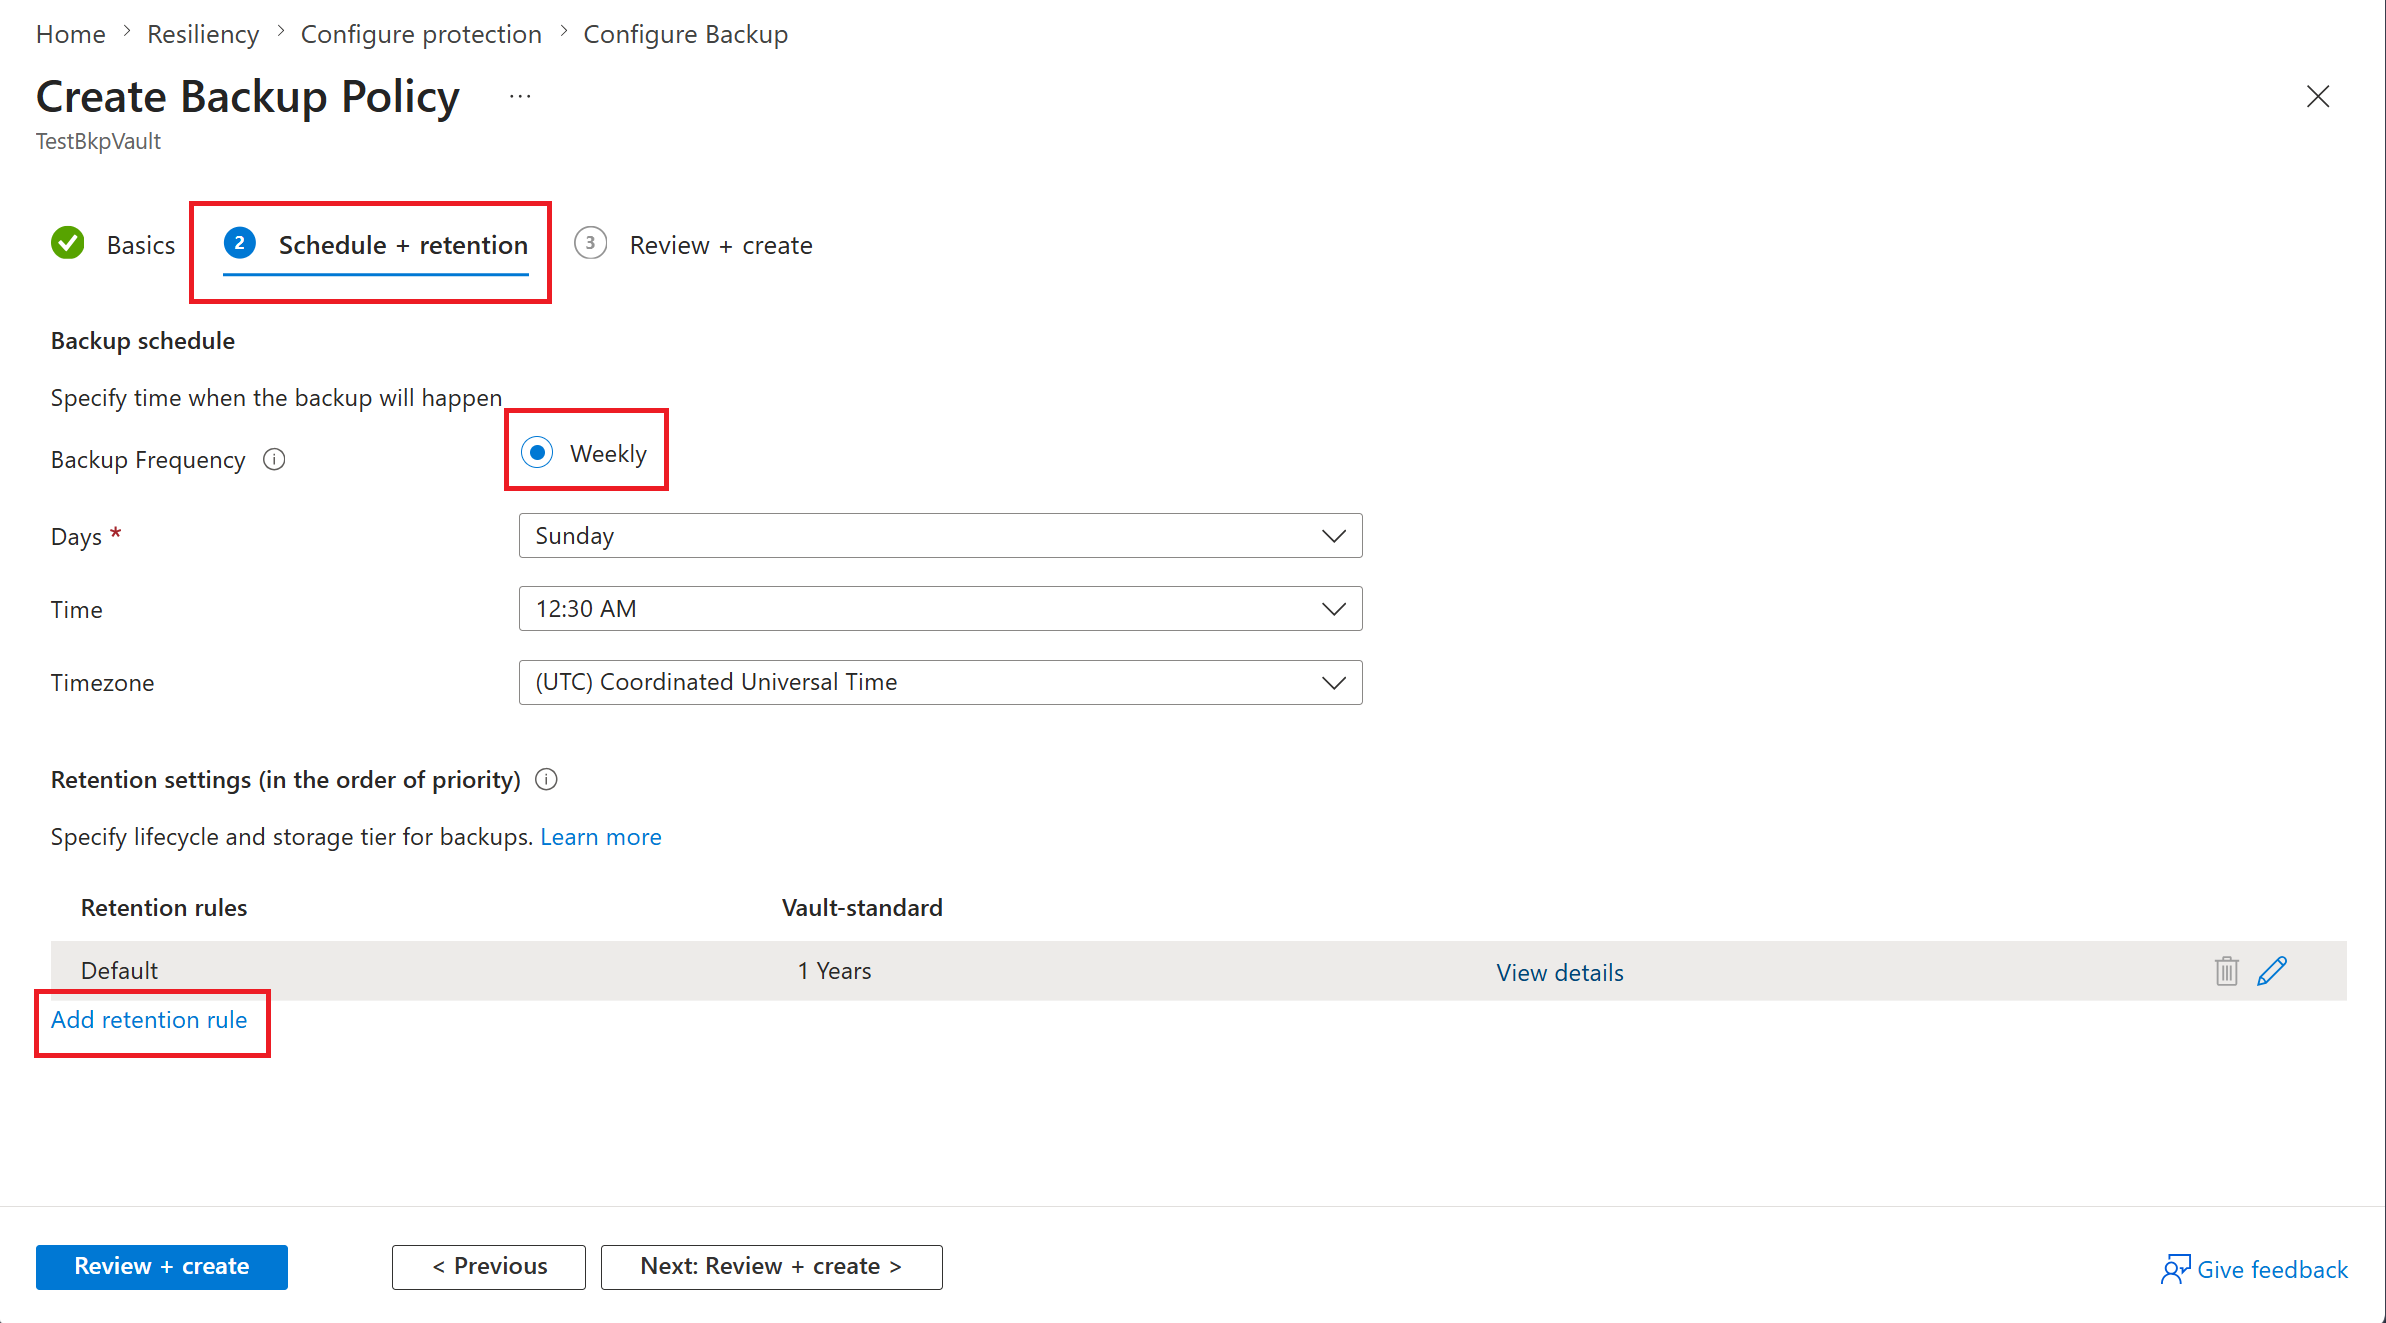
The preview feature supports weekly backup frequency only.
Under Retention rules, select Add retention rule to define retention rules for specific backups and set retention duration.
Note
You can apply rules in priority order: yearly, monthly, then weekly. When a recovery point matches multiple rules, apply the highest-priority rule. For example, apply monthly retention over weekly. The default retention rule (with a period of 1 year) applies when no rule matches.
On the Review + create tab, select Create and complete the backup policy creation.
Configure vaulted backup
To configure vaulted backup Cosmos DB account via Resiliency, follow these steps:
Go to Resiliency, select Overview > Configure protection.
Alternatively, to configure backup from the Backup vault pane, go to the Backup vault > Overview, and select Backup.
On the Configure protection pane, select Resource managed by as Azure, Datasource type as Azure Cosmos DB (Preview), and Solution as Azure Backup, and then select Continue.
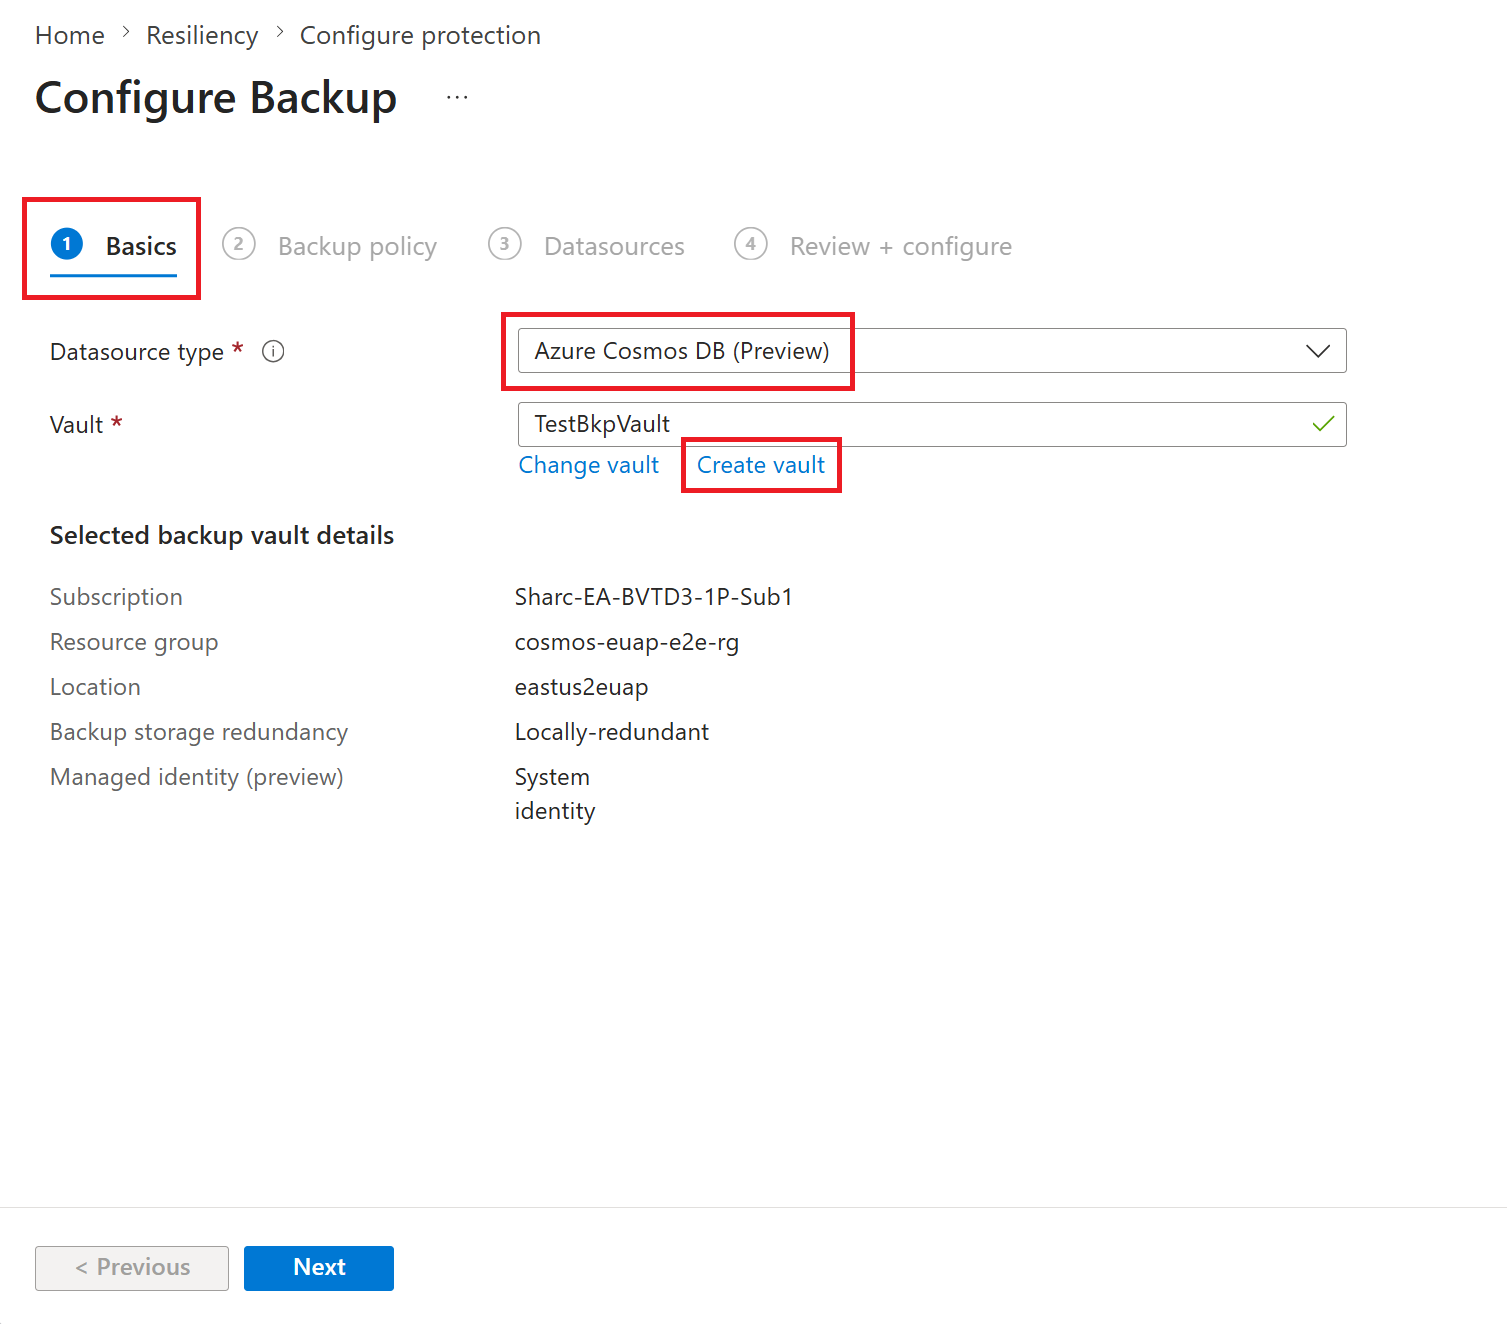
On the Configure Backup pane, on the Basics tab, check if Datasource type appears as Azure Cosmos DB (preview), click Select vault under Vault and choose an existing Backup vault from the dropdown list, and then select Next.
If you don't have a Backup vault, create a new one.
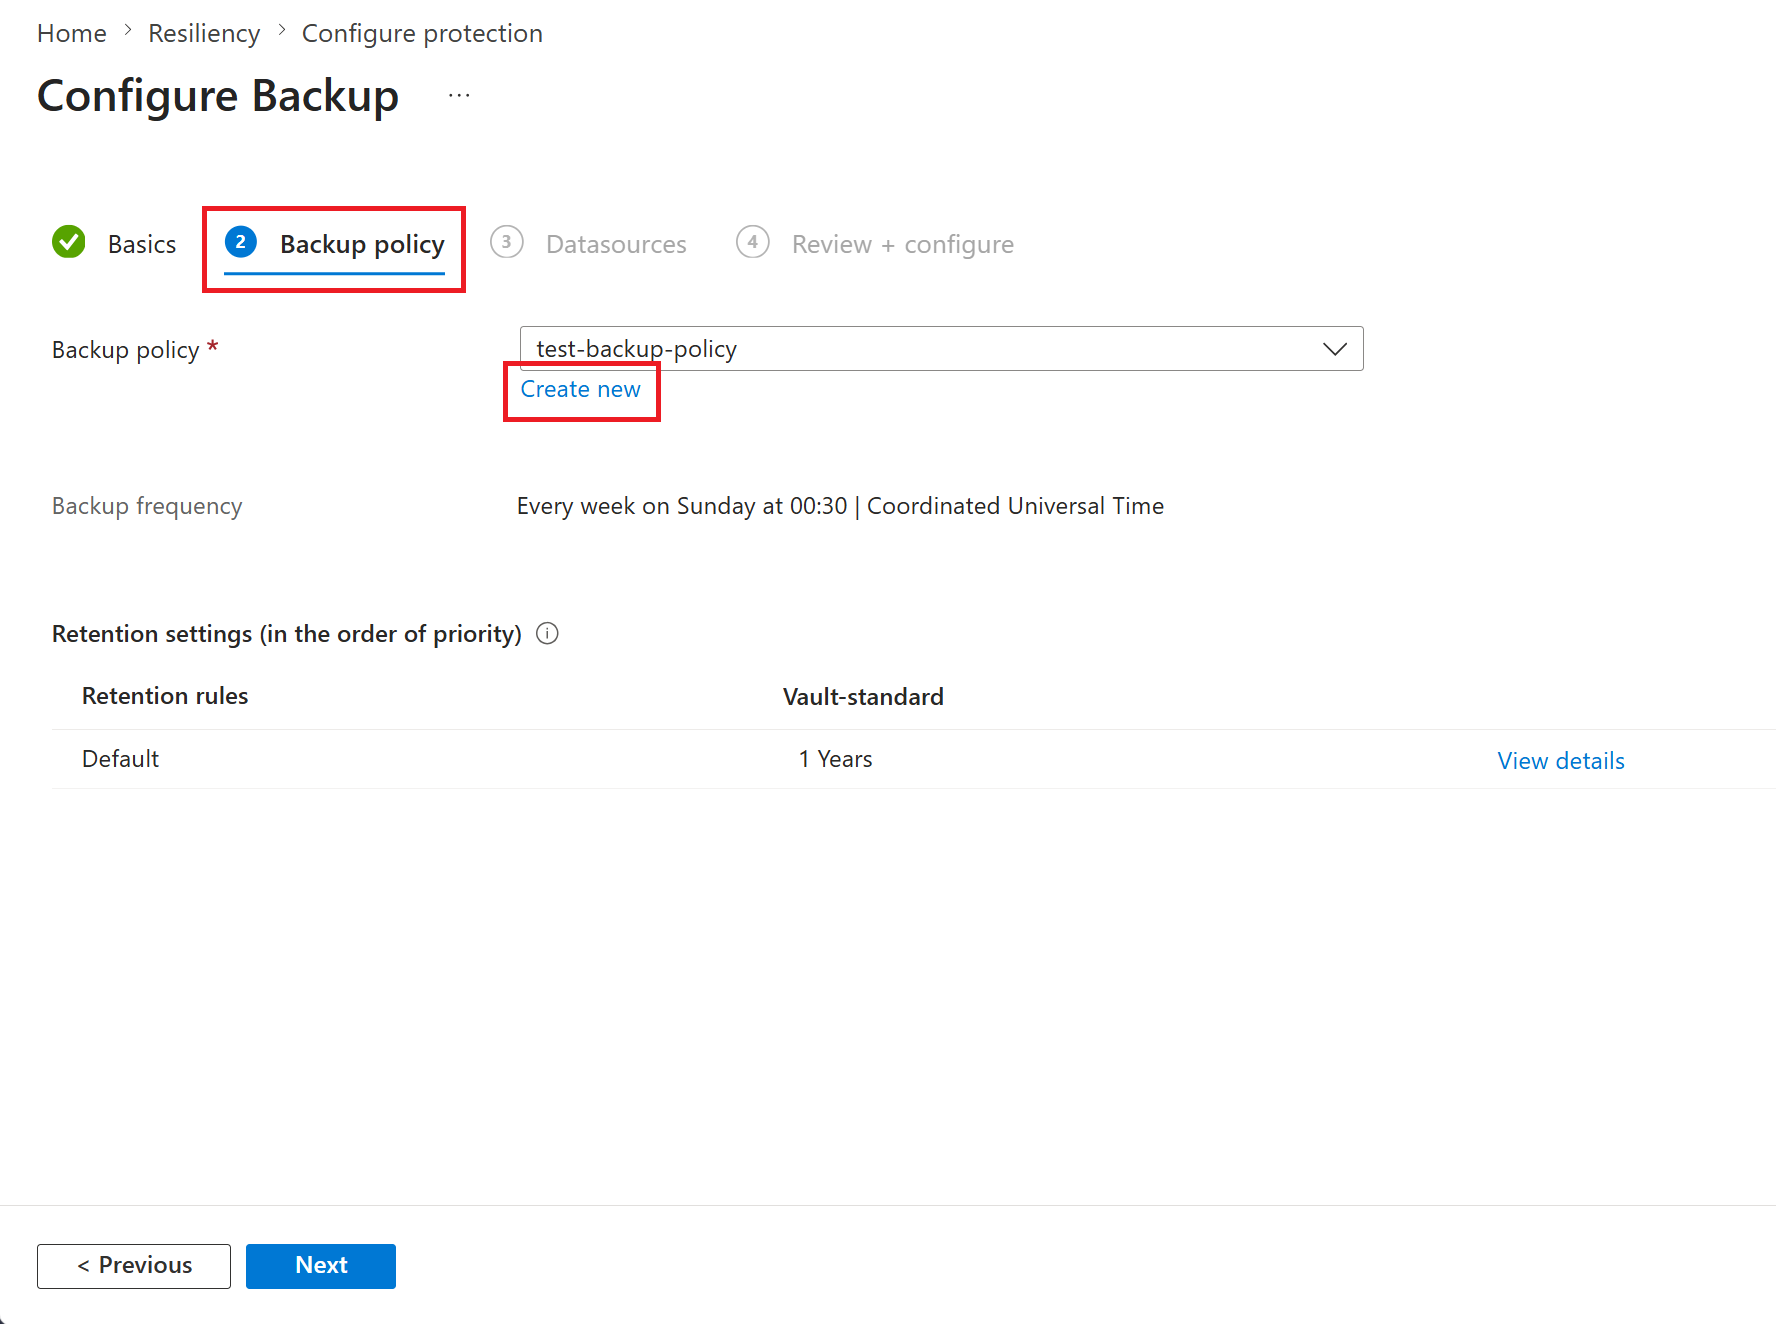
On the Backup policy tab, select a Backup policy that defines the backup schedule and the retention duration, and then select Next.
If you don’t have a backup policy, select Create new to create a new one.
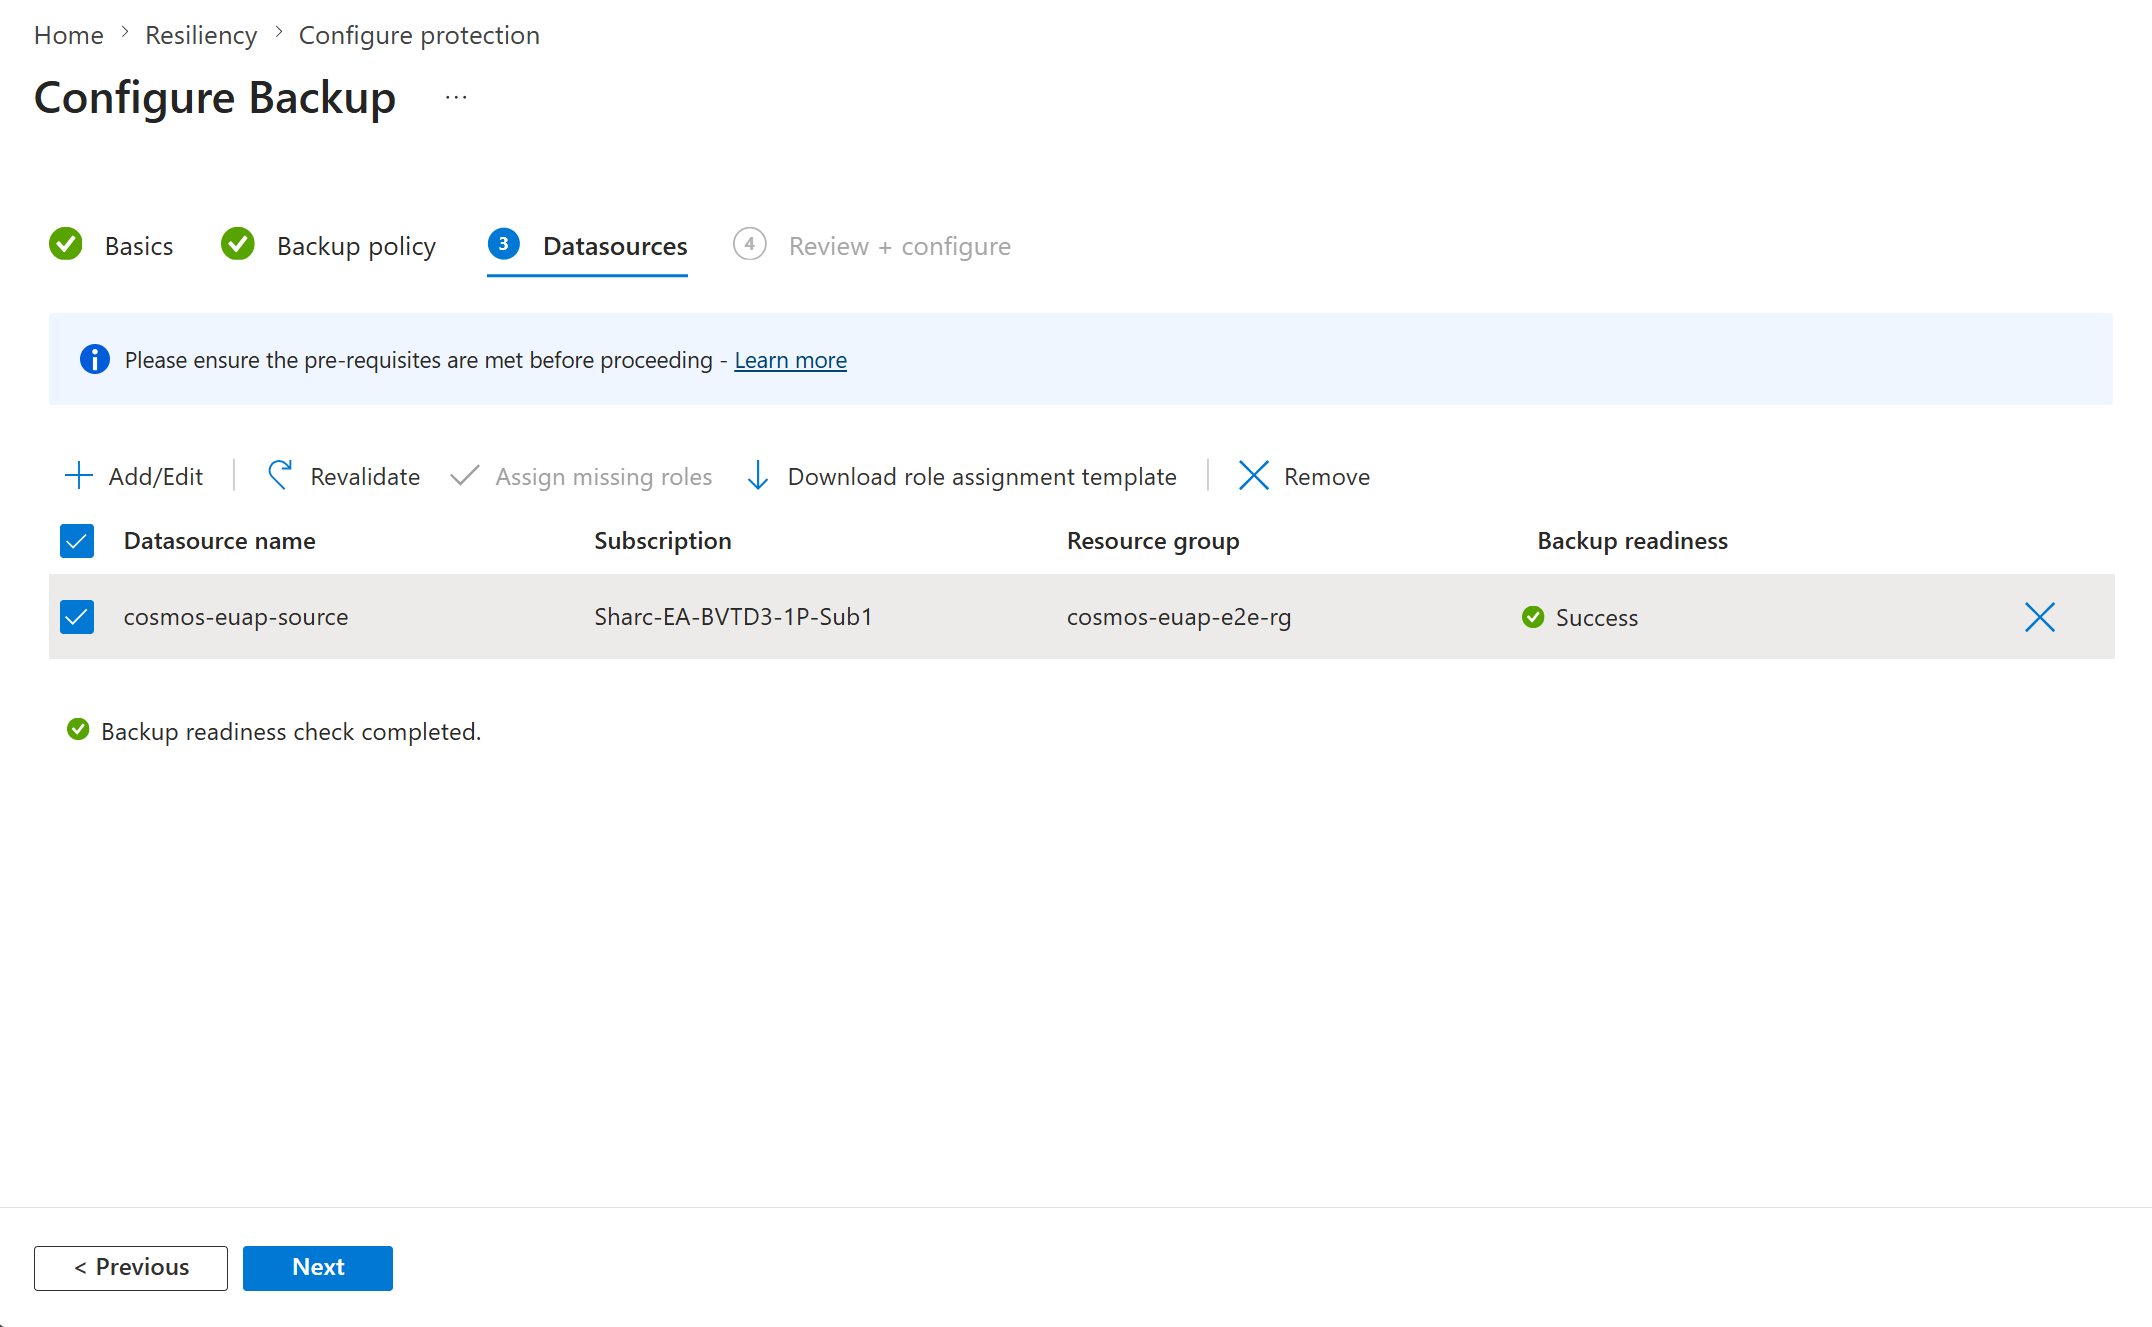
On the Datasources tab, select the datasource name.
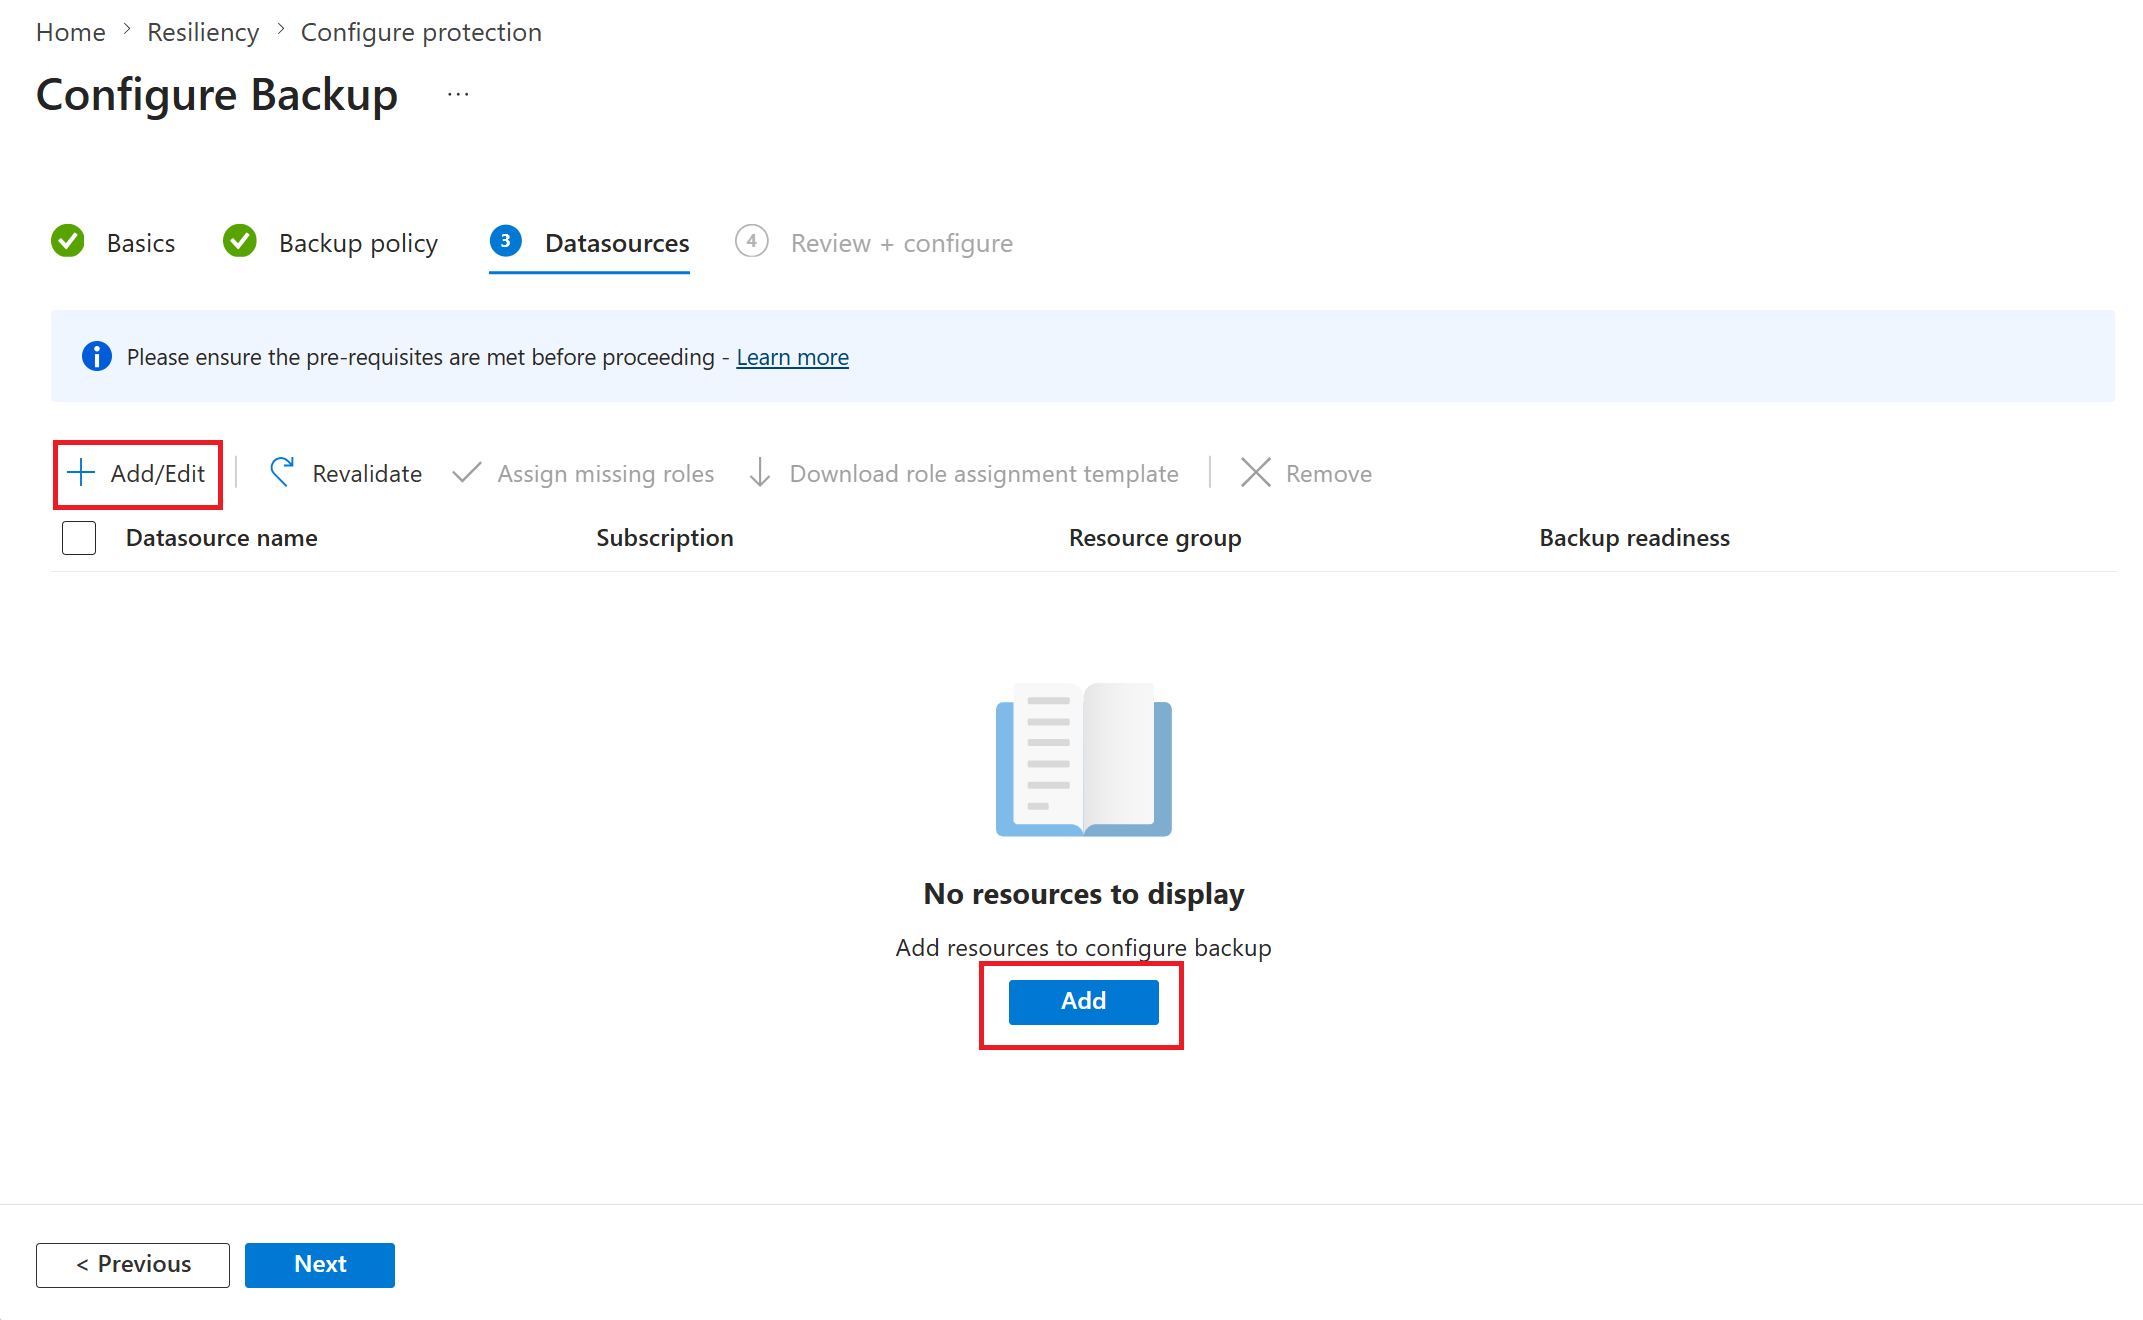
On the Select resources to backup pane, select the Azure Cosmos DB account to back up, and then click Select.
Ensure that the primary write region of the Azure Cosmos DB account is same as that of the Backup vault region.
On the Datasources tab, the Azure Backup service validates if all the necessary access permissions to connect to the Cosmos DB account. If one or more access permissions are missing, one of the following error messages appears:
- User cannot assign roles or
- Role assignment not done.
Error Cause Recommendation User cannot assign roles This message appears when you (the backup admin) don’t have the write access on the Cosmos DB account as listed under View details. To assign the necessary permissions on the required resources, select Download role assignment template to fetch the ARM template, and run the template as an administrator. Role assignment not done This message appears when you (the backup admin) have the write access on the Cosmos DB account to assign missing permissions as listed under View details. To grant permissions inline, select Assign missing roles. Once the permission assignment process starts, the missing access permissions on the Cosmos DB account are granted to the backup vault. You can define the scope at which the access permissions must be granted. When the action is complete, revalidation starts.
After the role assignment validation shows Success, select Next.
On the Review + configure tab, select Configure backup.
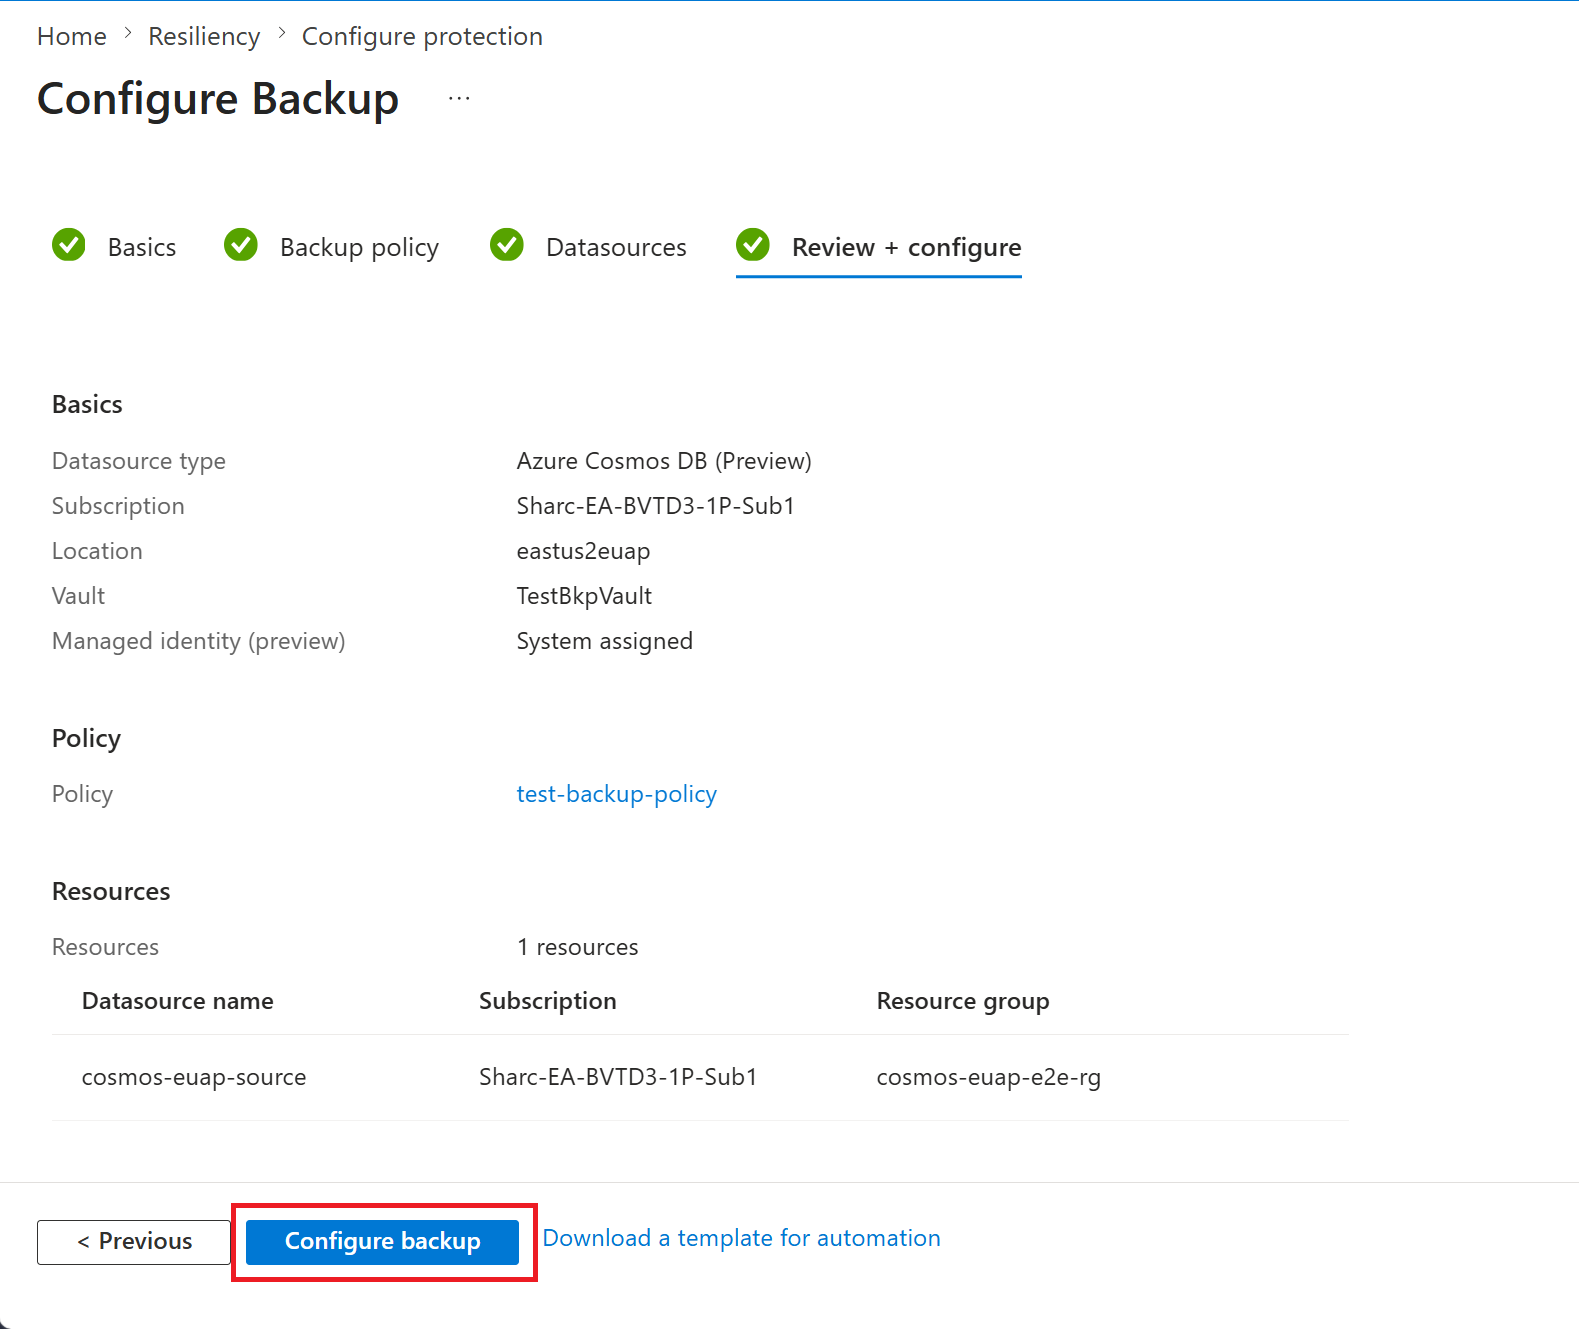
Protected item is now created.
Next steps
Restore Azure Cosmos DB account using Azure portal (preview)
Manage backup of Azure Cosmos DB account using Azure portal (preview)