Note
Access to this page requires authorization. You can try signing in or changing directories.
Access to this page requires authorization. You can try changing directories.
This article describes how to back up and restore SQL Server to Azure by using Microsoft Azure Backup Server (MABS).
Microsoft Azure Backup Server (MABS) provides backup and recovery for SQL Server databases. In addition to backing up SQL Server databases, you can run a system backup or full bare-metal backup of the SQL Server computer. You can use MABS to protect:
- A standalone SQL Server instance
- A SQL Server Failover Cluster Instance (FCI)
Supported scenarios
- MABS v3 UR2, MABS v4, or later supports SQL Server Failover Cluster Instance (FCI) using Cluster Shared Volume (CSV).
- Protection of SQL Server FCI with Storage Spaces Direct on Azure, and SQL Server FCI with Azure shared disks is supported with this feature. The DPM server must be deployed in the Azure Virtual Machine to protect the SQL FCI instance, deployed on the Azure VMs.
- A SQL Server Always On availability group with these preferences:
- Prefer Secondary
- Secondary only
- Primary
- Any Replica
SQL Server database protection workflow
To back up a SQL Server database and recover it from Azure:
- Create a backup policy to protect SQL Server databases in Azure.
- Create on-demand backup copies in Azure.
- Recover the database in Azure.
Prerequisites and limitations
Before you begin, review the following prerequisites and limitations:
- If you have a database with files on a remote file share, protection will fail with Error ID 104. MABS doesn't support protection for SQL Server data on a remote file share.
- Ensure that you've installed and prepared Azure Backup Server.
- MABS can't protect databases that are stored on remote SMB shares.
- Ensure that the availability group replicas are configured as read-only.
- You must explicitly add the system account NTAuthority\System to the Sysadmin group on SQL Server.
- When you perform an alternate location recovery for a partially contained database, you must ensure that the target SQL instance has the Contained Databases feature enabled.
- When you perform an alternate location recovery for a file stream database, you must ensure that the target SQL instance has the file stream database feature enabled.
- Protection for SQL Server Always On:
- MABS detects Availability Groups when running inquiry at protection group creation.
- MABS detects a failover and continues protection of the database.
- MABS supports multi-site cluster configurations for an instance of SQL Server.
- When you protect databases that use the Always On feature, MABS has the following limitations:
- MABS will honor the backup policy for availability groups that's set in SQL Server based on the backup preferences, as follows:
- Prefer secondary - Backups should occur on a secondary replica except when the primary replica is the only replica online. If there are multiple secondary replicas available, then the node with the highest backup priority will be selected for backup. IF only the primary replica is available, then the backup should occur on the primary replica.
- Secondary only - Backup shouldn't be performed on the primary replica. If the primary replica is the only one online, the backup shouldn't occur.
- Primary - Backups should always occur on the primary replica.
- Any Replica - Backups can happen on any of the availability replicas in the availability group. The node to be backed up from will be based on the backup priorities for each of the nodes.
- Note the following:
- Backups can happen from any readable replica - that is, primary, synchronous secondary, asynchronous secondary.
- If any replica is excluded from backup, for example Exclude Replica is enabled or is marked as not readable, then that replica won't be selected for backup under any of the options.
- If multiple replicas are available and readable, then the node with the highest backup priority will be selected for backup.
- If the backup fails on the selected node, then the backup operation fails.
- Recovery to the original location isn't supported.
- MABS will honor the backup policy for availability groups that's set in SQL Server based on the backup preferences, as follows:
- SQL Server 2014 or above backup issues:
- SQL server 2014 added a new feature to create a database for on-premises SQL Server in Windows Azure Blob storage. MABS can't be used to protect this configuration.
- There are some known issues with "Prefer secondary" backup preference for the SQL Always On option. MABS always takes a backup from secondary. If no secondary can be found, then the backup fails.
Create a backup policy
To protect SQL Server databases in Azure, first create a backup policy:
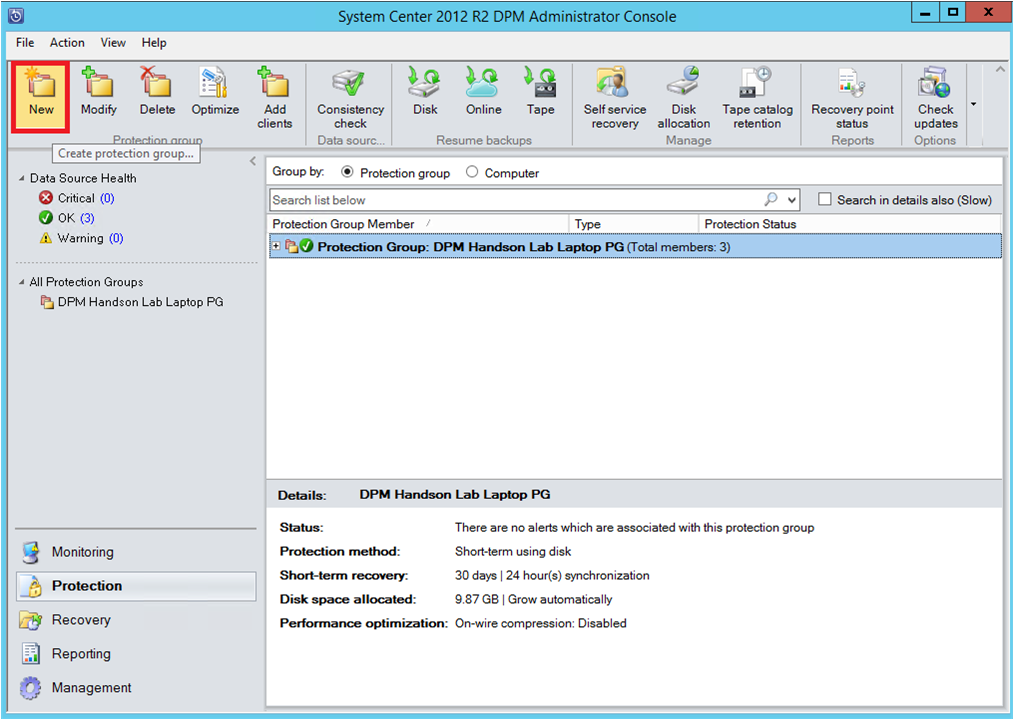
In Azure Backup Server, select the Protection workspace.
Select New to create a protection group.
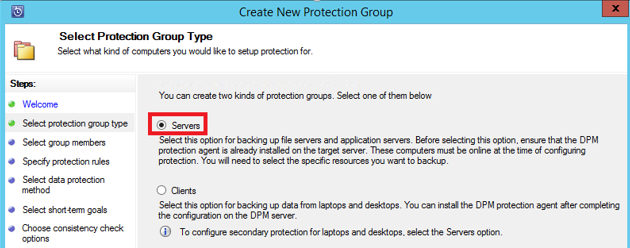
On the start blade, review the guidance about creating a protection group. Then select Next.
For the protection group type, select Servers.
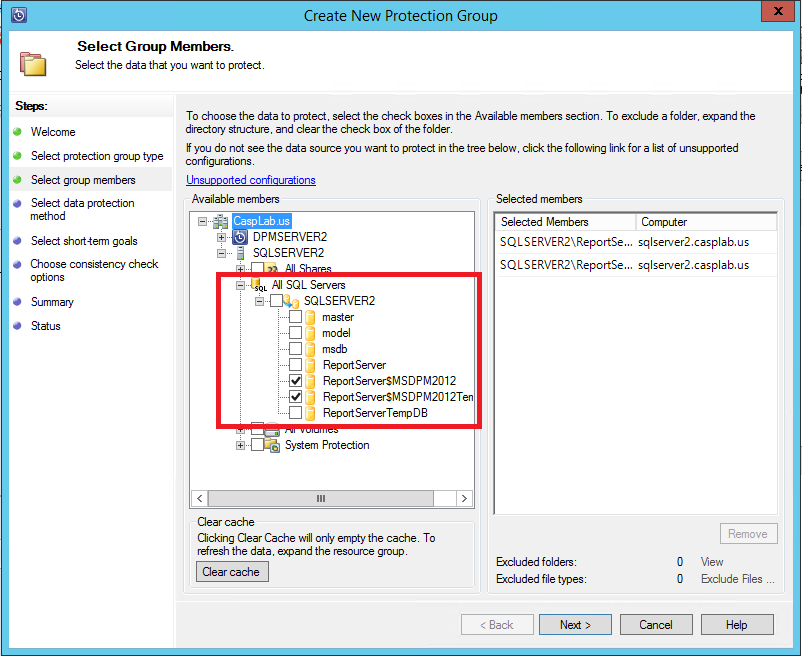
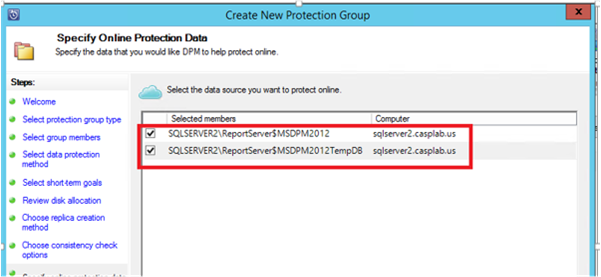
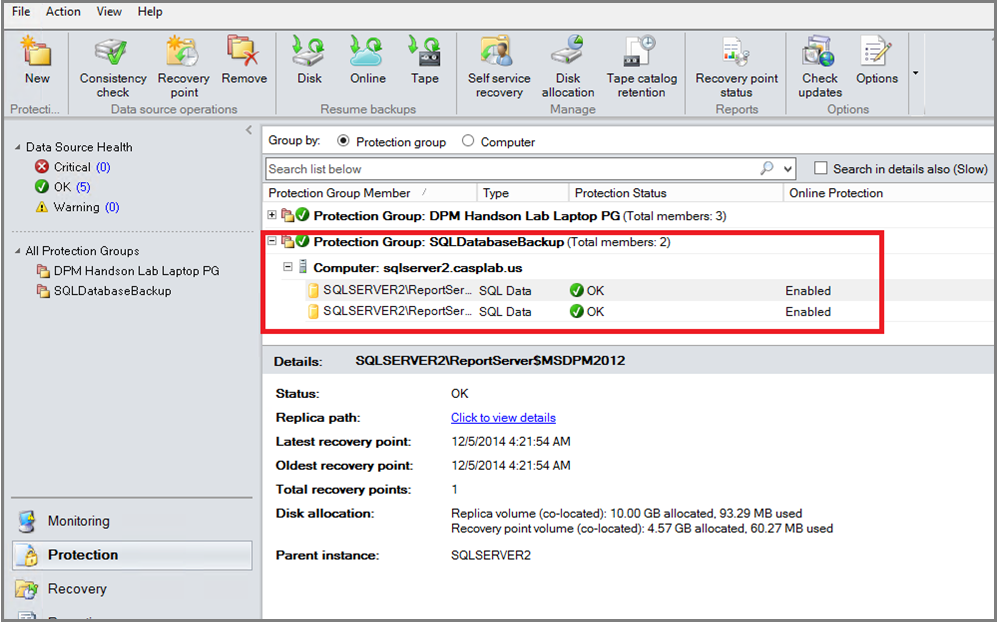
Expand the SQL Server instance where the databases that you want to back up are located. You see the data sources that can be backed up from that server. Expand All SQL Shares and then select the databases that you want to back up. In this example, we select ReportServer$MSDPM2012 and ReportServer$MSDPM2012TempDB. Select Next.
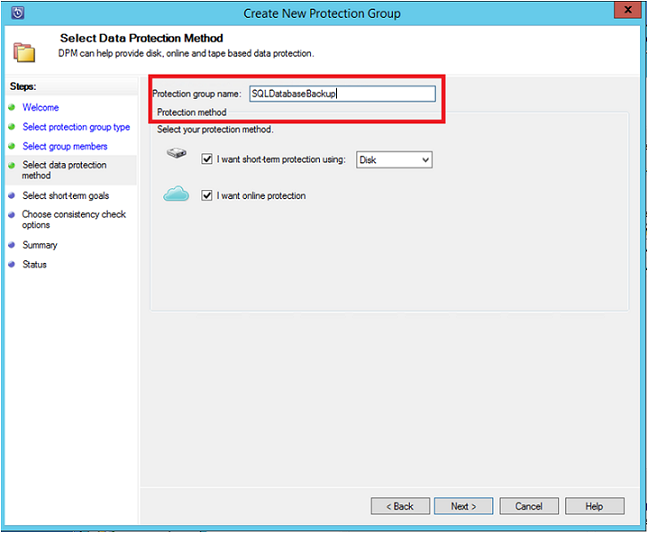
Name the protection group and then select I want online protection.
On the Specify Short-Term Goals blade, include the necessary inputs to create backup points to the disk.
In this example, Retention range is set to 5 days. The backup Synchronization frequency is set to once every 15 minutes. Express Full Backup is set to 8:00 PM.
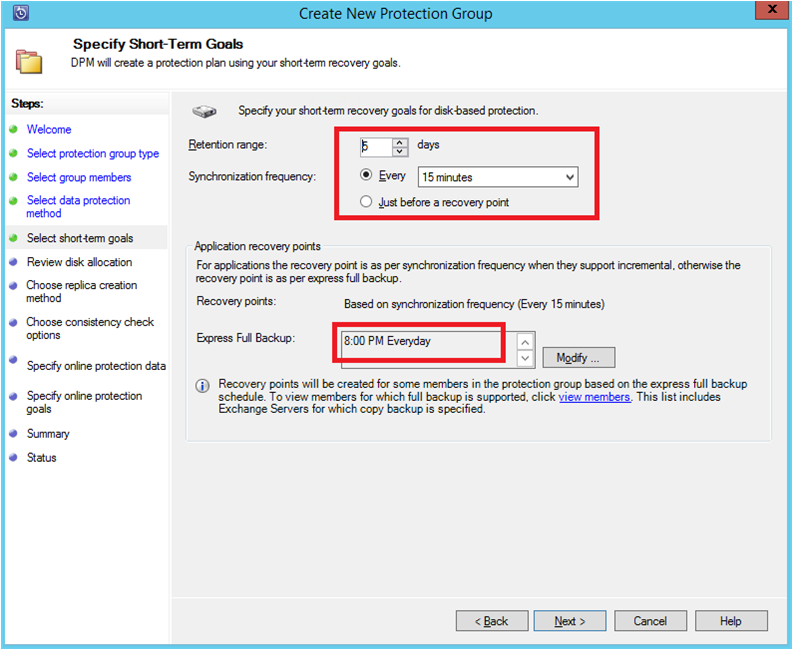
Note
In this example, a backup point is created at 8:00 PM every day. The data that has been modified since the previous day's 8:00 PM backup point is transferred. This process is called Express Full Backup. Although the transaction logs are synchronized every 15 minutes, if we need to recover the database at 9:00 PM, then the point is created by replaying the logs from the last express full backup point, which is 8:00 PM in this example.
Select Next. MABS shows the overall storage space available. It also shows the potential disk space utilization.
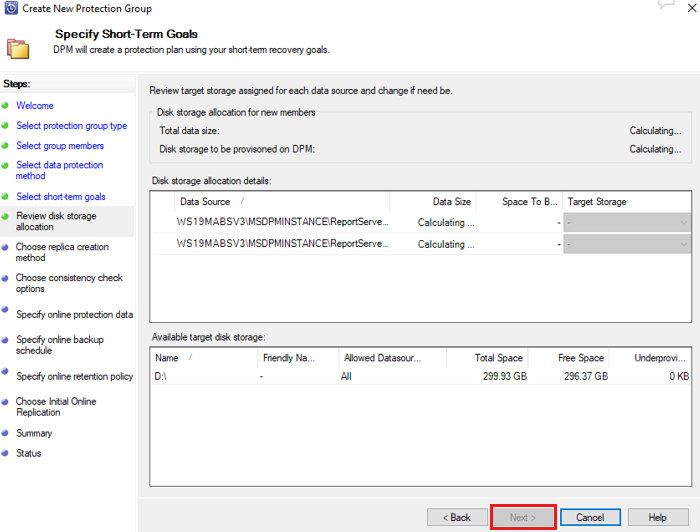
Total data size is the size of the data you want to back up, and disk space to be provisioned on DPM is the space that MABS recommends for the protection group. DPM chooses the ideal backup volume based on the settings. However, you can edit the backup volume choices in the disk allocation details. For the workloads, select the preferred storage in the dropdown menu. The edits change the values for Total Storage and Free Storage in the Available Disk Storage pane. Underprovisioned space is the amount of storage that DPM suggests you add to the volume for continuous smooth backups.
If you're an administrator, you can choose to transfer this initial backup Automatically over the network and choose the time of transfer. Or choose to Manually transfer the backup. Then select Next.
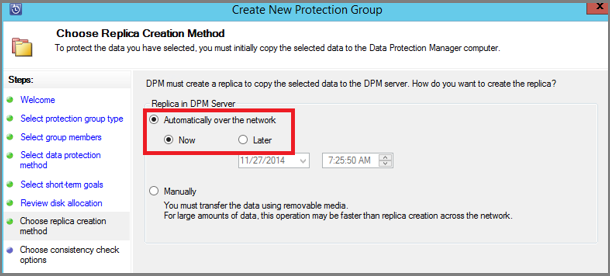
The initial backup copy requires the transfer of the entire data source (SQL Server database). The backup data moves from the production server (SQL Server computer) to MABS. If this backup is large, then transferring the data over the network could cause bandwidth congestion. For this reason, administrators can choose to use removable media to transfer the initial backup Manually. Or they can transfer the data Automatically over the network at a specified time.
After the initial backup finishes, backups continue incrementally on the initial backup copy. Incremental backups tend to be small and are easily transferred across the network.
Choose when to run a consistency check. Then select Next.
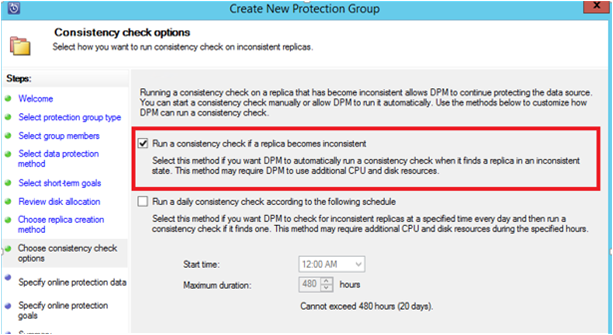
MABS can run a consistency check on the integrity of the backup point. It calculates the checksum of the backup file on the production server (the SQL Server computer in this example) and the backed-up data for that file in MABS. If the check finds a conflict, then the backed-up file in MABS is assumed to be corrupt. MABS fixes the backed-up data by sending the blocks that correspond to the checksum mismatch. Because the consistency check is a performance-intensive operation, administrators can choose to schedule the consistency check or run it automatically.
Select the data sources to protect in Azure. Then select Next.
If you're an administrator, you can choose backup schedules and retention policies that suit your organization's policies.
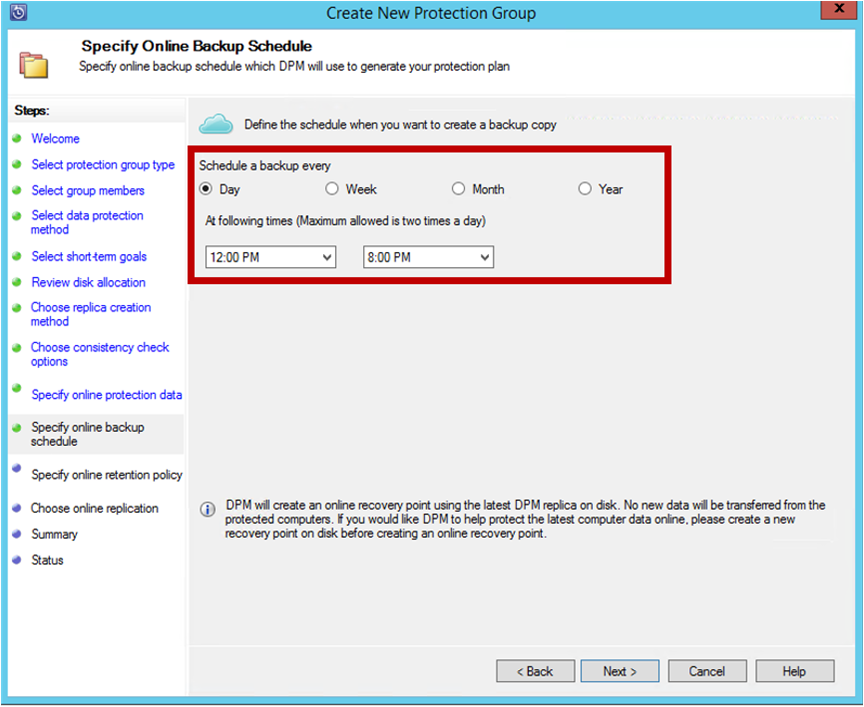
In this example, backups are taken daily at 12:00 PM and 8:00 PM.
Tip
For quick recovery, keep a few short-term recovery points on your disk. These recovery points are used for operational recovery. Azure serves as a good offsite location, providing higher SLAs and guaranteed availability.
Use Data Protection Manager (DPM) to schedule Azure Backups after the local disk backups finish. When you follow this practice, the latest disk backup is copied to Azure.
Choose the retention policy schedule. For more information about how the retention policy works, see Use Azure Backup to replace your tape infrastructure.
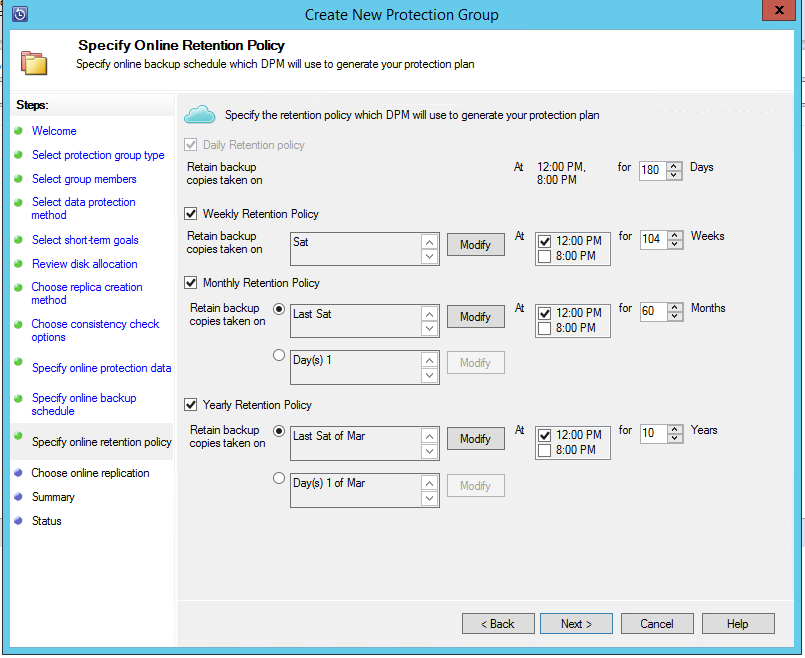
In this example:
- Backups are taken daily at 12:00 PM and 8:00 PM. They're kept for 180 days.
- The backup on Saturday at 12:00 PM is kept for 104 weeks.
- The backup from the last Saturday of the month at 12:00 PM is kept for 60 months.
- The backup from the last Saturday of March at 12:00 PM is kept for 10 years.
After you choose a retention policy, select Next.
Choose how to transfer the initial backup copy to Azure.
- The Automatically over the network option follows your backup schedule to transfer the data to Azure.
- For more information about Offline Backup, see Overview of Offline Backup.
After you choose a transfer mechanism, select Next.
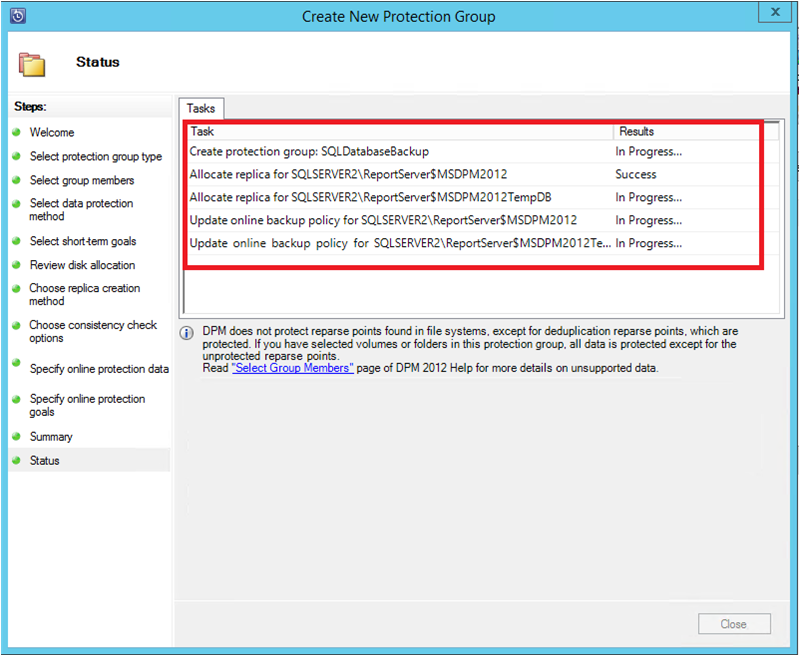
On the Summary blade, review the policy details. Then select Create group. You can select Close and watch the job progress in the Monitoring workspace.


Create on-demand backup copies of a SQL Server database
A recovery point is created when the first backup occurs. Rather than waiting for the schedule to run, you can manually trigger the creation of a recovery point:
In the protection group, make sure the database status is OK.
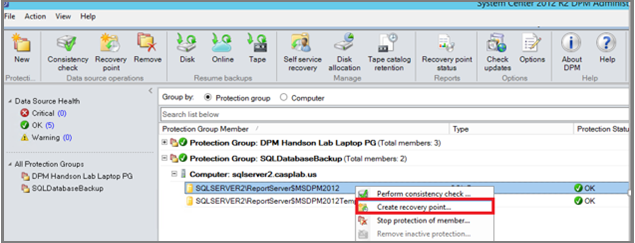
Right-click the database and then select Create recovery point.
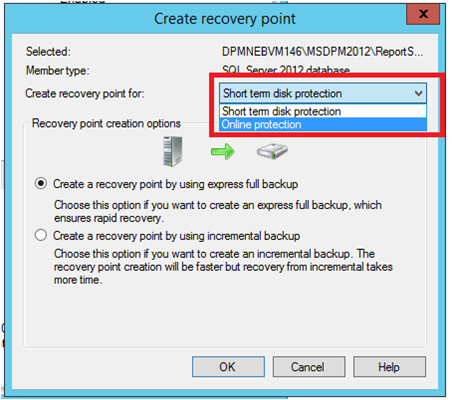
In the drop-down menu, select Online protection. Then select OK to start the creation of a recovery point in Azure.
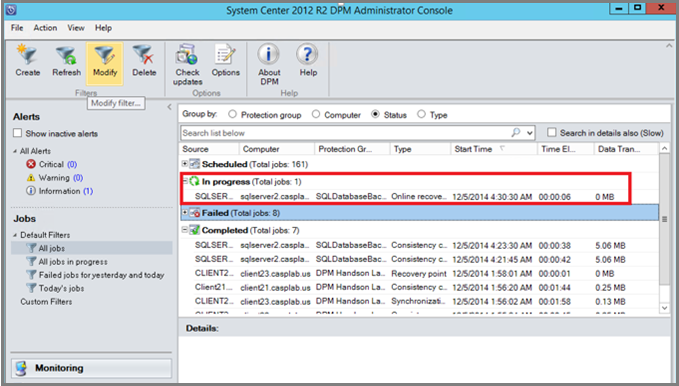
You can view the job progress in the Monitoring workspace.


Recover a SQL Server database from Azure
To recover a protected entity, such as a SQL Server database, from Azure:
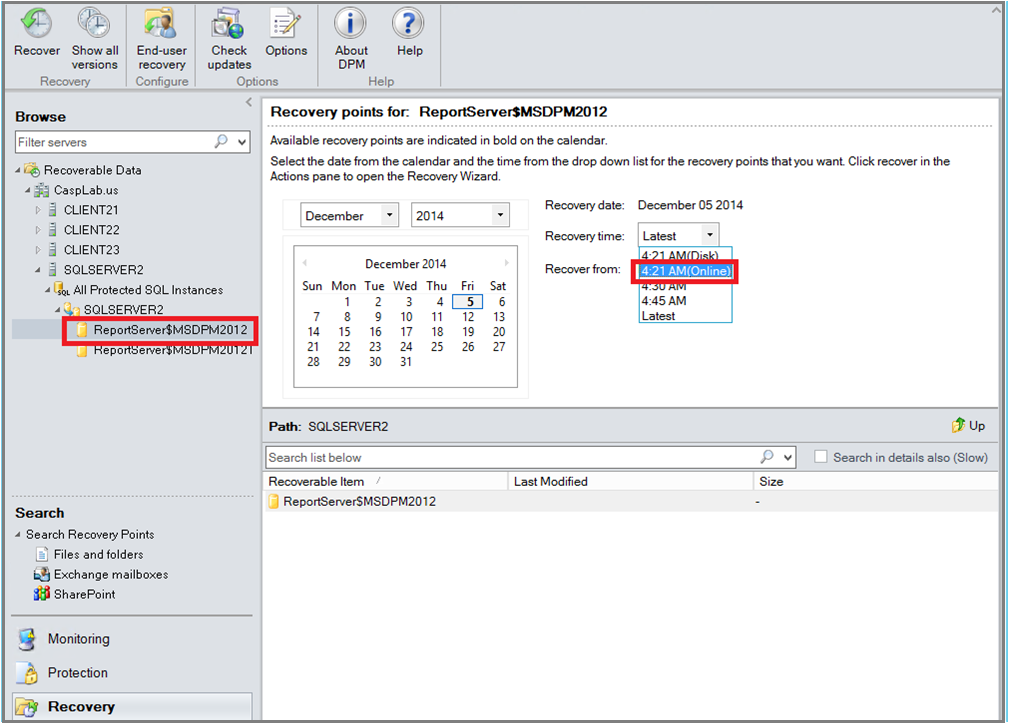
Open the DPM server management console. Go to the Recovery workspace to see the servers that DPM backs up. Select the database (in this example, ReportServer$MSDPM2012). Select a Recovery time that ends with Online.
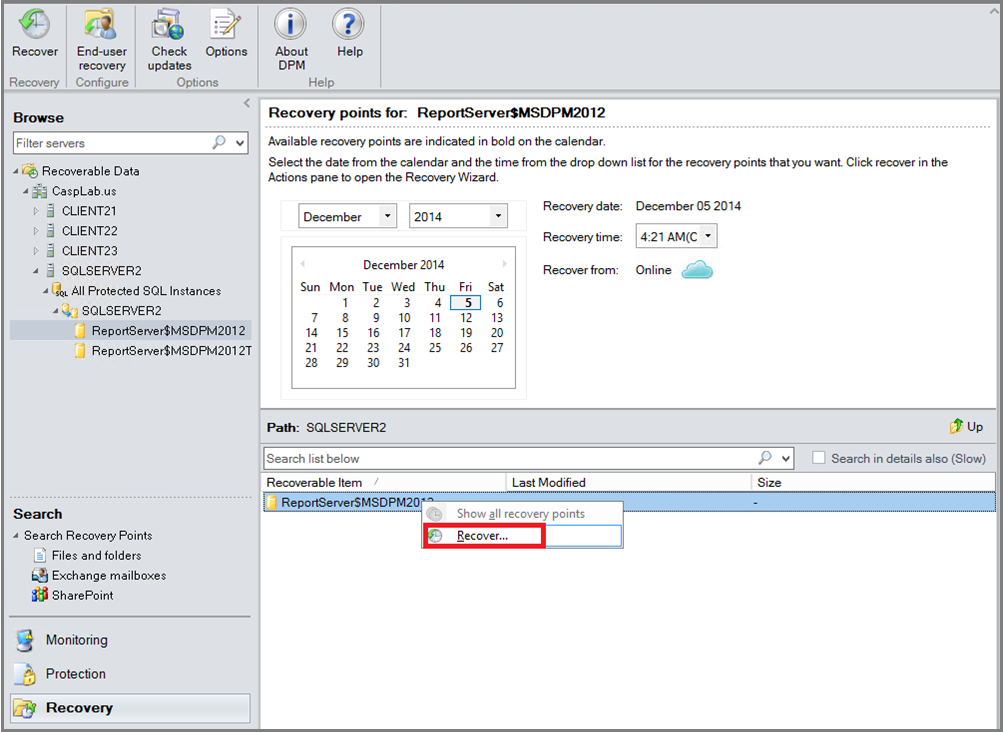
Right-click the database name and select Recover.
DPM shows the details of the recovery point. Select Next. To overwrite the database, select the recovery type Recover to original instance of SQL Server. Then select Next.
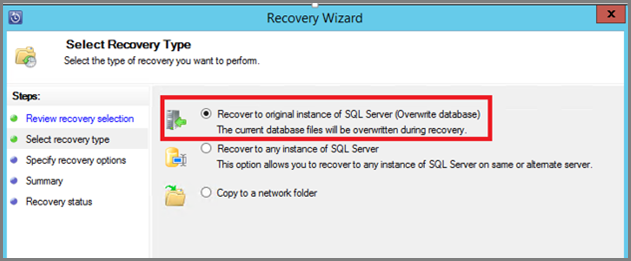
In this example, DPM allows the recovery of the database to another SQL Server instance or to a standalone network folder.
On the Specify Recovery Options blade, you can select the recovery options. For example, you can choose Network bandwidth usage throttling to throttle the bandwidth that recovery uses. Then select Next.
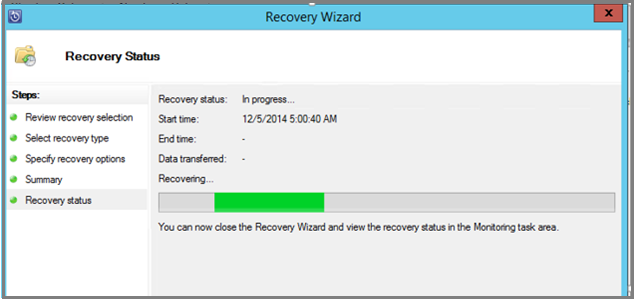
On the Summary blade, you see the current recovery configuration. Select Recover.
The recovery status shows the database being recovered. You can select Close to close the wizard and view the progress in the Monitoring workspace.
When the recovery is complete, the restored database is consistent with the application.


Next steps
For more information, see Azure Backup FAQ.