Note
Access to this page requires authorization. You can try signing in or changing directories.
Access to this page requires authorization. You can try changing directories.
This article describes how to enable backup when you create a virtual machine (VM) in the Azure portal.
You can use Azure Backup to protect VMs during creation. Backups follow a predefined schedule in a backup policy and generate recovery points stored in Recovery Services vaults.
Prerequisite
Before you create an Azure VM, review the supported operating systems for Azure Backup.
Sign in to the Azure portal
If you aren't already signed in to your account, sign in to the Azure portal.
Create a VM with Backup configuration
To create a VM and configure backup, follow these steps:
In the Azure portal, select Create a resource.
In Azure Marketplace, select Compute, and then select a VM image.
Note
To create a VM from a non-Marketplace image or swap the OS disk of a VM with a non-Marketplace image, remove the plan information from the VM. This step helps with seamless VM restore.
Set up the VM in accordance with the Windows or Linux instructions.
On the Management tab, for Enable backup, select On.
Azure Backup backs up to a Recovery Services vault. Select Create New if you don't have an existing vault.
Accept the suggested vault name or specify your own.
Specify or create a resource group in which the vault is located. The resource group vault can be different from the VM resource group.
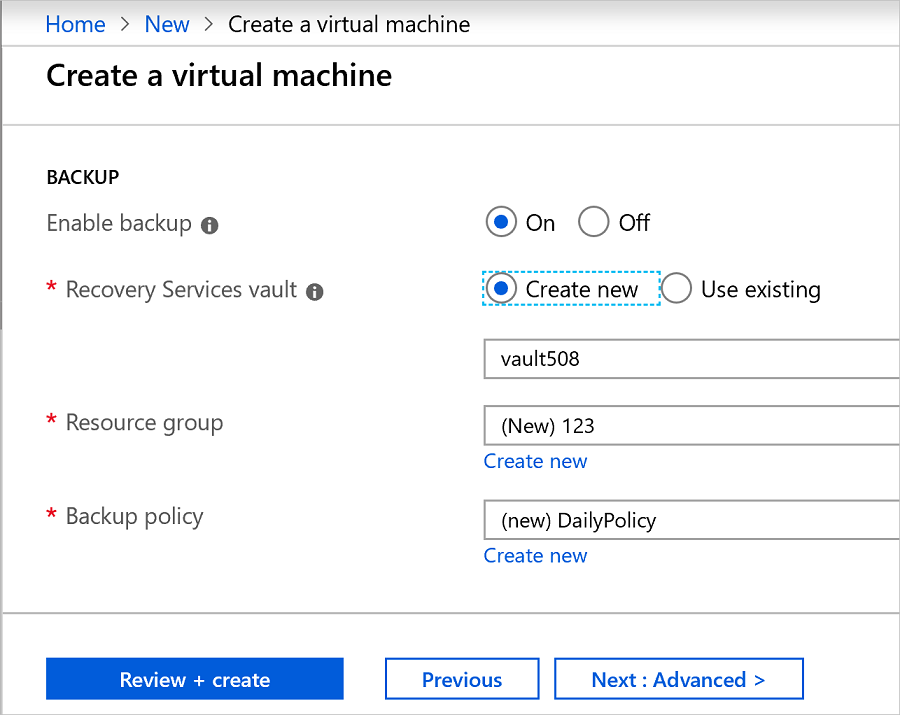
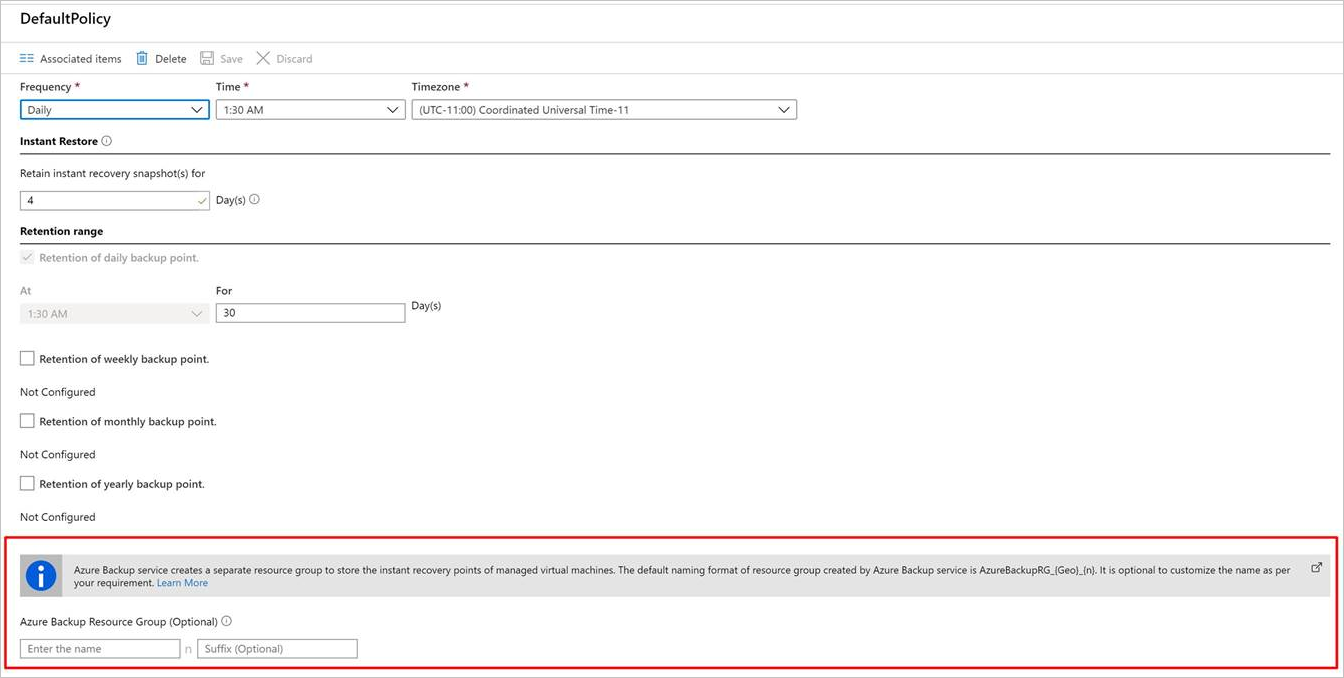
Accept the default backup policy or modify the settings:
Specify how frequently to take backup snapshots of the VM and how long to keep those backup copies via a backup policy.
Back up the VM once a day with the default policy.
Customize your own backup policy for an Azure VM to take backups daily or weekly.
Learn more about backup considerations for Azure VMs.
Learn more about the Instant Restore functionality.

Note
- Server-side encryption and platform-managed keys are the default encryption methods for Azure VMs. Backup supports backup and restore of these Azure VMs.
- Azure Backup now supports the migration to the Enhanced policy for the Azure VM backups by using the Standard policy. Learn more.
Azure Backup resource group for virtual machines
Azure Backup creates a separate resource group, different than the resource group of the VM, to store the restore point collection (RPC). The RPC houses the instant recovery points of managed VMs. The default naming format of the resource group created by Azure Backup is AzureBackupRG_<Geo>_<number>. An example is AzureBackupRG_northeurope_1. You can now customize the resource group name that Azure Backup created.
Points to note:
Use the default name of the resource group or customize the name according to organizational requirements.
When Azure Backup creates a resource group, a numeric is appended to the name of the resource group and used for restore point collection.
Provide the resource group name pattern as input during VM backup policy creation. Use the following format for the resource group name:
<alpha-numeric string>* n <alpha-numeric string>. Thenis replaced with an integer (starting from 1) and is used for scaling out if the first resource group is full. One resource group can have a maximum of 600 RPCs today.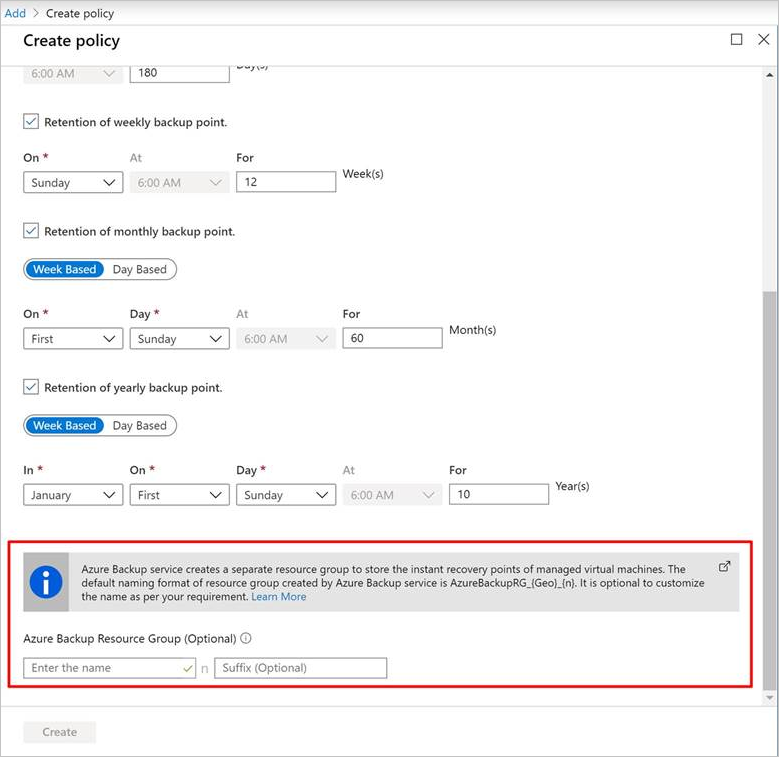
Follow resource group naming rules for the pattern. The total length shouldn't exceed the maximum-allowed resource group name length.
- Resource group names allow only alphanumeric characters, periods, underscores, hyphens, and parentheses. They can't end in a period.
- Resource group names can contain up to 74 characters, including the name of the resource group and the suffix.
Remember that the first
<alpha-numeric-string>is mandatory. The second one afternis optional. This naming pattern applies only if you give a customized name. If you don't enter anything in either of the text boxes, the default name is used.Edit the name of the resource group by modifying the policy if and when required. If the name pattern is changed, new recovery points (RPs) are created in the new resource group. The old RPs still reside in the old resource group and aren't moved because RP collection doesn't support moving resources. Eventually, the RPs get garbage collected as the points expire.
Don't lock the resource group created for use by Azure Backup.

To configure the Azure Backup resource group for VMs by using PowerShell, see Create an Azure Backup resource group during snapshot retention.
Run an on-demand backup after VM creation
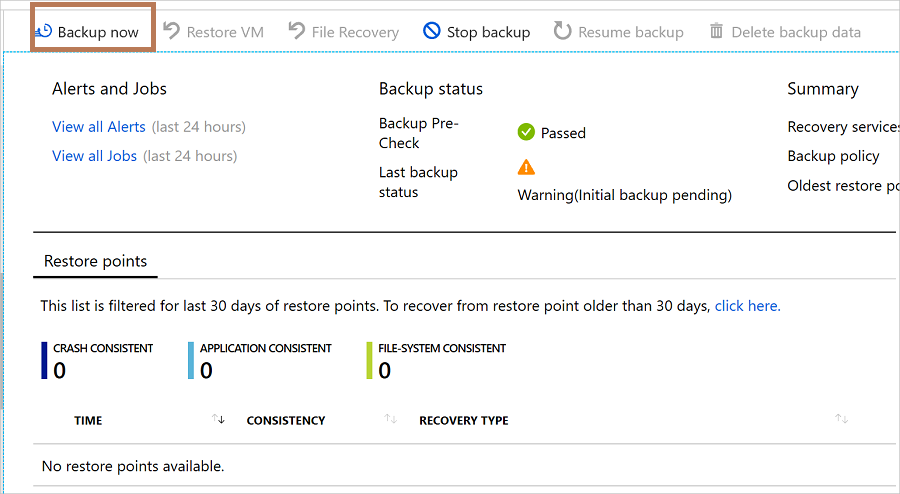
Your VM backup runs in accordance with your backup policy. We recommend that you run an initial backup.
To run an on-demand backup after the VM is created, follow these steps:
In the VM properties, select Backup. The VM status is Initial Backup Pending until the initial backup runs.
Select Back up now to run an on-demand backup.
Deploy a protected VM by using a Resource Manager template
The previous steps explain how to use the Azure portal to create a VM and protect it in a Recovery Services vault. To quickly deploy one or more VMs and protect them in a Recovery Services vault, see the template Deploy a Windows VM and enable backup.
Related content
After the VM protection is finished, learn how to manage and restore them:
If you encounter any issues, see Troubleshooting backup failures on Azure virtual machines.