Note
Access to this page requires authorization. You can try signing in or changing directories.
Access to this page requires authorization. You can try changing directories.
When you create an Azure Batch pool using Virtual Machine Configuration, you can encrypt compute nodes in the pool with a platform-managed key by specifying the disk encryption configuration.
This article explains how to create a Batch pool with disk encryption enabled.
Why use a pool with disk encryption configuration?
With a Batch pool, you can access and store data on the OS and temporary disks of the compute node. Encrypting the server-side disk with a platform-managed key will safeguard this data with low overhead and convenience.
Batch will apply one of these disk encryption technologies on compute nodes, based on pool configuration and regional supportability.
- Managed disk encryption at rest with platform-managed keys
- Encryption at host using a platform-managed Key
- Azure Disk Encryption
You won't be able to specify which encryption method will be applied to the nodes in your pool. Instead, you provide the target disks you want to encrypt on their nodes, and Batch can choose the appropriate encryption method, ensuring the specified disks are encrypted on the compute node. The following image depicts how Batch makes that choice.
Important
If you are creating your pool with a Linux custom image, you can only enable disk encryption only if your pool is using an Encryption At Host Supported VM size. Encryption At Host is not currently supported on User Subscription Pools until the feature becomes publicly available in Azure.

Some disk encryption configurations require that the VM family of the pool supports encryption at host. See End-to-end encryption using encryption at host to determine which VM families support encryption at host.
Azure portal
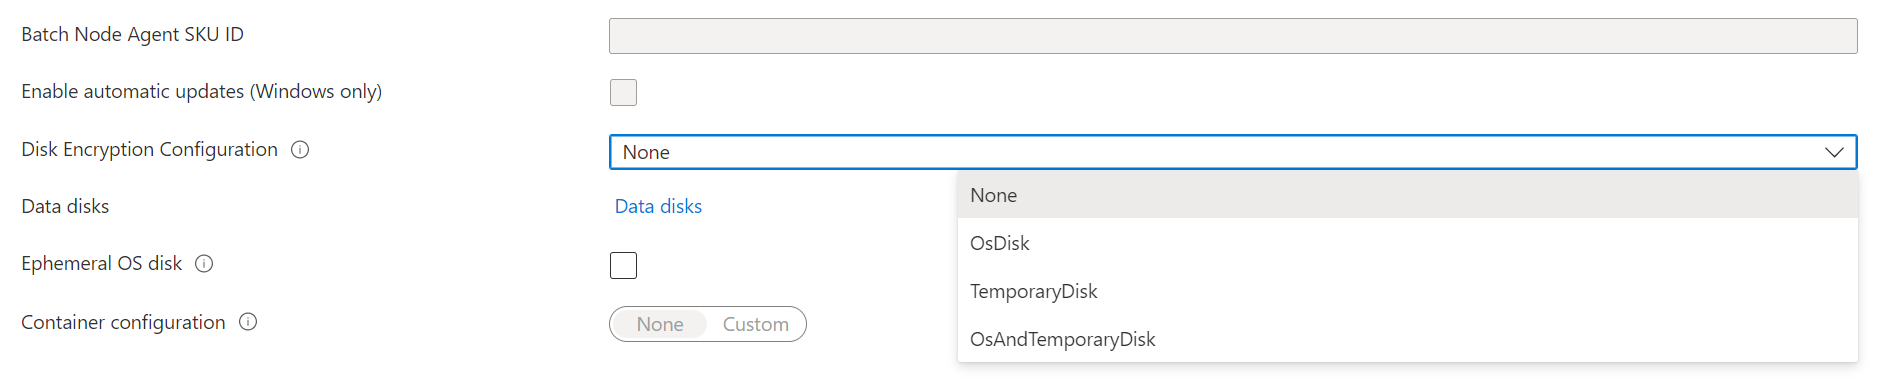
When creating a Batch pool in the Azure portal, select either OsDisk, TemporaryDisk or OsAndTemporaryDisk under Disk Encryption Configuration.
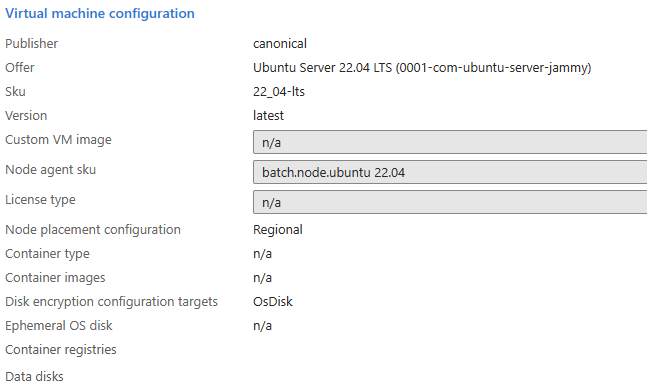
After the pool is created, you can see the disk encryption configuration targets in the pool's Properties section.
Examples
The following examples show how to encrypt the OS and temporary disks on a Batch pool using the Azure.ResourceManager.Batch SDK, the Batch REST API, and the Azure CLI.
Azure.ResourceManager.Batch SDK
using Azure;
using Azure.Identity;
using Azure.ResourceManager;
using Azure.ResourceManager.Batch;
using Azure.ResourceManager.Batch.Models;

//...

public async Task SetDiskEncryption()
{
    ArmClient client = new ArmClient(new DefaultAzureCredential());

    ResourceIdentifier batchAccountResourceId =
        BatchAccountResource.CreateResourceIdentifier("subscriptionId", "resourceGroupName", "accountName");
    BatchAccountResource batchAccount = client.GetBatchAccountResource(batchAccountResourceId);

    BatchAccountPoolCollection poolCollection = batchAccount.GetBatchAccountPools();

    BatchAccountPoolData poolData = new BatchAccountPoolData()
    {
        VmSize = "standard_ds1_v2",
        DeploymentConfiguration = new BatchDeploymentConfiguration()
        {
            VmConfiguration = new BatchVmConfiguration(
                imageReference: new BatchImageReference()
                {
                    Publisher = "Canonical",
                    Offer = "UbuntuServer",
                    Sku = "22.04-LTS"
                },
                nodeAgentSkuId: "batch.node.ubuntu 22.04")
            {
                 DiskEncryptionConfiguration = new BatchDiskEncryptionConfiguration()
                 {
                     Targets = { BatchDiskEncryptionTarget.OSDisk, BatchDiskEncryptionTarget.TemporaryDisk }
                 }
            }
        }
    };

    ArmOperation<BatchAccountPoolResource> pool = await poolCollection.CreateOrUpdateAsync(
        WaitUntil.Completed, "diskencryptionPool", poolData);
}
Batch REST API
REST API URL:
POST {batchURL}/pools?api-version=2020-03-01.11.0
client-request-id: 00000000-0000-0000-0000-000000000000
Request body:
"pool": {
    "id": "pool2",
    "vmSize": "standard_a1",
    "virtualMachineConfiguration": {
        "imageReference": {
            "publisher": "Canonical",
            "offer": "UbuntuServer",
            "sku": "22.04-LTS"
        },
        "diskEncryptionConfiguration": {
            "targets": [
                "OsDisk",
                "TemporaryDisk"
            ]
        }
        "nodeAgentSKUId": "batch.node.ubuntu 22.04"
    },
    "resizeTimeout": "PT15M",
    "targetDedicatedNodes": 5,
    "targetLowPriorityNodes": 0,
    "taskSlotsPerNode": 3,
    "enableAutoScale": false,
    "enableInterNodeCommunication": false
}
Azure CLI
az batch pool create \
    --id diskencryptionPool \
    --vm-size Standard_DS1_V2 \
    --target-dedicated-nodes 2 \
    --image canonical:ubuntuserver:22.04-LTS \
    --node-agent-sku-id "batch.node.ubuntu 22.04" \
    --disk-encryption-targets OsDisk TemporaryDisk
Next steps
- Learn more about server-side encryption of Azure Disk Storage.
- For an in-depth overview of Batch, see Batch service workflow and resources.